
Cutting terracotta pipe is a job that many homeowners, landscapers, and plumbers face when working on drainage or sewer projects. Terracotta pipes are strong and last for decades, but sometimes they need to be shortened, replaced, or rerouted. While the material is durable, it’s also brittle—making a clean, safe cut a challenge if you don’t know the right techniques or tools. The good news is that with the proper preparation and steps, nearly anyone can cut terracotta pipe with confidence.
Whether you’re updating an old clay sewer line, installing a French drain, or fixing a garden irrigation system, knowing how to cut terracotta pipe is a valuable skill. This guide will walk you through every aspect of the process, from understanding the material to choosing tools, making precise cuts, and ensuring safety.
You’ll also learn about common mistakes, practical tips, and get answers to the questions people often ask. By the end, you’ll have all you need to tackle your project—and avoid cracked pipes, wasted materials, or unsafe conditions.
Understanding Terracotta Pipe
Before you start cutting, it helps to know what you’re working with. Terracotta pipes are made from fired clay and have been used for drainage, sewage, and water systems for hundreds of years. Their popularity comes from their natural resistance to corrosion, chemicals, and tree roots.
However, terracotta is both hard and brittle. Unlike plastic or metal pipes, it doesn’t bend or flex. This means that the wrong cutting method can easily cause the pipe to crack, shatter, or break unevenly. Older pipes are especially prone to damage, as time and moisture can weaken the clay.
Typical terracotta pipes range from 4 to 12 inches in diameter, and the walls are usually ½ to 1 inch thick. Because of their weight and fragility, handling them requires care. Understanding these characteristics will help you choose the right tools and techniques for a clean, accurate cut.
When And Why You Need To Cut Terracotta Pipe
There are several situations where you may need to cut a terracotta pipe:
- Replacing damaged sections: Cracks, leaks, or root intrusion often require removing a section of pipe.
- Installing new fixtures or branches: Adding a cleanout, connecting new drains, or rerouting flow may need precise cuts.
- Adjusting pipe length: You may need to shorten pipes for a better fit in a trench or around obstacles.
- Retrofitting old systems: Upgrading old clay pipes to modern materials like PVC often requires clean, measured cuts.
Cutting terracotta is not just about making the pipe shorter. It’s about ensuring the edges are smooth, the pipe maintains its strength, and the connection is reliable. A poor cut can lead to leaks, collapsed joints, or extra repair work.
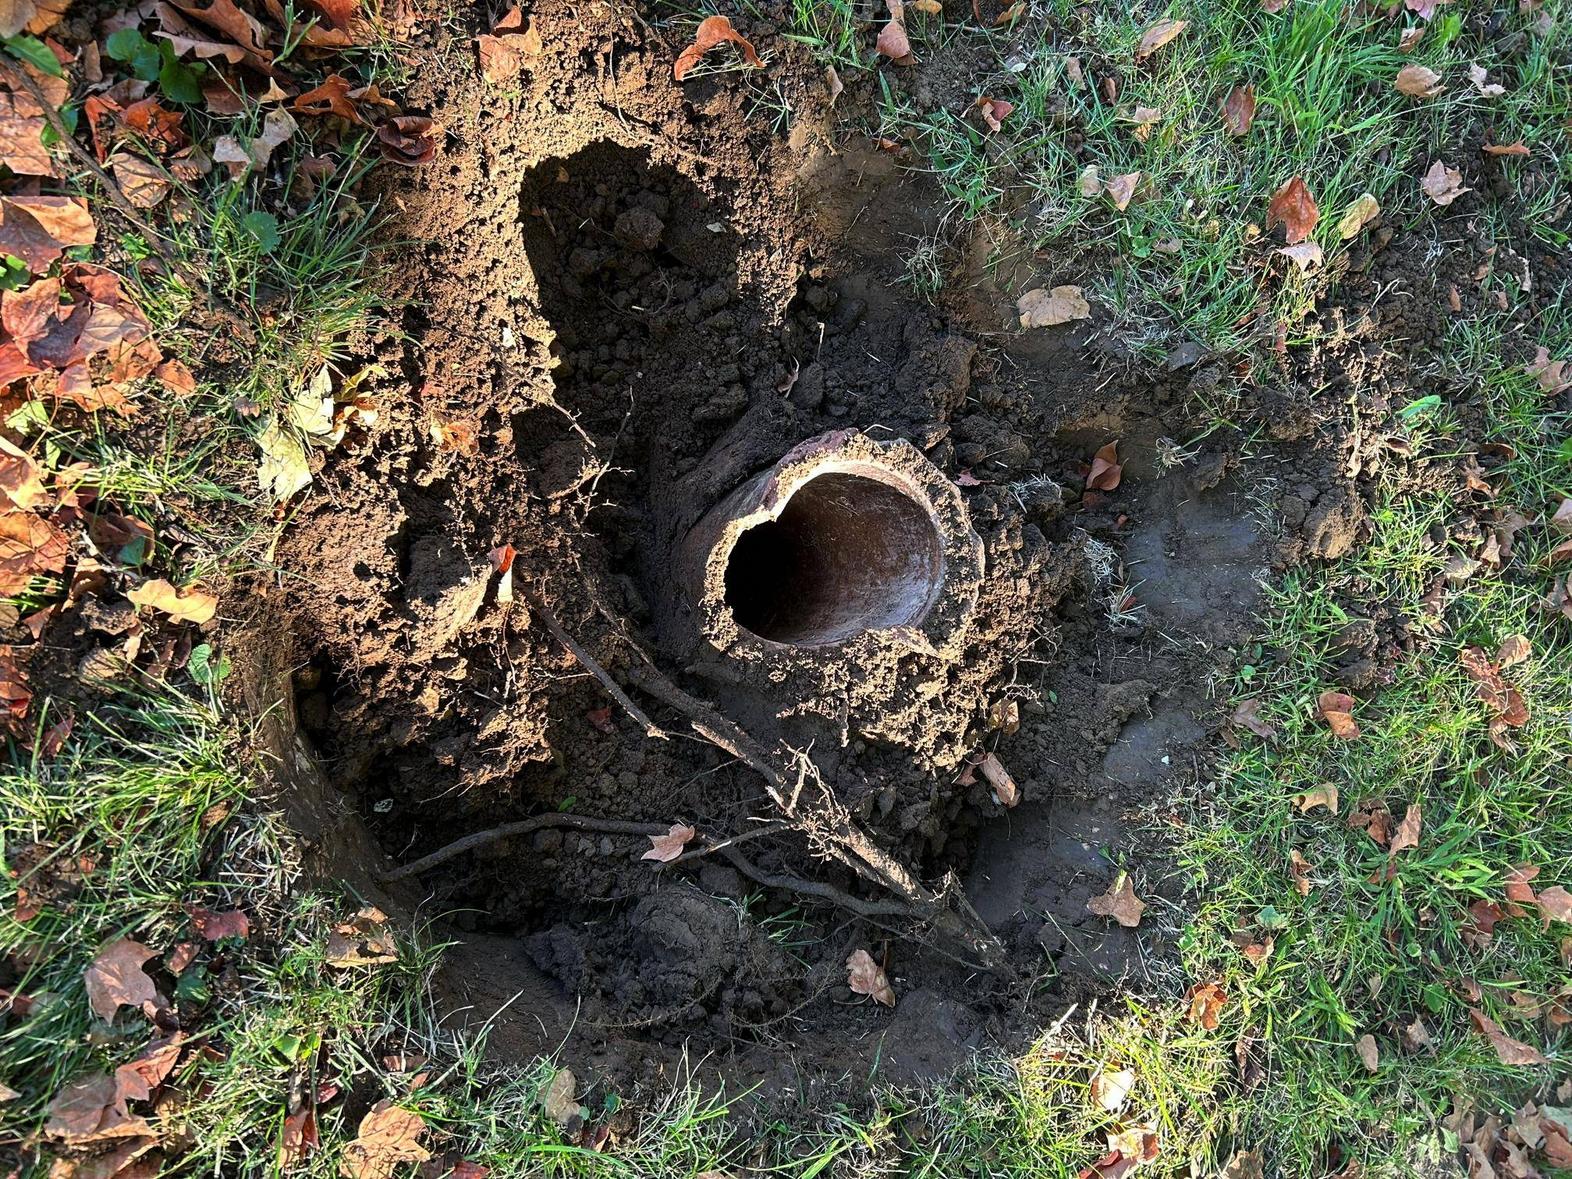
Credit: diy.stackexchange.com
Tools You Need For Cutting Terracotta Pipe
Choosing the right tool makes the job safer and easier. While there are several options, each tool has its pros and cons for different situations. Here’s a breakdown of the most common choices:
| Tool | Best For | Pros | Cons |
|---|---|---|---|
| Angle Grinder | Precise, straight cuts on medium to large pipes | Fast, accurate, widely available | Generates dust, requires power, can chip pipe if rushed |
| Handheld Snap Cutter | Quick cuts in tight spaces | Portable, no power needed | Can cause uneven breaks, less control |
| Reciprocating Saw (with diamond blade) | Curved or odd-shaped cuts | Versatile, good for demolition | Slower, can vibrate pipe and cause cracks |
| Hacksaw (with carbide/grit blade) | Small pipes or detailed work | Cheap, simple | Slow, lots of effort needed, not for thick walls |
| Rotary Tool (with diamond wheel) | Precision trimming, small adjustments | Very precise | Only for thin walls or finishing edges |
Most professionals use an angle grinder with a diamond blade for straight cuts and a snap cutter for quick, rough work. You can rent or buy these tools at most hardware stores.
Other Essential Supplies
Besides your main cutting tool, you’ll need:
- Safety glasses and dust mask: Protects your eyes and lungs from clay dust and shards.
- Work gloves: Prevents cuts from sharp edges.
- Tape measure and marker: For accurate measurements and marking the cut line.
- Clamps or supports: Holds the pipe steady.
- Water spray bottle: Helps reduce dust if using power tools.
- Brush or vacuum: Cleans up debris.
Preparing To Cut: Safety And Setup
Safety should always come first. Terracotta dust can be harmful if inhaled, and flying shards are a risk if the pipe cracks. Here’s how to get ready:
- Clear your work area: Make sure the pipe is on a stable, flat surface. Remove anything that could cause tripping or distraction.
- Wear PPE: Always put on safety glasses, a dust mask, and gloves before cutting.
- Mark your cut: Use a tape measure and permanent marker to draw a line around the pipe where you want to cut. Double-check your measurement.
- Support the pipe: Place the pipe on padded supports or sandbags to avoid rolling. If you’re cutting a section in place, use clamps or wedges to keep it steady.
- Check for existing cracks: Examine the pipe for any cracks. If you see any, avoid cutting near them—they can cause the pipe to break unpredictably.
Many beginners skip the step of supporting the pipe fully. This is a common mistake that leads to uneven cuts or broken pipes. Always make sure your workpiece is stable before you start.

Credit: www.youtube.com
Step-by-step Guide: How To Cut Terracotta Pipe
Let’s walk through the main steps using the most common tools. Each method has its special considerations.
Using An Angle Grinder
This is the go-to method for most straight cuts.
- Select a diamond blade: Terracotta is hard, so use a blade rated for masonry or tile.
- Position the pipe securely: Set the pipe on sandbags or foam blocks. Make sure it can’t move.
- Mark the cut line: Draw a clear line all the way around.
- Score the pipe: Start the grinder and gently score the line, going around the pipe. Don’t try to cut all the way through in one pass.
- Deepen the cut: Make several light passes, going deeper each time. This prevents chipping.
- Finish the cut: Once you’re about 80% through, gently tap the waste section with a rubber mallet. The pipe should snap cleanly along your cut.
- Smooth the edges: Use the grinder or a sanding stone to remove sharp bits.
Tip: Spraying a little water along the cut line can reduce dust and keep the blade cool.
Using A Snap Cutter
Snap cutters are often used by plumbers for quick work.
- Wrap the chain around the pipe: Position the cutter so the chain sits exactly on your cut line.
- Tighten the handle: Slowly increase tension until you hear the pipe crack.
- Check the break: If it’s uneven, smooth out the rough spots with a file or grinder.
Note: Snap cutters work best on pipes up to 8 inches in diameter. For larger pipes, use a grinder.
Using A Reciprocating Saw
For curved cuts or demolition jobs.
- Choose the right blade: Use a diamond or carbide-grit blade for hard materials.
- Secure the pipe: Lock the pipe in place with clamps or wedges.
- Cut slowly: Let the saw do the work. Forcing it can crack the pipe.
- Finish the edge: Clean up rough spots with a file.
Warning: Reciprocating saws can cause vibration, which may crack fragile pipes. Use gentle pressure.
Using A Hacksaw
Best for small pipes or trimming.
- Install a grit-edge blade: Standard metal blades will dull quickly.
- Mark your line: Accuracy is key for a clean cut.
- Saw gently: Go slow and steady. It will take time.
- Smooth the cut: Sand or file any roughness.
Fine Trimming With A Rotary Tool
If you need to shave off small amounts or fix a chip:
- Fit a diamond wheel: These cut through terracotta easily.
- Trim carefully: Hold the tool steady and go slow.
- Check your progress: Don’t over-cut.
This method is not for cutting through the whole pipe—just small adjustments.
Comparing Cutting Methods: Which Is Best?
Choosing the best cutting method depends on your project size, tools, and skill level. Below is a quick comparison:
| Method | Cut Quality | Speed | Risk of Cracking | Skill Required |
|---|---|---|---|---|
| Angle Grinder | Smooth, straight | Fast | Medium | Medium |
| Snap Cutter | Rough, but quick | Very fast | High | Low |
| Reciprocating Saw | Variable | Medium | Medium-High | Medium |
| Hacksaw | Fair, slow | Very slow | Low | Low |
For most DIYers, the angle grinder offers the best mix of speed, control, and finish. Snap cutters are great for quick demolition, but not for precision work.
Practical Tips For A Clean, Safe Cut
Even with the right tool, technique matters. Here are tips that make a difference:
- Score before cutting through: Always make a shallow groove before going deep. This prevents chips.
- Let the tool do the work: Forcing the cut can break the pipe or wear out the blade.
- Cut in a well-ventilated area: Terracotta dust can be harmful. Outdoors is best.
- Keep the pipe cool: If using power tools, pause often or use water to prevent overheating.
- Check blade condition: Dull blades cause more chipping and require more effort.
- Practice on a scrap piece: If you’re new to this, try cutting a leftover bit of pipe first.
- Support both sides of the cut: Especially for long pipes, so the ends don’t drop and crack.
- Inspect your cut: Look for small cracks or weak spots before installing the pipe.
One non-obvious insight: Old terracotta pipes often have tiny internal cracks not visible from the outside. If possible, tap the pipe lightly with a small tool and listen. A dull sound may mean the pipe is already weak—proceed with extra caution or choose a different section for cutting.
What To Do After Cutting
A clean cut is just the start. Here’s what you need to do next:
- Smooth the edges: Sharp clay can damage rubber couplings or cut hands. Use a sanding stone or file.
- Clean out the pipe: Remove all dust and chips from inside, as these can block flow or damage seals.
- Inspect for cracks: Look closely at the cut edge. If you see spider-web cracks, consider making a new cut further down.
- Seal or join: If you’re connecting to a modern pipe, use a flexible rubber coupling. These are designed to fit over rough terracotta and clamp tightly.
- Test fit: Always check that the cut piece fits properly before final installation.
If you’re working on a sewer or water line, check local codes—some areas require specific types of joints or seals for terracotta.
Common Mistakes To Avoid
Many beginners make errors that lead to wasted pipe or unsafe conditions. Here’s what to watch out for:
- Cutting too fast: Rushing leads to chips, cracks, or broken pipes.
- Not supporting the pipe: This causes the pipe to break unevenly or fall.
- Using the wrong blade: Wood or metal blades will not cut terracotta and may be dangerous.
- Ignoring safety gear: Dust and shards are serious hazards.
- Skipping edge smoothing: This causes leaks or cuts during installation.
- Forcing the tool: Let the blade do the work—force increases the risk of pipe failure.
- Cutting near an existing crack: Even small cracks can spread and ruin the pipe during cutting.
One insight: Never try to cut terracotta pipe when it’s cold outside. Clay becomes more brittle in low temperatures and is more likely to shatter. If possible, store the pipe in a warmer space before cutting.
Repairing And Joining Terracotta Pipe After Cutting
After making your cut, you may need to connect the terracotta pipe to another piece of terracotta, or to a different material like PVC. Here’s how to do it correctly:
Joining Two Terracotta Pipes
- Use a flexible rubber coupling: These are available in various sizes and have metal bands for a tight seal. Slide the coupling over both ends and tighten with a screwdriver or wrench.
- Check for leaks: Pour water through the pipe before burying to confirm the seal is tight.
Connecting Terracotta To Pvc
- Choose the right adapter: There are special transition couplings designed for clay to plastic.
- Measure carefully: PVC pipe is often thinner than terracotta, so ensure the coupling fits both sizes.
Sealing The Joint
- Use pipe sealant or joint compound if required by local codes. This adds extra leak protection, especially for underground or sewer pipes.
- Backfill carefully: When covering the pipe, use sand or fine gravel around the joint to avoid shifting or cracking.
How To Dispose Of Terracotta Pipe Waste
Cutting terracotta creates sharp shards and dust. Don’t just throw these in household trash. Here’s what to do:
- Collect all pieces: Place broken bits in a sturdy container.
- Check local regulations: Many municipalities treat terracotta as construction waste. Take it to a local landfill or recycling center.
- Never bury waste on-site: Old clay can leach minerals into the soil or block drainage.
Some artists or gardeners reuse terracotta chips for mosaic, drainage, or mulch, but only if they’re clean and free from contaminants.
Working With Buried Terracotta Pipe
If your project involves cutting a pipe that’s already buried (for example, a sewer or drain line), there are extra steps:
- Expose enough pipe: Dig around the pipe so you have space to work safely—at least 12 inches on each side.
- Check for water flow: Make sure the pipe is empty before cutting. Block or reroute any flow.
- Support the pipe: Use sandbags under both sides of the cut to prevent stress.
- Take extra care with vibration: Buried pipes are more likely to crack due to ground pressure.
- Seal the joint well: Underground connections must be watertight to prevent leaks or root intrusion.
It’s also wise to contact your local utility locator before digging, to avoid hitting other lines.
Advanced Techniques: Cutting Large Or Odd-shaped Terracotta Pipe
Some jobs involve pipes larger than 12 inches, or pipes with odd shapes. These require more advanced techniques:
- Use a wet saw: Tile or masonry saws with water feed can cut thick clay without dust or overheating. These are often available at rental shops.
- Score and snap method: For very thick pipes, deeply score the pipe all the way around, then tap gently with a rubber mallet to break it along the score.
- Custom blades: For unusual shapes, custom diamond blades or wire saws may be needed.
If you’re not comfortable with these methods, consider hiring a professional. Large pipes are expensive and mistakes can be costly.
Terracotta Pipe Maintenance After Cutting
After your new joint or section is installed, regular maintenance can extend its life:
- Inspect for leaks: After a few days of use, check the joint for any signs of water or sewage escaping.
- Prevent root intrusion: Tree roots often seek out old clay pipes. Use root barriers or chemical root killers if needed.
- Flush the system: Run clean water through the pipe to clear out any dust or grit left from cutting.
- Check annually: Especially for underground systems, inspect once a year for signs of shifting or cracking.
When To Call A Professional
While many DIYers can cut terracotta pipe with the right tools and care, some situations require expert help:
- Large diameter or thick-walled pipes: Mistakes can be expensive.
- Pipes in tight spaces or with limited access: Safety risks are higher.
- Critical systems (main sewer or water lines): Local codes may require licensed professionals.
- Unusual materials or connections: If you’re unsure, get advice before proceeding.
The cost of a professional is often less than the price of replacing a damaged pipe or fixing a leak.
Environmental And Health Considerations
Cutting terracotta pipe produces fine dust that contains silica. Silica dust can cause lung problems if inhaled repeatedly. Always:
- Wear a mask rated for fine dust
- Cut outdoors or in a well-ventilated space
- Use water to suppress dust when possible
Dispose of dust and shards safely. Don’t wash them into drains or leave them on the ground.
For more information about silica dust and safe handling, see the OSHA Silica Safety Guide.

Credit: bsptools.com
Frequently Asked Questions
How Do I Cut Terracotta Pipe Without Breaking It?
The key is to score the pipe first with a light pass using a diamond blade or snap cutter, then gradually deepen the cut. Don’t force the tool, and always support both sides of the cut. If possible, use water to cool the blade and reduce dust, which also helps prevent cracks.
What Blade Do I Need For Terracotta Pipe?
Always use a diamond blade or a blade labeled for masonry, tile, or stone. Regular metal or wood blades will not cut through terracotta and may be dangerous. For hand tools, use a carbide-grit blade.
Can I Use A Regular Saw To Cut Terracotta Pipe?
A regular hand saw or wood saw is not suitable. You need a reciprocating saw with a diamond or carbide blade, or a hacksaw with a grit-edge blade. Never try to cut terracotta with tools made for wood or metal.
How Do I Connect Terracotta Pipe To Pvc?
Use a flexible rubber coupling (sometimes called a Fernco) that fits both pipe sizes. These couplings have metal bands that tighten for a leak-proof seal. Make sure the ends are clean and smooth for best results.
Is Terracotta Pipe Still Used Today?
Terracotta pipe is less common in new construction, as materials like PVC and HDPE are lighter and more durable. However, many old drainage and sewer systems still use terracotta, especially in homes built before the 1970s. Repairs and replacements often require cutting existing clay pipes.
Cutting terracotta pipe can seem intimidating, but with the right tools, preparation, and safety steps, it becomes a straightforward task. Take your time, respect the material’s unique qualities, and you’ll get professional results—while preserving the integrity of your drainage or sewer system for years to come.