
If you enjoy cooking with an Instant Pot, you might have seen recipes that say, “deglaze the pot. ” But what does this really mean? And why is it so important? Deglazing is a simple but powerful technique that can change the way your food tastes and prevent frustrating errors like the “burn” warning.
In this guide, you’ll learn exactly how to deglaze an Instant Pot, why it matters, what liquids to use, and how to avoid common mistakes. With clear steps, tips, and real-life examples, you’ll soon feel confident using this method in your own kitchen.
What Does Deglazing Mean?
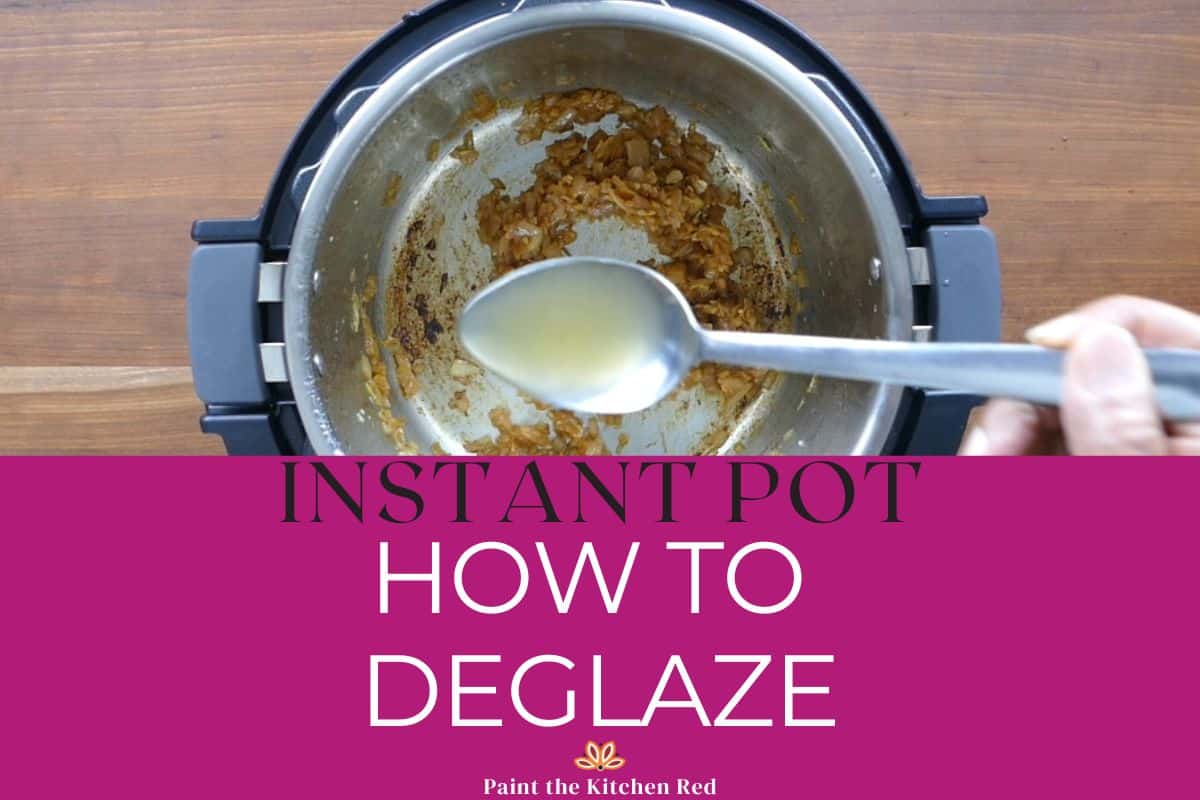
Deglazing is a cooking technique where you add liquid to a hot pan to loosen and dissolve the browned bits of food stuck to the bottom. These bits are called fond. In the Instant Pot, fond forms when you use the Sauté mode to brown meat or vegetables. These bits are packed with flavor. By deglazing, you lift these flavors and create a base for tasty sauces, gravies, or soups.
Many beginners think deglazing is only for fancy cooking. In reality, it’s a basic step that makes food taste richer and keeps your Instant Pot working smoothly. Even in simple recipes, deglazing can make a big difference. For example, if you’re making chili and sauté onions and garlic first, those browned bits add depth once you deglaze.
Some cooks use deglazing to create a sauce directly in the pot. After browning, you can add wine or broth, scrape, and reduce the liquid for a quick pan sauce before adding other ingredients. This simple step can turn a basic meal into something special, even if you’re just cooking for yourself.
Why Is Deglazing Important In An Instant Pot?
Unlike regular pots, the Instant Pot needs a clean bottom to work properly. If there’s stuck food, the machine can’t sense the liquid at the bottom. This often leads to the Burn warning, which stops your cooking and can ruin meals. Deglazing prevents this and does more:
- Enhances flavor by mixing all the browned bits into your food
- Prevents Burn error during pressure cooking
- Improves texture of sauces and stews
- Keeps the pot easy to clean after cooking
Skipping deglazing is one of the most common mistakes new Instant Pot users make. The Burn warning is more than just annoying—it can waste ingredients and time. Even if you don’t see many browned bits, a quick deglaze can help.
When you’re cooking thicker dishes, like risotto or pasta, deglazing is even more important because starches stick easily and trigger errors.
Deglazing also helps distribute seasoning. If you add salt or spices during sautéing, those flavors get stuck to the bottom. Deglazing pulls them into the whole dish, making the final meal taste more balanced.
Credit: www.paintthekitchenred.com
When Should You Deglaze The Instant Pot?
You should deglaze right after browning or sautéing food, before starting the pressure cooking part. Typical moments include:
- After searing meat or poultry
- After sautéing onions, garlic, or spices
- Before adding rice or grains
- Before pressure cooking sauces or stews
Some recipes repeat deglazing if you brown several ingredients in steps. Always follow the order in your recipe, but if you see browned bits, it’s time to deglaze.
Deglazing is also helpful if you notice a strong aroma or see some smoke from the pot bottom. This can mean sugar or protein is burning, so deglaze right away. For multi-step recipes, like layered casseroles, deglazing between steps can stop flavors from sticking or burning.
If you cook recipes with both meat and vegetables, deglaze after each group. For example, brown chicken, deglaze, sauté vegetables, deglaze again. This builds flavor and keeps the pot clean.
What Liquids Can You Use To Deglaze?
Not all liquids are the same. The right choice depends on the recipe and flavor you want. Here are common options:
- Water: Simple, safe, and always on hand. Good for any recipe.
- Broth (chicken, beef, vegetable): Adds more flavor, great for soups and stews.
- Wine (red or white): Classic for French dishes and sauces. Cook off alcohol after adding.
- Beer: Adds depth, especially for beef stews.
- Tomato juice or canned tomatoes: For chili or pasta sauces.
- Vinegar: For a tangy flavor, use sparingly.
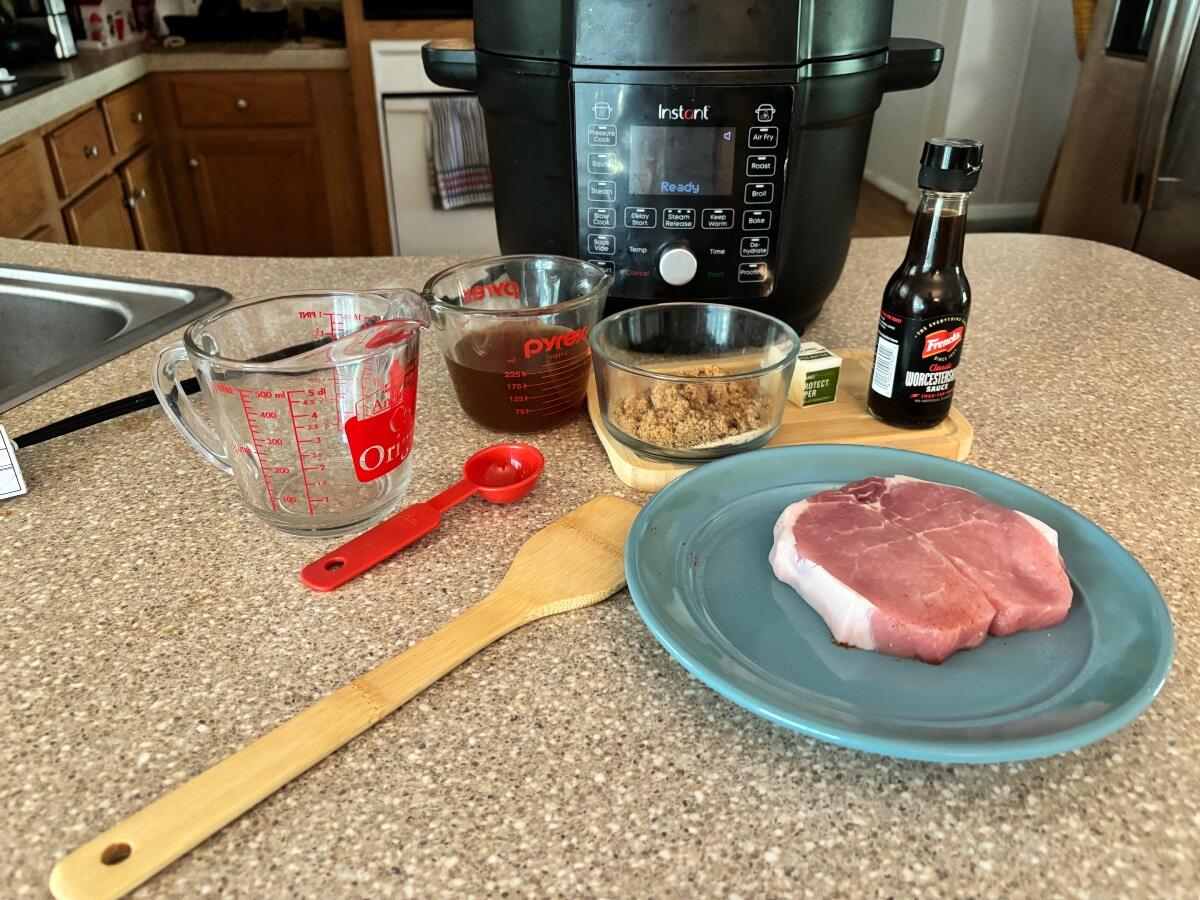
- Soy sauce or Worcestershire sauce: For Asian or savory recipes, mix with water.
Never use thick sauces (like cream or heavy tomato paste) for deglazing. They can burn and stick more.
When choosing a liquid, consider the dish and dietary needs. For example, if someone is vegetarian, use vegetable broth instead of chicken broth. If you want a lighter flavor, stick with water. For more richness, combine broth and wine for a balanced taste.
Some cooks add a splash of lemon juice or apple cider vinegar to brighten flavors. Just use small amounts, as too much acid can change the recipe’s taste. When deglazing with wine, always let it simmer for a minute or two to remove alcohol.
Credit: www.paintthekitchenred.com
Step-by-step Guide: How To Deglaze Instant Pot
Let’s break down the complete process with detailed steps and practical tips.
1. Finish Sautéing Or Browning
After using the Sauté function, stop when your meat or vegetables are browned. If the pot is very hot, press Cancel to pause.
Don’t rush this step—browning builds flavor. Make sure the food is well browned, not just cooked through. If you see dark brown bits, those are perfect for deglazing.
2. Add Deglazing Liquid
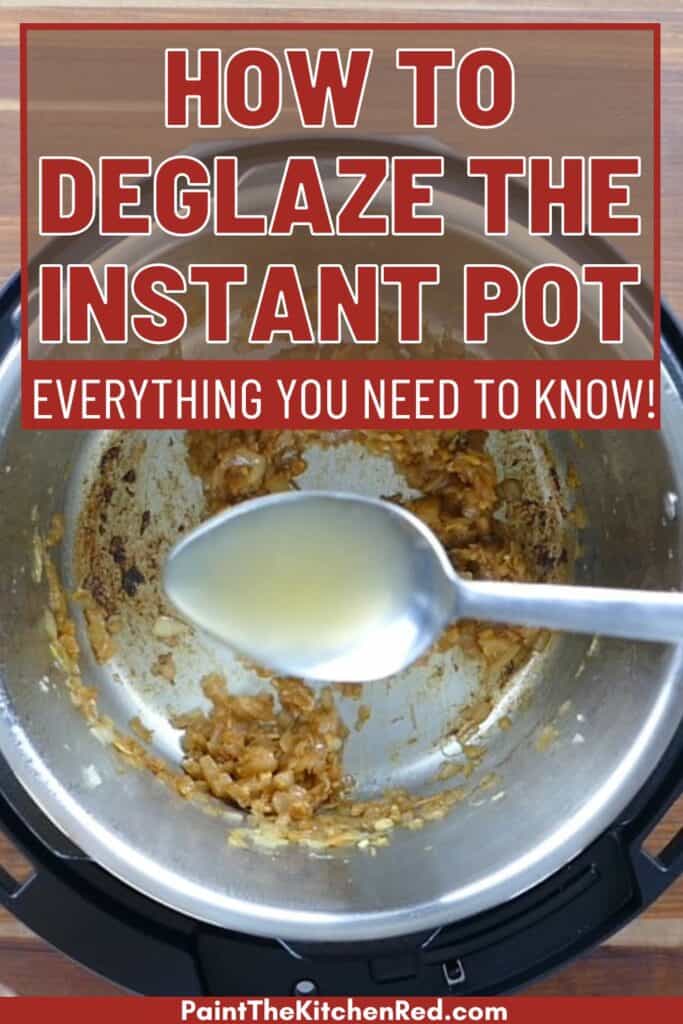
Pour a small amount of your chosen deglazing liquid (usually ¼ to ½ cup) into the pot. The pot will sizzle and steam. This is normal.
If you’re making a recipe with a sauce, you can use broth, wine, or even a mix. For Asian dishes, soy sauce and water work well. Measure your liquid so you don’t add too much and thin the dish.
3. Scrape The Bottom
Use a wooden spoon or silicone spatula. Gently scrape the bottom to loosen all browned bits. Be thorough, but don’t scratch the pot.
Focus on any dark spots. Move the spoon in circles and back-and-forth to catch all stuck bits. If you see stubborn spots, let the liquid sit for 30 seconds, then scrape again.
4. Stir And Simmer
Keep stirring for 1-2 minutes as the liquid bubbles. Make sure nothing is left stuck on the bottom. This mixes the flavor into your liquid.
If the pot bottom still feels rough, add a bit more liquid. For extra flavor, stir in herbs or spices during this step. Let the liquid simmer just enough to dissolve the fond.
5. Continue With Your Recipe
Once the pot bottom feels smooth, add other ingredients and start the pressure cooking. If you see stuck bits again after adding more food, repeat the deglazing step.
Pro Tip: Always use enough liquid to cover the bottom. Most Instant Pot recipes need at least 1 cup of liquid for pressure cooking.
If your recipe calls for thickening agents later (like cornstarch), add them after pressure cooking to avoid sticking.
Example: Deglazing For Beef Stew
Here’s a real-life example to show deglazing in action.
- Sauté chopped onions and garlic in oil until browned.
- Add beef cubes and brown all sides.
- After browning, press Cancel.
- Pour in ½ cup beef broth.
- Scrape the pot bottom well, dissolving browned bits.
- Add carrots, potatoes, and the rest of the broth.
- Lock the lid and pressure cook.
The stew will have a rich flavor, and you’ll avoid the Burn warning.
You can try variations—deglaze with red wine for a classic French beef stew, or use beer for a hearty winter meal. If your stew has tomato paste, wait to add it until after deglazing, so it doesn’t burn.
Comparing Deglazing Liquids
Here’s how common deglazing liquids compare for flavor and use:
| Liquid | Flavor Impact | Best For | Notes |
|---|---|---|---|
| Water | Neutral | Any dish | Always available |
| Broth | Rich, savory | Soups, stews | Boosts umami |
| Wine | Fruity, acidic | French dishes | Cook off alcohol |
| Beer | Malty, deep | Beef, pork | Use dark beer for rich flavor |
| Vinegar | Tangy, sharp | Pickled dishes | Use sparingly |
If you want to experiment, try mixing two liquids—like broth and wine—for layered flavor. For mild dishes, water is safe. For bold recipes, broth or beer adds more character.
Tools For Effective Deglazing
Choosing the right tools makes deglazing easier and protects your Instant Pot.
- Wooden spoon: Gentle on the pot, sturdy for scraping
- Silicone spatula: Flexible, won’t scratch nonstick liner
- Heatproof gloves: Protect hands from steam
- Measuring cup: For adding exact amounts of liquid
Never use metal utensils—they can scratch the stainless steel or nonstick pot liner.
If you often cook in your Instant Pot, invest in a silicone spatula with a flat edge. This shape is perfect for scraping corners and cleaning the pot bottom. For extra safety, use long-handled tools to keep your hands away from steam.
Common Mistakes When Deglazing Instant Pot
Even experienced cooks make errors. Here are mistakes to avoid:
- Not adding enough liquid: Too little liquid won’t loosen all the bits.
- Scraping with metal utensils: Can damage the pot lining.
- Skipping deglazing: Leads to Burn warning and bitter taste.
- Using thick sauces as liquid: Can burn and stick more.
- Not scraping thoroughly: Leaves burnt bits that spoil flavor.
- Deglazing with cold liquid: Can warp a hot liner; use room temperature or warm liquids.
- Adding dairy or cream: Dairy can curdle or stick, use after pressure cooking.
Another common mistake is rushing through the scraping step. If you don’t spend enough time scraping, some fond stays stuck and creates problems later. Also, never pour cold liquid straight from the fridge—let it come to room temperature first to avoid thermal shock.
Some beginners add more liquid after deglazing, thinking it’s necessary. Only add what your recipe calls for, or you’ll dilute flavors.
How Deglazing Affects Flavor
Deglazing doesn’t just prevent errors. It creates complex, deep flavors in your food. When you brown food, the Maillard reaction creates hundreds of flavor compounds. These are left as brown bits on the pot bottom. Deglazing dissolves them and mixes them into your dish.
For example, beef stew made without deglazing tastes flat. The same recipe, with proper deglazing, has a richer, more savory taste. This is why chefs always deglaze pans for gravies and sauces.
Deglazing can even change the color of your food. Browned bits give sauces a darker, more appetizing look. If you want lighter food, deglaze quickly and don’t over-brown.
Deglazing For Different Foods
Some foods need special care when deglazing.
Meat Dishes
Always deglaze after browning meat. This step is key for beef stew, chicken cacciatore, or pulled pork. Use broth or wine for extra flavor.
If you cook fatty meats, like pork belly, more fat may stick to the pot. Deglaze with a bit more liquid and scrape well to dissolve all fat and flavor.
Vegetable-based Recipes
Vegetables can leave sugar that burns easily. After sautéing, deglaze with water or broth, scraping up any caramelized bits.
For stir-fries or curries, deglaze after the first sauté step. This helps avoid burnt flavors and builds a sweet base.
Rice And Grains
Rice dishes like risotto or pilaf need a clean pot bottom before pressure cooking. Deglaze to prevent sticking and burning.
If you cook grains with spices, deglaze after to mix all flavors. For sticky rice, use a bit more liquid and stir longer.
Sauces And Soups
Deglazing is the base for rich tomato sauces, gravies, and even some chowders. Always deglaze after sautéing onions or garlic.
For tomato-based recipes, use broth or water to thin the sauce before pressure cooking. This prevents sticking and burning.
Can You Skip Deglazing?
Technically, you can skip it—but you shouldn’t. Skipping deglazing leads to:
- Burn errors that stop the Instant Pot
- Unpleasant, burnt taste
- Hard-to-clean pot
- Weaker flavors in your dish
Some recipes (like steaming plain vegetables) don’t need deglazing, but any recipe that starts with sautéing or browning does.
Even if you’re in a hurry, a quick deglaze takes just a minute and saves trouble later. If you’re unsure, deglaze anyway—better safe than sorry.
How Much Liquid Is Needed?
The Instant Pot manual usually recommends at least 1 cup of thin liquid for pressure cooking. For deglazing, you only need enough to cover the pot bottom (about ¼ to ½ cup). After deglazing, add more liquid as required by your recipe.
If you’re not sure, it’s better to use a bit more than too little. Too little liquid is a major cause of Burn errors.
If you’re cooking a large batch, double the deglazing liquid. For small recipes, stick to ¼ cup. Always check the pot bottom after scraping—if it still feels rough, add a splash more liquid.
Safety Tips When Deglazing
Deglazing creates steam and bubbling, so safety is important.
- Stand back when adding liquid to a hot pot.
- Use a long spoon to avoid steam burns.
- Add liquid slowly to avoid splashing.
- If using wine or spirits, let the alcohol cook off before closing the lid.
Some Instant Pots heat up quickly, so steam can be intense. Always wear heatproof gloves if you’re sensitive to steam. For children or pets nearby, keep them away from the pot during deglazing.
Deglazing Stainless Steel Vs. Nonstick Instant Pot Liners
Not all Instant Pots have the same liner. Here’s how deglazing differs:
| Liner Type | Deglazing Difficulty | Tool Advice | Notes |
|---|---|---|---|
| Stainless steel | Fond sticks more | Wooden or silicone tools | Scrape well but avoid scratching |
| Nonstick | Fond sticks less | Silicone only | Gentle scraping; never use metal |
Non-obvious Insight: Stainless steel liners create more fond, but also more flavor if you deglaze well. Nonstick liners are easier to clean but don’t produce as much flavor from browning.
If you want maximum flavor, choose stainless steel. For easy cleaning, nonstick is better. Either way, deglazing is crucial.
Advanced Deglazing: Layering Flavors
Professional chefs often deglaze several times in one recipe. This is called layering flavors. For example:
- Sauté onions and garlic—deglaze.
- Brown meat—deglaze again with wine.
- Add mushrooms—deglaze with a splash of broth.
Each step dissolves new browned bits and builds a complex flavor base. You can use this method for restaurant-quality results at home.
Try layering flavors in a stew or curry. Deglaze after each sauté step, using different liquids. The result is a dish with depth and richness.
Cleaning Up After Deglazing
Deglazing makes cleaning your Instant Pot much easier. After cooking, you’ll find less stuck food. If any bits remain, fill the pot with warm water and a little soap, let it soak, then scrub gently with a non-abrasive sponge.
If you ever forget to deglaze and get a Burn warning, immediately release pressure, open the lid, and deglaze before trying again.
For tough stains, use baking soda and water paste. Let it sit for 10 minutes, then scrub gently. Always dry the pot thoroughly before storing.
Deglazing And The Burn Warning
The Burn warning is a common frustration for Instant Pot users. It happens when the sensor detects overheating, usually from stuck food. Deglazing is the best way to prevent this warning.
If you get the warning:
- Turn off the Instant Pot.
- Open the lid safely.
- Check for stuck bits.
- Remove food, deglaze the pot, add more liquid, and restart.
Non-obvious Insight: Sometimes, tomato-based sauces cause Burn warnings because they are thick and sugary. Always thin with water or broth and deglaze well before pressure cooking.
Some recipes, like thick curries or cheesy dishes, burn easily. Deglaze twice if needed—after sautéing and before adding thick ingredients.
Credit: instantpoteats.com
Real-life Troubleshooting Examples
Here are common situations and how deglazing solves them:
- Sautéed onions stuck to the bottom: Add ¼ cup water, scrape, then add other veggies.
- Burn warning after browning meat: Stop cooking, deglaze with broth, restart.
- Rice sticking: Always deglaze before adding rice and liquid.
- Thick stew burns: Deglaze after each browning step, add extra liquid.
If you still get Burn warnings, check the pot liner for scratches or damage. Sometimes, a damaged liner causes false warnings.
Quick Reference: Deglazing Steps
You can remember deglazing in four words: Sauté, Add, Scrape, Continue.
- Sauté or brown food.
- Add liquid.
- Scrape bottom.
- Continue recipe.
Following this order will prevent most cooking problems.
Deglazing In Other Electric Pressure Cookers
While this guide focuses on the Instant Pot, the same method works for other brands like Ninja Foodi, Crock-Pot Express, and more. Always check your user manual, but the principles are the same.
If your cooker doesn’t have a Sauté function, brown food on the stovetop, then transfer and deglaze in the cooker. The flavor will still benefit.
Comparing Deglazing In Instant Pot Vs. Stovetop
How does deglazing in the Instant Pot compare to traditional methods?
| Feature | Instant Pot | Stovetop Pan |
|---|---|---|
| Heat control | Fixed settings (Sauté/More) | Manual adjustment |
| Fond formation | Moderate | Strong |
| Liquid needed | ¼–½ cup minimum | Varies |
| Risk of sticking | Medium | High if not watched |
| Burn warning | Yes (sensor-controlled) | No, but food may burn |
Key takeaway: Instant Pots require careful deglazing to avoid errors, but the technique is similar to traditional cooking.
On the stovetop, you can see and smell burning more easily. In the Instant Pot, rely on visual cues and the Burn warning.
Deglazing For Special Diets
If you cook gluten-free, vegan, or low-sodium meals, adjust your deglazing liquid:
- Use water, low-sodium broth, or vegetable broth for low-sodium diets.
- Use gluten-free broth or wine for gluten-free recipes.
- For vegan dishes, vegetable broth or water works well.
Always check labels if you have allergies or special dietary needs.
If you avoid alcohol, skip wine and use broth or water with herbs for flavor.
Frequently Asked Questions
What Is The Minimum Amount Of Liquid Needed To Deglaze An Instant Pot?
You need at least ¼ to ½ cup of thin liquid, enough to cover the bottom and dissolve all browned bits. For pressure cooking, the total liquid should be at least 1 cup.
Can I Use Milk Or Cream To Deglaze The Instant Pot?
No, avoid using milk or cream to deglaze. Dairy can curdle or stick to the pot. Add these ingredients after pressure cooking if needed.
What Should I Do If The Burn Warning Appears Even After Deglazing?
If you deglazed but still get the Burn warning, turn off the pot, open the lid, and check for stuck food. Remove the food, scrape the bottom again, add more liquid if necessary, and restart the recipe.
Is Deglazing Necessary For Every Instant Pot Recipe?
No, deglazing is only necessary if you sauté, brown, or see browned bits stuck to the pot. If you’re steaming or boiling without sautéing, you can skip this step.
Where Can I Learn More About Deglazing And Instant Pot Cooking?
You can find more about deglazing and pressure cooking at Serious Eats for expert guides and tips.
Cooking with an Instant Pot becomes much simpler once you master deglazing. This one technique can transform your meals from average to amazing, prevent errors, and make cleanup easier. With the right steps, tools, and a bit of practice, you’ll be able to handle any recipe and impress your family with rich, flavorful dishes.