
A leaking or broken shower pipe inside your wall can feel like a homeowner’s nightmare. Water stains, dripping sounds, or even a sudden loss of water pressure are all warning signs that something is wrong behind the tiles. If you ignore a broken pipe, the damage can spread—rotting wood, peeling paint, mold growth, and expensive repairs will follow.
The good news is that with the right tools, knowledge, and careful steps, you can fix a broken shower pipe in the wall yourself and save a lot of money.
This guide will walk you through everything you need to know, from finding the source of the leak to making a strong repair and preventing future problems. Whether you are a confident DIYer or a cautious beginner, you will learn how to tackle this common household issue safely and effectively.
Understanding The Problem: Signs Of A Broken Shower Pipe
Before you can repair the pipe, you need to be sure a pipe is the problem and not something else. Here are the most common signs that a shower pipe inside the wall is broken:
- Wet spots or stains on the bathroom wall or ceiling, often near the shower
- Mold or mildew smell, even after cleaning
- Peeling paint or wallpaper near the shower area
- Dripping sounds from inside the wall, especially when the shower is off
- Low water pressure or inconsistent water flow from the showerhead
Some leaks can be slow and hard to see at first, especially if the break is small. Over time, however, water will always find a way out, so early action is key.
Non-obvious insight: Sometimes, a leak in an upstairs bathroom can show up as a stain on the ceiling below—this can confuse homeowners into thinking it’s a roof problem.
Safety First: Preparing For The Repair
Fixing a broken shower pipe inside a wall involves working with water and, sometimes, electrical wiring. Safety is your top priority.
- Turn off the water supply. Find the main water shutoff valve for your home and turn it off. If you have a local shutoff for just the bathroom or shower, use it.
- Turn off power to the bathroom at the breaker box. This is essential if you suspect water has reached any outlets or wiring.
- Ventilate the bathroom. Open windows or use a fan to keep fresh air moving, especially if you’ll be using adhesives or solvents.
- Gather safety gear. Wear safety glasses, gloves, and a mask if you’ll be cutting drywall or tiles.
- Clear the work area. Remove toiletries, rugs, and any items that could be damaged or get in the way.
Non-obvious insight: Water can travel along pipes and wires, so be extra careful when opening a wall—sometimes the leak is not directly behind the wet spot.
Tools And Materials You Will Need
Having the right tools will make the job faster and safer. Here’s a list of essential tools and materials for fixing a broken shower pipe in the wall:
- Pipe cutter or hacksaw (for cutting damaged pipe)
- Adjustable wrench
- Screwdrivers (Phillips and flat-head)
- Utility knife
- Drywall saw (for cutting wallboard)
- Replacement pipe (copper, PEX, or PVC, depending on your system)
- Pipe connectors (couplings, elbows, or unions)
- Pipe cleaning brush or sandpaper (for copper)
- Soldering kit (for copper repairs)
- Pipe joint compound or Teflon tape
- Bucket and towels (to catch water)
- Pliers
- Flashlight or work light
- Stud finder (to avoid cutting into studs or wires)
- Measuring tape
Depending on your wall finish, you may also need tile tools, grout, and drywall repair supplies.
Tip: Match the replacement pipe material to your existing system—do not mix copper with galvanized steel, as this can cause corrosion.
Locating The Exact Source Of The Leak
Finding the precise location of the broken pipe is sometimes the hardest part. Here’s how to do it:
Visual Inspection
- Look for wet spots on the wall, ceiling, or floor near the shower.
- Check for swelling or softness in the drywall.
- Notice any discoloration or bubbling paint.
Listening
- Turn off all water sources in the house.
- Stand near the shower wall and listen carefully for dripping or hissing sounds.
Moisture Meter
- Use a moisture meter to detect dampness inside the wall. These tools are inexpensive and can pinpoint high moisture areas.
Cutting A Small Test Hole
- Cut a small hole (about 4×4 inches) in the drywall at the wettest spot.
- Shine a flashlight inside and look for dripping, wet insulation, or water stains on pipes.
If the leak is not obvious, you may need to cut several small holes to trace the water path.
Pro tip: Water can travel sideways or downward before showing up as a stain. Always check above the visible damage.
Gaining Access: Opening The Wall Safely
Once you have located the leak, you need to open the wall to access the broken pipe.
- Use a stud finder to locate studs, wires, and pipes.
- Mark the area you need to cut. Make the opening large enough to work comfortably—usually 12×12 inches or larger.
- Use a drywall saw or utility knife to cut the wall. Cut slowly to avoid hitting wires or pipes.
- Remove any insulation and place it aside for reuse.
If you have tile on the wall, you may need a rotary tool or tile saw. Be careful not to damage nearby tiles if you want to reuse them.
Caution: Some older homes have asbestos in wall materials. If you suspect this, stop and consult a professional.
Assessing The Damage: What Are You Dealing With?
With the wall open, inspect the pipe closely to understand the type of damage. Here are the most common types:
- Pinholes: Small holes in copper pipes, often from corrosion.
- Cracks: Usually from freezing or physical impact.
- Loose joints: Where two pipes connect but the joint is leaking.
- Burst pipes: Large splits, often from freezing.
Check if the damage is isolated to one spot or if there are multiple weak areas. If the pipe is old and shows lots of corrosion or pitting, replacing a longer section may be smarter.
Example: If you see green-blue stains on copper, this means corrosion. Black spots can mean old mold growth from long-term leaks.
Choosing The Right Repair Method
The best repair method depends on your pipe type, the size of the break, and your skill level. Here is a comparison of the most common repair approaches:
| Repair Method | Pipe Types | Difficulty | Durability |
|---|---|---|---|
| Soldering (sweating) | Copper | Intermediate | High |
| Compression fittings | Copper, PEX, PVC | Beginner | Medium-High |
| Push-fit connectors (SharkBite) | Copper, PEX, CPVC | Beginner | High |
| Pipe repair clamp | Copper, PVC | Easy | Temporary |
| PVC solvent welding | PVC | Beginner | High |
For most DIYers, push-fit connectors or compression fittings are the easiest, safest, and most reliable. Soldering gives a permanent result but requires more skill and safety precautions.
Step-by-step: How To Fix A Broken Shower Pipe In The Wall
This section covers a full repair using push-fit connectors, as they are suitable for most home pipes and require no special tools.
1. Cut Out The Damaged Section
- Use a pipe cutter or hacksaw to cut 1–2 inches on either side of the damaged area.
- Hold a bucket under the pipe to catch any water left inside.
- Make sure your cuts are straight and clean.
2. Prepare The Pipe Ends
- Use sandpaper or a pipe cleaning brush to smooth and clean the ends of copper pipes.
- For PEX or PVC, use a deburring tool or utility knife to remove rough edges.
- Wipe away dust and water.
3. Measure And Cut The Replacement Pipe
- Measure the gap you need to fill.
- Cut a replacement piece of the same material and size.
4. Attach Push-fit Connectors
- Slide a push-fit connector onto one end of the existing pipe.
- Insert the replacement pipe into the connector, then add a connector to the other end.
- Push the connector firmly until it clicks into place. Some brands have a mark to show full insertion.
Tip: Test the fit by pulling lightly—if it comes off, it isn’t fully seated.
5. Check For Leaks
- Open the main water valve slowly.
- Watch the repair for leaks as the water pressure builds.
- If you see any drips, turn off the water and reseat the connectors.
Pro insight: Wait 10–15 minutes before closing the wall, as slow leaks may take time to appear.
6. Replace Insulation And Close The Wall
- Replace any insulation you removed, making sure it is dry.
- Patch the drywall using drywall tape and compound.
- If you removed tiles, reapply tile adhesive and grout.
- Allow everything to dry fully before using the shower.
7. Paint Or Finish
- Sand the patched drywall smooth, prime, and paint to match your bathroom.
- For tiles, clean the area and seal the grout.
Example: A typical repair with push-fit connectors and drywall patching takes 3–5 hours, not including drying time.
Repairing Copper Pipe With Soldering
If you want a permanent, traditional repair and have copper pipes, soldering is the gold standard.
Steps For Soldering Copper Pipe
- Cut out the damaged section as before.
- Clean both pipe ends and the inside of the replacement coupling with a wire brush.
- Apply flux to all surfaces.
- Slide the coupling onto the pipe and align.
- Heat the joint with a propane torch and apply solder until it flows evenly.
- Allow to cool, then wipe clean.
Warning: Soldering uses open flames—keep a fire extinguisher close and never do this near insulation or wood.
Special Situations: Pvc And Pex Pipes
Pvc Pipes
- Cut the damaged section with a PVC cutter.
- Clean ends and dry-fit replacement pipe and couplings.
- Apply PVC primer and solvent cement.
- Press pieces together and hold for 30 seconds.
Pex Pipes
- Use a PEX cutter for clean cuts.
- Install push-fit or crimp connectors, following manufacturer instructions.
Non-obvious insight: PEX is flexible, so you can sometimes bend it slightly to fit connectors without extra elbows.

Credit: www.reddit.com
Temporary Fixes If You Can’t Repair Immediately
Sometimes you need to stop the leak quickly before a full repair. Here are temporary solutions:
- Pipe repair clamp: Fastens over the leak and stops water temporarily.
- Rubber and hose clamp: Wrap rubber (from a glove or hose) around the pipe, then tighten a hose clamp over it.
- Epoxy putty: Press into the crack or hole. Hardens in minutes and works for several days.
These fixes are only for emergencies—plan a permanent repair as soon as possible.
Preventing Future Shower Pipe Leaks
After your repair, it’s smart to take steps to avoid future problems:
- Insulate pipes—especially if your bathroom is near an outside wall and you live in a cold climate.
- Check water pressure. High pressure strains joints and can cause leaks. Normal home pressure is 40–60 psi.
- Inspect pipes yearly. Look for signs of corrosion, green/blue stains, or wet spots.
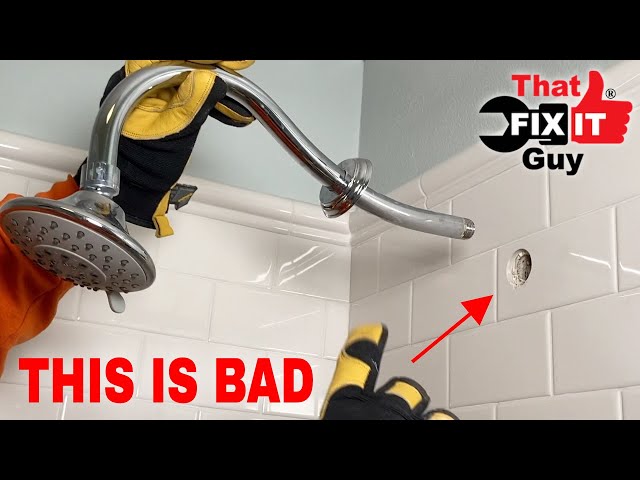
- Fix loose showerheads. If the showerhead wobbles, it can strain the pipe joint behind the wall.
Non-obvious insight: Some home insurance policies won’t cover water damage from slow leaks—so regular checks save you money and stress.
Comparing Repair Methods: Pros And Cons
Here’s a quick comparison of the most common repair solutions for shower pipes inside walls:
| Method | Cost | Skill Needed | Time Required | Best For |
|---|---|---|---|---|
| Push-fit connectors | $$ | Low | Quick (1-2 hrs) | Most DIYers |
| Soldering | $ | Medium | Longer (3-4 hrs) | Permanent copper repairs |
| Compression fittings | $$ | Low-Medium | Quick (1-2 hrs) | Temporary or small fixes |
| PVC solvent weld | $ | Low | Quick (1-2 hrs) | PVC pipes only |
Pro tip: Always consider the age and condition of your pipes. If you find lots of corrosion, plan for a more comprehensive replacement.
When To Call A Professional Plumber
DIY repairs can save money, but there are times when calling a professional is smarter:
- If the break is near the main water line or behind complex tilework
- If you find multiple leaks or signs of widespread corrosion
- If you’re unsure about the pipe material or how to make a safe repair
- If there is water near electrical wiring or outlets
- If you cannot stop the leak or the repair fails
A licensed plumber can also pressure-test your pipes and check for hidden damage that’s easy to miss.
Fact: According to the Insurance Information Institute, water damage is one of the top causes of homeowners’ insurance claims, costing an average of $10,000 per incident.
Cost Breakdown: Diy Vs. Professional Repair
Let’s compare the typical costs for fixing a broken shower pipe in the wall:
| Repair Type | DIY Cost | Professional Cost |
|---|---|---|
| Minor leak (push-fit repair) | $30 – $75 | $200 – $400 |
| Major repair (with drywall/tile) | $75 – $200 | $500 – $1,200 |
| Full pipe replacement | $150 – $400 | $1,500+ |
Note: Prices vary depending on your location and the age of your home.
Hidden Dangers: Mold And Structural Damage
A broken shower pipe left unrepaired can lead to mold growth and structural damage inside your walls. Mold can cause breathing problems and allergies, especially for children and older adults. Wood and drywall that stay wet for days or weeks can rot, weaken, and even attract pests.
If you find black, fuzzy mold or wood that is soft and crumbling, remove and replace it before closing the wall. If the damage is widespread, consult a specialist.
Credit: www.youtube.com
Tips For A Clean, Lasting Repair
- Always dry the area fully before closing the wall.
- Use primer and paint with mildew resistance for bathroom walls.
- Seal around tiles and fixtures with bathroom-grade caulk.
- Keep a photo record of your repair for insurance and future maintenance.
Pro insight: Label your home’s main water shutoff valve and show family members how to use it. Fast action during a leak can prevent thousands in damage.
Frequently Asked Questions
What Are The Risks Of Ignoring A Leaking Shower Pipe In The Wall?
Ignoring a leak can lead to mold growth, rotting wood, electrical hazards, and expensive water damage. Even a small leak can cause major problems over time, including hidden structural damage and higher water bills.
Can I Fix A Broken Shower Pipe In The Wall Without Removing Tiles?
If the leak is above the tile line or the wall behind the shower is accessible from another room, you might avoid removing tiles. However, if the break is directly behind tiles, some tile removal is usually required for a proper repair.

Credit: www.reddit.com
What Type Of Pipe Is Most Likely To Break Inside A Shower Wall?
Copper pipes can develop pinhole leaks from corrosion. PVC and PEX pipes are less likely to corrode but can be damaged by freezing or impact. The most common problem is with old copper pipes in homes built before the 1990s.
How Can I Tell If My Repair Is Holding After I Close The Wall?
Check the area for a few days after the repair. Look for new wet spots, listen for dripping sounds, and check for any musty smells. If you notice any of these, reopen the wall and inspect the repair.
Are Push-fit Connectors Reliable For Long-term Repairs?
Push-fit connectors (like SharkBite) are designed for permanent use and are approved by plumbing codes. They are very reliable if installed correctly on clean, undamaged pipe ends. Always follow the manufacturer’s instructions for best results.
Fixing a broken shower pipe inside a wall is a project you can handle with patience, the right tools, and careful attention to detail. Take your time, follow each step, and always put safety first. If in doubt, don’t risk further damage—call a professional. For more details on plumbing codes and safe repair methods, check resources like the Wikipedia Plumbing page.
With the right approach, you can restore your shower, stop water waste, and protect your home from costly damage—giving you peace of mind every time you turn on the tap.