
Fixing a stripped screw hole in a wood cabinet can feel stressful, especially when a door won’t close or a shelf wobbles. Many people try to force a bigger screw or add glue, but these quick fixes rarely last. The good news?
Most stripped screw holes can be repaired, and you don’t need to be a carpenter to do it well. With the right method and a bit of patience, you can make the repair strong—often stronger than the original wood.
In this guide, you’ll learn several proven ways to fix stripped screw holes in wood cabinets. We’ll explain each method in detail, including what tools you need, how long it takes, and why one solution may be better for your situation.
You’ll also learn how to avoid common mistakes and how to make your repair last for years. By the end, you’ll feel confident about tackling this common cabinet problem yourself.
Why Screw Holes Get Stripped In Wood Cabinets
Most people notice a screw spinning loosely or falling out, but it helps to know why this happens. Stripped screw holes occur when the threads of the screw no longer grip the wood fibers inside the hole. The most common reasons are:
- Over-tightening: Using too much force can crush the wood fibers, causing them to break apart.
- Frequent use: Hinges, handles, and shelf supports often loosen over time as the cabinet door or shelf is opened and closed.
- Soft wood: Materials like pine or particle board strip more easily than hardwoods.
- Moisture: Humidity can weaken wood, making it easier for holes to become stripped.
- Wrong screw size: Screws that are too small or too short lack enough grip.
Knowing the cause helps prevent future problems. For example, if you see that all hinge screws are loose, consider using stronger wood or larger screws for a more permanent repair.
Quick Fixes Vs. Lasting Solutions
There are many ways to fix a stripped screw hole, but not all are equal. Some methods work for lightweight doors or decorative hardware, but may fail if you use the cabinet every day. Others create a repair that can last the life of the cabinet.
Quick Fixes
- Toothpicks and glue
- Wooden matchsticks
- Bigger screws
These take a few minutes, but often only last a few months—sometimes less.
Lasting Solutions
- Wood dowel plugs
- Epoxy wood filler
- Commercial repair kits
These methods take more time but create a repair as strong as, or stronger than, the original wood.
Tools And Materials You May Need
Before starting your repair, gather your tools and materials. Not every method needs all items, but being prepared saves time.
Basic tools:
- Screwdriver (manual or electric)
- Wood glue (PVA or carpenter’s glue)
- Hammer or mallet
- Utility knife or chisel
- Drill and drill bits
- Wood filler or epoxy
- Sandpaper (medium and fine grit)
- Toothpicks or wooden matchsticks
- Wooden dowels (usually 1/4″ diameter)
- Clamps (optional, for some repairs)
- Screws (original size or next size up)
Pro tip: Have a damp cloth handy to wipe away extra glue or filler.
Method 1: Toothpicks And Wood Glue
This is the most popular quick fix. It works for small screws in light-duty spots like cabinet knobs or pulls.
Steps:
- Remove the loose screw.
- Squeeze a few drops of wood glue into the hole.
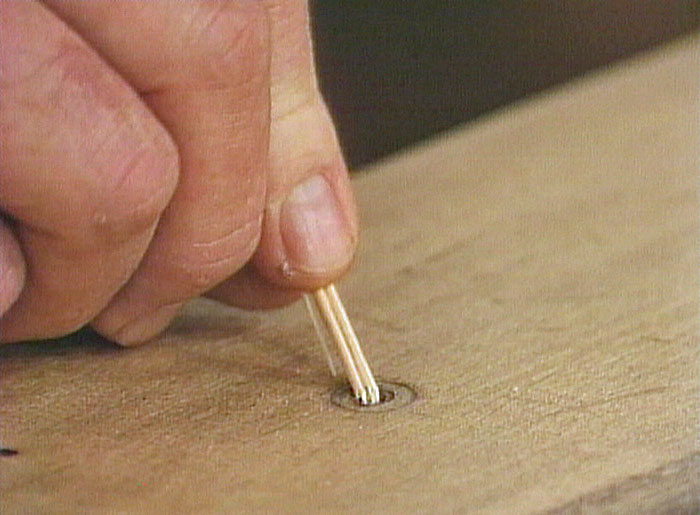
- Insert toothpicks (flat or round) into the hole. Pack them tightly.
- Break off the toothpicks flush with the surface using a utility knife.
- Re-insert the screw while the glue is still wet. Tighten gently.
Why it works: The toothpicks fill the space, and the glue binds the wood fibers together, creating new material for the screw threads.
Limitations: This method is not recommended for door hinges or high-stress areas. Over time, the repair can fail, especially if the cabinet is used daily.
Non-obvious insight: Using flat toothpicks provides more surface area, which makes the repair stronger than round ones.
Credit: www.homedepot.com
Method 2: Wooden Matchsticks
Similar to toothpicks, but matchsticks are usually larger and made of denser wood.
Steps:
- Remove the screw.
- Insert one or more wooden matchsticks (remove the heads first) with glue into the hole.
- Tap gently with a hammer to fit snugly.
- Break off flush, let dry, and re-insert the screw.
Tip: For a tighter fit, shave the matchstick to fit the hole exactly.
Limitation: Not suitable for heavy doors or repeated stress.
Method 3: Larger Screw
Sometimes, simply using a bigger screw works—if the hole is only slightly stripped.
Steps:
- Remove the old screw.
- Select a screw with a slightly larger diameter or length.
- Insert and tighten carefully.
Caution: Don’t use a screw that is too large, or you may split the wood or damage the cabinet.
Non-obvious insight: Use a washer under the screw head to distribute force. This reduces the risk of future stripping.
Method 4: Wood Dowel Plug
For a strong, permanent repair, especially for cabinet hinges, the wood dowel method is best.
Steps:
- Remove the screw and any loose material from the hole.
- Drill out the hole to a uniform size, usually 1/4″ diameter.
- Cut a wooden dowel to match the depth of the hole.
- Apply wood glue to the dowel and hole.
- Tap the dowel into the hole until flush with the surface.
- Let the glue dry (usually 1-2 hours).
- Drill a new pilot hole in the center of the dowel.
- Insert the original screw.
Why it works: The dowel is solid wood and provides new, strong threads for the screw.
Example: This method is used by professional cabinet makers and often outlasts the original construction.
Non-obvious insight: Use a hardwood dowel (like oak or maple) for extra strength, especially if the cabinet is made from softwood.
Method 5: Epoxy Wood Filler
Epoxy fillers are chemical compounds that harden like wood. They are ideal when the area around the hole is damaged or if you can’t use a dowel.
Steps:
- Clean out the hole.
- Mix the epoxy filler according to instructions.
- Pack the hole full of epoxy, smoothing the surface.
- Let it cure completely (usually overnight).
- Drill a new pilot hole and insert the screw.
Pros: Epoxy can be sanded, painted, or stained once cured.
Cons: Takes longer than glue methods, and you must follow instructions exactly.
Non-obvious insight: Warming the epoxy slightly before mixing can help it penetrate deeper into wood fibers for a stronger repair.
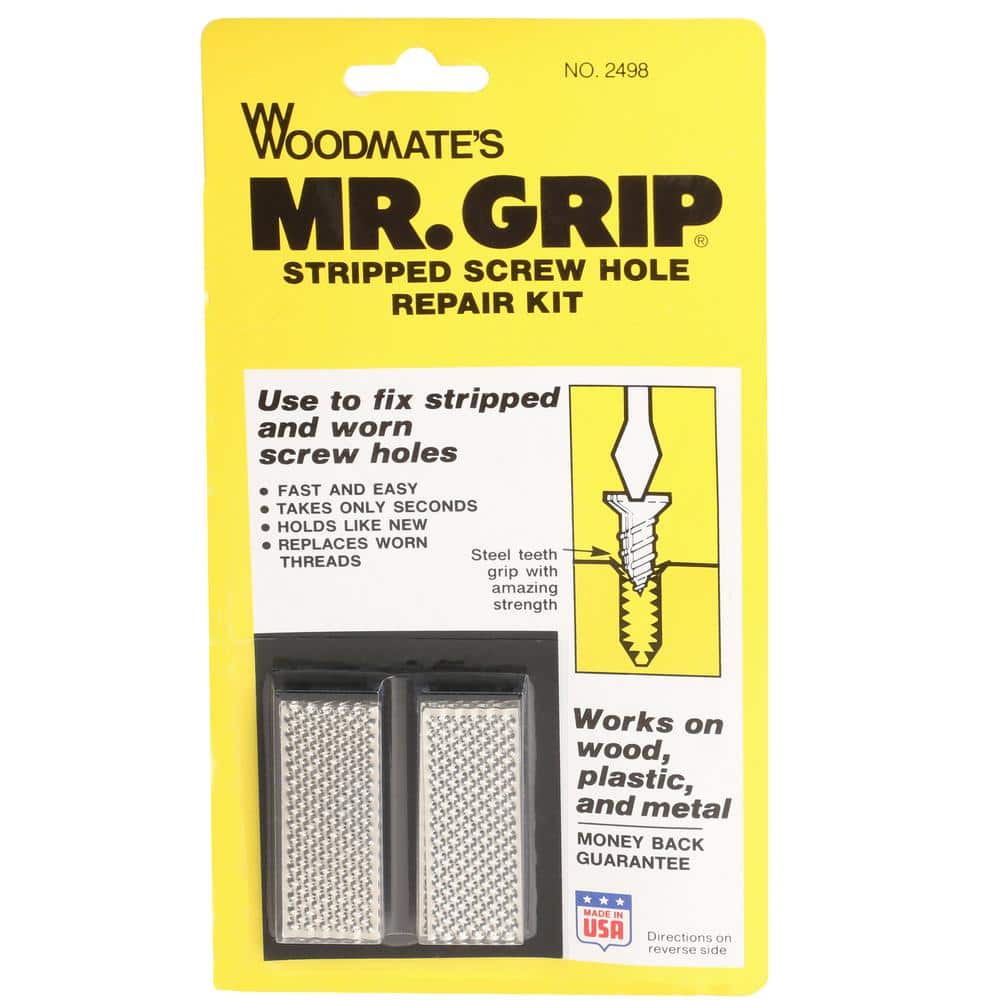
Method 6: Commercial Screw Hole Repair Kits
Many hardware stores sell kits designed for stripped screw holes. Most contain pre-cut dowel plugs, glue, and a drill bit.
Steps:
- Follow the instructions in the kit.
- Usually, you’ll drill out the hole, glue in the supplied plug, let it dry, and drill a new pilot hole.
Pros: All materials are included, and results are consistent.
Cons: More expensive than DIY fixes but provide a professional finish.
Method 7: Golf Tee Trick
A golf tee is the perfect diameter for many cabinet screws.
Steps:
- Insert a wooden golf tee into the stripped hole with wood glue.
- Tap it firmly with a hammer.
- Cut the excess tee flush with the surface.
- Drill a new pilot hole and insert the screw.
Non-obvious insight: Use wooden tees, not plastic, for best results.
Comparing Repair Methods
Here’s a side-by-side look at the most common methods, how long they take, and their strength.
| Method | Time Required | Strength | Best For |
|---|---|---|---|
| Toothpicks & Glue | 10 min | Low | Light fixtures/knobs |
| Wooden Matchsticks | 10 min | Low-Med | Small screws |
| Larger Screw | 5 min | Med | Slightly stripped holes |
| Wood Dowel Plug | 30 min (+drying) | High | Hinges/heavy use |
| Epoxy Filler | 1 hr (+curing) | High | Damaged wood |
| Repair Kit | 30 min (+drying) | High | All cases |
| Golf Tee | 15 min | High | Medium holes |
Step-by-step Guide: Wood Dowel Plug Repair
Let’s look in detail at the wood dowel method, as it offers the best long-term results for most cabinets.
What You Need
- Drill and 1/4″ bit
- Hardwood dowel
- Wood glue
- Saw or utility knife
- Drill bit for pilot hole
- Screwdriver
How To Do It
- Remove the hardware from the cabinet and clear away loose wood.
- Drill out the stripped hole to 1/4″ diameter, making sure the hole is straight.
- Cut a hardwood dowel to fit the depth of the hole. Test for fit.
- Apply glue liberally inside the hole and on the dowel.
- Insert the dowel and tap it in with a mallet until flush.
- Let dry for at least 1 hour (check glue instructions).
- Drill a new pilot hole in the center of the dowel.
- Reinstall the screw and hardware.
Tip: If the cabinet surface is visible, lightly sand and touch up with stain or paint to match.
When To Use Each Method
Not every repair suits every situation. Here’s a summary:
- Toothpicks/matchsticks: Quick, for light-duty.
- Larger screw: Only if the hole is barely stripped and the wood is solid.
- Dowel or repair kit: Heavy use, hinges, repeated stress.
- Epoxy: Damaged or weak wood where dowel won’t hold.
- Golf tee: Medium holes, when you don’t have a dowel.
Common Mistakes And How To Avoid Them
Many people rush the repair, but taking your time is key for a lasting fix.
- Not removing loose wood: Always clean out splinters or crumbled wood before repair.
- Skipping glue: Dry wood alone won’t hold. Use quality wood glue for best results.
- Not letting glue cure: If you insert screws before glue is dry, the repair will fail.
- Using weak filler: Don’t use wall putty or caulk; they won’t hold a screw.
- Drilling too big: Only enlarge the hole as much as needed for the dowel or tee.
- Using the same screw: If the old screw is stripped or rusty, replace it with a new one.
How To Prevent Future Stripped Screw Holes
Making your repair last also means preventing the same problem later.
- Don’t over-tighten screws. Hand-tighten until snug, then stop.
- Use the right screw size. Too small means less grip.
- Choose good quality screws. Cheap screws can break or strip easily.
- Seal wood. If your cabinet is in a humid area, protect it with paint or sealant.
- Check hardware regularly. Tighten screws at the first sign of looseness.
When To Call A Professional
Some situations need an expert. If your cabinet wood is rotted, split, or water-damaged, repairs may not hold. If your cabinets are antique or high value, or if you’re unsure, a cabinetmaker or carpenter can advise the best fix.
Credit: www.homedepot.com
Real-world Example
Maria had a kitchen cabinet with a hinge that kept coming loose. She tried toothpicks and glue three times, but the screw always pulled out. Finally, she used the dowel plug method, following the steps above. Two years later, the hinge is still solid, and she opens and closes the door every day.
How A Strong Repair Saves Money
Replacing a cabinet door or hiring a pro can cost $100 or more. Most repairs described here cost less than $5 and take less than an hour of hands-on work. If you fix it right the first time, you avoid repeated repairs and keep your cabinets looking good.
Credit: housecallsdiy.com
Comparing Cost And Durability
Here’s a quick look at cost, time, and durability for each method:
| Method | Average Cost | Durability |
|---|---|---|
| Toothpicks/Matchsticks | $0.50 | 6 months – 2 years |
| Larger Screw | $0.10 | 1-3 years |
| Dowel Plug | $1.00 | 10+ years |
| Epoxy Filler | $3.00 | 5-10 years |
| Repair Kit | $5.00 | 10+ years |
| Golf Tee | $0.20 | 5-10 years |
Environmental Considerations
Whenever possible, use wooden dowels and PVA glue, which are safer for the environment compared to chemical fillers. Reusing materials like matchsticks or golf tees also reduces waste. Avoid overusing epoxy if you want a greener repair.
Choosing The Right Screw For Cabinets
Even the best repair can fail if you use the wrong screw. For most cabinets:
- Use #8 or #10 wood screws for hinges.
- Choose screws at least 1 inch long for a strong hold.
- Brass or coated screws resist rust in kitchens or bathrooms.
Tip: For particle board cabinets, use special confirmat screws for better grip.
More Advanced Repairs
Sometimes the damage goes beyond a single hole—maybe a whole section of wood is weak. In those cases:
- Cut out the damaged area and patch with new wood.
- Use a backer board inside the cabinet to support hardware.
- For large repairs, consider replacing the affected cabinet part.
Should You Use Metal Inserts?
Some hardware stores sell metal screw inserts (like threaded sleeves). These are useful for cabinet parts that you need to remove often, such as adjustable shelves.
- Drill out the hole.
- Install the metal insert with epoxy.
- Use a machine screw instead of a wood screw.
This method works, but is rarely needed for most cabinet repairs.
Safety Tips
- Always wear eye protection when drilling.
- Use clamps to hold small cabinet parts.
- Dispose of old screws and broken wood safely.
- Keep glue and epoxy away from children and pets.
External Reference
For more details on wood repair techniques and information about woodworking adhesives, visit the Wikipedia Woodworking page.
Frequently Asked Questions
What Is The Best Method For Fixing A Stripped Screw Hole In A Cabinet Hinge?
The wood dowel plug method is the best for cabinet hinges. It provides a solid wood core for the screw, making the repair as strong or stronger than the original. Epoxy fillers or commercial repair kits also work well for heavy-use areas.
Can I Use Regular Glue Instead Of Wood Glue?
Regular white glue is not as strong as wood glue. For the best results, always use PVA or carpenter’s wood glue. It bonds better with wood fibers and holds up to daily use.
How Long Should I Wait Before Re-inserting The Screw After Using Glue?
Wait until the glue is fully dry—usually at least 1 hour, but check the glue instructions. Inserting the screw too soon can weaken the repair.
Will These Methods Work On Particle Board Cabinets?
Yes, but particle board is weaker than solid wood. Use the dowel or epoxy method for the best hold, and consider using special screws designed for particle board.
What If The Screw Keeps Coming Loose After Repair?
If the screw still loosens, the surrounding wood may be damaged, or the cabinet structure may be weak. Try a dowel or repair kit method, or reinforce the area with a backer board. If problems continue, consult a professional.
A little care and the right method can make your cabinet as good as new. With these tips, you can fix a stripped screw hole in wood cabinets quickly and confidently, saving money and extending the life of your furniture.