
Installing glass doors on a cabinet can change the look of a room and make any cabinet feel special. Glass doors add style, help you see what’s inside, and keep dust away from your favorite items. For many homeowners and DIY fans, this upgrade seems tricky, but with the right steps and some patience, almost anyone can do it.
This guide will walk you through every detail, from choosing your glass to attaching the final handle, so your project ends with a cabinet you’re proud to show off.
Why Install Glass Doors On A Cabinet?
Adding glass doors to cabinets is more than just a style choice. It brings several benefits that make daily life easier and adds value to your home.
- Showcase your items: Glass doors let you display dishes, collectibles, or books without exposing them to dust.
- Easy cleaning: Glass is simple to wipe clean compared to wood doors that may need special care.
- Modern look: Glass adds a fresh, open feeling to kitchens, bathrooms, and living rooms.
- Value boost: Small upgrades like glass doors can increase the appeal and resale value of your home.
Many people worry about breaking the glass or getting the measurements wrong. With careful planning, you can avoid these problems and have a great result.
Planning Your Glass Door Installation
Before starting, good planning saves time and avoids mistakes. Let’s look at what you need to do.
Measuring Your Cabinet Openings
The most important step is to measure the cabinet openings accurately. Use a steel tape measure for better accuracy.
- Measure the height and width of the opening.
- Check both sides—sometimes cabinets are not perfectly square.
- Write down the smallest measurement if the opening is uneven.
- Decide if you want the glass doors to sit inside the opening (inset), overlap the frame (overlay), or sit flush with the edge (flush).
Take your time. Even a few millimeters off can cause problems later.
Choosing Glass Type And Style
Glass comes in many styles. Your choice changes the look and safety of your cabinet.
- Clear glass: Shows everything inside, good for display cabinets.
- Frosted glass: Hides contents while letting light through, perfect for less tidy shelves.
- Textured glass: Adds pattern and interest, also hides fingerprints.
- Tempered glass: Stronger and safer, it’s less likely to break and safer if it does.
For homes with kids or in busy areas, tempered glass is the safest choice.
Hardware Selection
You need more than just glass. Here’s what to consider:
- Hinges: Soft-close, concealed, or traditional overlay—choose based on the look and function you want.
- Handles or knobs: Match with other hardware in your room.
- Glass clips or retainer strips: Secure the glass to the door frame if you’re building the frame yourself.
- Magnetic catches or latches: Keep the doors closed.
Check that all hardware is rated for the weight of your glass.
Budgeting And Time Estimate
Installing glass doors can cost from $80 for a basic DIY job to $400 or more for custom glass and high-end hardware. Time-wise, plan for 4–8 hours, depending on your experience and the complexity of your cabinet.
Credit: www.gsg-art.com
Tools And Materials Needed
Gather everything before you start. This avoids rushing out for missing parts later.
Essential tools:
- Tape measure
- Pencil and notepad
- Screwdriver (manual or electric)
- Drill and bits (for hinge mounting)
- Level
- Safety glasses and gloves
- Masking tape
- Glass cutter (if cutting glass yourself—most people order glass cut to size)
- Wood glue (if building frames)
- Clamps (for frame assembly)
Materials:
- Glass panels (cut to size)
- Hinges (number and type depends on door size and weight)
- Cabinet handles or knobs
- Mounting screws
- Glass retainer clips or silicone (if needed)
- Soft-close bumpers (optional but recommended)
If you’re not building the door frames, you can buy ready-made frames or order from a cabinet shop.
Preparing The Cabinet
A good result starts with a clean, stable surface. Prep your cabinet like a pro:
- Empty the cabinet and remove existing doors, if any.
- Clean all surfaces with mild soap and water. Remove grease, dust, and old glue.
- Check for damage—repair any cracks or loose parts before you start.
- Remove old hardware carefully. Keep old screws or hinges if they’re in good shape.
- Fill old screw holes with wood filler if the new hardware won’t use the same spots. Let dry and sand smooth.
If your cabinet is painted or stained, consider touching up the finish now for a fresh look behind the glass.
Building Or Buying Cabinet Door Frames
Most glass doors use a wood or metal frame to hold the glass. You can build these frames yourself or buy them pre-made.
Building Your Own Frames
If you like woodworking, building your own frames lets you match existing cabinets. A basic frame is made from four pieces of wood, joined at the corners.
Steps:
- Cut four strips of wood to size, allowing for glass thickness and hinge attachment.
- Create a groove (called a rabbet) on the inside edge of each piece, deep enough to hold the glass panel.
- Assemble the frame with wood glue and clamps. Double-check that corners are square.
- Let the glue dry fully, then sand and finish the frame.
- Test fit the glass in the groove, but do not install it until the frame is completely dry.
Buying Pre-made Frames
For most people, pre-made frames are faster and require less skill. Many hardware stores or online shops sell frames cut to your measurements.
When ordering, specify:
- Exact opening size
- Frame style (bevel, shaker, plain)
- Glass thickness and type
Pre-made frames usually come unfinished, so you may need to paint or stain them to match your cabinet.
Fitting The Glass
The next step is fitting the glass panel into your door frame.
Safety First
Always wear safety glasses and gloves when handling glass. Work on a flat, padded surface to reduce risk of breaking.
Installing The Glass In The Frame
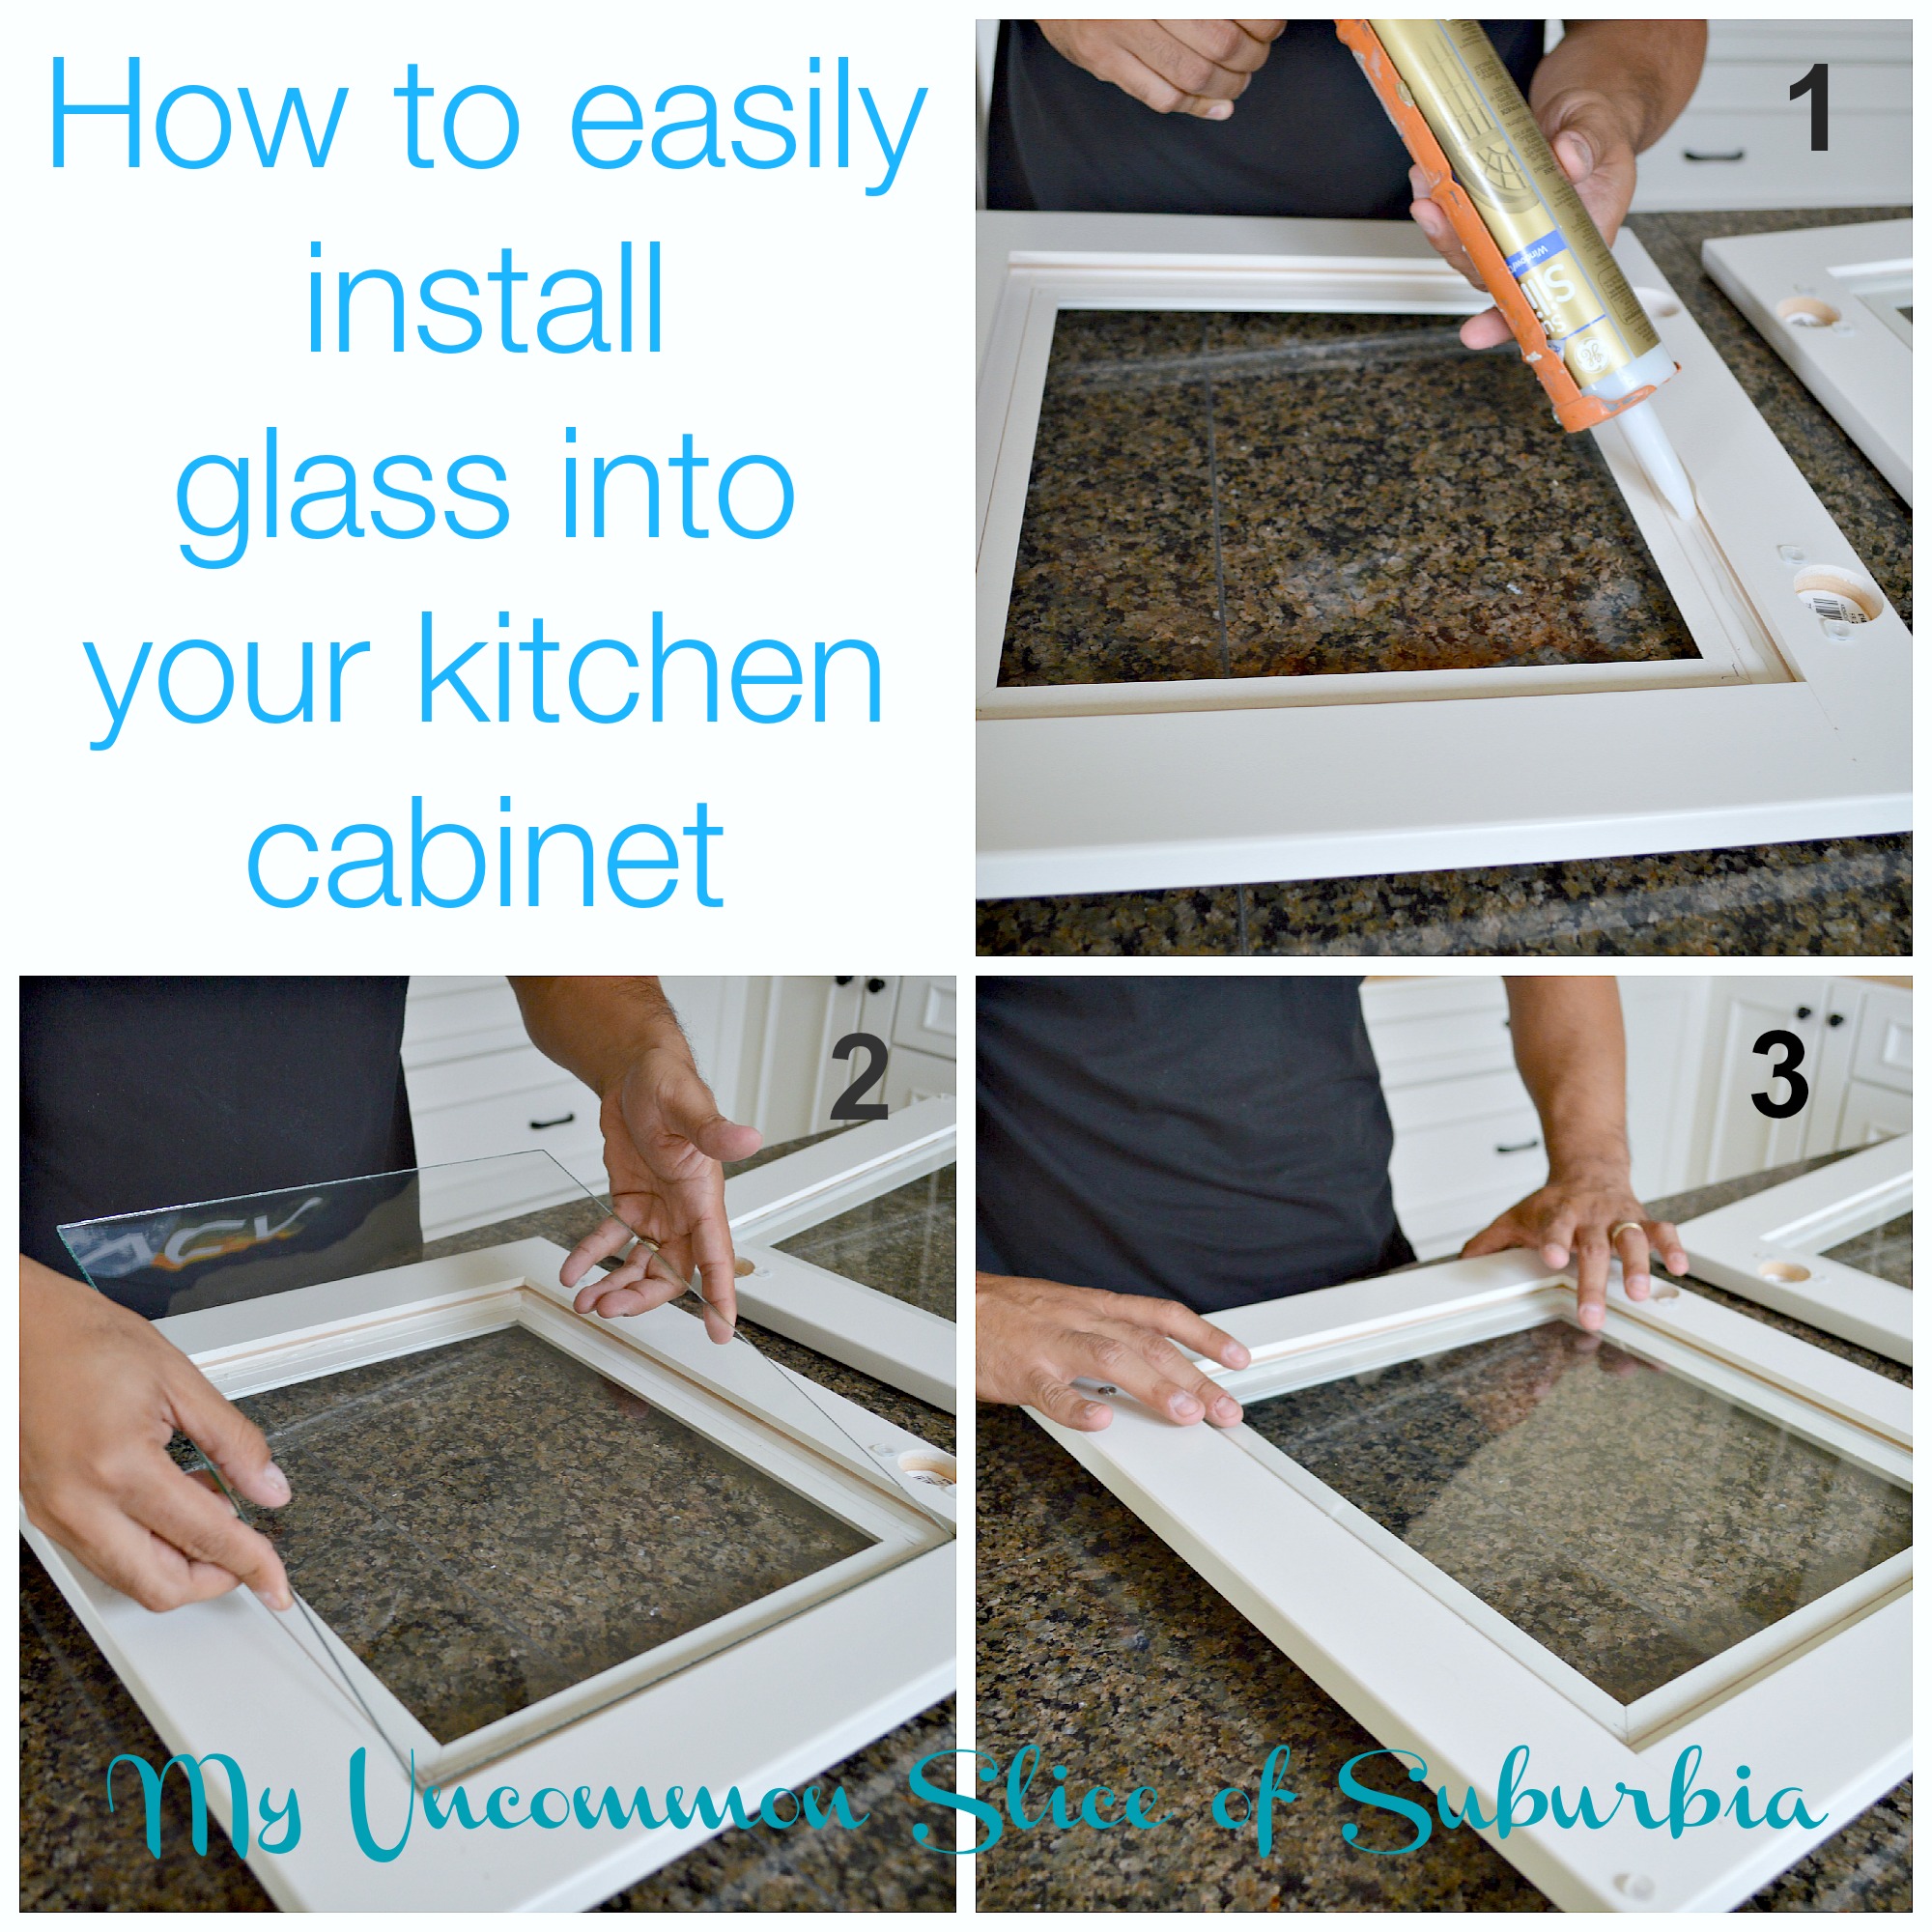
- Dry fit the glass in the frame to check sizing.
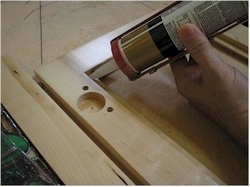
- Apply a small bead of clear silicone or use rubber glass retainer strips in the groove.
- Gently press the glass into the frame. Don’t force it—if it doesn’t fit, check for debris or measure again.
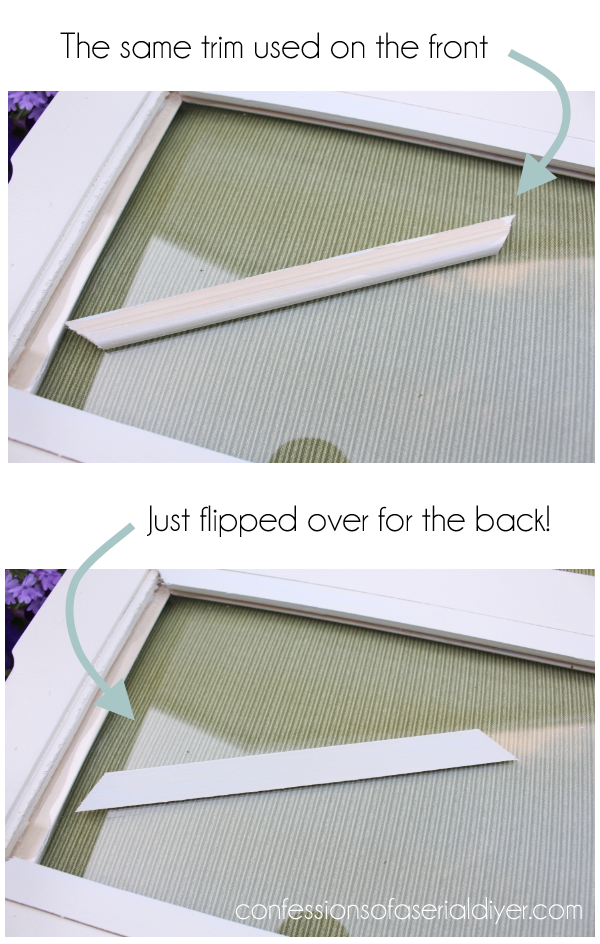
- Secure the glass with clips, more silicone, or flexible glazing points, depending on your frame style.
- Let silicone cure according to instructions before moving the door.
Some doors use small screws and retainers on the back to hold glass in place. Avoid overtightening—too much pressure can crack the glass.
Frameless Glass Doors
Some modern designs use frameless glass doors with special hinges. These are trickier to install and require precise drilling in the glass, usually done by the supplier. If you want this look, buy glass pre-drilled for hinges and handles.
Credit: myuncommonsliceofsuburbia.com
Attaching Hinges And Handles
How you attach the glass door depends on your hinge type and cabinet style.
Marking Hinge Placement
- Measure hinge locations on the cabinet frame and transfer those marks to the door.
- Use a level to make sure the doors hang straight.
- For two hinges, space them evenly from the top and bottom (usually 3–4 inches from each edge). For taller doors, add a third hinge in the middle.
Installing Hinges
- Pre-drill pilot holes for screws to avoid splitting the wood.
- Attach hinges to the door first, then to the cabinet.
- Check alignment—doors should swing freely and close evenly.
- Adjust hinges if possible. Many modern hinges have screws to fine-tune the fit.
Adding Handles Or Knobs
Handles should be placed where they’re easy to reach and look balanced. For glass doors, use hardware designed for glass or that attaches through the wood frame.
- Mark the location carefully before drilling.
- Use a small drill bit to avoid cracking.
- Tighten handles gently.
Hanging The Glass Doors
Now it’s time to see your hard work pay off.
- Hold the door in place and attach the hinges to the cabinet frame.
- Check the swing—the door should open and close smoothly.
- Check the reveal (the gap around the door). Adjust hinges or reposition if needed.
- Install magnetic catches or soft-close mechanisms as desired.
- Test everything—open and close the doors several times.
Small adjustments make a big difference. Patience here avoids crooked or sticking doors later.
Finishing Touches
With your glass doors installed, add the final details.
- Clean the glass with a non-ammonia cleaner and lint-free cloth.
- Install bumpers on the inside corners to soften the close and prevent rattling.
- Check for drafts—if you feel air coming through, add thin weatherstripping inside the frame.
- Touch up paint or stain as needed on the frame and cabinet.
If you see smudges or streaks, microfiber cloths work best for a spotless finish.
Common Problems And How To Fix Them
No DIY project is perfect. Here are some common issues and solutions:
- Glass panel too big or small: Double-check measurements. If slightly too big, have it trimmed by a pro. If too small, use thicker retainer strips.
- Door doesn’t close fully: Check for obstructions or adjust hinges.
- Door sags: Add a third hinge for support, or use stronger hardware.
- Uneven gaps: Reposition hinges, or sand door edges slightly if needed.
- Rattling glass: Add more silicone or rubber strips in the frame.
If you’re stuck, search for your hardware brand’s installation guide online, or ask at your local hardware store.
Credit: www.confessionsofaserialdiyer.com
Examples: Glass Door Styles For Cabinets
Let’s look at some popular styles and where they work best.
Framed Clear Glass Doors
- Best for: Kitchens, dining rooms, display cabinets
- Look: Classic and open, perfect for showing off dishes
Frosted Or Textured Glass
- Best for: Bathrooms, offices, modern kitchens
- Look: Hides clutter, diffuses light, adds privacy
Metal-framed Glass
- Best for: Industrial or modern spaces
- Look: Sleek lines, bold contrast, very durable
Mullion Glass Doors
- Best for: Traditional or cottage styles
- Look: Multiple small panes separated by thin strips (mullions), adds detail
Each style can be made with DIY frames or ordered ready to hang.
Comparing Glass Door Types And Hardware
Here’s a quick comparison of common glass and hardware choices.
| Glass Type | Visibility | Safety | Best Use |
|---|---|---|---|
| Clear Tempered | High | Very Safe | Display, Kitchens |
| Frosted Tempered | Medium | Very Safe | Bathrooms, Offices |
| Textured | Low to Medium | Safe | All Rooms |
| Annealed (Regular) | High | Less Safe | Low-traffic Areas |
And for hardware:
| Hinge Type | Visibility | Adjustment | Best For |
|---|---|---|---|
| Concealed (Euro) | Hidden | Easy (3-way) | Modern Cabinets |
| Overlay | Visible | Basic | Traditional Cabinets |
| Soft-close | Hidden/Visible | Easy | High-end Kitchens |
| Piano Hinge | Visible | None | Heavy Doors |
Pro Tips For A Flawless Result
People often miss small details that make a big difference:
- Order glass after measuring the finished frame, not before. Even small changes in the frame affect the final glass size.
- Let paint or stain cure fully before installing glass. Fresh finishes can stick to silicone or glass edges.
- Use masking tape on glass where you’ll drill or screw in retainers. This prevents chips and scratches.
- Invest in soft-close hardware if your cabinet gets lots of use. It protects the glass and feels more luxurious.
- Check the weight rating for all hardware. Glass is heavier than wood, so don’t guess—ask for help if you’re unsure.
When To Call A Professional
Not all cabinets are DIY-friendly. Call a pro if:
- Your cabinet is antique or valuable.
- You want large, heavy, or custom-shaped glass.
- You’re not confident with tools or accurate measuring.
- Frameless glass doors are required (these need special glass and tools).
A professional can install glass doors in a few hours and guarantee a safe, perfect fit.
Real-world Example: Upgrading A Kitchen Cabinet
Imagine you have a set of old wood cabinets in your kitchen. They’re solid, but look dark and closed in. By removing the center panels from two door frames and installing clear tempered glass, you brighten the room and show off your favorite dishes.
Here’s what that upgrade involves:
- Remove old panels carefully with a jigsaw.
- Sand and repaint the frames.
- Order glass to fit the openings.
- Install with clear silicone and retainer strips.
- Add soft-close hinges for a modern touch.
The result: A kitchen that looks custom and high-end for a fraction of the cost of new cabinets.
Maintenance And Long-term Care
Keeping your glass cabinet doors looking great is easy:
- Clean regularly with non-abrasive cleaners.
- Check hinges and handles every few months for looseness.
- Avoid slamming doors—even tempered glass can break under impact.
- Replace bumpers if they wear out or fall off.
With simple care, glass doors will last for many years and stay looking like new.
Frequently Asked Questions
How Thick Should The Glass Be For Cabinet Doors?
For most cabinet doors, 3mm to 5mm (about 1/8 to 3/16 inch) tempered glass is best. Thicker glass is stronger but heavier, so check your hinges can handle the weight.
Can I Cut Glass For Cabinet Doors Myself?
It’s possible but not recommended for beginners. Glass is tricky to cut without the right tools and skill. Most people order glass cut to size from a local glass shop or hardware store.
Do I Need Special Hinges For Glass Cabinet Doors?
Yes, especially for frameless glass doors or heavier panels. Look for hinges rated for glass, or use standard cabinet hinges if your glass is in a wood frame.
Are Glass Cabinet Doors Safe In Homes With Children?
Tempered glass is very safe, as it’s much stronger than regular glass and breaks into small, blunt pieces if shattered. For extra safety, choose frosted or textured glass to hide fingerprints.
Where Can I Find More Information About Glass Types And Safety?
The Wikipedia Glass Door page has helpful details on types of glass and common uses.
Adding glass doors to your cabinet is a project that pays off in both style and function. With careful planning, accurate measuring, and attention to detail, you’ll enjoy the results for years to come. If you’re ever in doubt, don’t hesitate to ask for help or consult a professional—sometimes peace of mind is worth the extra cost.
Happy building!