
Installing new kitchen cabinet hardware is a simple way to refresh your kitchen’s style and boost its function. Whether you want a modern, classic, or bold look, the right knobs and pulls make a huge impact. But for many homeowners, the idea of drilling holes into cabinets is intimidating.
Mistakes are hard to fix, and uneven hardware is easy to spot. The good news? You can install kitchen cabinet hardware with professional results using basic tools and careful planning—even if you’re a beginner.
This guide will walk you through every detail, from choosing the right hardware to measuring, drilling, and attaching everything cleanly. You’ll learn how to avoid common mistakes, select the best tools, and handle tricky situations like old holes or thick cabinet doors.
Follow these steps, and you’ll be ready to upgrade your kitchen with confidence.
Why Kitchen Cabinet Hardware Matters
It’s easy to overlook the importance of cabinet hardware. Small handles or knobs don’t seem like a big deal, but they serve both a practical and design purpose:
- Style transformation: The hardware is like jewelry for your cabinets. Swapping out handles can make old cabinets look new and match your changing taste.
- Functionality: Good hardware makes cabinets easy to open and close, especially for children, seniors, or people with mobility concerns.
- Protection: Handles and pulls keep hands away from cabinet surfaces, reducing fingerprints and scratches.
Most kitchens have 20-40 doors and drawers. If you choose wisely and install hardware well, you can improve your kitchen’s look and feel every single day.
Types Of Kitchen Cabinet Hardware
Before you buy anything, it’s important to understand your options. There are three main types of kitchen cabinet hardware:
Knobs
Knobs are small, single-screw pieces. They’re usually round or square, but come in many shapes and materials. Most people use knobs for cabinet doors.
Pulls
Pulls (sometimes called handles or bars) attach with two screws. They’re longer, making them easier to grab, and are often used on drawers. Pulls come in many lengths, finishes, and styles.
Cup Pulls And Specialty Handles
Cup pulls are semi-circular and open underneath for fingers. They offer a vintage or farmhouse look. Specialty handles include ring pulls, finger pulls, or recessed pulls, each with unique installation needs.
Material And Finish Options
Cabinet hardware can be made from:
- Metal (stainless steel, brass, bronze, chrome)
- Glass or crystal
- Ceramic
- Wood
Finishes include matte black, brushed nickel, oil-rubbed bronze, and more. The finish you choose should match your kitchen’s faucets, lighting, or appliance accents for a coordinated look.
How To Choose The Right Hardware
Selecting hardware goes beyond looks. Here’s what to consider before buying:
Size And Scale
- Knobs: Usually 1”–1.5” in diameter. Use larger knobs for big doors.
- Pulls: Common lengths are 3”–5” (center-to-center). Large drawers (over 24”) may look better with pulls 6” or longer.
Comfort
Pick hardware that feels good in your hand. Try samples in the store. Some shapes are easier for children or seniors to use.
Style Consistency
Match hardware style to your cabinet design. Sleek bar pulls suit modern kitchens, while ornate knobs fit traditional spaces.
Durability
Choose solid metal or quality materials for hardware you’ll touch daily. Cheap hardware may loosen or finish may wear off.
Price
Cabinet hardware ranges from $2 to $20+ per piece. For 30 cabinets, even small price differences add up.
Example:
If you have 30 cabinets:
- $3 hardware: $90 total
- $8 hardware: $240 total
Many homeowners mix knobs on doors with pulls on drawers for both style and budget flexibility.
Tools And Materials Needed
Gather all tools before starting. This keeps the process smooth and avoids mistakes.
Basic Tools:
- Tape measure or ruler
- Pencil
- Drill (cordless or corded)
- Drill bits (usually 3/16” or 1/4”)
- Screwdriver (manual or electric)
- Hardware template or jig (optional but recommended)
- Level (small torpedo style is best)
- Masking tape
- Safety glasses
Hardware and Fasteners:
- Knobs, pulls, or specialty hardware
- Screws (usually included with hardware, but check length)
Optional:
- Blue painter’s tape (for marking and protecting cabinets)
- Wood putty (for filling old holes)
- Touch-up paint or marker (if needed)
Pro Tip: Measure the thickness of your cabinet doors/drawers. Standard hardware screws fit 3/4” thick doors. If yours are thicker, buy longer screws.
Planning Your Hardware Layout
Don’t start drilling yet! The most common mistake is misaligned hardware. Planning saves time and prevents ugly errors.
1. Decide On Placement
Knobs are usually placed:
- On doors: 2.5”–3” from the bottom corner (for upper cabinets) or top corner (for lower cabinets)
- On drawers: Centered vertically and horizontally
Pulls are usually placed:
- On doors: Vertically, same as knobs
- On drawers: Centered or with a “rule of thirds” (1/3 from the top or bottom)
Cup pulls: Usually centered on the drawer face.
2. Mark Before You Drill
Use a pencil to lightly mark the spot for each knob or pull. Double-check measurements. For multiple cabinets, use a hardware template or make your own jig from cardboard or wood to ensure consistency.
3. Test With Tape
Attach hardware temporarily with double-sided tape to see how it looks. Walk around your kitchen and check from different angles. Adjust as needed.
4. Check For Obstacles
Open doors and drawers. Make sure handles don’t hit each other, appliances, or walls. On some drawers, screw length may hit items inside—check before drilling.
Example Measurement:
For a standard 12” drawer:
- Pull length: 4” (center-to-center)
- Mark a line at 6” (center of drawer)
- Place pull so its center holes are equal distance from the drawer’s center point
Step-by-step: How To Install Kitchen Cabinet Hardware
Now you’re ready for installation. Follow these steps for perfect results.
Step 1: Create A Template (or Use A Jig)
A hardware template is a clear plastic or metal guide with common hole placements. You can also make a simple jig from cardboard or wood.
- Place template on the corner of the door or center of the drawer
- Mark the holes with a pencil
- Repeat for all doors/drawers
Why use a template? It keeps hole placement identical across all cabinets, which looks professional.
Step 2: Mark All Holes
With your template, mark the hardware location for every knob or pull. For pulls, mark both screw holes. For knobs, mark a single spot.
Tip: Label each cabinet with masking tape (e.g., “A1,” “B3”) to track your progress.
Step 3: Protect Surfaces
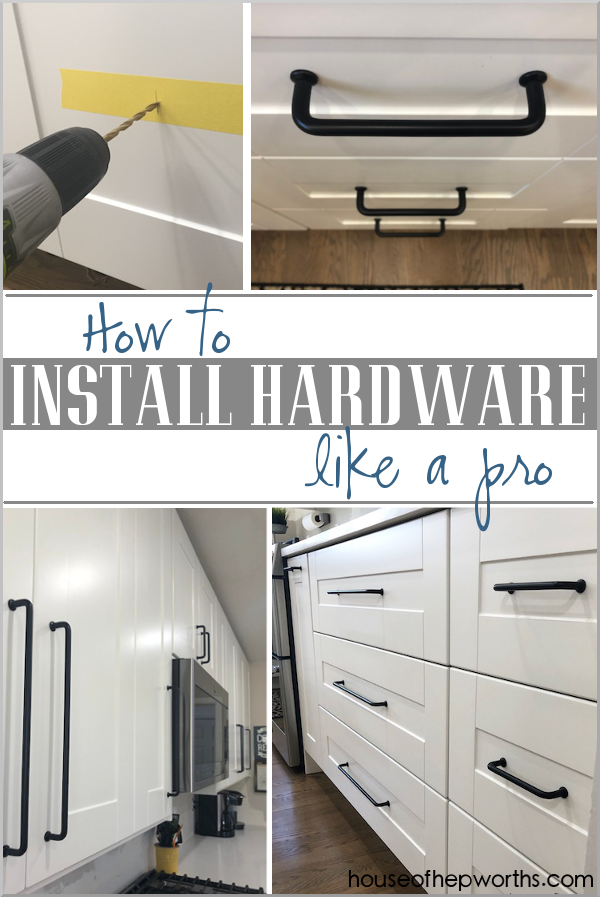
Place a piece of painter’s tape over the spot you’ll drill. This prevents chipping and splintering. Redraw your mark on the tape.
Step 4: Drill Pilot Holes
- Select the right drill bit size (usually 3/16” or 1/4”)
- Put on safety glasses
- Hold the drill perpendicular to the surface
- Drill slowly through the mark
Pro Insight: If your cabinets are solid wood, drill straight through. For thin or hollow doors, press gently to avoid pushing through too hard.
Step 5: Attach Hardware
- Insert screws from the inside of the cabinet or drawer
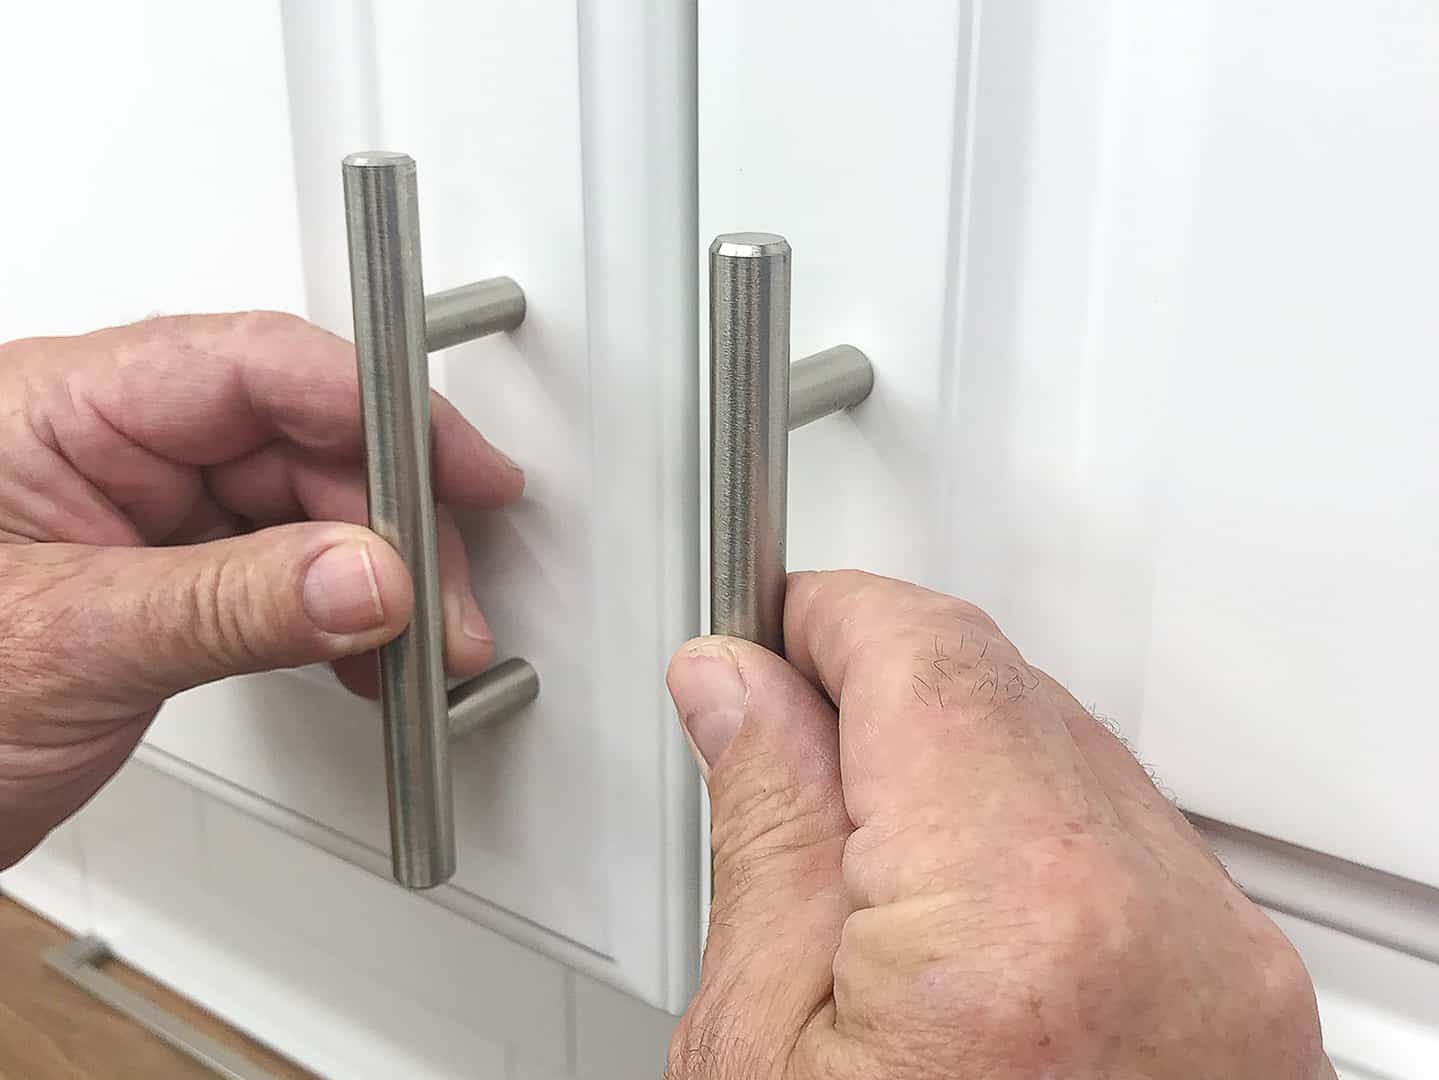
- Hold the knob or pull against the outside and tighten by hand
- Use a screwdriver for final tightening (avoid over-tightening, which can strip the screw or damage the wood)
Step 6: Test And Adjust
- Open and close each door and drawer to make sure the hardware feels secure and comfortable
- If a screw is too long, add a washer or buy shorter screws
Repeat for all cabinets. If you make a mistake, fill the hole with wood putty and touch-up paint, then re-drill in the correct spot.
Credit: www.houseofhepworths.com
Common Mistakes And How To Avoid Them
Many DIYers make the same errors when installing hardware. Avoid these pitfalls for a flawless finish:
- Misaligned hardware: Use a template or jig for perfect placement.
- Drilling the wrong spot: Double-check measurements before drilling—measure twice, drill once.
- Splintered wood: Use painter’s tape and a sharp drill bit.
- Over-tightening screws: Tighten gently to avoid stripping the screw or crushing the cabinet.
- Wrong screw length: Test on a scrap piece or hidden cabinet first.
- Not checking for obstacles: Open all doors/drawers to ensure handles don’t bump each other or the wall.
Non-obvious insight: Even a small misalignment (as little as 1/8”) is visible when you stand back. Always check your layout from a distance before drilling.
Special Situations: Upgrading Old Cabinets
If you’re replacing old hardware, you may face extra challenges:
Filling Old Holes
If the new hardware doesn’t match the old hole locations, fill the old holes with wood putty:
- Clean out the old hole
- Fill with putty, let dry, and sand smooth
- Touch up with matching paint or stain before drilling new holes
Oversized Or Irregular Hardware
Some vintage cabinets have unique hardware sizes. For these, consider custom-made pulls or adapt standard pulls with backplates that cover old holes.
Thick Or Thin Doors
Standard hardware screws fit 3/4” thick cabinet doors. For thinner doors (like IKEA cabinets), you may need shorter screws. For extra-thick doors, buy longer screws at a hardware store.
Example Table: Screw Length Guide
Here’s a quick reference for choosing screw length:
| Cabinet Thickness | Recommended Screw Length |
|---|---|
| 1/2 inch | 5/8 inch |
| 3/4 inch (standard) | 1 inch |
| 1 inch | 1 1/4 inch |
Always test on a spare piece first if you’re unsure.
Hardware Placement Styles: What The Pros Use
There’s more than one way to install cabinet hardware. Here are three common approaches:
1. Consistent Placement
All knobs and pulls are placed the same distance from the cabinet edge. This looks uniform and modern.
2. Centered Placement
Each knob or pull is centered on the cabinet or drawer face. This is traditional and works well for symmetrical kitchens.
3. Rule Of Thirds
Pulls are placed about one-third from the top (for lower cabinets) or bottom (for upper cabinets). This adds visual interest and is popular in designer kitchens.
Example Table: Placement Comparison
Compare different placement styles:
| Style | Best For | Visual Effect |
|---|---|---|
| Consistent | Modern kitchens | Clean, uniform lines |
| Centered | Traditional kitchens | Balanced, classic look |
| Rule of Thirds | Designer kitchens | Dynamic, interesting |
Pro Insight: If you have very wide drawers, consider using two smaller pulls instead of one long pull. This keeps the hardware balanced and makes large drawers easier to open.
Cleaning And Maintaining Cabinet Hardware
Once your new hardware is installed, keep it looking great with simple care:
- Wipe hardware weekly with a damp cloth to remove fingerprints and grease.
- For metal hardware, avoid abrasive cleaners that can scratch the finish.
- If hardware loosens over time, tighten screws gently with a screwdriver.
- For glass or crystal knobs, use a mild glass cleaner and soft cloth.
Non-obvious tip: Humidity and temperature changes can cause screws to loosen. Check hardware every few months and re-tighten as needed.
Credit: truepositiontools.com
When To Hire A Professional
Most homeowners can install kitchen cabinet hardware with patience and basic tools. But consider hiring a pro if:
- Your cabinets are custom, very expensive, or antique
- You want a complex pattern or non-standard hardware
- You have very hard wood cabinets (like maple) and lack a powerful drill
A skilled installer can finish a typical kitchen (30–40 pieces) in 2–3 hours, usually for $100–$200. For large or luxury kitchens, the peace of mind may be worth the cost.
Real-world Example: A 25-cabinet Kitchen
Let’s walk through a realistic scenario:
You have a kitchen with 15 cabinet doors and 10 drawers. You choose brushed nickel bar pulls for all. Each pull is 5” long, and your cabinet doors are standard 3/4” thick.
Steps you take:
- Buy a hardware template for $10.
- Mark each door 2.5” from the bottom and side edges.
- Mark each drawer centered horizontally and vertically.
- Place painter’s tape on each spot.
- Drill pilot holes with a 3/16” bit.
- Attach each pull using 1” screws.
- Check for alignment and tighten as needed.
Total time: 3–4 hours, including measuring and cleanup. The result: a modern kitchen that looks brand new for under $150.
Cost Breakdown: Diy Vs. Professional
Here’s how costs compare for a standard kitchen (30 pieces of hardware):
| Expense | DIY | Professional |
|---|---|---|
| Hardware | $90–$180 | $90–$180 |
| Tools (if needed) | $20–$40 | Included |
| Labor | $0 | $100–$200 |
| Total Cost | $110–$220 | $190–$420 |
Doing it yourself saves $80–$200, but consider your skill level and the value of your time.
Safety Tips For Installing Cabinet Hardware
Safety is often overlooked, but it’s essential:
- Always wear safety glasses when drilling.
- Secure cabinet doors with a clamp or have someone hold them steady.
- Keep your drill bit sharp for clean holes.
- Unplug your drill when changing bits.
If you’re working near children or pets, keep tools and screws out of reach.
Advanced Tips For Perfect Results
If you want a truly professional look, try these advanced techniques:
- Use a center punch to make a small dent where you’ll drill. This keeps the bit from wandering.
- For painted cabinets, start with a small pilot hole, then enlarge with the final bit size.
- If you need to move hardware slightly, use a backplate to cover old holes.
- For inset cabinet doors (doors set inside the frame), check clearance carefully so hardware doesn’t hit the frame.
Non-obvious insight: If your cabinets have a heavy grain (like oak), align the hardware with the grain direction for a more natural look.
Troubleshooting: Fixing Common Problems
Mistakes happen. Here’s how to fix them:
- Hole drilled in the wrong spot: Fill with wood putty, sand, and touch up with paint or stain. Let dry before redrilling.
- Loose hardware: Use a drop of wood glue in the hole before inserting the screw.
- Stripped screw hole: Insert a wooden toothpick with glue, let dry, and reinstall the screw.
- Finish chipped around hole: Use a touch-up marker matching your cabinet color.
If you have custom or painted cabinets, test repairs on an inside surface first.

Credit: www.youtube.com
Sustainability: Choosing Eco-friendly Hardware
Eco-friendly options are now widely available:
- Choose recycled metal hardware for less environmental impact.
- Pick hardware with a powder-coated finish, which is more durable and less polluting.
- Reuse or donate old hardware instead of throwing it away.
To learn more about sustainable building materials, visit this Sustainable Building Wikipedia page.
Frequently Asked Questions
How Do I Choose Between Knobs And Pulls?
Both knobs and pulls work well, but most people use knobs on doors and pulls on drawers. Pulls offer a better grip for heavy drawers. You can mix and match, but keep finishes and styles consistent.
What Size Drill Bit Should I Use For Cabinet Hardware?
Most hardware uses #8 screws, which fit a 3/16” or 1/4” drill bit. Check your hardware instructions and test on a hidden spot first.
Can I Install Hardware Without A Template?
Yes, but using a template or jig makes placement more accurate and professional. You can make a simple template from cardboard if you don’t want to buy one.
What If My Screws Are Too Long For My Cabinet Doors?
Buy shorter screws at a hardware store, or use washers to take up extra space. Never force a long screw—it can poke through the front of the cabinet.
How Do I Fix A Crooked Or Misplaced Hole?
Fill the hole with wood putty, let it dry, sand it smooth, and touch up with paint. Then carefully measure and drill a new hole in the correct spot.
Upgrading your kitchen cabinet hardware is one of the fastest and most satisfying DIY projects. With care, patience, and the steps in this guide, you can achieve a result that rivals a professional installation—adding both beauty and value to your home for years to come.