
Installing a pool handrail in pavers is one of those upgrades that makes your swimming area safer and more comfortable. Whether you have young children, older family members, or guests who need extra support, a secure handrail is a smart investment.
But when your pool is surrounded by pavers, installing a handrail isn’t as simple as drilling into plain concrete. It requires careful planning, the right tools, and the correct installation method to ensure it stays strong and looks great for years.
Many pool owners underestimate the complexity of this project. A small mistake can lead to loose rails, damaged pavers, or even safety hazards. But with the right guidance and a clear step-by-step approach, even someone with basic DIY skills can achieve a professional result.
In this detailed guide, you’ll learn exactly how to install a pool handrail in pavers, including preparation, choosing the right rail, selecting the best anchors, and finishing the job with confidence. Plus, you’ll find practical tips, common mistakes to avoid, and answers to questions that often confuse beginners.
Why Install A Pool Handrail In Pavers?
A pool handrail is not just a nice accessory; it’s a safety essential. Here are some key reasons why adding a handrail to your pool area is a wise decision:
- Safety for Everyone: Handrails help people get in and out of the pool safely, reducing slips and falls. This is especially important for children, elderly swimmers, and those with mobility issues.
- Compliance with Codes: In many regions, building codes or insurance policies require pool handrails for public or community pools. Even for private pools, having a handrail adds peace of mind.
- Convenience: Handrails provide balance and support, making it easier to enter and exit the pool, especially after a long swim.
- Increases Property Value: A well-installed handrail adds a professional touch to your pool area, which can be attractive to future buyers.
- Reduces Liability: If someone is injured due to the lack of safety equipment, you could be held responsible. Installing a handrail helps protect you legally.
Many pool owners think handrails are only for older people, but in reality, they make the pool safer and more welcoming for everyone.
Understanding The Challenges Of Paver Installation
Installing a pool handrail in concrete is usually straightforward. But when you have pavers around your pool, things get more complex. Pavers are individual stones or bricks placed on a sand or gravel base. They are not as solid as poured concrete, so regular anchors won’t work.
Some common challenges include:
- Movement: Pavers can shift over time, especially with changing weather or heavy foot traffic.
- Weak Support: Without a proper base, pavers alone can’t hold a handrail securely.
- Aesthetic Concerns: Drilling or cutting pavers can leave visible marks if not done carefully.
- Water Drainage: Incorrect installation can lead to water pooling, which damages both the pavers and the rail.
To avoid these problems, it’s important to use the right anchors and methods designed for paver surfaces.

Credit: www.youtube.com
Choosing The Right Pool Handrail
Not all handrails are the same. Your choice affects both safety and how well the rail fits your pool area. Here are the main factors to consider:
Material
- Stainless Steel: The most popular option. It resists rust, lasts a long time, and looks modern. Grade 316 stainless steel is recommended for pools, especially saltwater pools.
- Powder-Coated Steel: Offers extra protection and color options. However, if the coating chips, it can rust.
- Polymer or Composite: Lightweight and rust-proof, but not as strong as steel.
Shape And Size
- Standard Rail: Looks like an upside-down U. Common for straight pool edges.
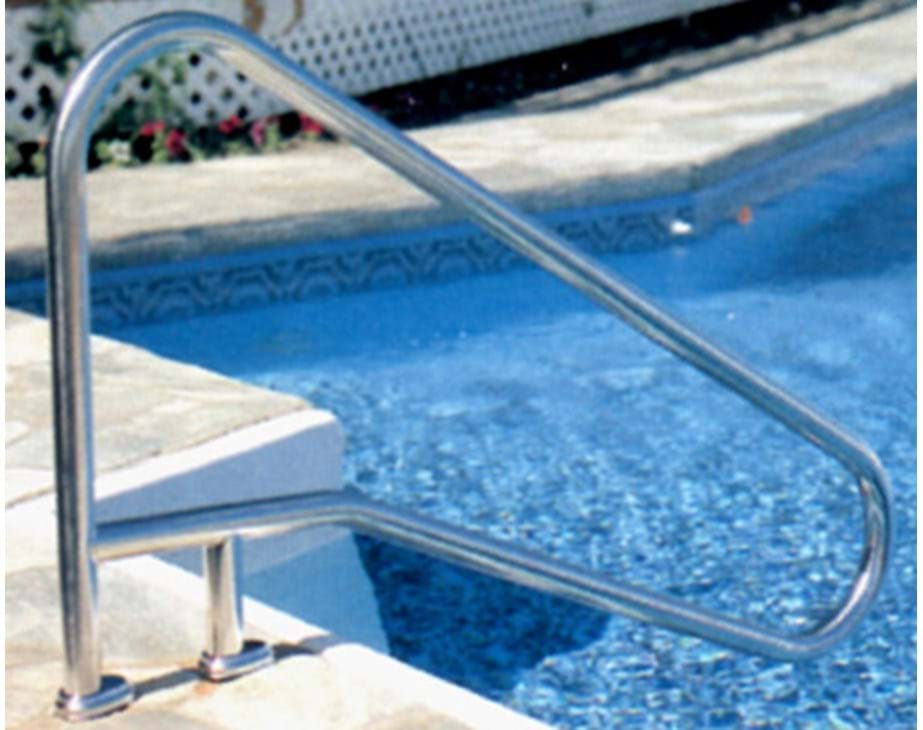
- Figure Four Rail: Has an extra bend for easier grip, often used for stairs or sloped entries.
- Custom Rails: For unique pool shapes or special needs.
Mounting Style
- Surface Mount: Bolts to the pool deck or pavers. Easier to install in existing pools.
- Embedded Mount: Anchored into concrete below the pavers (harder for retrofits).
Compatibility With Pavers
Make sure the handrail you buy comes with base plates that can be attached to paver anchors. Some rails are sold for new pool builds and won’t work on existing paver decks.
Example Handrail Comparison
Here’s a quick comparison of common handrail types for paver pools:
| Type | Material | Best For | Notes |
|---|---|---|---|
| Standard U-Rail | 316 Stainless Steel | Most pools | Simple, reliable |
| Figure 4 Rail | 316 Stainless Steel | Stairs/sloped entries | Easier grip for kids/elderly |
| Powder-Coated Rail | Steel with powder coat | Style/color choice | Needs careful maintenance |
| Composite Rail | Polymer | Saltwater pools | Less strength, light duty use |
Tools And Materials Needed
Before starting, gather all necessary tools and materials. Missing something mid-project can delay your work and increase mistakes.
Basic tools:
- Hammer drill (with masonry bits)
- Impact driver or wrench
- Tape measure and pencil
- Level
- Shop vacuum or brush
- Safety glasses and gloves
Materials:
- Pool handrail (with base plates)
- Paver anchors (sleeve or wedge type)
- Epoxy or expanding concrete (for added strength)
- Stainless steel bolts and washers
- Rubber gaskets (to reduce vibration)
- Water hose (for cleaning dust)
Optional but helpful:
- Diamond hole saw (for neat paver cuts)
- Shop towels
- Drill template (if included with your handrail)
Most hardware stores carry these items, but specialty pool anchors may need to be ordered online.
Measuring And Planning The Install Location
A successful install starts with good planning. Take your time with these steps to avoid misaligned or loose rails.
Measuring For Placement
- Identify the Entry Point: Decide where the handrail will be most useful. Usually, it is placed near steps, ladders, or sloped entries.
- Check Clearance: Make sure there’s enough space for swimmers to grip the rail without hitting nearby obstacles like planters, chairs, or pool covers.
- Mark Anchor Points: Use the handrail base as a template. Mark the center of each anchor hole with a pencil or marker.
- Double-Check Alignment: Stand back and look. Is the rail straight and parallel to the pool edge? Is it evenly spaced?
Consider Subsurface Conditions
Pavers are often set on a bedding layer of sand, gravel, or mortar. If the base is too soft, you’ll need to reinforce it with concrete or a special mounting kit.
Insight: Many beginners forget to check what’s under the pavers. If you drill and only find loose sand, the anchor will not hold. Tap the paver with a mallet to feel if it’s solid. If not, plan to add concrete below.
Drilling And Preparing Anchor Holes
Drilling through pavers requires care. Here’s how to do it right:
- Set the Drill Bit: Use a masonry bit that matches your anchor size. A diamond hole saw gives the cleanest cut but is not always necessary.
- Start Drilling Slowly: Place the drill where you marked. Start at a low speed to avoid cracking the paver.
- Go Vertical: Keep the drill straight. If you angle it, the anchor will not sit flat.
- Vacuum Dust Often: Stop every few seconds to clear dust from the hole. This keeps the drill bit cool and prevents jams.
- Go Deep Enough: Drill through the paver and at least 3–4 inches into the base below. This is important for anchor strength.
- Check the Hole: Clean out all debris. If the base is loose, you may need to remove the paver and add concrete.
Practical tip: For very thick or hard pavers, cool the bit with water to prevent overheating.

Credit: www.reddit.com
Installing Paver Anchors
Anchors are what hold the handrail firmly in place. For paver decks, you need a system that grips both the paver and the solid base below.
Types Of Anchors
- Sleeve Anchors: Expand as you tighten the bolt, gripping the sides of the hole.
- Wedge Anchors: Wedge out at the bottom for a strong hold in concrete.
- Epoxy Set Anchors: Use a chemical adhesive to bond the anchor to the hole.
Step-by-step Anchor Installation
- Test Fit the Anchor: Drop the anchor into the hole. It should slide in but not rattle.
- Set in Place: For sleeve or wedge anchors, tap them gently with a hammer until flush with the paver.
- Epoxy (if needed): If using epoxy, fill the bottom half of the hole, then insert the anchor. Wait for the epoxy to cure (see package for time).
- Check Level: Anchors must be straight and level. Adjust before the adhesive sets.
- Tighten Bolts: Once all anchors are in, tighten each bolt a little at a time in a crisscross pattern.
Non-obvious insight: For high-traffic pools, combining a wedge anchor with epoxy provides extra strength and long-term stability.
Anchor Strength Comparison
To understand which anchor is right for your project, see the table below:
| Anchor Type | Pull-Out Strength | Best For | Notes |
|---|---|---|---|
| Sleeve Anchor | Medium | Most home pools | Easy to install |
| Wedge Anchor | High | Heavy use/commercial | Requires solid base |
| Epoxy Anchor | Very high | Loose base or repair | Needs cure time |
Securing The Handrail
With the anchors installed, it’s time to attach the handrail itself:
- Place Rubber Gaskets: Between the base plate and paver, put a rubber gasket. This absorbs vibration and prevents the plate from scratching the paver.
- Align the Handrail: Set the handrail over the anchor bolts. It should sit flat and level.
- Add Washers and Nuts: Use stainless steel hardware for maximum rust resistance.
- Tighten Evenly: Don’t overtighten any one bolt at first. Tighten each a little, then repeat until all are snug. This prevents the plate from bending.
- Check Stability: Firmly shake the rail. It should not move or wobble.
- Clean Up: Remove any dust or debris, and rinse the area with water.
Example: Many DIYers forget the gasket, leading to metal-to-stone contact. Over time, this can chip the paver or cause rust stains.
Grouting And Sealing Around The Base
To finish, you need to seal the area around each base plate. This keeps water out and prevents paver shifting.
- Non-shrink grout: Fill any gaps between the base plate and paver. This provides extra support.
- Flexible sealant: Use a silicone or polyurethane sealant around the edge to block water.
- Color match: Choose a grout or sealant color that matches your pavers for a clean look.
Practical tip: Let all grout and sealant cure according to the label before using the pool. Rushing this step can lead to cracks or leaks.
Testing And Safety Check
Before swimming, do a final safety check:
- Pull Test: Apply firm pressure to the rail in all directions. It should not budge or loosen.
- Visual Inspection: Look for cracks in the paver, loose bolts, or gaps in the sealant.
- Check for Sharp Edges: Run your hand along the rail and base to check for any sharp spots.
- Clean the Area: Remove tools, dust, and any leftover hardware.
Non-obvious insight: Test the rail again after a week of use. Sometimes anchors settle, and a quick retighten can prevent future problems.
Credit: www.troublefreepool.com
Maintenance Tips For Pool Handrails In Pavers
Proper maintenance will keep your handrail safe and looking good for many years.
- Inspect Monthly: Check for loose bolts, rust, or cracked pavers.
- Clean Regularly: Wipe the rail with fresh water to remove pool chemicals and prevent corrosion.
- Lubricate Bolts: Once a year, apply a bit of silicone spray to the bolt threads to keep them easy to remove.
- Check Grout and Sealant: Touch up any cracks or gaps immediately to stop water from getting under the pavers.
- Winterize (if needed): In cold climates, remove the rail and store indoors to prevent freeze damage.
Mistakes To Avoid When Installing A Pool Handrail In Pavers
Many installations fail because of common errors. Here are mistakes to watch out for:
- Not Checking the Subsurface: Anchors must grip solid material. Never install directly into loose sand or gravel.
- Wrong Anchor Type: Sleeve anchors are good for most jobs, but heavy-use pools may need wedge or epoxy anchors.
- Skipping the Gasket: Metal against stone will cause damage over time.
- Rushing the Job: Let adhesives and grout cure fully before using the handrail.
- Poor Measurement: Misaligned rails look bad and are less safe.
- Ignoring Maintenance: Even the best install needs regular checks.
Expert tip: If in doubt, consult a pool professional. It’s better to pay for advice than to fix a safety problem later.
Example: Step-by-step Installation Scenario
Let’s walk through a real-world example to make the process clearer.
Scenario
Homeowner John wants to install a standard U-shaped stainless steel handrail on his backyard pool, which is surrounded by 2-inch thick concrete pavers set on a 4-inch sand base.
Steps
- Planning: John checks the entry area and marks anchor points using the rail’s base plate.
- Checking the Base: He lifts one paver and finds only sand underneath. He digs a 6-inch hole, fills it with concrete, and lets it set for 48 hours.
- Drilling: John uses a hammer drill with a 1/2-inch masonry bit to drill through the paver and into the new concrete.
- Installing Anchors: He inserts stainless steel sleeve anchors with a dab of epoxy for extra hold.
- Mounting the Rail: After the epoxy cures, he places rubber gaskets, aligns the rail, and tightens the bolts.
- Sealing: He grouts around the base plate, smooths the edges, and applies a color-matched silicone sealant.
- Final Check: After 24 hours, John tests the rail. It is rock solid and looks great.
This careful process ensures a safe, long-lasting handrail.
When To Call A Professional
While many homeowners can do this project themselves, certain situations need expert help:
- Very large or commercial pools
- Complex paver designs or expensive stone
- Unstable or unknown subsurface
- Building code requirements
A professional can ensure the job meets all safety standards and lasts for years.
Cost Guide: Pool Handrail Installation In Pavers
Budgeting your project helps avoid surprises. Here’s a typical cost breakdown:
| Item | Low Estimate | High Estimate |
|---|---|---|
| Stainless Steel Handrail | $120 | $300 |
| Paver Anchors (set of 2) | $25 | $60 |
| Epoxy/Grout/Sealant | $20 | $50 |
| Tools (if not owned) | $0 (rental) | $100 |
| Professional Labor | $200 | $500+ |
Tip: Doing the work yourself saves labor costs, but always buy quality anchors and hardware.
Helpful Resources
For more information on pool safety and installation standards, check the guidelines from the Centers for Disease Control and Prevention (CDC). These resources give advice on keeping your pool safe for everyone.
Frequently Asked Questions
How Deep Should Anchors Go When Installing A Handrail In Pavers?
Anchors should extend at least 3–4 inches into a solid base below the paver, such as concrete. This ensures the handrail stays secure and supports weight safely.
Can I Install A Pool Handrail In Pavers Without Concrete Beneath?
It’s not recommended. Pavers alone are too weak to hold a handrail securely. For best results, remove the paver, add concrete below, and then install the anchor.
What Type Of Handrail Is Best For Saltwater Pools?
Choose a 316 stainless steel handrail. It offers the best rust resistance in salty environments. Avoid regular steel or low-grade stainless, which can corrode.
How Long Does It Take To Install A Pool Handrail In Pavers?
Most DIY installations take 2–4 hours, not counting time for concrete or epoxy to cure. Professional installers may finish faster.
Do I Need A Permit To Install A Pool Handrail?
Rules vary by location. Many cities do not require a permit for a simple handrail, but check with your local building department or homeowner’s association to be sure.
Adding a pool handrail to your paver deck is a smart investment in safety and comfort. With careful planning and the right materials, your new handrail will provide secure support and add value to your pool area for many years to come.