
Installing a pool handrail in pavers can make your swimming area safer and more comfortable for everyone. Many pool owners want a sturdy handrail but worry about damaging their beautiful paver deck or facing a complicated process. The good news is, with the right tools and careful planning, you can install a secure and attractive handrail without ruining your pavers or needing professional help.
This detailed guide will walk you through every step, from understanding your options to avoiding common mistakes. Whether you’re a DIY enthusiast or a cautious beginner, you’ll learn how to do the job right—and safely.
Why A Pool Handrail Matters
A pool handrail isn’t just about looks. It’s a key safety feature, especially for children, older adults, or anyone with mobility issues. The right handrail gives swimmers support when entering or leaving the pool, reducing the risk of slips and falls. Even strong swimmers can lose footing on wet pavers, so having a firm place to hold on to makes a big difference.
Many building codes now recommend or require handrails for new pool installations. Even if your area doesn’t mandate it, adding a handrail can make your pool more family-friendly and increase your property’s value.
Understanding Your Pool Deck: What Are Pavers?
Before you start, it’s important to know what pavers are. Pavers are individual bricks, stones, or concrete blocks that fit together to form a flat surface. They’re popular for pool decks because they look great, drain water well, and are easy to repair. But because they’re not poured concrete, installing things like handrails takes a different approach.
Pavers sit on a base of sand or gravel, not solid concrete. This means you can’t just drill and bolt a handrail directly into the paver itself—it won’t hold. You need a method that keeps the pavers intact and creates a strong, lasting anchor.
Choosing The Right Handrail For Your Pool
Not all handrails are the same, and picking the right one for pavers is crucial. Here are the main types you’ll find:
- Standard Pool Handrail: The classic curved rail seen at most public pools. Good for most deck types.
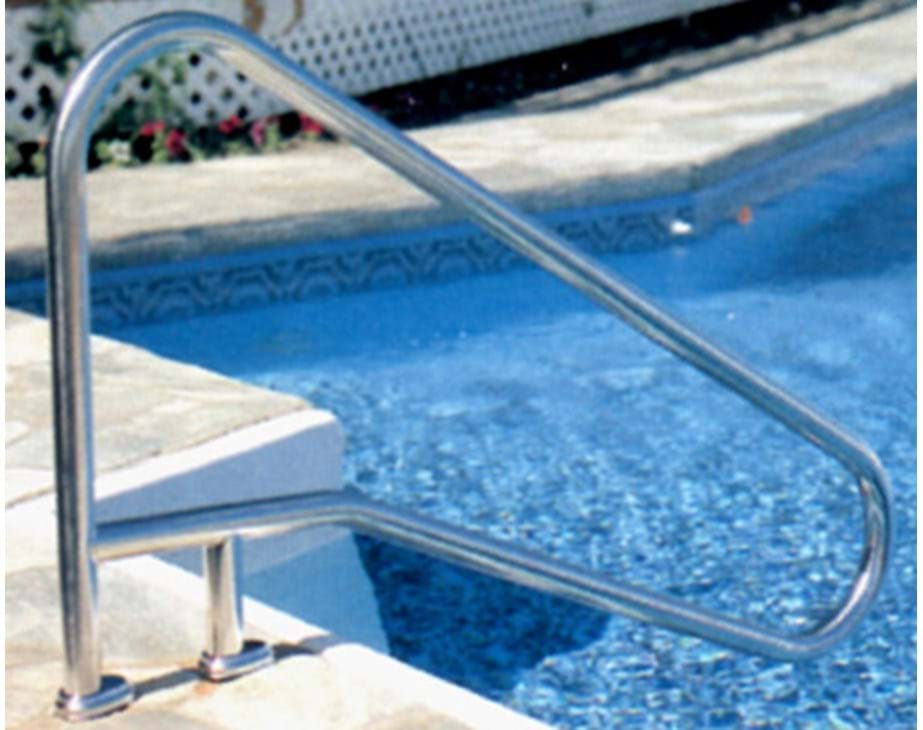
- Figure-4 Handrail: Shaped like the number 4, with extra support. Ideal for steps or shallow areas.
- Custom or Designer Rails: Made to fit unusual pool shapes or styles, but may require special mounting hardware.
When choosing, check these factors:
- Material: Stainless steel is the most common because it resists rust. Powder-coated rails offer more color options.
- Diameter: Most rails are 1.9” thick, which is comfortable to grip.
- Mounting Base: Make sure the base plate and anchors are designed for paver installation.
- Length & Height: Measure your pool edge and steps to pick a rail that gives enough support.
A standard stainless steel handrail fits most needs, but always check your pool’s dimensions and look for rails rated for outdoor/pool use.
Tools And Materials Needed
You’ll need the right tools and supplies to do a professional job. Here’s a detailed list:
Tools:
- Hammer drill (with masonry bit)
- Cordless drill/driver
- Rubber mallet
- Tape measure
- Pencil or chalk
- Level
- Socket wrench set
- Vacuum or brush (for dust)
Materials:
- Pool handrail (with base plates)
- Rail anchors (sleeves or core drill anchor kit)
- Epoxy or anchoring cement (rated for outdoor and wet use)
- Stainless steel bolts (matching your anchor kit)
- Plastic or rubber shims (optional, for leveling)
- Protective gloves and safety glasses
Pro Tip: Always buy extra bolts and epoxy. It’s better to have more than you need than to stop in the middle of your project.
Planning Your Installation
A careful plan will save you time, effort, and frustration. Here’s what you should do before drilling any holes:
1. Pick The Right Location
Stand at your pool and look for the best spot for the handrail. Consider:
- The main entry/exit point of the pool
- Where people usually step in or out
- Distance from any pool equipment, furniture, or landscaping
Mark the spot with chalk or masking tape. Walk through how you’ll use the rail to make sure it’s comfortable for both adults and kids.
2. Check For Obstacles Below The Pavers
You need to know what’s under your paver deck. Underneath, you’ll usually find sand or gravel, but sometimes there’s concrete, plumbing, or electrical lines. Gently lift a paver in your chosen spot (use a screwdriver if needed) to inspect the base.
If you find solid concrete, you can use standard concrete anchors. If it’s sand or gravel, you’ll need a special anchor system designed for loose bases.
3. Measure Twice
Use your tape measure and level to check your marks. The handrail should line up with the pool steps or where swimmers climb out. Double-check the distance between the holes—this must match the base plate of your handrail. Mistakes here can mean re-doing the whole project.
4. Review Local Pool Codes
Some areas have rules for how far a handrail must extend, or how high it should be. Check your city or county’s building code website for pool safety rules. This helps you avoid problems later if you sell your house or have an inspection.
Comparing Pool Handrail Mounting Options
To help you choose the right anchoring method, here’s a comparison of the three main ways to install a handrail in pavers:
| Mounting Method | Best For | Pros | Cons |
|---|---|---|---|
| Core-Drill Anchor | New or thick paver decks with concrete base | Very strong, professional look | Requires special tools, more work |
| Surface-Mount Anchor | Most paver decks | Easier to install, no deep drilling | May need extra support under pavers |
| Paver Sleeve/Insert Kit | Loose pavers, sand/gravel base | No damage to pavers, adjustable | Less sturdy if not installed correctly |
Insight: Many homeowners think they can just bolt the handrail to the surface. This is a common mistake! Without proper anchors, the handrail will loosen or tip, risking injury.

Credit: www.youtube.com
Step-by-step Installation Guide
Let’s break down the process for a secure, lasting pool handrail in pavers. For this guide, we’ll use the surface-mount anchor method, which works for most paver pool decks. If you find solid concrete beneath, you can adapt these steps.
Step 1: Lay Out And Mark The Base Plates
Place the handrail base plates on your marked spot. Use the tape measure to make sure they’re the right distance from the pool and perfectly aligned with the steps or entry point. Mark the holes with a pencil or chalk.
Double-check with a level.
Step 2: Remove Pavers Where You’ll Anchor
Carefully lift the pavers under each base plate. You want to anchor into the solid base below, not just the paver itself. If you’re only drilling through pavers, the handrail will not be secure.
If your deck uses sand or gravel, dig down until you reach solid ground (at least 6 inches below the paver). If there’s a concrete pad below, clean the surface.
Step 3: Drill Anchor Holes
Put on safety glasses and gloves. Using a hammer drill with a masonry bit, drill holes for the anchors. The size and depth depend on your anchor kit—always follow the instructions from the manufacturer.
- For sand/gravel bases: You may need a sleeve or insert that expands in the hole.
- For concrete: Standard wedge anchors or sleeve anchors work best.
Vacuum or brush out all dust and debris from the holes. Dust prevents the anchor from gripping correctly.
Step 4: Set The Anchors
Install the anchors according to your kit. For surface-mount kits, insert the anchor into the hole and fill around it with epoxy or anchoring cement. Make sure it’s rated for outdoor and wet environments. Let it cure as directed (usually 24 hours).
If using a paver sleeve, follow the instructions to expand or secure the sleeve below the paver. The goal is a tight, unmoving anchor.
Step 5: Replace The Pavers
Once the anchors are set and the epoxy has cured, replace the pavers around the anchor. Use a rubber mallet to gently tap them into place. If needed, use plastic or rubber shims to keep the paver level with the rest of the deck.
Step 6: Attach The Handrail
Place the handrail base over the anchors. Insert the stainless steel bolts and tighten with a socket wrench. Don’t overtighten—this can crack the paver or strip the anchor. Check with a level to make sure the rail is straight.
Step 7: Test For Stability
Give the handrail a firm shake. It should not wobble or shift. If it moves, check that the anchors are fully expanded and the epoxy has cured. Never use a handrail that feels loose.
Expert Tip: Many people skip waiting for the epoxy to cure, thinking it’s “good enough.” This is a mistake. A few hours of patience can prevent costly repairs or accidents.
Common Mistakes And How To Avoid Them
Even with good instructions, beginners often make errors that weaken the handrail or damage the pool deck. Here’s what to watch out for:
- Anchoring only to the paver: Pavers are not strong enough alone. Always anchor into the base below.
- Skipping epoxy or cement: Bolts will loosen over time if not set in a strong, waterproof material.
- Incorrect measurements: Holes that don’t line up mean a crooked rail or having to redo the work.
- Not checking for pipes or wires: Damaging a water or electrical line can be dangerous and expensive.
- Ignoring local codes: Failing inspection can mean fines or having to remove and redo the handrail.
Advanced Tip: Reinforcing Pavers For Extra Strength
If your pavers sit over sand or gravel and you want maximum strength, consider adding a small concrete pad just under the handrail base. Here’s how:
- Dig a hole about 12” x 12” and 6” deep where each base plate will sit.
- Fill the hole with concrete and let it cure for at least 24 hours.
- Drill and set your anchors into this mini pad.
- Replace the pavers on top, drilling holes in them for the anchor bolts.
This method gives you the holding power of concrete without pouring a full deck.
Maintenance Tips For Your Pool Handrail
A good handrail can last 10–20 years if cared for. Here’s how to keep it safe and looking good:
- Rinse with fresh water weekly to remove pool chemicals that cause rust.
- Check bolts and anchors twice a year. Tighten if needed.
- Look for rust or corrosion. Most stainless steel is very resistant, but small spots can form. Clean with a stainless steel cleaner or a mixture of baking soda and water.
- Inspect the base plates for movement. If the rail feels loose, re-tighten or re-set the anchors.

Credit: www.reddit.com
Cost Breakdown: What Should You Expect To Pay?
Here’s an overview of typical costs for a DIY pool handrail installation in pavers:
| Item | Low Cost | High Cost |
|---|---|---|
| Stainless Steel Handrail | $120 | $350 |
| Anchor Kit | $40 | $100 |
| Epoxy/Cement | $15 | $30 |
| Rental Tools (if needed) | $40 | $80 |
| Extra Materials (bolts, shims) | $10 | $30 |
The total is usually $225–$590 for most DIY projects. Hiring a professional can cost $500–$1,200 depending on your area and deck type.
Real-world Example: Diy Pool Owner Success
Sarah, a pool owner in Arizona, wanted to add a handrail to her paver deck after her father slipped getting out of the pool. She used a surface-mount anchor kit and followed the steps above, taking time to dig down to the gravel base and set the anchors in high-strength epoxy.
The handrail has stayed rock-solid for three years, even with heavy use.
Her main lesson? “Double-check everything before you drill. And don’t rush the epoxy. It’s worth the wait!”
Credit: www.troublefreepool.com
Safety Reminders
- Always wear gloves and safety glasses when drilling or using epoxy.
- Keep children and pets away during installation.
- Allow all adhesives or cement to cure fully before using the handrail.
- If you’re unsure about underground lines, call your local utility marking service before digging.
When To Call A Professional
If you find a thick concrete base, run into trouble with alignment, or just don’t feel comfortable drilling and anchoring, don’t hesitate to hire a pro. A professional installer will have the right tools and experience to ensure your handrail is safe and meets all codes.
How Pool Handrails In Pavers Compare To Other Deck Types
For those considering different decking materials, here’s a quick comparison:
| Deck Type | Handrail Installation Difficulty | Durability | Common Issues |
|---|---|---|---|
| Pavers | Moderate | High (with correct anchors) | Requires proper base anchoring |
| Poured Concrete | Easy-Moderate | Very High | Can crack if drilled poorly |
| Wood Deck | Moderate | Medium | Wood rot, less sturdy over time |
Insight: Paver decks look beautiful and are easy to repair, but they demand careful anchoring for safety features like handrails.
Environmental Factors To Consider
If you live in a cold climate where the ground freezes, pavers can shift. This movement can loosen handrail anchors over time. In these areas:
- Check the handrail each spring for movement.
- Use flexible caulk around the anchor base to keep water out.
- Consider reinforcing with a mini concrete pad under the anchor for extra stability.
In very wet or coastal areas, choose marine-grade stainless steel to resist corrosion.
Improving Accessibility And Compliance
For people with disabilities or limited mobility, a pool handrail makes a huge difference. If you need to comply with the Americans with Disabilities Act (ADA) or similar standards, choose a rail specifically labeled as ADA-compliant. These are thicker, have specific shapes, and must be installed at a set height and length. For more on ADA rules, check the official ADA website.
Frequently Asked Questions
How Deep Should I Drill For Pool Handrail Anchors In Pavers?
The depth depends on your anchor kit, but typically you’ll drill at least 4–6 inches below the paver. The anchor must reach solid ground or a concrete base for strength. Always follow the instructions with your anchor kit.
Can I Just Bolt A Handrail Directly To The Paver Surface?
No, this is not safe. Pavers are not strong enough to hold a handrail by themselves. Always anchor into the base beneath the paver and use epoxy or cement for a secure fit.
How Long Does The Installation Process Take?
With all tools and materials ready, most people can finish the job in 2–4 hours, plus waiting time for epoxy or cement to cure (usually 24 hours). Don’t rush this step.
Will Installing A Handrail Damage My Pavers?
If you follow the steps and use the right anchors, your pavers will not be damaged. You may need to drill small holes, but these are hidden under the base plate. Always work slowly and use proper tools.
Is It Possible To Remove Or Move The Handrail Later?
Yes. If you ever need to remove the handrail, you can fill the anchor holes with paver sand or a matching filler. The small holes are usually not noticeable, especially if you keep extra pavers from your original installation.
Adding a pool handrail to your paver deck is one of the best ways to improve safety and comfort around your pool. With careful planning and the right materials, you can achieve a professional, lasting result that looks great and makes every swim safer for your family.