Kashering an electric stove top may sound complicated, but with the right guidance, it is a process anyone can follow. If you keep kosher or want to prepare your kitchen for Passover, learning to kasher your stove is essential. Many people have questions about safety, halacha (Jewish law), and practical steps.
In this guide, you will find everything you need to know about kashering an electric stove top—detailed instructions, common mistakes, practical tips, and what to do if your stove is modern or has unique features.
Kashering is not just a tradition; it’s a process with meaning. It helps ensure that your food and cooking space meet kosher standards. Some people worry they will damage their stove or not do the process correctly. This article answers all those concerns with clear explanations, data, and examples.
By the end, you will feel confident to kasher your electric stove top in a way that is both safe and fully kosher.
Understanding Kashering: Basics And Why It Matters
Before starting, it helps to know what kashering means. Kashering is the process of making utensils and appliances suitable for kosher use. If a stove top was used for non-kosher food or chametz (leavened products, especially before Passover), it absorbs taste into its surface. Jewish law says you must remove this taste before cooking kosher food.
Kashering uses heat to “purge” or “burn out” these absorbed tastes. This follows the principle “k’bol’o kach polto”—as it absorbed, so it is purged. The method you use depends on the material and how it was used. For electric stove tops, the process is straightforward, but it must be done correctly for full kosher status.
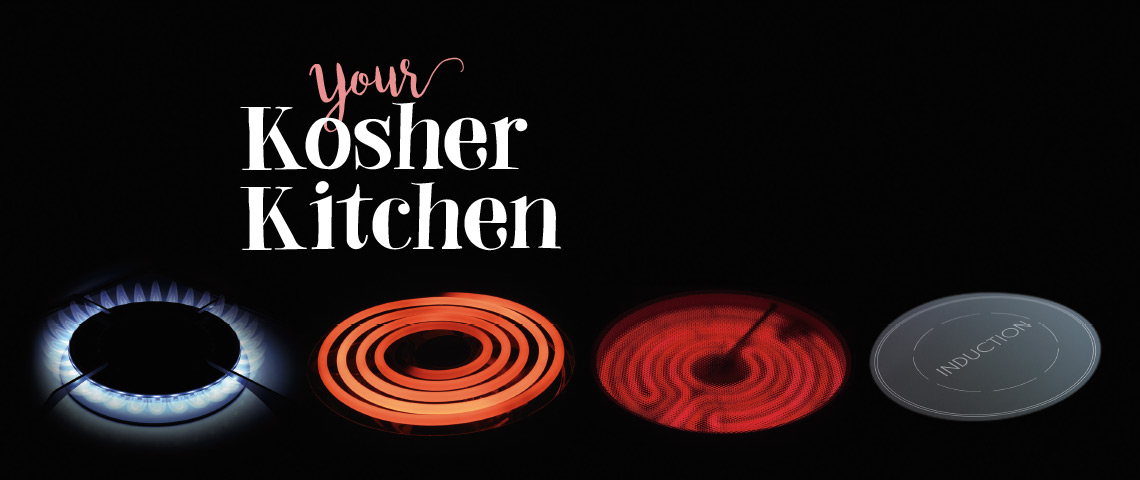
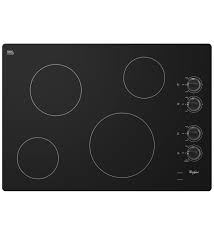
Types Of Electric Stove Tops
Not all electric stove tops are the same. It’s important to know what type you have, as the kashering method may change.
| Stove Top Type | Surface Material | Kashering Feasibility | Notes |
|---|---|---|---|
| Coil Electric | Exposed metal coils | Easy | Most common, simplest to kasher |
| Glass-Ceramic (e.g., Ceran) | Solid glass/ceramic | Complex | Some authorities do not allow kashering |
| Solid Disk (Hot Plate) | Solid metal disks | Possible | Similar to coils but slower heating |
Non-obvious insight: Many people think all electric stoves are the same. But glass-ceramic surfaces have special halachic concerns. Always check the type of surface before starting.
When Is Kashering Required?
Kashering your electric stove top is necessary in these cases:
- Switching from non-kosher to kosher: If your home previously did not keep kosher.
- After non-kosher use: If someone cooked non-kosher food on the stove.
- Before Passover: Removing chametz taste for Pesach, even if the stove is otherwise kosher.
- Switching between milk and meat: If your stove was used for dairy and you want to use it for meat (or vice versa), some authorities recommend kashering.
If you are unsure whether kashering is needed, consult your rabbi.
What You Need Before Starting
To kasher an electric stove top, you need some simple tools and materials:
- Cleaning supplies: Degreaser, sponge, towel, scraper (for stuck-on food)
- Protective gloves: For safety when cleaning and using heat
- Pot of water: For boiling if cleaning drip pans or grates
- Aluminum foil or stove-top covers: For covering areas after kashering (especially for Passover)
- Timer or clock: To track heating times
Non-obvious tip: Many people forget to clean under the burners and around the control knobs. Food can get stuck there and invalidate the kashering.
Credit: cor.ca
Step-by-step Guide: How To Kasher An Electric Stove Top
The kashering process has several clear steps. Following them closely ensures your stove is properly koshered.
Step 1: Wait 24 Hours
Jewish law requires waiting 24 hours since the stove was last used for non-kosher, dairy, or chametz. This waiting period is called “ben yomo”—after 24 hours, the absorbed taste is considered less strong.
- Do not use the stove for cooking during this time.
- If someone accidentally cooks, restart the 24-hour period.
Step 2: Clean Thoroughly
Cleaning is the most important step. Kashering cannot work if there is food or grease on the stove.
- Remove all burner grates, drip pans, and knobs if possible.
- Scrub the entire surface with degreaser and a non-scratch sponge.
- Use a scraper for stuck-on residue.
- Clean the area under and around the burners.
- Rinse with clean water and dry completely.
Example: Even a small crumb or grease spot under a burner can block kashering. Pay attention to every corner.
Step 3: Kasher The Burners (coil Type)
For coil-type electric stoves:
- Turn each burner to its highest setting.
- Let the burners glow red-hot for at least 15 minutes. This burns off any absorbed residue.
- You may notice smoke or smell as residue burns away—this is normal but open a window for ventilation.
- After 15 minutes, turn off and let cool.
Safety warning: Do not touch the coils or nearby metal while hot.
Step 4: Kasher The Surface
The stove top surface between the burners (usually porcelain or enamel) cannot be heated directly. Here’s what to do:
- After cleaning, pour boiling water (“irui”) over all areas between the burners. Use a kettle or large pot.
- Move slowly so the entire surface is covered.
- Wipe dry with a clean towel.
- For extra caution (especially for Passover), some people cover the surface with heavy-duty aluminum foil after kashering.
Important: If the surface is glass-ceramic (e.g., Ceran), see the special section below.
Step 5: Kasher Drip Pans And Grates
- Metal drip pans and grates should be removed and cleaned.
- Boil them in a pot of water for at least 10 minutes (ensure the water is boiling before adding the items).
- If boiling is not possible, replace them with new ones.
Step 6: Reassemble And Cover
- Replace all parts after they cool and dry.
- For Passover, cover exposed areas between the burners with foil or special stove-top covers.
- Some people cover the control knobs as well.
Kashering Glass-ceramic (ceran) And Modern Electric Stoves
Glass-ceramic stove tops (sometimes called Ceran) are popular, but kashering them is debated in Jewish law.
| Method | Allowed? | Notes |
|---|---|---|
| Direct heating | Some say no | Glass may not be kasherable |
| Covering with metal sheet | Sometimes allowed | Used as a barrier, not true kashering |
| Replacing top | Always allowed | Costly but certain |
Many rabbinic authorities say glass-ceramic cannot be kashered for Passover or after non-kosher use. Some allow covering the surface with a thin metal sheet and only using covered pots. If your stove is glass-ceramic, consult your rabbi before kashering.
Practical example: For year-round use (not Passover), some people clean the surface well, heat each zone to maximum for 15 minutes, then cover the surface with a metal sheet during use.
Special Considerations For Passover
Kashering for Passover is stricter than year-round kashering. Chametz (leaven) is forbidden even in tiny amounts.
- Clean every part of the stove, including under burners and inside cracks.
- Use new drip pans or boil old ones.
- Cover all surfaces between burners with heavy-duty aluminum foil or special Passover covers.
- For glass-ceramic, most authorities do not allow kashering for Passover. Use a separate stove top or consult your rabbi for possible workarounds.
Common mistake: Relying on year-round kashering rules for Passover can make your kitchen not kosher for Pesach.
Safety Tips And What To Avoid
Many people worry about damaging their stove or causing a fire. Kashering is safe if you follow these tips:
- Never leave burners unattended on high heat.
- Open windows for ventilation during burning.
- Do not pour cold water on a hot stove; it can crack the surface.
- Use gloves to protect your hands when cleaning or pouring boiling water.
- Let all parts cool before reassembling.
Credit: www.ok.org
What To Do If There Are Questions Or Problems
If you are unsure whether your kashering was done correctly, or you find a spot that was missed, do not panic. Here are practical steps:
- If possible, reclean and repeat the kashering process for the missed area.
- For questions about halacha, ask your local rabbi. Many communities have hotlines before Passover or offer home visits.
- If a part cannot be kashered (e.g., plastic knobs), replace them or cover with foil.
Non-obvious insight: Partial kashering is not enough. Every part that comes in contact with food or pots must be clean and kashered, or covered.
Comparison: Electric Vs. Gas And Induction Stoves
Many homes have different types of stoves. Here’s how electric kashering compares:
| Type | Kashering Method | Difficulty Level |
|---|---|---|
| Electric (coil) | Burn coils, boil/cover surface | Easy |
| Electric (glass-ceramic) | Debated, often not allowed | Complex |
| Gas | Burn grates, cover surface | Moderate |
| Induction | Surface usually glass, not kasherable | Difficult |
Example: Electric coil stoves are the easiest to kasher. Glass and induction are the hardest due to their surfaces.
Common Mistakes And How To Avoid Them
Many people make avoidable errors when kashering. Here are the top ones:
- Not waiting 24 hours: This step is halachically required.
- Incomplete cleaning: Even tiny crumbs can block kashering.
- Forgetting drip pans or knobs: These parts can absorb taste too.
- Using the wrong method for glass-ceramic: Always check your stove type.
- Not covering surfaces for Passover: Extra stringency is needed.
Paying attention to these details ensures your kashering is effective.
Practical Tips For Ongoing Kosher Use
Once your stove is kashered, here are ways to keep it kosher:
- Wipe spills right away, especially dairy or meat.
- Use separate covers or foil for dairy and meat cooking.
- Keep spare drip pans for Passover.
- Mark the stove with labels if others use your kitchen.
Non-obvious tip: Many homes keep a roll of foil and a stack of disposable covers just for koshering emergencies.
Credit: www.star-k.org
Kashering If You Live In A Rental Or Dorm
If you do not own your stove, you can still kasher it:
- Get permission from your landlord if possible.
- Use removable foil or covers if the stove is not yours.
- Document your cleaning and kashering for your own records.
- If you move, you may need to kasher again in your new home.
Example: Many students use portable electric burners for kosher cooking and kasher them each year before Passover.
When To Consult A Rabbi
Some situations need rabbinic advice:
- Glass-ceramic or induction stove tops.
- Stoves with complex digital controls.
- If you are unsure whether kashering is possible.
- If someone accidentally uses the stove for non-kosher food.
Rabbis have experience with many types of stoves and can help you follow halacha correctly.
Dealing With Modern Stove Features
Newer electric stoves may have “smart” features, digital controls, or safety shutoffs. Here are points to remember:
- Digital controls do not need kashering, but clean them well.
- Be careful not to trip safety sensors when heating the burners.
- If your stove automatically turns off after a set time, you may need to restart the kashering cycle.
Read your user manual before starting. Some manufacturers post guidelines for cleaning and high-heat use on their websites.
Environmental And Energy Concerns
Kashering uses energy (heating coils to red-hot) but is not dangerous if done properly.
- The process takes about 15–20 minutes of high heat per burner.
- Open a window for air circulation.
- Avoid kashering during a heat wave or if your kitchen gets very hot.
Tip: If you worry about energy use, kasher all burners at the same time.
How Long Does Kashering Take?
Here is a typical time breakdown:
- 24 hours: Waiting period (no work needed)
- 30–60 minutes: Cleaning
- 15–20 minutes: Kashering burners (can do all at once)
- 10–15 minutes: Pouring boiling water and reassembling
You can finish active work in about 60–90 minutes, plus the 24-hour wait.
What If My Stove Is Old Or Damaged?
Older stoves can usually be kashered, but:
- Check for cracks, rust, or missing parts.
- If the coils do not glow red, replace them or use a different burner.
- If the surface is damaged, cover with foil after kashering.
If the stove is unsafe, do not use it until repaired.
What To Do If You Move Or Sell Your Home
If you move, kasher the stove in your new home before using it. If you sell your home, tell the new owners if the stove was kashered. Some people leave a note with the date and method used.
Summary Checklist For Kashering An Electric Stove Top
- Wait 24 hours since last use for non-kosher/chametz/dairy/meat
- Clean all parts thoroughly: Burners, surface, drip pans, knobs
- Turn on burners to high for 15 minutes until red-hot
- Pour boiling water over surface areas
- Boil drip pans/grates or replace
- Cover surfaces for Passover
- Reassemble and use
Following these steps gives you a fully kosher electric stove top.
Where To Learn More
If you want to read more about the halachic background, OU Kosher is a reliable resource.
Frequently Asked Questions
What If I Missed Cleaning A Spot Before Kashering?
If you find food or grease after kashering, clean that area thoroughly and repeat the kashering process for that part. Kashering only works on clean surfaces.
Can I Kasher A Glass-top Electric Stove?
Kashering glass-ceramic stove tops is debated. Most authorities do not allow kashering for Passover. For year-round use, some permit heating each burner and covering the surface with a metal sheet. Always consult your rabbi for your situation.
How Do I Kasher For Passover Specifically?
For Passover, kashering is stricter. Clean all parts deeply, boil drip pans, and cover all surfaces with foil or Passover covers after kashering. If your stove is glass or induction, consult your rabbi, as kashering may not be possible.
Is Kashering Safe For My Electric Stove?
Yes, if you follow safety guidelines: never leave burners unattended, open windows for ventilation, avoid pouring cold water on hot surfaces, and let all parts cool before handling.
How Often Should I Kasher My Stove?
Kasher once when you begin keeping kosher, after non-kosher use, or before Passover each year. For daily kosher kitchens, kashering is not needed unless the stove is used for non-kosher, dairy, or meat by mistake.
By following these guidelines, you ensure your electric stove top is kosher, safe, and ready for all your cooking needs.