
Making your own edge grain cutting board is both rewarding and practical. It’s a woodworking project that even beginners can tackle with patience, some planning, and the right tools. In your kitchen, a handcrafted cutting board stands out for durability and beauty. It can become a centerpiece you use every day or a special gift for someone who loves cooking. But building one is not just about gluing some wood together. Each step, from choosing the right lumber to applying the final oil finish, matters for both function and appearance.
This guide walks you through every detail of making an edge grain cutting board. Whether you’re new to woodworking or have some experience, you’ll find clear steps, helpful tips, and important safety advice. Along the way, you’ll see tables comparing wood types, finish options, and thickness choices so you can pick what’s best for your needs.
By the end, you’ll understand not only how to build a cutting board but also how to avoid common mistakes and create something that lasts for years.
What Is An Edge Grain Cutting Board?
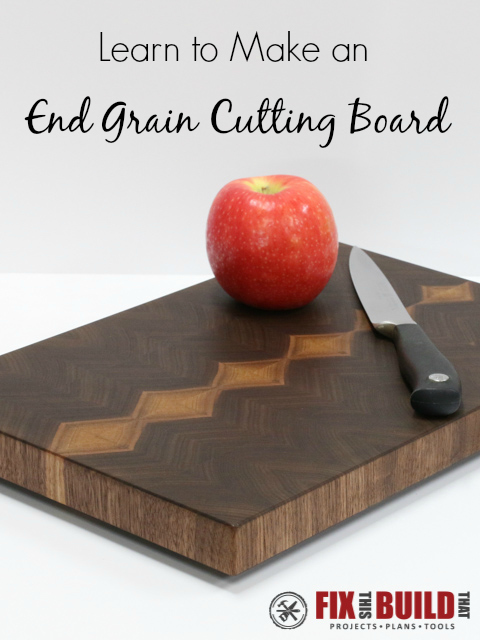
An edge grain cutting board is made by gluing strips of wood together so the long, narrow edges face up. When you cut on the board, your knife touches the edge of the wood grain. This is different from an end grain cutting board (where the cut face is the end of the wood), or a face grain board (which shows the wide surface of the wood).
Edge grain boards are popular because they’re:
- Durable and less likely to warp
- Easier to make compared to end grain boards
- Knife-friendly but not as gentle as end grain boards
- Attractive with linear wood patterns
Understanding these differences helps you know why edge grain is a great choice for your first project. The process is simpler, and the results are strong enough for everyday use.
Planning Your Cutting Board
Good planning makes everything easier. If you rush, you might pick the wrong wood, buy too little glue, or end up with a board that’s too big for your kitchen.
Choosing The Size
First, decide how big you want your cutting board. Common sizes are:
- Small (8” x 12”) – good for chopping fruit or herbs
- Medium (12” x 18”) – fits most kitchens and tasks
- Large (16” x 22”) – for serious cooks, bread, or carving meat
A typical thickness is 1 to 1.5 inches. Thicker boards last longer and feel more solid.
Tip: Before you buy wood, check if your sink or drying rack fits your planned board size. A board that’s too big is hard to clean and store.
Design Choices
Edge grain boards can be simple or decorative. You can:
- Use one wood type for a classic look
- Alternate strips of different woods for contrast
- Make all strips the same width or mix wide and narrow
Sketch your design on paper. Decide the number of strips and the pattern before cutting anything.
Picking The Right Wood
Wood choice affects your board’s safety, look, and lifespan. Not all wood is suitable for food contact or frequent washing.
Best Woods For Cutting Boards
Use hardwoods with closed grain. Here’s why:
- Hardwoods resist deep cuts and bacteria
- Closed grain means fewer open pores for water and food to enter
Common choices:
- Maple (especially hard maple)
- Walnut
- Cherry
- Beech
Avoid softwoods (like pine), open-grained woods (like oak), or exotic woods that may be toxic.
Wood Properties Comparison
Below is a table comparing popular hardwoods for edge grain boards:
| Wood Type | Hardness (Janka) | Color/Appearance | Food Safe? | Cost |
|---|---|---|---|---|
| Maple | 1450 | Pale cream | Yes | $$ |
| Walnut | 1010 | Dark brown | Yes | $$$ |
| Cherry | 995 | Reddish brown | Yes | $$ |
| Beech | 1300 | Pale pink/brown | Yes | $ |
Non-obvious insight: Don’t use reclaimed wood unless you know it’s food safe and chemical-free. Old wood can have hidden oils, stains, or finishes that are unsafe for food.
Tools And Materials You Need
Even beginners can build a cutting board with basic tools. Here’s a checklist with some alternatives if you don’t have a full workshop:
Essential Tools
- Table saw or circular saw (for straight cuts)
- Planer or hand plane (for flattening)
- Jointer (optional, for straightening edges)
- Random orbit sander (or sanding block)
- Clamps (bar clamps or pipe clamps, at least 2–3)
- Measuring tape or ruler
- Carpenter’s square
- Pencil
Materials
- Hardwood boards (enough for your chosen size)
- Food-safe wood glue (like Titebond III)
- Sandpaper (80, 120, 180, 220 grit)
- Mineral oil or cutting board oil (for finishing)
- Optional: Beeswax (for a richer finish)
- Rubber feet (optional, for the bottom)
Practical tip: If you don’t have a table saw, most hardwood suppliers can cut boards for you at a small cost.

Credit: www.diywithdave.com
Step-by-step: Making An Edge Grain Cutting Board
This section breaks down each part of the process, from wood preparation to the final oiling.
1. Preparing The Wood
Start by measuring and marking your lumber. Cut boards to slightly longer than your final size (an extra inch gives room for mistakes).
- Rip (cut along the grain) the boards into strips of equal width. For a 12-inch-wide board, cut 6 strips, each 2 inches wide.
- Check all edges for square (90-degree angle). Uneven edges lead to weak glue joints.
Beginner mistake: Not removing all saw marks or roughness. This prevents a tight glue bond.
2. Arranging The Strips
Lay the strips side by side. Rotate each so the grain direction alternates up and down. This reduces warping later.
- Try different arrangements for the best color pattern.
- Number the strips with a pencil to remember the order.
Non-obvious insight: If you mix wood types, test the look by misting with water. This shows how the colors will appear with oil.
3. Gluing Up The Board
- Set up your clamps on a flat surface.
- Apply a thin, even coat of food-safe glue on one edge of each strip. Don’t use too much—just enough to cover.
- Press the strips together, aligning the top edges as close as possible.
- Place clamps across the width. Add one or two more clamps on top to keep the board flat.
- Tighten until glue squeezes out, but don’t over-tighten (this can squeeze out all the glue).
Let the glue dry for at least 8 hours (or overnight).
Pro tip: Wipe away excess glue with a damp rag before it dries. Dried glue is hard to sand off.
4. Flattening And Trimming
Once dry, remove the clamps. Your board will look rough and may have uneven edges.
- Use a planer or hand plane to flatten the board’s surface.
- Flip over and repeat until both sides are smooth.
- Trim the ends with a saw for a clean, square shape.
If you don’t have a planer: Use a sanding block and patience, but keep checking for flatness.
5. Sanding
Sanding makes your board smooth and safe for use.
- Start with 80 grit sandpaper to remove rough spots.
- Move to 120, then 180, and finish with 220 grit for a silky touch.
- Round the edges and corners slightly—this prevents chipping.
Always sand in the direction of the grain, not across it.
6. Optional: Adding Juice Grooves Or Handles
If you want a fancier board:
- Juice groove: Use a router to cut a shallow groove near the edge. This catches meat juices or water from food.
- Handles: Cut finger holes or attach metal handles for easy lifting.
These features are not required, but they add function.
7. Final Cleaning
After sanding, remove all dust with a damp cloth. Let the board dry fully before finishing.
Don’t skip this step: Dust under the finish feels gritty and looks bad.
8. Applying The Finish
A cutting board needs a food-safe finish. This protects the wood from water and bacteria.
- Use mineral oil or a commercial cutting board oil.
- Apply generously with a soft cloth. Let the oil soak in for at least 20 minutes.
- Wipe off extra oil and let the board sit overnight.
- Repeat 2–3 times for best results.
For extra protection, rub on a mix of mineral oil and beeswax.
9. Adding Rubber Feet (optional)
If your board will stay on the counter, screw small rubber feet into each corner on the bottom. This keeps the board from sliding and lets air flow underneath.
Note: If you plan to use both sides, skip the feet.
Comparing Finishing Options
Different finishes give different looks and levels of protection. Here’s a quick comparison:
| Finish Type | Food Safe? | Water Resistance | How Often to Reapply | Shine |
|---|---|---|---|---|
| Mineral Oil | Yes | Medium | Monthly | Matte |
| Beeswax + Oil | Yes | High | Every 2–3 months | Soft sheen |
| Pure Tung Oil | Yes | High | Every 6 months | Glossy |
| Vegetable/Olive Oil | No (can go rancid) | Poor | Not recommended | Varies |
Important: Never use vegetable, olive, or corn oil. They spoil, smell bad, and can make the board unsafe.
Credit: fixthisbuildthat.com
Caring For Your Edge Grain Cutting Board
A well-made board lasts years, but only if you take care of it.
Daily Care
- Wash by hand with warm, soapy water after each use.
- Dry right away with a towel; don’t let water sit on the board.
- Never put the board in a dishwasher or soak it in water.
Monthly Maintenance
- When the board looks dry or rough, reapply mineral oil.
- Buff with beeswax for extra moisture protection.
Removing Odors And Stains
- Sprinkle coarse salt on the board, rub with half a lemon, then rinse and dry.
- For stubborn stains, sand lightly with 220 grit paper and refinish.
Pro tip: Stand the board on its edge to dry. This prevents warping.
Common Mistakes And How To Avoid Them
Even experienced woodworkers make mistakes. Here’s how to avoid the most common ones:
- Using the wrong glue: Only use food-safe glue. Many common glues are not safe for kitchen use.
- Not checking for flatness: Clamp on a flat surface and check with a straight edge.
- Skipping sanding steps: Don’t rush. Fine sanding makes a board smooth and safe.
- Using oily or open-grained wood: Woods like oak, ash, or tropical exotics can harbor bacteria or cause allergies.
- Forgetting to finish all sides: Oil both sides and edges so moisture doesn’t enter unevenly.
Non-obvious insight: Let your finished board rest for a day before using it. This lets the finish harden and the glue fully cure.
Edge Grain Vs. End Grain Vs. Face Grain
Understanding the differences helps you choose the right board for your needs.
| Type | Durability | Knife Friendliness | Maintenance | Look | Difficulty to Make |
|---|---|---|---|---|---|
| Edge Grain | High | Good | Medium | Linear pattern | Easy |
| End Grain | Very high | Excellent | High | Checkerboard | Hard |
| Face Grain | Medium | Fair | Low | Flat, wide grain | Very easy |
Edge grain is the best balance of looks, durability, and ease for most home cooks.
Advanced Tips For A Unique Cutting Board
Once you’ve made a basic board, you might want to try these advanced features:
- Decorative inlays: Add a thin strip of contrasting wood for a custom look.
- Juice groove: For carving boards, a groove keeps counters clean.
- Non-slip feet or pads: For stability, especially on slick countertops.
- Laser engraving: Personalize with a name or design.
Tip: Practice on scrap wood before adding features to your main board.

Credit: www.youtube.com
When To Replace Your Cutting Board
Even a well-made board has a lifespan. Replace your board if:
- Cracks or splits appear (bacteria can hide here)
- The board won’t stay flat
- Deep grooves can’t be sanded out
Regular maintenance delays these problems, but safety comes first.
Example: Making A Simple Maple Edge Grain Cutting Board
Let’s walk through a basic project for a 12” x 18” board.
- Buy 6 board feet of hard maple.
- Cut strips 18” long and 2” wide.
- Arrange for best grain pattern.
- Glue, clamp, and let dry overnight.
- Plane both sides flat.
- Trim ends for a clean rectangle.
- Sand through grits 80 to 220.
- Clean off all dust.
- Apply mineral oil, let soak, and repeat twice.
- Board is ready for use.
Time needed: About 4–6 hours, plus drying time.
Safety Tips
- Always wear eye and ear protection when cutting wood.
- Use clamps to hold wood, not your hands.
- Keep glue away from your skin and eyes.
- Work in a well-ventilated area, especially when sanding or applying oil.
Important: Don’t rush. Most woodworking accidents happen when people hurry or skip safety gear.
Where To Find Materials And More Help
- Local hardwood dealers: Best for quality wood.
- Home centers: Can work for small boards, but selection is limited.
- Online woodworking stores: Offer kits with pre-cut wood.
For more details, check resources like Wikipedia’s Cutting Board page.
Frequently Asked Questions
How Long Does It Take To Make An Edge Grain Cutting Board?
Most people finish in one weekend. Cutting, gluing, and sanding take about 4–6 hours, but you need to wait overnight for glue and oil to dry. If you add complex features, it may take longer.
Is Edge Grain Better Than End Grain For Cutting Boards?
Edge grain boards are easier to make and maintain. End grain boards are gentler on knives and last longer but require more skill and tools. Edge grain is best for most home cooks who want a balance of durability and simplicity.
What Kind Of Oil Should I Use For Finishing?
Use food-safe mineral oil or a cutting board oil blend. Avoid vegetable or olive oil because they spoil and cause odor. Beeswax mixed with oil adds extra protection.
Can I Use Any Hardwood For My Cutting Board?
No. Only use closed-grain, food-safe hardwoods like maple, walnut, cherry, or beech. Stay away from open-grained woods (like oak) or reclaimed wood that may have chemicals.
How Do I Fix A Warped Or Cracked Cutting Board?
For small warps, sand the board flat and reapply oil. For cracks, you may be able to fill with food-safe glue and clamp, but deep cracks mean the board should be replaced for safety.
Building your own edge grain cutting board is a project that combines craft, utility, and pride. With the right wood, tools, and care, your board can serve your kitchen for many years. The satisfaction of making something by hand will show every time you prepare a meal.