
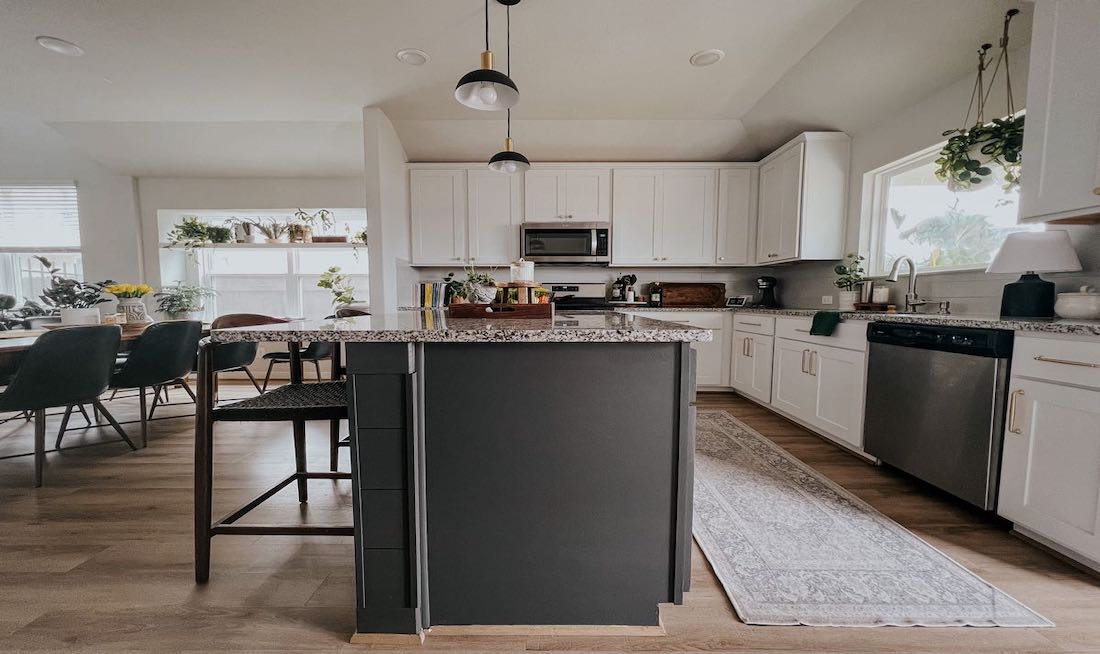
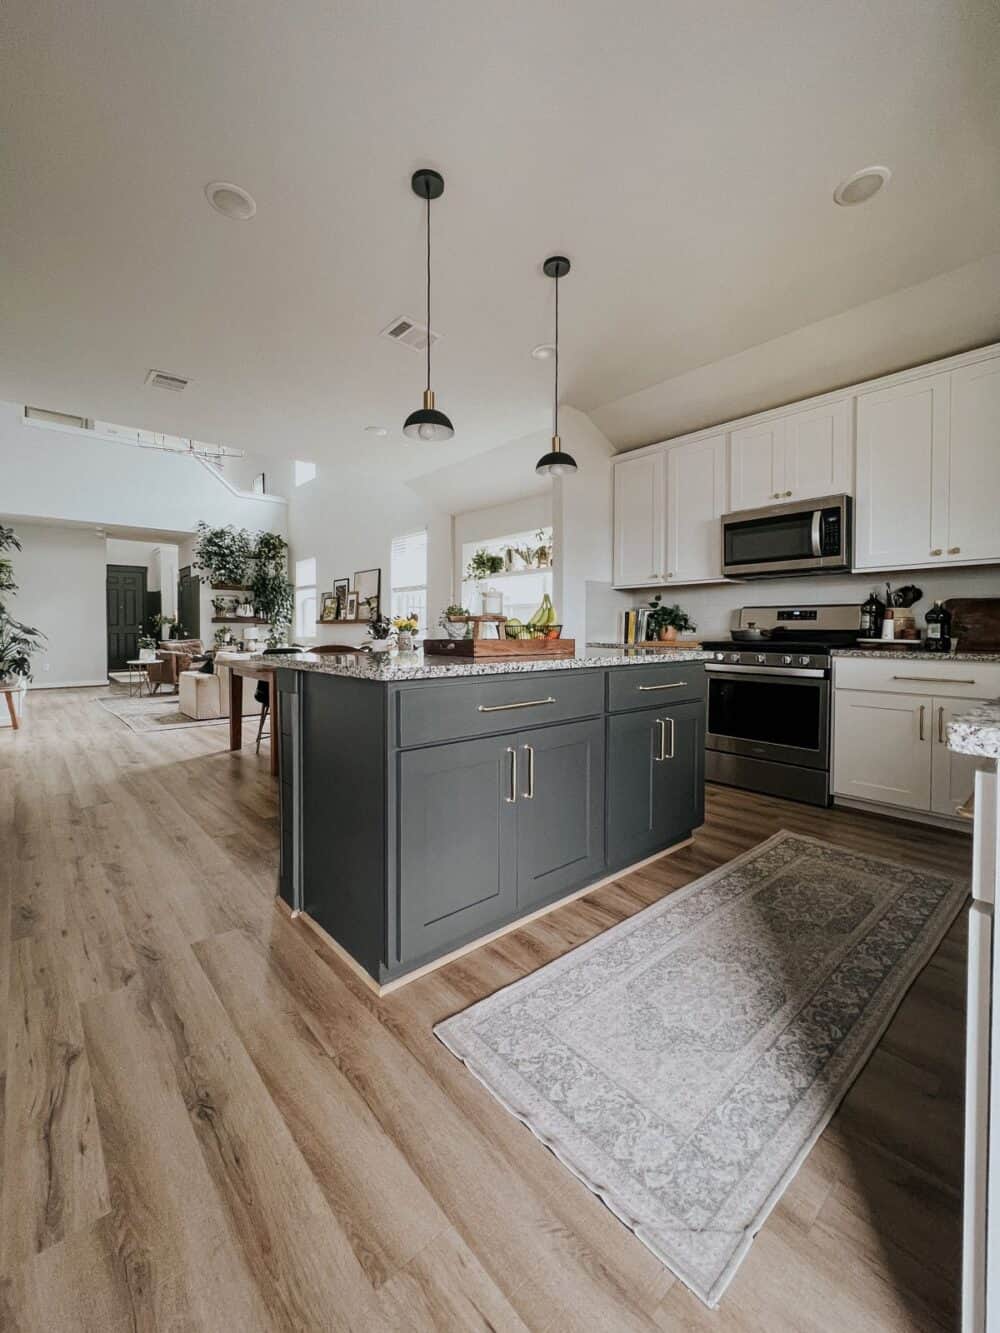
Painting your kitchen island is one of the easiest ways to change your kitchen’s atmosphere without the high cost of a full remodel. A fresh coat of paint can transform a tired, dated island into a bold centerpiece or help it blend seamlessly into a new color scheme.
Many people want to try this project themselves, but worry about the process, what tools to use, and how to get a finish that looks professional. The good news? With careful preparation and the right approach, anyone can achieve a beautiful result.
This guide walks you through every step, from choosing paint to final touches, with practical tips and expert insights you won’t find in most tutorials.
Why Paint Your Kitchen Island?
The kitchen island is not just a workspace—it’s often the heart of the kitchen. It’s where families gather, kids do homework, and guests lean in for conversation. Over time, the island’s finish can get scratched, stained, or simply out of style. Painting your island offers several advantages:
- Cost-effective upgrade: Painting is much cheaper than replacing the island or cabinets.
- Personalization: You can match your style, from bold colors to subtle neutrals.
- Home value: A modern, well-painted island can make your kitchen more attractive to buyers.
- Flexibility: Painted surfaces are easy to touch up or change again later.
But painting is not as simple as slapping on a new color. The finish must be durable, smooth, and resistant to kitchen wear. Beginners often miss important steps, leading to peeling, chipping, or uneven color. The following sections detail each part of the process, so you get a result you’ll be proud to show off.
Planning And Preparation
Evaluate Your Kitchen Island
Before you start, examine your island closely. Is it made of solid wood, MDF, laminate, or another material? The surface type determines the prep and paint you’ll use. For example, real wood and high-quality MDF are ideal for painting, while laminate needs special prep to help paint stick.
Look for dents, grease, water damage, or cracks. Fix these before painting to avoid problems later.
Choose The Right Paint And Primer
Picking the best paint is crucial. Kitchen islands get a lot of use, so you need a finish that resists stains, scratches, and moisture.
Paint Options:
- Acrylic latex: Durable, easy to clean, and widely available. Good for most wood and MDF islands.
- Alkyd enamel: Harder finish, dries slowly but very tough. Best for high-traffic kitchens.
- Chalk paint: Easy to apply and gives a matte finish, but needs a protective topcoat.
- Oil-based paint: Extremely durable but harder to use and clean up.
Primer Options:
- Bonding primer: Essential for glossy surfaces (like laminate) or previously painted islands.
- Stain-blocking primer: Blocks old stains or wood knots from bleeding through.
Finish:
Choose semi-gloss or satin for a balance of shine and cleanability. Matte looks stylish but shows dirt and is harder to clean.
Gather Tools And Materials
A good result starts with the right tools. Here’s what you’ll need:
- Drop cloths or plastic sheeting
- Painter’s tape
- Screwdriver (for removing hardware)
- Sandpaper (120- to 220-grit)
- Degreasing cleaner
- Tack cloth
- Quality paintbrushes (angled for detail)
- Small foam roller (for smooth finish)
- Primer (matched to your surface)
- Paint (enough for 2-3 coats)
- Topcoat/sealer (for extra durability)
- Wood filler (for repairs)
- Putty knife
- Clean rags
Many first-timers forget to use a tack cloth or skip foam rollers, but these tools make a visible difference in the final look.
Preparation Steps
Clear And Protect The Area
Painting can get messy. Move nearby furniture and cover the floor with drop cloths. Tape off surrounding cabinets, countertops, and appliances with painter’s tape. Remove stools, rugs, and anything else that could be splattered. Good prep saves hours of cleanup later.
Remove Hardware And Accessories
Take off all handles, knobs, and any removable panels or trim. If your island has electrical outlets or built-in shelves, unscrew faceplates and set them aside. Label hardware and screws in small bags so you don’t lose track.
Clean Thoroughly
Kitchen islands often have grease, fingerprints, and food stains. These will prevent paint from sticking. Scrub every surface with a degreasing cleaner (like TSP or a vinegar-water mix). Pay special attention to corners and edges. Rinse with clean water and let dry fully.
Insider tip: Even if the surface looks clean, invisible oils can cause paint to bubble or peel. Don’t skip this step.
Repair And Fill Imperfections
Check for dents, gouges, or holes. Use wood filler to repair any damage. Press the filler in with a putty knife, smooth the surface, and let it dry according to the package directions. Sand the area gently until smooth. For deep scratches or swelling (common on MDF), let the filler dry longer to prevent shrinking.
Sand For A Smooth Base
Sanding creates a surface the paint can grip. Use 120- to 220-grit sandpaper to lightly scuff all paintable areas. You don’t need to remove all old paint, just rough up the surface. Focus on corners and edges, but avoid over-sanding, especially on veneer or MDF, which can be damaged easily.
Wipe every surface with a tack cloth to remove dust. Many beginners skip the tack cloth, but even tiny dust particles can ruin a smooth finish.
Priming The Kitchen Island
When To Prime
Primer is essential for most kitchen islands, especially if:
- The surface is glossy or laminate.
- You’re changing from a dark to light color (or vice versa).
- There are stains or wood knots.
- The old paint is peeling.
Skipping primer can lead to peeling, uneven color, or stains bleeding through.
Applying Primer
Stir the primer well. Use a brush for corners, trim, and detailed areas, and a foam roller for flat panels. Apply a thin, even coat. Let it dry fully (usually 1-4 hours, check the label). Lightly sand the primer with 220-grit sandpaper for extra smoothness, then wipe with a tack cloth.
If the old color shows through or the surface feels rough, apply a second coat of primer. Let it dry completely before painting.
Painting Techniques For A Professional Finish
Choosing Your Painting Method
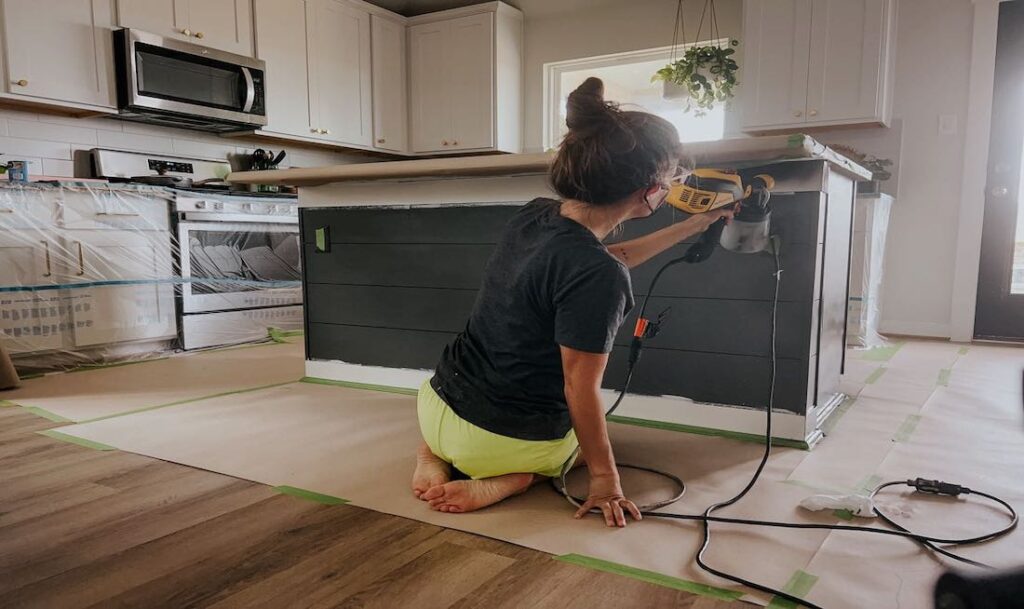
You have two main options: brush and roller, or spraying.
- Brush and roller: Best for most DIYers. Gives good control, especially on panels and trim.
- Spraying: Fast and gives ultra-smooth finish, but needs practice and careful masking.
For most home projects, a brush and roller combination is easiest and safest.
Applying The Paint
Stir the paint thoroughly. Load the brush for corners and edges (called “cutting in”), then use the foam roller for large, flat areas. Work in sections, keeping a “wet edge” to avoid lines or lap marks. Don’t overload the roller—thin coats dry faster and look smoother.
Let each coat dry fully (usually 4-8 hours) before adding the next. Lightly sand between coats with fine (220-grit) sandpaper and wipe with a tack cloth. This step is often missed, but it removes dust and brush marks, creating a flawless surface.
Apply at least two coats of paint. For bold color changes, three coats may be necessary for even coverage.
Special Techniques For A Standout Island
Want your island to stand out? Consider these ideas:
- Two-tone islands: Paint the base a different color from the top or countertop.
- Accent colors: Use a bold hue for the island and neutral for cabinets.
- Distressed look: After painting, sand edges lightly for a vintage feel.
- Stenciling or patterns: Add visual interest with simple geometric shapes or borders.
If you try special techniques, practice on a scrap board first. Paint behaves differently on MDF, wood, and laminate.
Sealing And Protecting The Finish
Why Seal?
Kitchen islands take a beating from spills, cleaning, and daily use. A topcoat or sealer protects the paint, adds durability, and makes cleaning easier.
Types Of Sealers
- Water-based polyurethane: Dries clear, won’t yellow, easy to apply.
- Oil-based polyurethane: Extremely tough, but can yellow over time.
- Clear wax: For chalk paint; easy to use but less durable for heavy-use surfaces.
Choose a finish (satin, semi-gloss, or gloss) that matches your paint. Semi-gloss is the most popular for kitchens—shiny but not too reflective.
How To Apply
Apply the sealer with a clean brush or foam applicator. Avoid over-brushing, which can cause streaks. Let each coat dry completely (check the label), then lightly sand and apply a second coat for the best protection. Wait at least 24 hours before heavy use, and a week before cleaning with water.
Credit: www.wagnerspraytech.com
Reassembling And Final Touches
Reinstall Hardware And Accessories
Once the paint and sealer are fully cured, reattach handles, knobs, and faceplates. Replace any trim or decorative panels. If you want a new look, consider upgrading to modern hardware—just check screw hole spacing matches your old ones.
Clean Up And Inspect
Remove all painter’s tape carefully. Touch up any small nicks with a small artist’s brush. Clean up dust, and check edges for drips or missed spots.
Let Paint Cure
Even when dry to the touch, paint and sealer take up to a week to fully harden. Avoid dragging heavy objects or cleaning with harsh chemicals during this time. This patience pays off with a longer-lasting finish.
Troubleshooting: Common Painting Problems
Many DIYers run into issues. Here’s how to avoid or fix them:
- Peeling paint: Usually caused by poor cleaning or skipping primer. Sand the area, prime, and repaint.
- Brush marks or roller texture: Use higher-quality brushes/rollers and sand lightly between coats.
- Bubbles: Often from painting over dust or using old paint. Sand smooth and repaint.
- Stains bleeding through: Apply a stain-blocking primer and repaint.
- Uneven color: May need an extra coat, or the paint wasn’t stirred enough.
Tip: Always keep a small can of your island paint for quick touch-ups.
Credit: www.wagnerspraytech.com
Maintenance And Long-term Care
A well-painted kitchen island can last years with the right care. Here’s how to keep it looking new:
- Clean with mild soap and water. Avoid harsh abrasives.
- Wipe spills quickly to prevent staining.
- Use cutting boards to avoid scratches.
- Touch up chips with a small brush and leftover paint.
- Reapply sealer every few years if the finish looks dull or worn.
How Paint Colors Affect Kitchen Design
Paint color can change the mood and style of your kitchen. Here’s how different shades work:
| Color | Effect | Best For |
|---|---|---|
| White | Bright, clean, timeless | Small or dark kitchens |
| Gray | Modern, neutral, flexible | All kitchen styles |
| Blue | Fresh, calming, coastal feel | Open or airy kitchens |
| Green | Natural, relaxing, on-trend | Farmhouse or eco styles |
| Black/Navy | Bold, dramatic, elegant | Large kitchens with good light |
Don’t be afraid to try a dramatic color—kitchen islands are the perfect spot for a bold accent, since they can be changed later with less work than full cabinets.
Comparing Paint Types For Kitchen Islands
It’s important to choose the best paint for your kitchen island’s needs. Here’s a quick comparison:
| Type | Durability | Finish | Ease of Use |
|---|---|---|---|
| Acrylic Latex | High | Satin/Semi-gloss | Easy |
| Alkyd Enamel | Very High | Gloss | Moderate |
| Chalk Paint | Medium | Matte | Very Easy |
| Oil-Based | Very High | Gloss/Semi-gloss | Harder |
Insider insight: Alkyd and oil-based paints are the toughest, but water-based acrylic latex is usually more than enough for most homes, and is much easier to work with and clean up.
Advanced Tips For A Flawless Finish
Most guides skip the little details that make a huge difference. Here are two often-missed steps:
- Edge Sanding: After priming, lightly round over sharp corners with sandpaper. This helps paint resist chipping, especially on busy islands.
- Tinted Primer: If you’re painting a dark color, ask your paint store to tint the primer to match. This makes coverage more even and uses less paint.
Also, if you want a silky-smooth finish, use a high-density foam roller and a paint conditioner (like Floetrol) to reduce brush marks.
Credit: www.loveandrenovations.com
Real-life Example: Painting A Laminate Island
Many people worry that paint won’t stick to laminate. Here’s a quick case study:
A family wanted to update their glossy white laminate island to navy blue. They:
- Cleaned thoroughly with TSP.
- Sanded gently with 220-grit.
- Used a bonding primer made for laminate.
- Applied two coats of acrylic latex paint with a foam roller.
- Finished with two coats of water-based polyurethane.
After six months of heavy use (kids, spills, cleaning), the paint still looked flawless. The key was careful prep and the right primer.
Cost Breakdown: Diy Vs. Hiring A Pro
How much will this project cost? Here’s an estimate for a typical DIY kitchen island (3-4 feet wide):
| Item | DIY Cost (USD) | Professional Cost (USD) |
|---|---|---|
| Primer & Paint | $40–$80 | Included |
| Tools & Supplies | $30–$60 | Included |
| Labor | Free | $200–$500 |
| Total | $70–$140 | $200–$580 |
DIY saves a lot, but you invest your time and effort. If you want a perfect, factory finish, hiring a pro may be worth it. For most homeowners, DIY gives excellent results with patience and care.
Frequently Asked Questions
How Long Does It Take To Paint A Kitchen Island?
Most kitchen islands can be painted over a weekend. Preparation (cleaning, sanding, priming) takes about a day, and painting/sealing takes another day with drying time between coats. Allow 24-48 hours before heavy use, and a week for full curing.
Can I Paint A Laminate Kitchen Island?
Yes, but preparation is even more important. Use a bonding primer made for glossy or laminate surfaces, and sand lightly to help the primer adhere. Acrylic latex or alkyd paint works well. Always finish with a protective topcoat for durability.
Do I Need To Remove The Countertop?
Usually, you do not need to remove the countertop. Just mask the edges with painter’s tape and work carefully. If you plan to replace the countertop, paint first for easier access.
How Do I Avoid Brush Marks On My Painted Island?
Use a high-quality angled brush for detail and a small foam roller for flat areas. Apply thin, even coats and sand lightly between layers. Adding a paint conditioner (like Floetrol) can also help reduce brush marks.
What’s The Best Paint For Kitchen Islands?
Acrylic latex paint with a semi-gloss or satin finish is the best all-around choice for most kitchen islands. It’s durable, easy to clean, and simple to apply. For very high-traffic kitchens, alkyd enamel or oil-based paint provides extra toughness.
For more information on paint types and kitchen projects, you can visit Bob Vila.
Painting your kitchen island is a project that pays off every time you walk into the kitchen. With the right approach, careful preparation, and a little patience, you’ll transform your space and enjoy the results for years to come.