
Painting oak kitchen cabinets can completely change the look and feel of your kitchen. Oak cabinets are common in many homes because they are durable and have a classic wood grain. However, over time, the orange or yellow tones of oak can make your kitchen look outdated.
The good news is, you do not need to replace your cabinets to get a fresh, modern look. With the right preparation, tools, and techniques, you can paint oak kitchen cabinets and achieve a smooth, beautiful finish that lasts for years.
Many people worry about painting oak because of its deep wood grain and strong finish. Some fear the paint will not stick, or that the grain will show through even after painting. But with careful steps, you can get a professional-looking result.
This guide will walk you through every part of the process, from gathering materials to protecting your new finish. Along the way, you will learn helpful tips and avoid common mistakes that often frustrate first-timers. By the end, you’ll have the confidence and knowledge to tackle your oak cabinets and truly transform your kitchen.
Why Paint Oak Kitchen Cabinets?
Updating oak cabinets with paint is one of the most cost-effective ways to modernize your kitchen. While oak wood is strong and attractive, the color can sometimes look old-fashioned, especially with sunlight or age. Painting your cabinets offers several benefits:
- Cost Savings: Replacing cabinets can cost thousands of dollars. Painting them is much more affordable, often costing less than 10% of a full replacement.
- Customization: You can choose any color that matches your style, from classic white to bold navy or soft gray.
- Increase Home Value: A fresh, modern kitchen is attractive to buyers and can raise your home’s resale value.
- Sustainability: By painting, you keep your existing cabinets out of landfills and reduce waste.
Many professional designers now recommend painted cabinets for a clean, contemporary look. With the right process, your oak cabinets can look like new and last for many more years.
Understanding Oak Cabinets: Challenges And Opportunities
Before starting, it’s important to understand what makes oak cabinets unique. Oak is a hardwood known for its visible grain pattern. This grain is deeper and more pronounced than woods like maple or birch. Here’s what this means for painting:
- Deep Grain: Paint can settle into the grain, making it visible after painting unless you take steps to fill or minimize it.
- Hard Finish: Oak cabinets often have a tough, glossy finish that resists paint. Proper cleaning and sanding are essential.
- Durability: Oak is strong, so your cabinets will last with proper care.
A common mistake is to skip the extra prep that oak requires. Rushing the process can result in paint peeling, grain showing, or uneven color. Taking time to prep pays off with a smooth, flawless result.
Tools And Materials You Will Need
Gather all your supplies before starting. Having everything ready helps you work more efficiently and avoid delays. Here’s what you’ll need:
- Screwdriver (for removing doors and hardware)
- Degreaser or TSP (Trisodium Phosphate) for cleaning
- Sponge and bucket
- Painter’s tape
- Drop cloths or plastic sheets
- 120- and 220-grit sandpaper
- Sanding block or electric sander
- Vacuum and tack cloth
- Wood filler or grain filler
- Putty knife
- High-quality primer (preferably shellac- or oil-based for oak)
- Quality paint (acrylic, alkyd, or enamel; semi-gloss or satin finish is best for kitchens)
- Paintbrushes (angled brush for corners)
- Foam rollers (for smooth finish)
- Paint trays
- New hardware (optional)
Estimated Costs
Here’s a comparison of the average costs for painting versus replacing oak cabinets.
| Project | Average Cost | Time Required |
|---|---|---|
| Painting Cabinets | $200 – $600 | 3-7 days |
| Replacing Cabinets | $4,000 – $12,000 | 2-3 weeks |
| Refacing Cabinets | $1,000 – $4,000 | 3-5 days |
Painting is clearly the most budget-friendly option for most homeowners.
Step 1: Prepare Your Kitchen
Preparation is the key to a successful cabinet painting project. Rushing this step often leads to problems later. Follow these steps:
- Empty Cabinets and Clear Surfaces: Remove all dishes, food, and items from your cabinets and counters.
- Protect Surrounding Areas: Lay drop cloths on the floor. Use painter’s tape to protect walls, ceilings, and backsplashes.
- Remove Cabinet Doors and Hardware: Use a screwdriver to take off all doors, drawers, and hardware (hinges, handles, knobs). Label each piece with tape so you know where it belongs.
- Set Up a Work Area: Find a space to paint the doors and drawers, like a garage or basement. Lay out drop cloths and use small blocks to raise each door off the floor for easier painting.
Pro Tip: Number Your Doors
Use a small piece of masking tape to number each door and its matching spot on the cabinet. This makes it much easier to reinstall them in the right place.
Step 2: Clean And Degrease All Surfaces
Oak cabinets, especially in kitchens, collect grease and grime over time. Paint will not stick to dirty surfaces. Here’s how to clean them:
- Mix water with a strong degreaser or TSP (follow product instructions).
- Use a sponge to scrub all cabinet surfaces, including doors, frames, and sides.
- Rinse with clean water and allow to dry fully.
Do not skip this step. Even small amounts of grease or dust can cause paint to peel or bubble.
Step 3: Sand And Smooth The Oak Grain
Sanding is critical for oak cabinets because it does two things:
- It roughens the glossy surface so primer and paint can stick.
- It helps minimize the deep grain lines of oak.
- Start with 120-grit sandpaper to remove the old finish and rough up the surface.
- For very deep grain, use wood filler or grain filler. Spread a thin layer over the surface with a putty knife, let it dry, then sand smooth.
- Finish with 220-grit sandpaper for a smooth surface.
Always sand in the direction of the wood grain. After sanding, vacuum all dust and wipe every surface with a tack cloth.
Filling The Grain
If you want a glass-smooth, modern look, use a grain filler. This is a special product that fills the pores of oak, making the surface flat. Not all homeowners mind the look of some grain, but for a flawless finish, filling is worth the effort.
Step 4: Prime Cabinets For Best Results
A good primer is essential for oak cabinets. It blocks stains, seals the wood, and provides a perfect surface for paint. Oak can bleed tannins (natural wood oils), so choose a high-quality primer:
- Shellac-based primers block stains and seal in wood tannins best.
- Oil-based primers are also effective, especially for kitchens.
Apply one or two coats of primer with a brush or roller. Allow each coat to dry completely before the next. Sand lightly with 220-grit sandpaper after priming for an extra-smooth finish.
Primer Comparison Table
Here’s how the most common primers for oak cabinets compare:
| Primer Type | Blocks Tannins | Odor Level | Dry Time |
|---|---|---|---|
| Shellac-Based | Excellent | High | Quick (45 min) |
| Oil-Based | Very Good | Medium | 2-4 hours |
| Water-Based | Fair | Low | 1 hour |
For oak, shellac-based is usually best, but oil-based is a good alternative if odors are a concern.
Step 5: Choose The Right Paint
Not all paints are created equal, especially for kitchen cabinets. You need a paint that is durable, easy to clean, and resistant to moisture and stains. Here are your best options:
- Acrylic enamel: Water-based, dries hard, and is easy to clean.
- Alkyd paint: Mimics oil-based paint but is easier to use and less smelly.
- Oil-based paint: Very durable but takes longer to dry and has a strong odor.
Pick a semi-gloss or satin finish. These finishes are easier to wipe clean and resist kitchen messes. Flat or matte paints are not recommended for cabinets because they show stains and wear.
Step 6: Paint Your Cabinets
Now you’re ready for the fun part—painting. Here’s how to do it right:
- Stir the paint well to mix any settled pigment.
- Start with cabinet frames. Use an angled brush for corners and a foam roller for flat surfaces.
- Paint doors and drawers flat, starting with the back, letting them dry, then flipping to paint the front.
- Apply two or three thin coats. Allow each coat to dry fully before the next.
- Sand lightly between coats with 220-grit sandpaper for a flawless finish.
Thin coats are better than one thick coat. Thick paint can drip, run, or dry unevenly.
How Long Does It Take?
Depending on the size of your kitchen, allow at least 3–7 days for the entire process. Most of the time is spent waiting for paint and primer to dry.
Step 7: Let The Paint Cure
Paint dries to the touch in a few hours, but it takes time to fully harden or “cure.” Curing can take up to 2–3 weeks. During this time:
- Avoid slamming doors or pulling on hardware too hard.
- Do not place heavy objects inside cabinets yet.
- Clean gently if needed.
Be patient—fully cured paint is much more durable and resistant to chips and scratches.
Step 8: Reinstall Doors, Drawers, And Hardware
Once the paint is fully dry and cured, it’s time to put your kitchen back together:
- Remove all painter’s tape from walls and floors.
- Reinstall all hardware (or update with new handles and knobs for a fresh look).
- Hang doors and slide in drawers. Use your numbered labels to match each piece to its original spot.
Check for any touch-ups needed. Use a small brush for tiny nicks or missed spots.
Step 9: Clean Up And Maintain Your Painted Cabinets
Proper care will keep your painted cabinets looking good for years:
- Use a soft cloth or sponge and mild soap for cleaning.
- Avoid harsh chemicals or abrasive pads that can scratch the paint.
- Wipe up spills quickly.
- Check hinges and hardware occasionally and tighten if needed.
Small chips or scratches can be touched up with leftover paint.
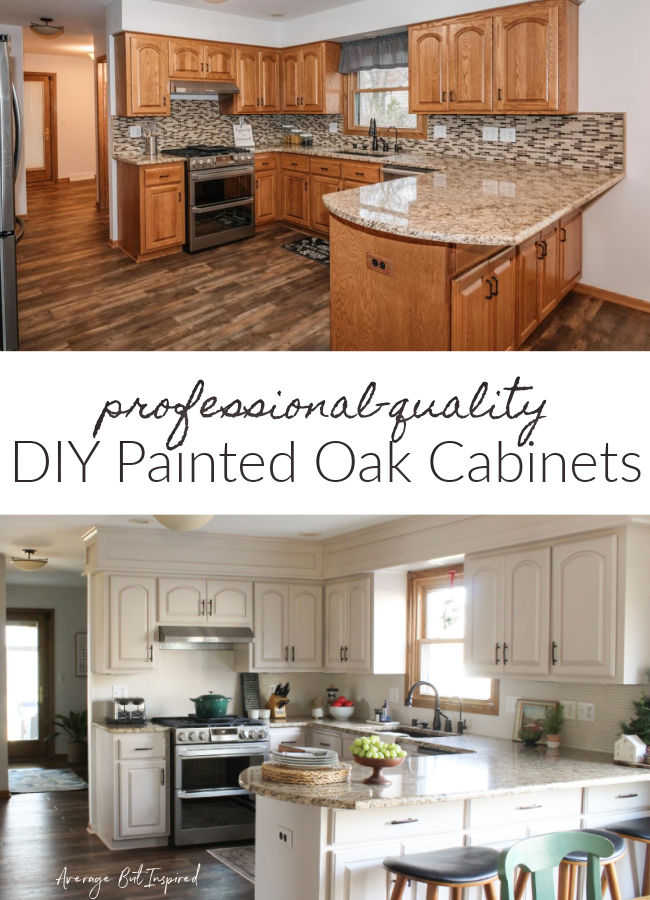
Credit: averageinspired.com
Common Mistakes To Avoid
Painting oak kitchen cabinets is a big project, and beginners often make mistakes that cause frustration. Here are the most common:
- Skipping cleaning: Any grease left on the surface will make paint peel.
- Not sanding enough: Without sanding, paint may not stick and the grain will show.
- Using the wrong primer: Always use a stain-blocking primer for oak.
- Rushing coats: Allow plenty of drying time between coats.
- Using cheap brushes/rollers: Low-quality tools can leave streaks and hairs in your paint.
- Painting in high humidity: Moisture can cause paint to dry slowly or unevenly.
- Not labeling doors/drawers: It’s easy to get pieces mixed up when reinstalling.
Even many DIYers with painting experience forget how different oak is from other woods. The deep grain and tough finish require more prep, but the result is worth it.
Advanced Tips For A Professional Finish
If you want your oak cabinets to look like they were painted by a pro, try these advanced tips:
- Spray painting: Renting a paint sprayer gives the smoothest finish, especially on doors and drawers. Practice on scrap wood first.
- Add a topcoat: After the final paint layer, apply a water-based polyurethane for extra durability and shine.
- Upgrade hardware: Modern handles and knobs can make old cabinets feel brand new.
- Soft close hinges: Install soft-close hinges for a luxury feel and to protect your new finish from slamming.
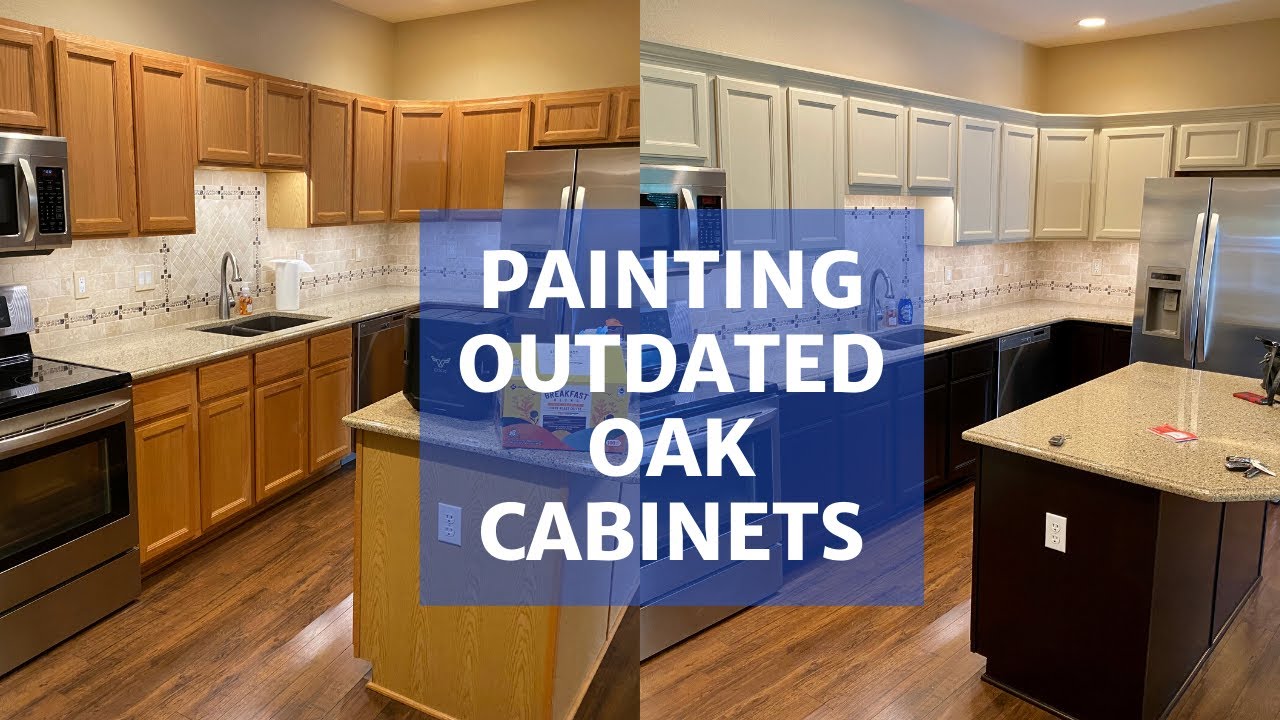
Credit: www.youtube.com
Color Ideas For Painted Oak Cabinets
Choosing the right color makes a big difference. Here are popular choices that work well with oak:
- Classic white: Makes the kitchen feel bright, clean, and modern.
- Soft gray: A trendy neutral that pairs with many styles.
- Navy blue: Bold but sophisticated, especially with brass hardware.
- Charcoal: Deep, dramatic, and hides stains well.
- Green tones: Sage or forest green adds warmth and uniqueness.
If possible, test a few sample colors on hidden cabinet areas before committing.
Oak Grain: Hide It Or Highlight It?
Some homeowners want to completely hide the oak grain for a smooth, modern look. Others prefer to let some of the wood’s natural texture show through. Here’s how your options compare:
| Method | Grain Visibility | Time/Work | Look |
|---|---|---|---|
| No grain filler | Visible | Less | Traditional, rustic |
| Grain filler used | Minimal | More | Modern, smooth |
| Heavy sanding + filler | Almost none | Most | Contemporary, seamless |
Decide what look you want before starting, as filling the grain is more work but gives a very different final result.
Is Painting Oak Cabinets Right For You?
Painting oak kitchen cabinets is not for everyone. If your cabinets are in poor condition (warped, heavily damaged, or waterlogged), replacement may be better. But for most kitchens, painting offers a dramatic transformation at a fraction of the cost. The process takes patience and careful work, but the results can look just as good as new cabinets.
If you are unsure about doing it yourself, you can hire a professional painter. But with the steps in this guide, most DIYers can achieve excellent results with some time and effort.
For more background and expert advice, you can also check resources like this This Old House guide.
Frequently Asked Questions
How Long Does It Take To Paint Oak Kitchen Cabinets?
The total project usually takes 3–7 days for the average kitchen. Most of this time is spent waiting for primer and paint to dry. If you use grain filler or spray painting, it may take a bit longer.
Will The Oak Grain Show After Painting?
If you do not use grain filler, some wood grain will show, even after several coats of paint. Using a grain filler and sanding thoroughly can make the surface smooth, almost like factory-finished cabinets.
What Is The Best Paint For Oak Cabinets?
High-quality acrylic enamel or alkyd paint works best for kitchen cabinets. Choose a semi-gloss or satin finish for easy cleaning and durability.
Can I Paint Over Oak Cabinets Without Sanding?
Sanding is highly recommended for oak cabinets. It helps paint stick and reduces grain visibility. Skipping sanding may lead to peeling paint and a rough finish.
How Do I Keep Painted Cabinets From Chipping?
Let the paint cure fully (2–3 weeks) before heavy use. Use a good primer and apply thin, even coats of paint. Avoid slamming doors, and clean with gentle soap and water.
Transforming your oak kitchen cabinets with paint is a satisfying project that can give your kitchen a fresh, modern look. With patience and the right steps, you can achieve a finish that rivals professional work—and enjoy your new space for years to come.
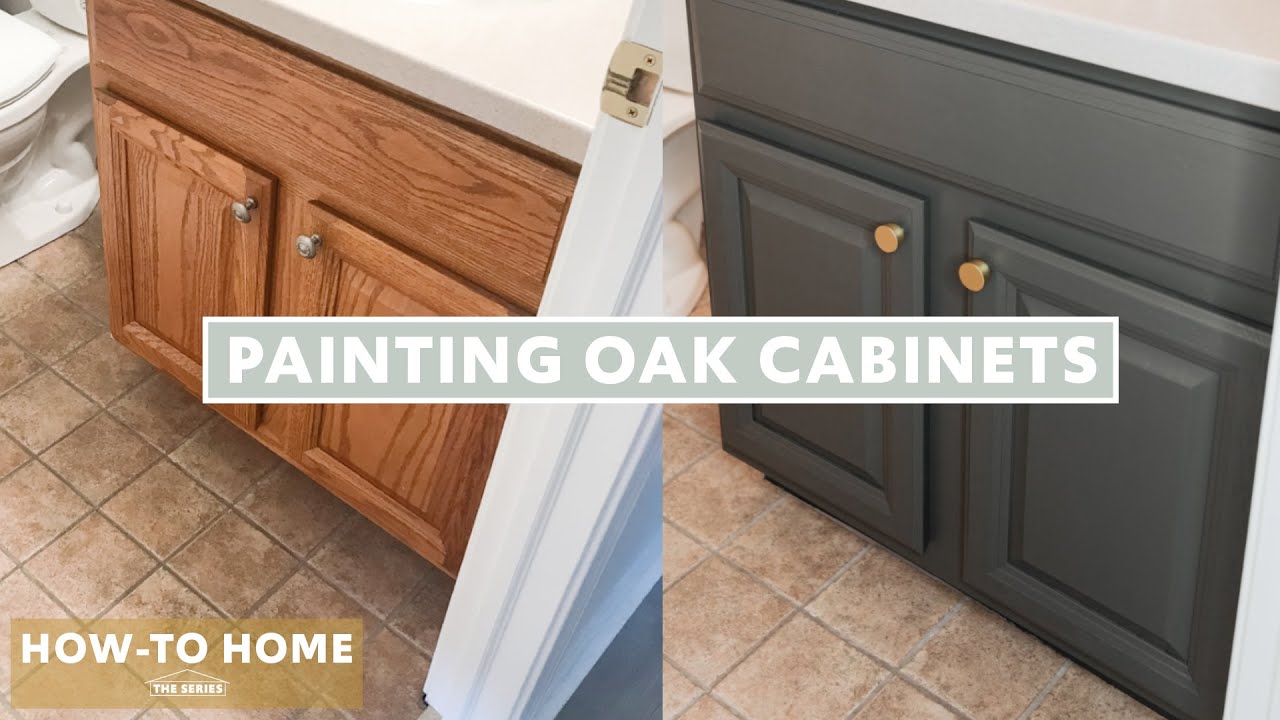
Credit: www.youtube.com