
Keeping your painted cabinets looking fresh and clean is not always easy. In kitchens, bathrooms, or laundry rooms, cabinets can face daily splashes, greasy hands, and bumps. Over time, this can lead to fading, scratches, or even peeling paint. Many homeowners find their cabinets lose their shine much faster than expected. The good news is: you can make painted cabinets last for years with the right care and habits. By learning how to protect painted cabinets, you not only keep your home beautiful, but also save money on repairs or repainting.
This guide will show you step-by-step how to care for painted cabinets. You will learn what cleaning products are safe, which habits help most, and even how to fix small problems before they get worse. You do not need special skills—just a little knowledge and regular attention.
Let’s explore the key methods that will keep your painted cabinets bright, smooth, and strong for a long time.
Understanding Painted Cabinets: Materials And Common Problems
Before you start protecting your cabinets, it helps to know what you are working with. Painted cabinets are usually made from wood, MDF (medium-density fiberboard), or plywood. The paint can be latex, oil-based, or even specialty enamel. Each type has its own strengths and weaknesses, but all need protection from damage.
The most common problems with painted cabinets are:
- Scratches and chips from daily use or cleaning with rough materials
- Moisture damage from water, steam, or cleaning products
- Stains from food, oil, or dirty hands
- Fading or yellowing from sunlight or heat
- Peeling or bubbling paint from poor adhesion or water exposure
Understanding these risks helps you focus on the best protection methods for your cabinets.
Daily Habits That Extend Paint Life
How you treat your cabinets every day makes a big difference. Small actions can prevent most damage before it starts.
1. Always Wipe Spills Immediately
Moisture is one of the biggest enemies of painted surfaces. When you spill water, coffee, sauces, or any liquid, wipe it up right away with a soft, dry cloth. Leaving spills allows water to soak into seams and edges, which can cause the paint to bubble or peel.
2. Use Gentle Touch
Avoid slamming doors and drawers. Gentle closing prevents chipping at corners and edges. Teach children and other family members to open and close cabinets softly.
3. Keep Hands Clean
Oily or dirty hands can leave marks and attract dust. Get in the habit of cleaning your hands before cooking or touching cabinets. This simple step reduces stains and makes cleaning easier.
4. Open Windows When Cooking
Heat and steam from cooking can damage paint over time. Use your kitchen fan or open a window to reduce humidity and heat around your cabinets.
5. Avoid Hanging Wet Towels On Cabinet Doors
Many people hang dish towels on cabinet handles. This keeps the area tidy, but wet towels can cause moisture damage, especially at the bottom of the door. Use a hook or a towel bar away from cabinets instead.
Choosing The Right Cleaning Products
Not all cleaning products are safe for painted cabinets. Some can strip away paint or leave a dull film.
What To Use
- Mild dish soap mixed with warm water is safe for most painted cabinets.
- Soft microfiber cloths or sponges prevent scratching.
- White vinegar (diluted) can help with greasy spots, but always test a small area first.
- Specialty cabinet cleaners (labeled safe for painted surfaces) are also a good choice.
What To Avoid
- Abrasive scrubbers like steel wool or rough sponges
- Harsh chemicals like bleach, ammonia, or strong degreasers
- Spray polishes with silicone, which can build up and cause yellowing
How To Clean Safely
- Mix a few drops of mild dish soap in a bowl of warm water.
- Dip a soft cloth into the solution and wring it out well.
- Wipe the cabinet surfaces gently, following the direction of the wood grain if visible.
- Rinse the cloth in clean water, wring out, and wipe off any soap.
- Dry immediately with a clean, dry towel.
Example Cleaning Routine
Many homeowners clean their cabinets only when they look dirty. But a quick wipe once a week can prevent buildup and stains. Set a reminder on your phone or calendar to make this habit stick.
Protecting High-traffic Areas
Certain spots on your cabinets see more use and are more likely to get damaged.
Cabinet Handles And Edges
The area around handles collects oils, dirt, and moisture. Wipe these spots more often, and check for early signs of wear.
Sink Cabinets
Doors and drawers near sinks are at high risk from water splashes. Keep a close eye on the edges and bottoms. If you see the paint bubbling or peeling, dry it quickly and consider adding a water barrier inside the door.
Trash Pull-outs And Lower Drawers
These areas get touched most often and may get scratched by shoes or cleaning tools. Place a soft mat under your trash can to absorb spills and protect the cabinet finish.
Using Protective Barriers And Hardware
Adding a few simple tools can prevent a lot of damage.
Cabinet Door Bumpers
Soft bumpers (small rubber pads) stop doors from banging against the frame. They are cheap, easy to install, and can prevent paint chips and cracks.
Drawer Liners
Use non-slip liners inside drawers and shelves. These protect the paint from scratches caused by pots, pans, and utensils.
Edge Guards
For families with small children, flexible edge guards can be placed on lower cabinet corners. This reduces chips from toys or vacuum cleaners.
Under-sink Mats
Moisture is a big problem under sinks. Special mats or trays catch leaks and keep the baseboard paint safe. Choose a mat that fits your cabinet size.
Soft-close Hinges
Replacing old hinges with soft-close models helps stop slamming, which is a common cause of cracks at door corners.
Managing Sunlight And Heat
Sun and heat can cause paint to fade, yellow, or crack. Kitchens often get a lot of both.
Install Window Coverings
Use blinds or curtains to block direct sunlight during the brightest hours of the day. This is especially important for cabinets near windows or glass doors.
Move Heat-producing Appliances
Try to keep toasters, coffee makers, and other hot appliances away from painted cabinet surfaces. Heat can make paint soft and more likely to peel.
Monitor Oven And Stove Areas
Cabinets next to ovens or stoves are at high risk. Make sure your range hood is working well and always use it when cooking.
Regular Maintenance: Inspections And Quick Fixes
Catching small problems early keeps painted cabinets looking new.
Inspect Cabinets Monthly
Look for:
- Scratches or chips
- Bubbling or peeling paint
- Water stains or discoloration
If you find any problems, act fast.
Touching Up Paint
Most hardware stores sell small cans or pens for touch-up paint. Keep the original color information. Clean the area, let it dry, then use a fine brush to fill in chips or scratches. Let it dry completely before using the cabinet.
Tighten Hinges And Handles
Loose hardware can cause doors to hang unevenly or rub against frames, damaging the paint. Use a screwdriver to check and tighten all screws every few months.
Reseal Gaps
If you see cracks or gaps at the edges, use a matching caulk to seal them. This keeps water out and stops further damage.
Deep Cleaning And Seasonal Care
Even with good habits, painted cabinets need a deeper clean a few times a year.
Steps For A Deep Clean
- Remove all items from cabinets and drawers.
- Dust the inside and outside with a microfiber cloth.
- Use a mild soap and water solution to wipe all surfaces.
- Dry with a soft towel.
- Inspect for damage and make any small repairs.
Extra Tips For Kitchen Cabinets
- Remove grease with a mixture of vinegar and water (test first).
- Use a soft toothbrush to clean around hinges and handles.
- Always dry surfaces completely after cleaning.
Bathroom And Laundry Room Cabinets
Humidity is higher in these rooms. Run an exhaust fan during and after showers or laundry to reduce moisture. Check for mold or mildew on the cabinet surface, especially around sinks and faucets.
Comparing Cabinet Paint Types And Their Care Needs
Different paint types have their own strengths and weaknesses. Below is a comparison of common cabinet paints.
| Paint Type | Durability | Ease of Cleaning | Water Resistance | Common Issues |
|---|---|---|---|---|
| Latex | Good | Easy | Moderate | May chip if scratched |
| Oil-Based | Very Good | Moderate | Good | Yellows over time |
| Enamel | Excellent | Easy | High | Harder to touch up |
Knowing your cabinet paint type helps you choose the right cleaning and protection methods.
The Role Of Humidity And Temperature
Both humidity and temperature play a big role in how long your painted cabinets last.
- High humidity can cause paint to swell, bubble, or peel.
- Dry air can make paint crack and wood shrink.
- Large temperature swings can stress paint and wood joints.
How To Control Humidity And Temperature
- Use a dehumidifier in damp rooms, especially basements and laundry areas.
- Keep rooms at a steady temperature if possible.
- Use exhaust fans in kitchens and bathrooms to remove steam and moisture.
- Avoid placing cabinets directly above heaters or close to exterior doors.
Best Practices For Long-term Protection
Below are some advanced tips many homeowners overlook.
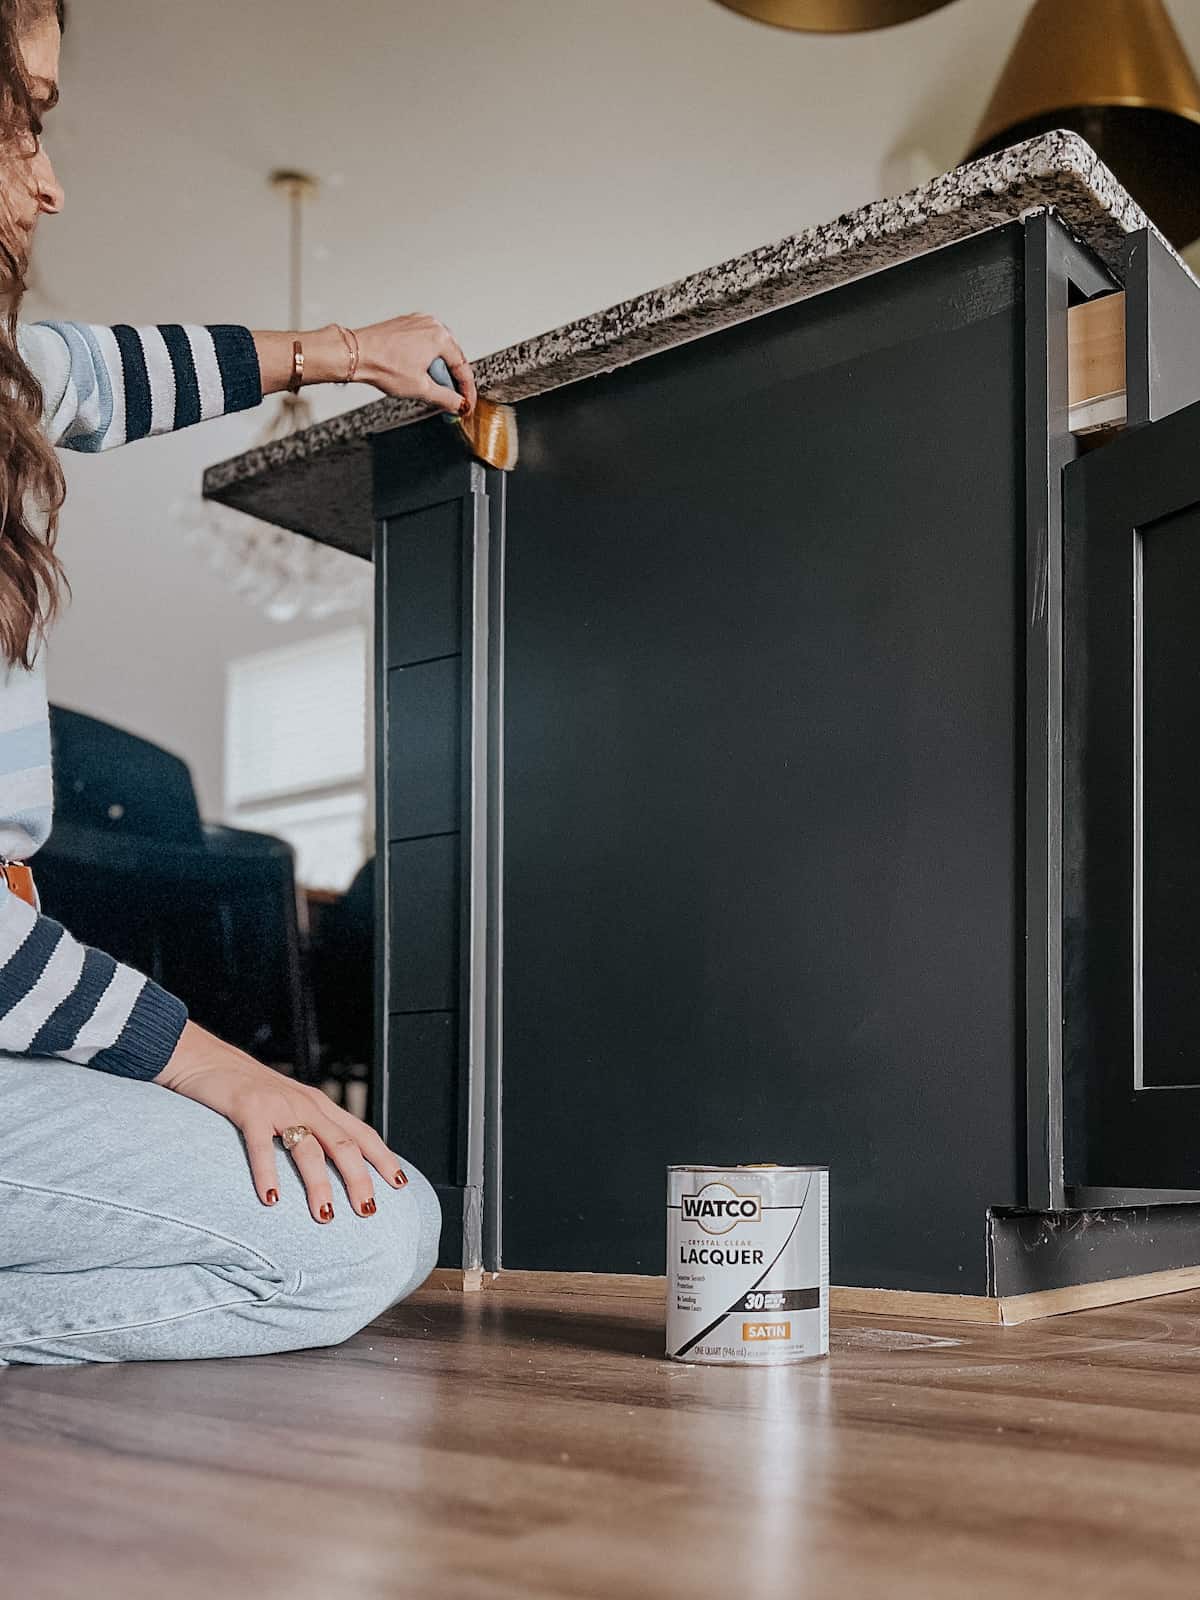
Reapply A Protective Topcoat
Some painted cabinets have a clear topcoat (like polyurethane) for extra protection. If yours do not, consider applying one every few years. This adds a hard layer over the paint and makes cleaning easier. Choose a water-based topcoat for latex paints and an oil-based topcoat for oil paints.
Use Cabinet Door Stops
Install door stops to prevent doors from opening too far and banging into walls or appliances. This reduces stress on hinges and paint.
Avoid Overloading Shelves
Heavy items can make shelves bow and put extra stress on joints, leading to cracks in the paint. Follow the cabinet maker’s weight limit guidelines.
Organize Storage
Use baskets, bins, or shelf risers to keep items from rubbing against painted surfaces. This also makes cleaning easier.
Plan For Pets
If you have pets, keep their food and water bowls away from cabinets. Spills and splashes are common sources of paint damage.
Comparing Common Cabinet Protection Mistakes
Many people try to protect their cabinets, but some methods do more harm than good. See the comparison below.
| Common Mistake | Why It’s Harmful | Better Alternative |
|---|---|---|
| Using wax-based polish | Builds up, attracts dust, yellows over time | Use a damp cloth or specialty cabinet cleaner |
| Scrubbing with abrasive pads | Scratches paint, removes finish | Use microfiber cloths or soft sponges |
| Ignoring small chips | Allows water to get under paint, causes peeling | Touch up chips immediately |
When To Call A Professional
Not all cabinet problems can be fixed with DIY methods. If you see large areas of peeling paint, deep water damage, or mold, it’s time to call a cabinet professional or painter. Trying to fix major issues yourself can make them worse and may void your cabinet warranty.
Real-life Example: Protecting Cabinets In A Busy Family Kitchen
Consider the example of a family with young children and pets. Their painted kitchen cabinets were getting chipped at the corners and sticky around handles within two years of installation. After talking with a professional, they made a few changes:
- Added soft-close hinges and door bumpers
- Started wiping spills right away
- Used baskets and liners inside drawers
- Touched up small chips monthly
After one year, the cabinets still looked almost new. The family spent less than $50 on supplies and saved hundreds in repainting costs.
Credit: www.loveandrenovations.com
How Long Do Painted Cabinets Last With Proper Care?
With regular cleaning, quick repairs, and good habits, painted cabinets can last 10 to 15 years before needing major work. Some high-quality paints and careful owners report cabinets looking great even after 20 years. The key is consistency—protect your cabinets every day, not just when you see problems.
Cost Comparison: Repainting Vs. Protecting
Protecting your cabinets is much cheaper than repainting. See the data below.
| Action | Average Cost (USD) | Frequency |
|---|---|---|
| Weekly gentle cleaning | Under $1 (for soap, water, cloth) | 52 times/year |
| Touch-up paint | $5-$20 (once per year) | As needed |
| Full repainting | $1,000-$3,000 | Every 10-15 years |
A little prevention goes a long way in saving money and time.

Credit: www.lovelyetc.com
Extra Insights And Tips Most People Miss
- Cabinet interiors matter too: Don’t forget to clean and protect the inside surfaces. Water or grease inside can cause paint to peel from the back out.
- Seasonal humidity changes: In dry winters, wood and paint shrink. In humid summers, they expand. Watch for cracks or sticking doors and adjust room humidity if needed.
- Label your paint color and finish: Keep a note or label inside a cabinet with your paint brand, color, and finish. This makes touch-ups much easier years later.
- Children’s art and stickers: If kids put stickers or tape on cabinet paint, remove them gently with warm soapy water and a soft cloth. Never scrape with a knife or hard object.
Frequently Asked Questions
How Often Should I Clean My Painted Cabinets?
Wipe your cabinets with a soft, damp cloth weekly to remove dust and prevent stains. For kitchen cabinets, clean high-traffic areas like handles and edges more often, especially if cooking frequently.
What Should I Do If My Cabinet Paint Starts Peeling?
First, dry the area and stop any water source. Scrape away loose paint gently, sand the area smooth, and touch up with matching paint. For large peeling areas, it’s best to call a professional.
Are Magic Erasers Safe For Painted Cabinets?
Magic erasers are slightly abrasive and can dull or scratch painted surfaces. Use them only on stubborn stains and always test in a hidden area first.
Can I Use Bleach Or Strong Disinfectants On My Cabinets?
No, harsh chemicals like bleach or ammonia can damage paint and make it peel or fade. Stick to mild soap and water or cleaners made for painted surfaces.
Where Can I Find More Tips About Cabinet Care?
You can find more detailed tips and expert advice at This Old House.
Taking care of your painted cabinets is simple but requires regular attention. With the right products, habits, and tools, your cabinets can stay bright, smooth, and beautiful for many years. Start today, and you’ll enjoy the benefits every time you walk into your kitchen or bath.

Credit: www.youtube.com