
Putting up shelves without brackets is something many people want to do. Maybe you want a cleaner look, or your walls can’t handle heavy bracket screws. Or maybe you just want to try a new style. The good news is, you have many options to hang shelves with no visible brackets.
Some are simple enough for first-timers, while others need a bit more skill. This guide gives you everything you need, from tools and materials to step-by-step methods, real-life tips, and common mistakes to avoid.
By the end, you’ll know exactly how to choose the right shelf style, install it safely, and get a professional, floating effect. We’ll also cover non-obvious details like weight limits, wall types, and how to keep shelves level for years.
Even if you’ve never used a drill before, you’ll find clear explanations for every step.
Why Put Up Shelves Without Brackets?
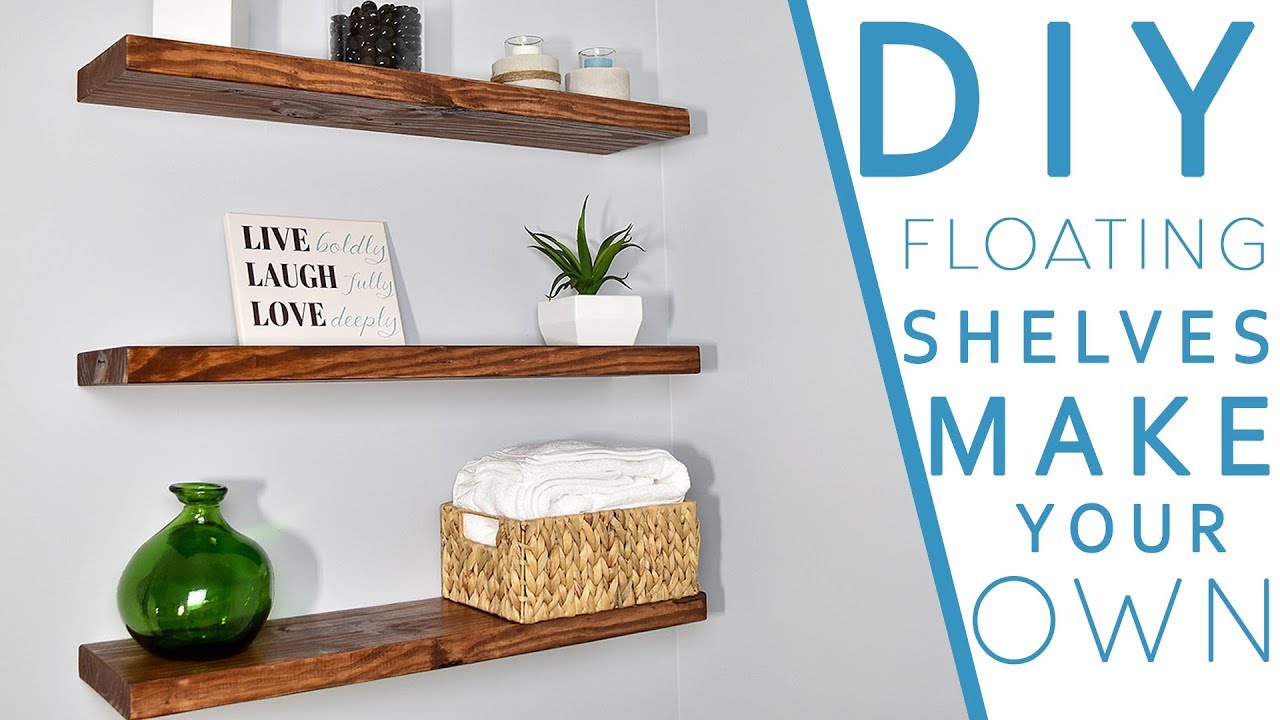
Shelves without visible brackets are called floating shelves. They look modern and clean because you don’t see any supports. This style is very popular in kitchens, living rooms, and offices. But looks aren’t the only reason people like them. Here are the main benefits:
- Space-saving: No brackets means you can use all the shelf space.
- Easy to clean: Dust won’t collect around brackets.
- Flexible style: Floating shelves match many designs—from classic to modern.
- Safer for kids: No sharp bracket edges to bump into.
- Great for small rooms: The “floating” look makes walls feel less crowded.
There are some challenges too. You need to install them carefully, or they may not hold as much weight as bracketed shelves. Still, with the right method, floating shelves can be strong and beautiful.
How Floating Shelves Work
Floating shelves use hidden supports inside the shelf. Instead of hanging from below, they are fixed into the wall and the shelf slides over them. Some use a metal rod or tube. Others use a wooden cleat (a thin piece of wood that fits into a groove inside the shelf). If you buy a ready-made floating shelf, it usually comes with its own hidden mounting hardware. But you can also make your own from scratch.
There are several systems, including:
- Floating shelf brackets (hidden inside the shelf)
- French cleat systems
- Dowel supports
- Keyhole hangers
- Heavy-duty adhesives (for light loads or special walls)
Each one works best for different shelf sizes, materials, and wall types.
Planning Your Shelf Project
Good planning is the key to a strong and safe shelf. Don’t skip this step! Here’s what you need to consider:
1. What Will You Put On The Shelf?
- Light items: Photos, small decor, lightweight books
- Medium items: Stacked books, dishes, electronics
- Heavy items: Tools, kitchen appliances, lots of books
The heavier the load, the stronger your supports need to be. Never guess—overloading is the #1 reason shelves fail.
2. Wall Type
Not all walls are the same. The main types:
- Drywall (gypsum board)
- Plaster
- Masonry (brick, concrete)
- Wood paneling
Drywall is most common, but also weakest. You need to find studs (the wooden beams inside the wall) for strong support. Masonry walls can hold more, but you’ll need special tools.
3. Shelf Size And Thickness
- Length: Longer shelves need more support.
- Depth: Deeper shelves have more leverage and can pull away from the wall.
- Thickness: Thicker shelves are stronger but heavier.
For most home projects, shelves 24–48 inches long, 8–12 inches deep, and 1–2 inches thick work well.
4. Tools And Materials
You don’t need a workshop. A basic tool kit is enough for most methods:
- Drill and drill bits (masonry and wood types)
- Screwdriver
- Level
- Stud finder
- Tape measure
- Pencil
- Wall anchors (toggle bolts, if no stud)
- Heavy-duty screws
- Wood glue (if making your own)
- Shelf material (solid wood, plywood, or MDF)
Some methods need extra parts like dowels, cleats, or special brackets.
Main Methods To Put Up Shelves Without Brackets
There’s no single “right” way. Here are the most popular and reliable systems, with step-by-step instructions for each.
1. Floating Shelf With Internal Bracket
This is the most common floating shelf system. It uses a metal or wooden support hidden inside the shelf.
How It Works
- A strong metal rod or plate is attached to the wall (usually screwed into studs).
- The shelf has holes or a slot in the back.
- The shelf slides onto the rods, hiding the support.
Step-by-step Guide
- Mark the shelf position: Use a level and pencil to draw a straight line where you want the shelf.
- Find the studs: Use a stud finder. Mark their positions. You’ll need to attach the bracket to at least two studs for a safe hold.
- Drill the mounting holes: Hold the bracket against the wall, lined up with your marks. Drill pilot holes into the studs.
- Attach the bracket: Use heavy-duty screws (at least 2.5 inches long) to fix the bracket to the studs.
- Prepare the shelf: If you bought a ready-made shelf, it will have holes in the back. If not, drill matching holes or a slot.
- Slide the shelf onto the bracket: Push until it fits snugly against the wall. Check with a level.
- Secure the shelf: Some systems have small set screws or wood glue for extra grip.
Pro tip: If your wall doesn’t have studs in the right place, use heavy-duty wall anchors rated for at least 50 lbs each.
When To Use
- Shelves 2–4 feet long
- Medium to heavy loads
- Most wall types
Example
A 36-inch long, 10-inch deep oak shelf using a double-rod bracket can hold up to 100 pounds if fixed to studs.
2. French Cleat System
A French cleat is a strong, simple way to hang shelves and cabinets. It uses two angled strips—one attached to the wall, one to the shelf. The angles lock together for a strong hold.
How It Works
- Cut a wooden strip (the cleat) with a 45° angle.
- Attach one piece to the wall, angle facing up.
- Attach the matching piece to the shelf, angle facing down.
- The shelf “hooks” onto the wall cleat.
Step-by-step Guide
- Cut the cleat: Use a table saw or hand saw to cut a 1×3 or 1×4 board at a 45° angle.
- Attach the wall cleat: Screw one half to the wall, into studs if possible. Use a level.
- Attach the shelf cleat: Fix the other half to the back of the shelf, angle down.
- Hang the shelf: Lift and hook the shelf cleat onto the wall cleat.
- Secure if needed: Add short screws from below for extra security.
Non-obvious insight: You can use a French cleat to make shelves *removable*—just lift them off for painting or cleaning.
When To Use
- Long or heavy shelves
- Need for easy removal or adjustment
- Wood or plywood shelves
Example
French cleats are used to hang kitchen cabinets, which often weigh 200 pounds or more when filled.
3. Dowel Supports
This method uses wooden or metal dowels hidden inside the shelf.
How It Works
- Dowels stick out from the wall and fit into holes in the back of the shelf.
Step-by-step Guide
- Mark the shelf position and dowel locations: Make sure the dowels will hit at least one stud.
- Drill holes in the wall and shelf: Use a drill bit the same size as your dowel.
- Insert dowels: Fix them into the wall using glue or anchors.
- Slide shelf onto dowels: The shelf should fit snugly.
Pro tip: For long shelves, use at least 3 dowels spaced evenly.
When To Use
- Small, lightweight shelves (under 24 inches)
- Decorative displays
- Drywall, plaster, or masonry
Example
A 2-foot shelf with three 3/8-inch steel dowels can hold up to 40 pounds if at least one dowel hits a stud.
4. Keyhole Hangers
Keyhole hangers are metal plates with a keyhole-shaped slot. Screws go into the wall, and the shelf hangs on the screw heads.
How It Works
- Keyhole plates are set into the back of the shelf.
- Screws are fixed in the wall.
- Slide the shelf down to lock onto the screws.
Step-by-step Guide
- Install keyhole plates: Route a shallow pocket in the back of the shelf and screw the plate into place.
- Mark and install wall screws: Use a template to space screws at the right distance.
- Hang shelf: Slide keyholes over the screw heads and pull down to lock.
Non-obvious insight: Keyhole hangers are best for light shelves that won’t get bumped often. They can loosen over time if used for heavy items.
When To Use
- Lightweight, decorative shelves
- Short shelves under 24 inches
Example
Picture ledges and small trophy shelves often use this method.
5. Heavy-duty Adhesives
If you can’t drill (for example, in some apartments or on tile), construction adhesive is an option.
How It Works
- High-strength glue attaches the shelf to the wall.
- Best for very light loads and short shelves.
Step-by-step Guide
- Clean wall and shelf surfaces: Remove dust and grease.
- Apply adhesive: Use a zigzag pattern on the shelf back.
- Press shelf in place: Hold or prop it for at least 24 hours.
- Check for movement: Do not load shelf for 48 hours.
Pro tip: Only use this for shelves holding lightweight items, like picture frames.
When To Use
- Temporary shelves
- Tile, glass, or stone walls
- No drilling allowed
Example
Adhesive can hold a 12-inch shelf with 5 pounds of weight on tile.

Credit: plankandpillow.com
Comparison Of Methods
To help you choose, here’s a comparison of the main bracket-free shelving methods:
| Method | Best For | Max Shelf Length | Max Weight (Approx.) | Removable? |
|---|---|---|---|---|
| Internal Bracket | Medium/Heavy Loads | 48″ | 100 lbs | Sometimes |
| French Cleat | Heavy Loads, Cabinets | 72″+ | 200+ lbs | Yes |
| Dowel Supports | Small/Decorative | 24″ | 40 lbs | No |
| Keyhole Hanger | Very Light Loads | 24″ | 15 lbs | Yes |
| Adhesive | Very Light Loads, No Drilling | 18″ | 5 lbs | No |
Choosing The Right Shelf Material
The shelf itself matters as much as the mounting system. Here are the most common materials:
- Solid wood: Strong, looks good, but can warp if not sealed.
- Plywood: Stable and strong; easy to cut to size.
- MDF: Very smooth, but weaker for heavy loads.
- Particleboard: Cheap, but not recommended for floating shelves.
Pro tip: For shelves over 36 inches long, avoid MDF or particleboard unless you add strong internal supports.
Here’s a quick comparison:
| Material | Strength | Cost | Best Use |
|---|---|---|---|
| Solid Wood | High | $$$ | Heavy, long shelves |
| Plywood | Medium-High | $$ | Medium shelves |
| MDF | Low-Medium | $ | Short shelves, paint finish |
| Particleboard | Low | $ | Temporary, light shelves |
Step-by-step Example: Installing A 36-inch Floating Shelf With An Internal Bracket
Let’s walk through a typical floating shelf install.
Tools And Materials
- 36″ x 10″ x 1.5″ wood shelf (pre-drilled for bracket)
- Metal floating shelf bracket (double rod, 12″ rods)
- Drill and bits
- Stud finder
- Level
- Tape measure
- Pencil
- 2.5″ wood screws
Steps
- Mark the height and position for the shelf on the wall using the level.
- Find the studs with the stud finder. Mark where the bracket will align with at least two studs.
- Hold the bracket in place and mark the mounting holes on the wall.
- Drill pilot holes into the studs.
- Screw the bracket to the wall with long wood screws. Check it’s level.
- Line up the shelf and slide it onto the bracket rods.
- Secure with set screws (if your shelf has them) or a little wood glue for extra holding power.
- Check the level again. Adjust if needed before the glue dries.
- Wait at least 1 hour before loading the shelf.
Example: This shelf can safely hold 75–100 pounds if installed into studs.
Dealing With Common Wall Types
Every wall is a bit different. Here’s how to handle the most common types:
Drywall Over Studs
- Always try to hit at least one stud per shelf.
- If you can’t, use toggle bolts or heavy-duty anchors rated for 50+ lbs.
Plaster Walls
- Drill slowly to avoid cracks.
- Use longer screws to reach the wood lath behind the plaster.
Masonry (brick Or Concrete)
- Use a hammer drill and masonry bit.
- Insert plastic or lead anchors before screwing in shelf supports.
Tile Walls
- Use a glass/tile drill bit.
- Drill slowly with no hammer action.
- Use strong adhesive for very light shelves if you can’t drill at all.
Keeping Shelves Level And Secure
A shelf that starts level can sag or tilt over time if installed wrong. Here’s how to avoid that:
- Use a long level for shelves over 2 feet.
- Check for wall bowing—walls aren’t always perfectly flat.
- Add shims (thin wedges) between the shelf and wall if needed.
- Tighten set screws if your system has them.
- Check for movement every 3–6 months, especially if you add weight.
Non-obvious insight: Humidity changes can make wooden shelves expand or shrink. Leave a tiny gap at the wall if your climate changes a lot.
Mistakes To Avoid
- Skipping the studs: Drywall alone can’t hold much weight.
- Using the wrong anchors: Light-duty plastic anchors can pull out.
- Overloading the shelf: Know your limits—don’t guess.
- Not checking for level: Even a small tilt is very visible.
- Poor shelf material: Cheap particleboard can break without warning.
- Ignoring wall damage: Fill cracks or holes before installing.
- Not pre-drilling: For hard woods, always drill pilot holes to avoid splitting.
Credit: www.youtube.com
Advanced Tips For Extra-strong Shelves
- Double up the supports: Use two methods together (e.g., dowels and a cleat) for heavy loads.
- Reinforce the shelf: Add a “torsion box” (a hollow, framed core) for long shelves.
- Anchor to more studs: The more studs you hit, the stronger the shelf.
- Hidden steel plates: For ultra-thin shelves, use a laser-cut steel plate inside.
- Finish the shelf edges: Use edge banding or a router for a professional look.
Decorating And Styling Floating Shelves
Once your shelves are up, you can use them for almost anything:
- Books and magazines
- Plants and vases
- Picture frames
- Kitchen dishes
- Bathroom toiletries
- Electronics (with cable holes cut in back)
Pro tip: Place heavier items close to the wall, lighter items at the front. This reduces the risk of tipping.
Maintenance And Longevity
Floating shelves need little care, but it’s wise to:
- Check for movement twice a year.
- Dust regularly to keep the look clean.
- Touch up paint or finish if you see wear.
- Re-tighten screws if the shelf feels loose.
Well-installed floating shelves can last for decades.
When Not To Use Bracket-free Shelves
There are times when a traditional bracket is a better choice:
- Very heavy loads (more than 100 lbs per shelf)
- Very deep shelves (over 14 inches)
- Unstable or soft wall materials
- Outdoor use (exposed to rain or sun)
For these cases, safety comes first.
Useful Resources
If you want more technical details or shelf hardware, see this Wikipedia page on shelving.
Frequently Asked Questions
How Much Weight Can A Floating Shelf Hold Without Brackets?
It depends on the installation method, wall type, and how well you anchor into the studs. A well-installed floating shelf with internal brackets can hold 75–100 pounds on drywall with studs. French cleats on masonry can hold much more. Always check the hardware’s weight rating.
Can I Put Up Floating Shelves On Plaster Walls?
Yes, but you need to be careful. Drill slowly to avoid cracking the plaster. Use long screws to reach the wood lath behind the plaster. Avoid heavy loads unless you’re sure the wall is solid.
Are Adhesive-mounted Shelves Safe?
Only for very light items (under 5 pounds). Adhesive shelves are good for renters or on surfaces you can’t drill, like tile or glass. Never use them for books, electronics, or anything valuable.
How Do I Keep My Shelves From Sagging?
Use a strong shelf material (solid wood or plywood). Make sure you have enough supports (at least two studs for longer shelves). Place heavy items close to the wall, not at the front edge. Don’t overload the shelf.
What If My Shelf Isn’t Level After Installing?
Remove the shelf and check if the bracket or cleat is level. You may need to add shims behind the supports or redrill the holes. Always check level before final tightening.
Putting up shelves without brackets is a smart way to get a modern, clean look. With good planning, the right method, and careful installation, you can enjoy strong and stylish shelves for years—no brackets needed.

Credit: www.youtube.com