
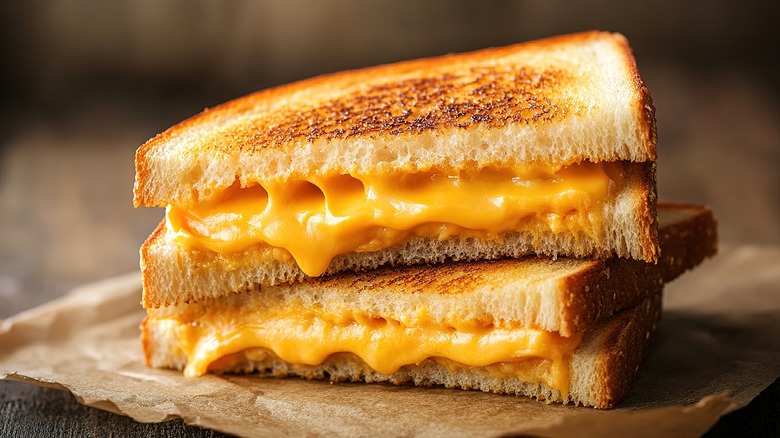
Grilled cheese sandwiches are a comfort food favorite in many parts of the world. That golden, crispy bread and gooey, melted cheese create a taste and texture that people of all ages love. But what if you have leftover grilled cheese or want to make several sandwiches ahead of time?
Reheating grilled cheese is not as simple as it sounds. If you do it wrong, you can end up with soggy bread or rubbery cheese. Done right, though, you can bring back much of that just-cooked magic.
This guide will show you everything you need to know about how to reheat grilled cheese. We’ll cover the best methods, compare them, and give you tips for the best results. You’ll learn how to avoid common mistakes and even discover some creative twists. Whether you have a classic American grilled cheese, a fancy sourdough melt, or a vegan version, you’ll find answers here. Let’s bring your leftover grilled cheese back to life!
Why Reheating Grilled Cheese Is Tricky
Grilled cheese sandwiches are special because of their texture. The contrast between crispy bread and soft, melted cheese is key. When reheating, it’s easy to lose these qualities. If you use a microwave, the bread can become soggy. Oven methods can dry out the sandwich if you’re not careful. Many people think any method is fine, but the wrong choice can ruin your sandwich.
Another challenge is the filling. Some grilled cheese sandwiches have extra ingredients like tomatoes, ham, or bacon. These fillings can release moisture when reheated, making the bread less crispy. Vegan cheeses can behave differently than dairy cheese, too. All these variables mean there’s no one-size-fits-all answer.
Even the temperature you start with matters. A sandwich straight from the fridge can reheat less evenly than one that’s been out for a few minutes. Cold cheese takes longer to melt, which can lead to overcooked bread. If you rush, you might end up with hot edges and a cold center.
Understanding these small factors can make a big difference in your results.
The Most Popular Reheating Methods
Let’s look at the most common ways people reheat grilled cheese. Each method has pros and cons. The best choice depends on your time, tools, and how much you care about getting the perfect texture.
1. Skillet (stovetop) Method
The skillet or pan method is the top choice for many grilled cheese fans. It gives you control over heat and helps restore the bread’s crispiness.
How to do it:
- Heat a nonstick skillet over medium-low heat.
- Add a small amount of butter or oil for extra crispiness (optional).
- Place the grilled cheese sandwich in the skillet.
- Cover with a lid to help the cheese melt evenly.
- Heat for 2-4 minutes, then flip. Heat the other side for 2-3 minutes.
- Check that the cheese inside is soft and gooey.
Pros: Brings back crispiness, easy to control.
Cons: Takes a bit of time, need to watch closely.
Practical tip: Don’t use high heat. It can burn the bread before the inside is hot.
This method also lets you add extra flavor. Some people like to sprinkle a little garlic powder or dried herbs on the bread before reheating. If you have leftover bacon fat or clarified butter, you can use a tiny amount instead of regular butter for a richer taste.
The skillet method works well for almost any bread, from classic white to hearty multigrain.
2. Oven Or Toaster Oven Method
The oven is perfect for reheating several sandwiches at once. It’s a reliable way to get even heating.
How to do it:
- Preheat your oven to 350°F (175°C).
- Place sandwiches on a baking sheet. You can use parchment paper for easy cleanup.
- Bake for 8-10 minutes, flipping halfway.
- For extra crisp, finish with 2 minutes under the broiler.
Pros: Great for batch reheating, evenly melts cheese.
Cons: Takes longer, can dry out sandwich if overheated.
Practical tip: Check after 6 minutes. Every oven is different, and thin sandwiches can heat faster.
Toaster ovens work similarly and are handy for small kitchens. If your oven has a convection setting, use it for a more even result. You can also slide a piece of foil under the bread to help with cleanup and prevent sticking.
For thick sandwiches or those with juicy fillings, the oven method prevents sogginess better than a microwave.
3. Air Fryer Method
Air fryers are popular for their speed and ability to crisp foods.
How to do it:
- Preheat air fryer to 350°F (175°C) if needed.
- Place sandwich in the basket (don’t overcrowd).
- Heat for 3-5 minutes, flipping once.
Pros: Fast, makes bread crispy.
Cons: Can dry out thin sandwiches, not all air fryer baskets fit large sandwiches.
Practical tip: Check after 3 minutes—air fryers heat quickly.
If your air fryer doesn’t have a basket large enough, you can cut the sandwich in half. Some people like to lightly brush the bread with oil before air frying for extra crunch. The air fryer method is surprisingly good for getting that “just grilled” feeling, but you need to check often to avoid burning.
4. Microwave Method
The microwave is the quickest, but it’s also risky for grilled cheese. The bread can turn soggy.
How to do it:
- Place sandwich on a paper towel or microwave-safe plate.
- Heat at 50% power for 30 seconds.
- Check, then heat in 10-second bursts if needed.
Pros: Very fast, no special tools.
Cons: Bread often gets soggy, cheese can become rubbery.
Practical tip: Use low power and short bursts. High power overheats the cheese.
If you don’t mind a little extra work, you can reheat in the microwave and then transfer the sandwich to a dry skillet for one minute per side. This brings back some crispiness. Microwaving is best if you’re in a hurry or don’t have access to a stove or oven.
5. Sandwich Press Or Panini Maker Method
A sandwich press is great if you want extra crunch.
How to do it:
- Preheat the press.
- Place sandwich inside, close gently.
- Heat for 2-4 minutes.
Pros: Extra crispy, even heating.
Cons: Not everyone owns a press, can flatten sandwich too much.
Practical tip: Don’t press down hard—light pressure is enough.
With this method, the sandwich will get those classic grill lines and a delicious crust. You can add a slice of tomato or a few spinach leaves before pressing for a quick upgrade. It’s also possible to line the press with parchment paper to keep cheese from sticking if it oozes out.

Credit: pantryandlarder.com
Comparing Reheating Methods
The best method depends on your priorities: speed, crispiness, or convenience. Here’s a side-by-side comparison:
| Method | Crispiness | Speed | Batch Size | Ease |
|---|---|---|---|---|
| Skillet | High | Medium | 1-2 | Easy |
| Oven | High | Slow | Many | Easy |
| Air Fryer | High | Fast | 2-4 | Easy |
| Microwave | Low | Very Fast | 1-2 | Very Easy |
| Sandwich Press | High | Fast | 1-2 | Easy |
Non-obvious insight: The skillet method and the oven are best for sandwiches with extra fillings, because they heat gently and don’t make the bread soggy. If you want to reheat more than two sandwiches at once, the oven is really the only choice that keeps quality high.
How To Choose The Best Method For Your Sandwich
Not all grilled cheese sandwiches are the same. Choosing the right reheating method depends on a few things:
Bread Type
- Thin white bread: Reheats quickly, but can dry out. Use skillet or oven.
- Sourdough or thick bread: Handles air fryer or oven well.
- Gluten-free bread: Can become tough; skillet is best.
If you’re using sweet or specialty breads (like brioche or rye), check often as sugar in bread can brown fast and burn easily.
Cheese Type
- Hard cheeses (cheddar, Swiss): Melt slower, so need a bit more time.
- Soft cheeses (mozzarella, brie): Melt fast, so watch closely.
If your cheese is shredded, it usually melts quicker and more evenly than sliced blocks.
Fillings
- Vegetables or tomatoes: Can release water. Oven or skillet is best.
- Meat or bacon: Any method works, but press or skillet keeps them crisp.
If you have a lot of fillings, consider opening the sandwich and patting the inside dry with a paper towel before reheating.
How Many Sandwiches
- One or two: Skillet, microwave, air fryer, or press.
- Several: Oven is most efficient.
For parties or family gatherings, a large baking sheet in the oven can reheat six or more sandwiches at once.
Step-by-step: Skillet Method In Detail
This is the classic way to reheat grilled cheese and brings the best balance of crispness and gooey cheese.
- Prepare your skillet: Use a non-stick or cast iron pan. Heat on medium-low. Add a teaspoon of butter or a light spray of oil for extra crunch.
- Place sandwich in skillet: If it’s cold from the fridge, let it sit at room temperature for 10 minutes first. This helps the cheese melt evenly.
- Cover with a lid: This traps heat and melts the cheese without burning the bread.
- Flip halfway: After 2-4 minutes, use a spatula to flip the sandwich. Heat the other side for 2-3 minutes.
- Check the inside: Press gently with a spatula. If the cheese is soft and the bread is golden, it’s ready.
Non-obvious insight: For extra flavor, add a pinch of garlic powder or a thin layer of mayo on the bread before reheating.
If you want an extra crispy crust, try using clarified butter (ghee) instead of regular butter. It has a higher smoke point, which allows for a crunchier finish without burning the bread.
Step-by-step: Oven Method In Detail
Great for reheating several sandwiches at once. Here’s how to do it right:
- Preheat oven: 350°F (175°C) is ideal.
- Prepare sandwiches: Place them on a baking sheet. Use parchment paper for easy removal.
- Space sandwiches: Don’t crowd. Leave space for heat to circulate.
- Bake: 8-10 minutes total, flipping halfway.
- Optional broil: For extra crunch, broil for 1-2 minutes at the end.
Practical tip: For very thick sandwiches, wrap loosely in foil for the first 5 minutes, then uncover to finish crisping.
If you want to add a little extra flavor, sprinkle grated Parmesan or herbs on top before broiling. This creates a savory, crispy crust.
Step-by-step: Air Fryer Method In Detail
Air fryers are fast and can make the bread extra crispy.
- Preheat air fryer: 350°F (175°C).
- Add sandwich: Place in basket. Don’t stack.
- Set timer: 3 minutes, then check. Flip and add another 1-2 minutes if needed.
- Watch closely: Air fryers vary. Thin sandwiches can burn quickly.
Practical tip: If the bread is getting too dark, lower the temperature to 325°F (160°C).
You can line the bottom of the air fryer basket with parchment to catch any melted cheese that drips out. Some air fryers have special settings for sandwiches—use them if available.
Step-by-step: Microwave Method In Detail
Microwaves are not the best for grilled cheese, but sometimes you need speed.
- Paper towel trick: Place sandwich on a paper towel to absorb moisture.
- Use low power: Set to 50% power, 30 seconds.
- Check and repeat: Heat in 10-second bursts until the cheese is soft.
Practical tip: For better results, finish the sandwich in a dry skillet for 1 minute to crisp up the bread.
If you want to reduce sogginess, let the sandwich sit for 1-2 minutes after microwaving. This lets steam escape and can help the bread dry out a bit.
Credit: www.tastingtable.com
Step-by-step: Sandwich Press Method In Detail
Sandwich presses are great for paninis and grilled cheese.
- Preheat press: Medium heat.
- Place sandwich: Position in center, close lid gently.
- Heat: 2-4 minutes, checking after 2 minutes.
- Don’t press hard: Let the weight of the lid do the work.
Practical tip: If you want extra crunch, brush the outside of the bread with melted butter before pressing.
A sandwich press is also perfect for reheating grilled cheese with spinach, mushrooms, or other vegetables. The pressure helps keep everything together and heats the sandwich evenly.
How To Store Grilled Cheese For The Best Reheating Results
How you store your grilled cheese matters a lot. The wrong approach can make the bread soggy or the cheese rubbery.
- Cool completely: Let the sandwich cool to room temperature before storing.
- Wrap in foil: This keeps moisture out. Avoid plastic wrap, which traps steam.
- Use an airtight container: Place the wrapped sandwich in a container to prevent fridge odors.
- Refrigerate: Eat within 2 days for best taste.
- Freeze for longer storage: Wrap in foil and place in a freezer bag. Thaw in the fridge overnight before reheating.
Non-obvious insight: Do not cut the sandwich before storing. Whole sandwiches lose less moisture and reheat better.
If you plan to freeze several sandwiches, label them with the date to avoid forgetting how long they’ve been stored. Freezing grilled cheese works surprisingly well, but always thaw fully before reheating for best results.

Credit: natashaskitchen.com
Special Tips For Vegan And Gluten-free Grilled Cheese
Vegan and gluten-free options are more popular than ever. They need special handling:
- Vegan cheese: Melts differently. Use skillet or oven for gentle, even heat.
- Gluten-free bread: Dries out fast. Add a bit of oil or butter before reheating to keep it moist.
- Allergy warning: Clean your skillet or press well before reheating different types.
Some vegan cheeses can separate or become oily when overheated. Reheat slowly and check often. If you use gluten-free bread, try adding a sprinkle of water (just a few drops) to the skillet before covering. The steam helps prevent drying out.
Creative Ways To Use Leftover Grilled Cheese
If you don’t want to simply reheat, try these ideas:
- Grilled cheese croutons: Cut sandwich into cubes, bake at 400°F (200°C) for 8 minutes. Great for salads or soups.
- Grilled cheese breakfast melt: Top with a fried egg and some salsa.
- Grilled cheese “french toast”: Dip in beaten egg and pan-fry for a savory breakfast.
- Soup dipper: Cut into strips for dipping in tomato soup.
Non-obvious insight: Leftover grilled cheese can be blended into tomato soup to add flavor and creaminess.
Another creative idea: make a grilled cheese casserole. Chop leftover sandwiches, layer with tomato sauce and more cheese, then bake until bubbly. It’s an easy way to turn leftovers into a family-friendly meal.
Mistakes To Avoid When Reheating Grilled Cheese
Even experienced cooks make errors. Here are the most common:
- Using high heat: Burns bread before cheese is hot.
- Skipping the flip: Both sides need even heat.
- Not covering: A lid or foil helps melt the cheese.
- Microwaving too long: Ruins texture.
- Reheating from frozen: Always thaw first for best results.
Another mistake: reheating directly from the fridge without letting the sandwich warm up a few minutes at room temperature. This small step helps everything heat evenly and prevents a cold center.
Frequently Asked Questions
How Do I Keep My Reheated Grilled Cheese Crispy?
Use a skillet or oven and heat at medium temperature. Avoid the microwave if possible. For extra crispiness, add a thin layer of butter to the bread before reheating.
Also, serve the sandwich immediately after reheating. Letting it sit can cause steam to soften the crust.
Is It Safe To Reheat Grilled Cheese?
Yes, it’s safe if your sandwich was stored properly (wrapped, refrigerated, and eaten within 2 days). Always reheat until the cheese is hot and the bread is crispy.
If you see any mold or smell anything odd, don’t eat it.
Can I Freeze Grilled Cheese Sandwiches?
You can freeze grilled cheese. Wrap tightly in foil, then put in a freezer bag. Thaw in the fridge before reheating. Use the oven or skillet to keep the bread crispy.
If you plan to freeze, undercook the sandwich slightly before freezing. This helps avoid overcooking when you reheat.
How Do I Reheat Grilled Cheese Without Drying It Out?
Use medium heat and do not overcook. Covering the sandwich while heating helps retain moisture. Avoid very high heat in the oven or air fryer, which can dry out bread.
You can also sprinkle a tiny bit of water in the pan and cover with a lid. The steam keeps the bread from drying out.
What’s The Best Way To Reheat A Grilled Cheese With Extra Fillings?
The oven or skillet method works best for sandwiches with tomatoes, vegetables, or meat. These methods gently reheat the inside without making the bread soggy.
For really juicy fillings, consider opening the sandwich, reheating the halves separately, and then pressing them together for the last minute.
Final Thoughts
Reheating grilled cheese is not just about making it warm again—it’s about restoring that perfect balance of crispy bread and melted cheese. With the right method, your sandwich can taste almost as good as fresh. Think about your bread, cheese, and fillings before choosing a method. Use the skillet or oven for best results, and save the microwave for emergencies only. Try creative twists if you have leftovers, and always store your grilled cheese the right way for easy reheating. For more on grilled cheese history and variations, check out this Wikipedia article.
With these tips and methods, you’ll never have to settle for a soggy or rubbery grilled cheese again. Enjoy your next bite—crispy, gooey, and delicious!