
Every grinder user, whether for herbs, spices, or coffee, eventually faces the challenge of a dirty or clogged screen. The grinder screen (sometimes called a kief catcher or mesh) is crucial because it separates fine particles from larger pieces. Over time, sticky residue, dust, or plant matter can block the screen, making it less effective. Some users also prefer to remove the screen for cleaning, replacing, or maximizing space. But taking out a grinder screen isn’t always as simple as it looks.
Many people damage their grinder trying to force the screen out, or they lose small parts. Others don’t realize how much difference a clean, well-maintained screen makes in the quality of their grind. If you want to remove your grinder screen safely, avoid common mistakes, and keep your grinder in top shape, you need a method that’s careful, thorough, and suited to your grinder’s design.
This guide explains each step in detail, with practical tips, mistakes to avoid, and extra advice for both beginners and experienced users.
Understanding Grinder Screens
Before removing anything, it’s important to know what the screen does and why it matters. Most four-piece grinders have a lower chamber where a fine mesh screen sits above a small compartment. As you grind, tiny particles fall through the screen and collect below. This is often called kief (in herb grinders) or simply fine powder in spice/coffee grinders.
Not all screens are the same. Some are tightly fixed, while others are designed to be removable. The material can range from stainless steel to aluminum or even plastic in cheaper models. Some screens are held by a thin metal ring, others are pressed in, and some are screwed or snapped into place.
Understanding your screen type helps you choose the right removal method and avoid accidental damage.
Common Types Of Grinder Screens
- Press-Fit Screen: Held in place by tension, no screws or rings.
- Threaded Screen: Screwed into a groove; needs to be unscrewed.
- Snap-In Screen: Clicks into plastic or metal slots.
- Retaining Ring Screen: Held by a thin circular ring.
- Magnetic Screen: Less common, uses magnets to stay attached.
Each type requires a slightly different approach, so always check your grinder’s screen system before starting.
Tools And Preparation
Trying to remove a grinder screen with your fingers alone often ends in frustration. Having the right tools not only makes the job easier but also protects your grinder from scratches or bending.
Essential Tools
- Small flathead screwdriver: For prying or unscrewing.
- Tweezers or needle-nose pliers: For gripping tiny parts.
- Soft brush: To clean away debris.
- Isopropyl alcohol (at least 70%): For cleaning sticky residue.
- Cotton swabs or toothpicks: For detailed cleaning.
- Magnifying glass (optional): To see small parts clearly.
- Protective gloves (optional): Keeps hands clean, especially with sticky residue.
- Paper towels or soft cloth: To catch loose particles or protect surfaces.
Preparation Steps
- Work in a clean area with good lighting. Lay down a paper towel or cloth.
- Empty your grinder completely. Remove any leftover herbs, spices, or coffee.
- Disassemble the grinder as much as possible. Take off the lid, grinding chamber, and collection chamber.
- Check for screws or rings. Examine the screen edges for visible hardware.
- Decide if you need to clean first. If there’s lots of residue, a quick pre-clean helps.
Pro tip: Take a photo of your grinder before you start, so you remember how to reassemble it.
Credit: damp-e.com
Step-by-step Guide: Removing The Screen
The exact steps depend on your grinder type. This section covers general methods for each main screen style. If your grinder uses a unique design, adapt the method but always use gentle pressure.
For Press-fit Screens
- Inspect the screen edge. Find a small gap where you can insert the tip of a small flathead screwdriver or a toothpick.
- Gently pry upward. Wiggle the tool under the edge and carefully lift. Work slowly around the edge rather than forcing one side.
- Continue around the screen. Move the tool bit by bit, raising the screen evenly.
- Lift out the screen. Once loose, use tweezers to remove it without bending.
For Threaded Screens
- Look for notches or grooves. Some grinders have small slots for a tool.
- Insert a screwdriver into the slot. Turn counter-clockwise to unscrew.
- If stuck, use a drop of isopropyl alcohol around the threads to loosen residue.
- Remove the screen carefully. Avoid cross-threading when reinstalling.
For Snap-in Screens
- Find the snap points. Usually, small tabs hold the screen in place.
- Press the tabs inward with tweezers or a flat tool.
- Carefully pop out the screen. Use even pressure to avoid cracking plastic.
For Retaining Ring Screens
- Identify the retaining ring. It looks like a thin wire or metal band.
- Use a pick or small screwdriver to hook the ring.
- Gently pull out the ring. It should unclip or slide out.
- Remove the screen below the ring.
For Magnetic Screens
- Hold the grinder upside down. Some magnetic screens drop out with a tap.
- If not, use a plastic tool to gently lift the screen without scratching.
Important: Never force a stuck screen. If you feel strong resistance, stop and try cleaning with isopropyl alcohol before trying again.
Cleaning The Grinder Screen
Once the screen is out, it’s a good chance to clean it thoroughly. Even if you’re replacing it, cleaning helps keep your grinder working at its best.
Basic Cleaning
- Brush off loose particles using a soft brush.
- Soak in isopropyl alcohol for 10-20 minutes. This loosens sticky residue.
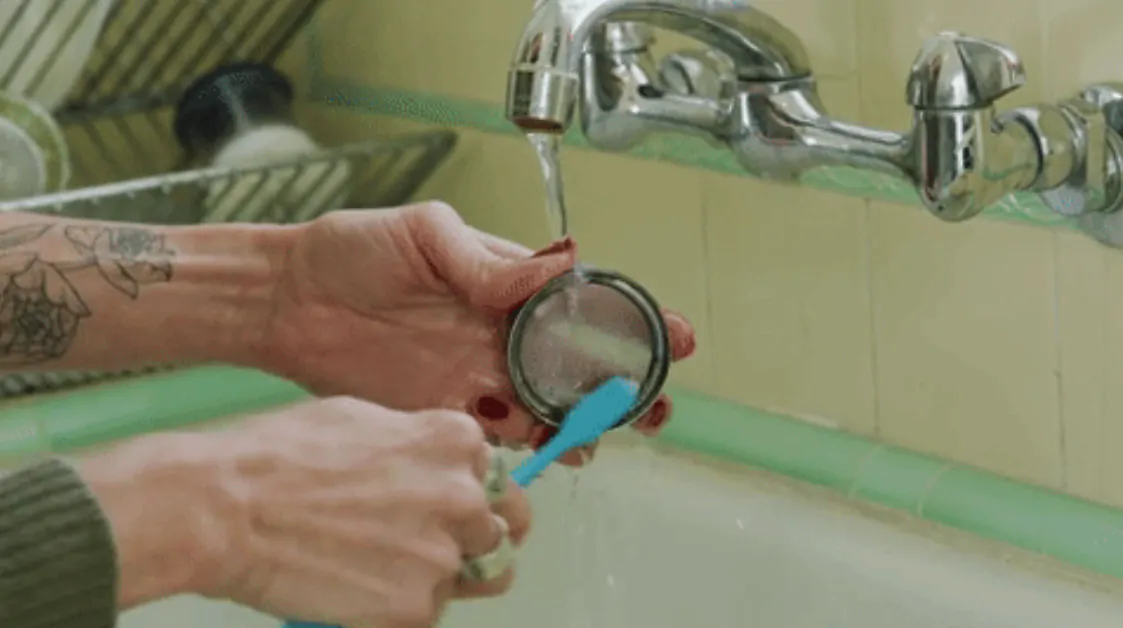
- Scrub gently with a toothbrush or cotton swab.
- Rinse with warm water and dry fully before reinstalling.
Deep Cleaning For Heavy Build-up
- Place the screen in a small container.
- Cover with isopropyl alcohol.
- Agitate gently to loosen particles.
- Use a soft brush to scrub both sides.
- Rinse and let air dry on a paper towel.
Avoid These Cleaning Mistakes
- Don’t use metal brushes—they can tear the mesh.
- Don’t use boiling water; it can warp plastic frames.
- Don’t bend the screen; it may not fit back tightly.
Insight: A clean screen improves airflow and grinding efficiency. Many users think a clogged screen is “just old,” when in fact it can be restored like new with proper cleaning.
Reinstalling Or Replacing The Screen
After cleaning or replacing your grinder screen, putting it back correctly is just as important as removing it.
Reinstallation Steps
- Check for damage. If the screen is torn or bent, consider replacing it.
- Align the screen properly. Make sure the edges sit evenly in the groove or frame.
- Reverse the removal steps. For threaded screens, screw in gently. For snap-in, press the tabs in place.
- Test the fit. The screen should not rattle or wobble.
- Reassemble the grinder. Check that all parts fit smoothly.
Replacing With A New Screen
Replacement screens are sold for many popular grinder brands. Always check the size (diameter and thickness) and material before buying.
- Most screens are 2-2.5 inches in diameter for standard herb grinders.
- Stainless steel lasts longer and is less likely to rust.
- Some universal screens can be trimmed to size with scissors.
Practical tip: Keep a spare screen on hand. Over-tightening or frequent cleaning can wear out screens over time.
Maximizing Grinder Performance
Removing and cleaning the screen is not just for maintenance. It can also change the way your grinder works.
Why Remove The Screen?
- To collect all material together (some users don’t want kief separated).
- To increase grinder capacity, especially if the screen takes up space.
- To replace a clogged or damaged screen.
- To customize your grind (some baristas or chefs prefer no screen for certain recipes).
Performance Differences (with Vs. Without Screen)
Here’s a quick comparison of grinder performance with and without a screen:
| Feature | Screen Installed | Screen Removed |
|---|---|---|
| Kief Collection | Yes | No |
| Chamber Capacity | Smaller | Larger |
| Cleaning Needed | More Often | Less Often |
| Grind Consistency | Finer | Coarser |
Non-obvious insight: Removing the screen can actually change the feel of your grind. Some users notice a coarser grind and less powdery residue, which may be desirable for specific uses.

Credit: www.reddit.com
Common Mistakes To Avoid
Many beginners make errors that can damage the grinder or lose parts. Here are the most common pitfalls:
- Using excessive force: Bending or breaking the mesh or frame.
- Losing small parts: Retaining rings and screws are easy to misplace.
- Not cleaning before removal: Sticky residue can make removal much harder.
- Forgetting reassembly order: Taking photos helps you remember.
- Mixing up parts: Not all screens are interchangeable—keep each part with its grinder.
Special Cases: Unique Grinder Brands
Some popular grinder brands have unique designs. Here’s how to handle a few common ones:
Space Case Grinders
Space Case screens are press-fit but often very tight. Freezing the grinder for 10 minutes can shrink the metal slightly, making it easier to remove the screen.
Santa Cruz Shredder
Uses a unique threaded screen. Use a coin or flat tool in the two small notches to unscrew carefully.
Cheap Plastic Grinders
Screens are often glued or molded in. It’s usually best not to remove these, as they can break easily.
Tip: Always check the manufacturer’s website for specific instructions if you have a high-end or unusual grinder.
Troubleshooting Stuck Screens
Sometimes, no matter how careful you are, the screen just won’t budge. Here’s what to try:
If The Screen Is Stuck
- Soak the grinder base in isopropyl alcohol for 20–30 minutes to dissolve sticky build-up.
- Tap gently with a soft tool (like the plastic handle of a toothbrush) to loosen.
- Freeze the grinder for 10 minutes, then try again. The cold can shrink metal parts slightly.
- Use a wooden toothpick instead of metal to avoid damaging the mesh.
If The Screen Warps Or Bends
- Try to flatten gently between two hard surfaces, like a book and a table.
- If the mesh separates from the frame, it’s better to replace it.
Insight: Many users mistake a stuck screen for a “broken” grinder. Patience and gentle soaking usually solve the problem.
How To Keep Grinder Screens Clean Longer
Prevention saves time and extends the life of your grinder screen.
- Brush off particles after each use.
- Do not overload the grinder—this can force material into the screen.
- Store in a dry place to avoid rust or mold.
- Clean with alcohol once a month if used daily.
Regular maintenance means you won’t have to remove the screen as often.
Comparing Grinder Types: Ease Of Screen Removal
Different grinder styles make screen removal easier or harder. Here’s a comparison:
| Grinder Type | Screen Removal Difficulty | Special Tools Needed |
|---|---|---|
| Aluminum (4-piece) | Medium | Small screwdriver |
| Plastic (3-piece) | Hard | None (risk of breakage) |
| Stainless Steel | Easy | Tweezers |
| Magnetic | Very Easy | None |
Observation: Investing in a grinder with an easy-to-remove screen can save you hassle over the years, especially if you grind frequently.
Environmental And Health Considerations
Keeping your grinder and screen clean is not just about performance. Old, stuck plant matter or coffee grounds can grow mold or bacteria, especially in humid climates. Inhaling or consuming contaminated material can cause health problems over time.
- Always clean your grinder after grinding moist material.
- Never use a rusty or moldy screen. Replace if unsure.
- Isopropyl alcohol is safe for cleaning metal parts, but rinse well and let dry.
Tip: If you notice a strange smell or taste, it’s probably time to remove and clean the screen.

Credit: www.reddit.com
When To Seek Professional Help
Some premium grinders are expensive or have complex designs. If you’re worried about damaging your grinder, or if you can’t remove a stuck screen after several attempts, consider:
- Contacting the manufacturer for advice or replacement parts.
- Visiting a specialty store—many smoke shops or coffee equipment shops offer cleaning services.
- Watching brand-specific videos (from trusted sources).
For example, the official Santa Cruz Shredder website offers detailed guides for their grinders.
Frequently Asked Questions
How Often Should I Remove And Clean The Grinder Screen?
For most users, once a month is enough. If you grind sticky or moist material, clean more often. For coffee and spices, clean every 10–20 uses to keep flavors fresh.
Can I Use Soap And Water Instead Of Isopropyl Alcohol?
Yes, but isopropyl alcohol is better for removing sticky resin and dries faster. Soap and water are okay for basic cleaning, but always dry the screen completely to prevent rust.
What If My Grinder Screen Is Damaged?
A torn or bent screen should be replaced. Using a damaged screen can let large particles through or clog your grinder. Replacement screens are available for most brands.
Is It Safe To Run My Grinder Without A Screen?
Yes, but you lose the benefit of separating fine particles (like kief or powder). The grinder will still work but may produce a coarser grind and collect more residue in the lower chamber.
Where Can I Find Replacement Screens?
Most grinder brands sell replacement screens online. Check the manufacturer’s website or look for universal screens that can be trimmed to fit. For reliable options, see Wikipedia’s herb grinder page for more details.
Removing a screen from your grinder is not just a cleaning task—it’s a way to keep your equipment performing at its best and to customize your grind. Take your time, use the right tools, and pay attention to your grinder’s design.
With regular care, your grinder can last for years and deliver the best possible results every time you use it.