Many modern refrigerators come with water dispensers built into the door. These give you cool, filtered water on demand. But sometimes, you need to remove the water line from the refrigerator door. Maybe you’re replacing the fridge, fixing a leak, or cleaning the system. No matter the reason, this job can look complicated if you have never done it before.
But the truth is, with the right steps and tools, you can do it yourself safely. In this guide, you’ll learn everything you need to know about removing the water line from your refrigerator door. You’ll find practical advice, common mistakes to avoid, and expert tips that make the process smoother—even if you have never tried home repairs before.
Why Remove The Water Line From A Refrigerator Door?
First, let’s talk about why you might need to do this. The water line is the small plastic or copper tube that brings water from your home supply to your fridge’s water dispenser and ice maker. You might need to remove it for several reasons:
- Replacing the refrigerator: If you’re buying a new fridge, you must disconnect the old water line first.
- Fixing leaks: Water leaks often come from a damaged or loose water line.
- Cleaning or maintenance: Sometimes, the line gets clogged or needs a deep clean.
- Moving the fridge: For a big move, disconnecting the water line prevents damage.
- Upgrading parts: If you’re installing a new filter, valve, or dispenser, you’ll need access to the water line.
Whatever your reason, removing the water line safely keeps your kitchen dry and your fridge working well.
Understanding Your Refrigerator’s Water Line System
Before you start, it helps to know how the water line system works. Not all fridges are designed the same way, and understanding your model makes the job much easier.
Main Components
- Water supply valve: Usually under the sink or behind the fridge. This connects your home’s plumbing to the fridge.
- Water line tubing: A flexible plastic or copper tube runs from the supply valve into the fridge.
- Quick-connect fitting: A push-in connector that holds the tube in place. Some older fridges use compression nuts instead.
- Water filter: Often inside the fridge, before water reaches the dispenser.
- Dispenser and ice maker: The end points inside the fridge door.
Types Of Water Lines
There are two main types:
- Plastic (polyethylene) tubing: Most common today. Flexible and easy to cut.
- Copper tubing: Used in older setups. Strong but harder to bend and cut.
Connection Points
You’ll usually find two main connection points:
- At the wall: Where the water line connects to your home’s water supply.
- Behind the fridge or inside the door: Where the line enters the fridge, sometimes with a visible connector.
Knowing these parts helps you plan your work and avoid surprises.
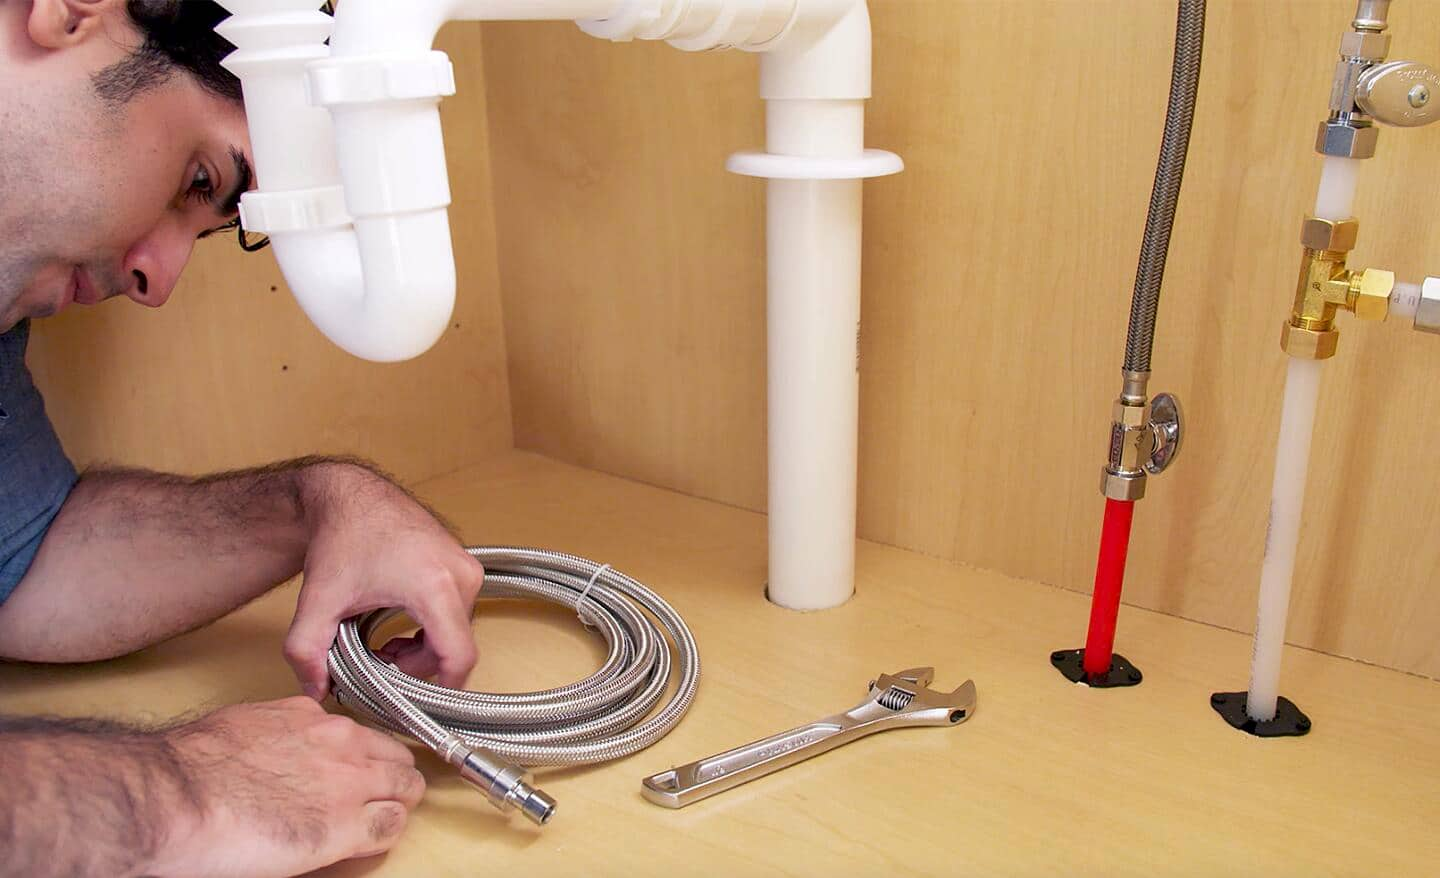
Credit: www.homedepot.com
Tools And Materials Needed
Having the right tools makes the job much easier. Here’s what you’ll usually need:
- Adjustable wrench
- Pliers
- Towel or small bucket (for catching water)
- Utility knife or tube cutter (for plastic tubing)
- Screwdriver (if panels or covers need removing)
- Flashlight (for tight spaces)
- Replacement fitting (if you plan to reconnect the line later)
If your water line uses a copper tube, you may need a small pipe cutter. For newer plastic lines, a sharp utility knife works well.
Insider Tip: Always check your refrigerator’s manual. Some models need special connectors or tools. You can usually find manuals online by searching your fridge’s model number.
Safety First: Preparing Your Workspace
Before you start, safety comes first. Water and electricity don’t mix, so follow these steps:
- Unplug the refrigerator. Even if you’re not working with electrical parts, unplugging removes any risk.
- Turn off the water supply. Locate the water valve and turn it clockwise to close.
- Clear the area. Move the fridge if needed, and remove anything on top or around the appliance.
- Get towels ready. Some water will leak when you disconnect the line.
Pro Tip: If you’re not sure where the water supply valve is, trace the water line from the back of the fridge to the wall. The valve is usually a small lever or knob near the floor or under the kitchen sink.
Step-by-step Guide: How To Remove Water Line From Refrigerator Door
Now let’s get to the main process. These steps work for most home refrigerators, but always check your model’s manual for special instructions.
1. Find And Turn Off The Water Supply
Look behind your fridge or under the sink for the water supply valve. Turn it off by rotating clockwise. If the valve is stuck, don’t force it—use a wrench gently or spray with a little penetrating oil.
Check that the water has stopped by trying the water dispenser. Nothing should come out.
2. Unplug The Refrigerator
Pull out the fridge gently and unplug it from the wall socket. This is for safety and may reset any water-related sensors.
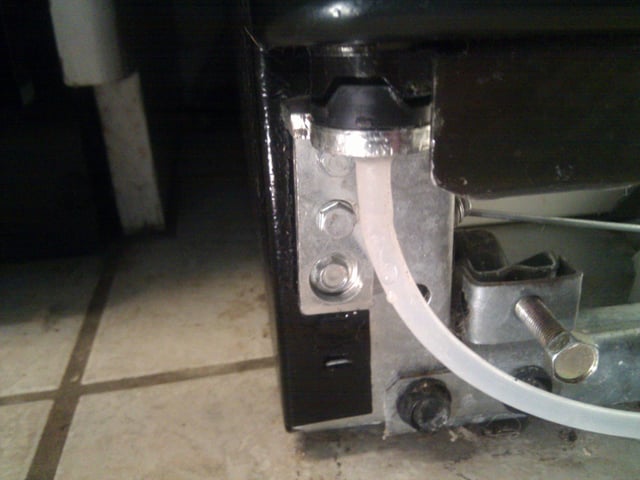
3. Locate The Water Line Connection
Find the spot where the water line enters the fridge. Most often, you’ll see a plastic or copper tube connected with a quick-connect fitting or a compression nut.
If your model has a water line inside the fridge door, you may need to remove a lower panel or kick plate to access it.
4. Prepare For Drips
Place a towel or small bucket under the connection. Even after shutting off the water, some water remains in the line.
5. Disconnect The Water Line
Depending on your connector, the removal method is different:
For Quick-connect Fittings
- Push in the small ring or collar at the fitting (usually gray or white plastic).
- While holding the collar, pull the tubing out gently but firmly.
For Compression Nuts
- Use an adjustable wrench to turn the nut counterclockwise.
- Hold the fitting with pliers if it spins.
- Once loose, pull the tube out.
For Internal Door Connections
- Some fridges have a water line that runs up into the door. Look for a connector at the bottom hinge.
- Press the collar and pull out the tube, or unscrew the connector as needed.
6. Remove Any Retaining Clips Or Panels
If the water line is held by clips or behind a panel, use a screwdriver to remove them. Keep screws and clips in a safe place for reassembly.
7. Pull The Water Line Free
Gently pull the water line out from the fridge door. If it’s stuck, wiggle it slowly—never force it. For long runs, you may need to feed the line out in sections.
8. Cap Or Seal The Water Line (if Needed)
If you are not reconnecting the line soon, cap the open end to prevent leaks. Hardware stores sell plastic end caps for this purpose.
Advanced Tip: If you plan to leave the fridge off for a long time, run a little vinegar through the line before sealing to prevent bacteria growth.
9. Clean Up
Wipe any spills and check for leaks. If you plan to reconnect, inspect the line for cracks or wear.
Reinstalling The Water Line: What To Know
If you’re reconnecting the water line—either to the same fridge or a new one—there are a few things to keep in mind.
- Inspect the tubing: Replace any cracked or discolored plastic.
- Use fresh fittings: Old connectors can leak after being removed.
- Flush the line: Run a quart of water through to remove old debris.
- Check for leaks: After reconnecting, turn the water supply on slowly and watch for drips.
If you ever see a slow drip, tighten the connector gently or trim 1 cm off the tube for a fresh seal.
Common Problems And How To Solve Them
Removing the water line is simple in theory, but sometimes problems pop up. Here’s how to handle the most common issues.
Stuck Or Jammed Fittings
If a quick-connect fitting won’t release, try pushing the collar in harder while pulling the tube. If it still won’t budge, use a small adjustable wrench to press the collar evenly.
Leaky Connections After Removal
If water drips after disconnecting, the valve may not be fully closed. Turn the handle tighter or check for a second shut-off valve closer to the water source.
Water Line Won’t Come Out Of Door
Some fridge models have the water line routed through insulation. If it feels stuck, check your manual or look for hidden retaining clips. Never use sharp tools to pry, as you might puncture the insulation.
Old Or Brittle Tubing
Plastic tubing gets brittle over time. If it cracks during removal, cut it back to a clean section before reinstalling. For copper lines, use a pipe cutter to make a fresh, clean cut.
Insider Insight: Many people forget to check for hidden water left in the line. Always have a towel ready, and hold the tube over a bucket when first pulling it out.
When Should You Call A Professional?
While most people can handle this job, sometimes it’s better to call a plumber or appliance tech:
- If you see corrosion or mold around the water line
- If the shut-off valve is stuck or leaking
- If your fridge is built-in or hard to move
- If you’re not comfortable working with plumbing
The cost for a professional removal is usually between $75 and $200, depending on the complexity and your location.

Credit: www.youtube.com
Comparing Water Line Materials: Plastic Vs. Copper
Choosing the right water line material matters if you’re replacing the line. Here’s a simple comparison:
| Feature | Plastic (Polyethylene) | Copper |
|---|---|---|
| Flexibility | Very flexible | Less flexible |
| Cost | Low | Higher |
| Ease of Cutting | Utility knife | Pipe cutter |
| Durability | 10-15 years | 20+ years |
| Risk of Leaks | Higher (with age) | Lower |
Expert Note: Plastic is easier for DIY, but copper is longer-lasting. If your home has very cold or hot water, copper may be better. For most people, plastic works fine.
Water Line Removal: Time And Difficulty
You may wonder how long this project takes and how difficult it is. Here’s a quick overview:
| Step | Time Needed | Difficulty |
|---|---|---|
| Shutting off water & unplugging | 5 minutes | Very easy |
| Disconnecting water line | 10-15 minutes | Easy |
| Removing from door/behind panels | 10-20 minutes | Medium |
| Sealing/capping line | 5 minutes | Easy |
| Clean up | 5-10 minutes | Easy |
In total, most people can finish the whole process in 30-45 minutes. If it’s your first time, allow an hour.
Mistakes To Avoid When Removing Refrigerator Water Lines
Even simple jobs have common pitfalls. Here’s what to watch for:
- Forgetting to shut off the water: This can cause a flood. Always double-check.
- Not unplugging the fridge: Risk of electrical shock or tripping the circuit.
- Using the wrong tools: Pliers can crush plastic tubing. Use the right wrench or your hands for push fittings.
- Pulling too hard: Yanking the line can break connectors or damage the fridge door.
- Not capping the line: Open water lines can drip or collect dust inside.
- Losing screws or clips: Keep small parts in a cup or bag.
- Ignoring old tubing: If the line is yellow or brittle, replace it instead of reusing.
Non-obvious Insight: Many people rush and forget to check for a second shut-off valve. Sometimes, there’s a main valve under the sink and a secondary one behind the fridge. Both should be closed before starting.
Cleaning And Maintenance After Removal
Once the water line is removed, it’s a good time for some simple maintenance:
- Wipe down behind and under the fridge
- Vacuum coils to improve fridge efficiency
- Clean up any water stains on the floor or wall
- Inspect for mold where water may have leaked before
If you’re reinstalling a new line, consider flushing a little vinegar through it to keep things fresh and bacteria-free.
Pro Tip: If your water line was leaking, check the fridge’s drip pan. It’s often hidden behind a lower grill and can fill with water over time.
How To Tell If The Water Line Needs Replacement
Sometimes, you remove the water line only to discover it’s in bad shape. Here are signs you should replace it instead of reinstalling:
- Cracks or splits in the tubing
- Yellowing or cloudiness
- Stiff or brittle texture (should be flexible)
- Leaking at connectors
- Rust or green marks (for copper lines)
If you see any of these, buy a new water line kit. They cost around $10–$20 at hardware stores and come with new fittings.
Reconnecting The Water Line: Step-by-step
If you are putting the water line back—either to the same fridge or a new model—follow these steps:
- Insert the tubing into the new or existing fitting. Push firmly until it stops.
- For quick-connect fittings, pull gently to check it’s locked.
- For compression nuts, hand-tighten, then use a wrench for a snug fit (do not over-tighten).
- Turn on the water supply slowly. Look for leaks.
- Plug in the fridge and run the water dispenser for 2–3 minutes to flush air and debris.
Expert Tip: If you have a filter, replace it when reconnecting. Old filters can leak or reduce water flow.
Credit: diy.stackexchange.com
Upgrading Or Moving: What To Do With The Water Line
If you’re moving the fridge to a new house or upgrading to a waterless model, you have options:
- Cap the line at the wall: Use a plastic or brass end cap.
- Remove the line entirely: Trace it back to the valve and pull it out.
- Leave the valve off: If you may use it later.
If you’re not sure, capping is safest. It prevents leaks and keeps the line clean.
Environmental And Health Considerations
Water lines can collect bacteria over time, especially if the fridge is unused. Always flush the line before reconnecting, and replace old lines every 5–7 years.
Did you know? Studies show that refrigerator water lines can develop biofilm if unused for weeks. Running fresh water through before use keeps your drinking water safe.
For more about water safety and standards, see the guidelines from the CDC.
Essential Tips For A Smooth Removal
- Label screws and parts as you go.
- Take photos of connections before disconnecting. This helps when reinstalling.
- Have a helper if your fridge is large or heavy.
- Write down the fridge model and serial number for quick manual lookup.
Frequently Asked Questions
How Do I Know If My Refrigerator Water Line Is Leaking?
Look for puddles under the fridge or a slow drip from the tubing. You may also notice low water pressure from the dispenser or wet spots behind the appliance.
Can I Use Any Tubing For My Refrigerator Water Line?
No. Use food-grade polyethylene or copper tubing only. Standard plastic hose can leach chemicals or burst under pressure.
Do I Need Plumber’s Tape When Reinstalling The Water Line?
Usually, no. Quick-connect and compression fittings seal without tape. Use tape only if the instructions for your specific fitting require it.
Is It Okay To Leave The Water Line Disconnected For A Long Time?
Yes, but always cap or seal the end to keep out dust and bugs. Flush the line before reuse if it’s been disconnected for weeks or months.
What If Water Keeps Coming Out After I Turn Off The Valve?
The shut-off valve may be faulty or not fully closed. Try turning it tighter, or check for a secondary valve. If water still flows, call a plumber.
Removing the water line from your refrigerator door is a simple, manageable task if you follow the right steps. It saves you money, prevents leaks, and keeps your kitchen running smoothly. Take your time, use the right tools, and always prioritize safety.
If you ever feel unsure, it’s perfectly fine to ask for help or consult a professional. With a little care, you can handle this like a pro.