
Replacing the floor under kitchen cabinets is one of those home improvement projects that sounds simple—until you start. Many homeowners discover water damage, uneven surfaces, or even mold lurking under those cabinets. But whether you’re updating old vinyl with tile, repairing after a leak, or simply wanting a fresh look, this job can be done by determined DIYers who prepare well and work carefully.
The right approach saves you money, prevents future problems, and ensures your kitchen remains both beautiful and functional.
This guide will walk you through the entire process, from understanding what’s involved, to gathering tools, prepping your kitchen, and handling tricky steps like working around plumbing and reinstalling cabinets. You’ll also discover common mistakes, safety tips, and a few pro tricks that even experienced renovators sometimes overlook.
If you’re new to this, you’ll find practical advice and detailed explanations to help you avoid headaches and finish with a kitchen you’re proud of.
Why Replace The Floor Under Kitchen Cabinets?
Many people ask if it’s really necessary to change the floor beneath cabinets. The answer depends on your situation, but there are good reasons to consider it.
- Water Damage: Leaks under sinks, dishwashers, or fridges can ruin subflooring and cause rot. Ignoring this leads to structural issues and mold. Even slow drips can create big problems over time. It’s common for water damage to go unnoticed until you pull out cabinets or flooring.
- Upgrading Flooring Material: If you want to install a new, higher-end floor (like tile or hardwood), it’s best to run it under the cabinets for a seamless look and future flexibility. This also means if you ever want to change the cabinet layout, you won’t have to patch the floor.
- Resale Value: A solid, continuous kitchen floor looks more professional and is attractive to buyers. Home inspectors and realtors often notice patchy or uneven kitchen floors, which can lead to lower offers on your home.
- Leveling Problems: Old floors often have dips or high spots. Fixing the subfloor now prevents headaches later. Cabinets and appliances need a flat base to operate correctly—especially dishwashers and refrigerators, which can tilt or vibrate if the floor isn’t even.
Non-obvious insight: Even if your floor looks fine around the cabinets, hidden damage underneath can cause odors, squeaks, and even pest problems down the road.
What You Need Before Starting
Replacing the floor under cabinets is not a quick afternoon task. Make sure you have:
- Time: Expect 2–5 days, depending on your skill and kitchen size. If you’re doing this alone, be patient and allow for unexpected delays, like drying time for repairs.
- Tools: Crowbar, screwdrivers, drill, reciprocating saw, circular saw, utility knife, measuring tape, level, hammer, pry bar, floor scraper, shop vacuum, safety goggles, dust mask. A knee pad or old cushion helps for comfort during long hours on the floor.
- Materials: New flooring (plus 10% extra for cuts/mistakes), matching underlayment, screws, nails, shims, subfloor patch/leveler, wood glue, caulk, construction adhesive, plastic sheeting, painter’s tape. Have extra garbage bags for debris and consider getting a small dumpster if removing tile or heavy flooring.
- Help: At least one strong friend for lifting cabinets and appliances. Some tasks, like moving large countertops, may need two or more helpers.
Don’t forget: If your cabinets or countertops are especially heavy or custom-built, you may need special brackets or a contractor’s advice. For very old homes, check for hidden wires or plumbing in cabinet bases before you start.
Non-obvious tip: Take time to read the installation instructions for your new flooring material before you begin. Some floors need acclimation—sitting in your home for 2–3 days—to adjust to humidity and temperature.
Preparing Your Kitchen
A successful floor replacement starts with careful preparation. Skipping these steps can make the project much harder later.
1. Clear Out The Space
Remove everything from cabinets, countertops, and the floor. Take out appliances, doors, and drawers if possible. Use plastic sheeting and tape to seal off kitchen doorways and vents to keep dust contained. Don’t forget items inside lazy Susans or deep corner cabinets—missing these can lead to broken glass or spilled food.
2. Turn Off Utilities
Shut off water supply lines to your sink, dishwasher, and fridge. Turn off electrical circuits if you’ll be disconnecting any outlets or appliances. For extra safety, place a note on your breaker panel so nobody turns power back on accidentally.
3. Label Everything
As you remove doors, drawers, or appliances, label hardware and take photos. You’ll thank yourself during reassembly. Use zip-top bags for screws and tape them to the matching cabinet or door.
4. Protect Adjacent Areas
Lay down cardboard or drop cloths in nearby rooms. Kitchens are high-traffic zones, and debris easily spreads. Also, tape down plastic sheeting in doorways to keep dust from drifting into the rest of your home.
Practical example: If your kitchen connects to a dining room, move furniture out of the way. Dust from demo work travels farther than you expect.
Removing Kitchen Cabinets Safely
Taking out kitchen cabinets is usually necessary to reach the floor beneath. Here’s how to do it without damaging them:
Steps To Remove Cabinets
1. Detach Baseboards And Trim
Carefully pry off baseboards and quarter-round molding with a thin pry bar. Save them if you plan to reuse. Work slowly to avoid cracking the wood or damaging the wall.
2. Remove Countertops First
Most countertops are attached with screws from inside the cabinets. Disconnect plumbing and any attached appliances (like dishwashers) before lifting. Tile countertops may require cutting away caulk or grout first.
3. Unscrew Cabinets From Wall And Each Other
Start with wall cabinets (if present), then move to the base units. Cabinets are often screwed together at the sides and secured to wall studs. Some older cabinets use nails—be gentle to avoid splintering.
4. Lift Cabinets Out
Use help to carefully lift and carry each section. Place them on a blanket or cardboard in another room. Always lift with your legs, not your back.
Pro Tip: Cabinets can be very heavy, especially with countertops. Never try to move long sections alone. If a cabinet is stuck, check for hidden screws at the back or bottom.
Extra guidance: If you have under-cabinet lighting or electrical outlets, disconnect these carefully and label wires for easy reconnection.
Removing Old Flooring And Subfloor
You may find one of several types of flooring under your cabinets: vinyl, tile, laminate, or even hardwood. Removing them takes patience and the right tools.
Steps For Floor Removal
1. Check For Asbestos Or Lead
Homes built before 1980 may have dangerous materials. If you suspect this, hire a professional to test before removing old floors. Asbestos is common in old vinyl and tile adhesives, while lead paint may be present on old trim.
2. Take Up Floor Coverings
Use a utility knife for vinyl, a floor scraper for tile, or a pry bar for hardwood. Work slowly to avoid damaging the subfloor. For stubborn adhesive, a heat gun can help soften the glue.
3. Remove Underlayment
Old plywood or particleboard underlayment may be stapled or glued down. Pry it up carefully. Wear gloves to avoid splinters and watch for rusty nails.
4. Inspect And Repair Subfloor
Look for soft spots, water stains, or mold. Replace damaged sections with new plywood. Use a level and patching compound to fix dips or seams. For small repairs, wood filler works, but for large sections, cut out and replace the subfloor.
Here’s a quick comparison of common flooring removal challenges:
| Floor Type | Difficulty | Special Tools Needed | Mess Level |
|---|---|---|---|
| Vinyl/Sheet Linoleum | Low | Utility knife, scraper | Moderate (adhesive residue) |
| Tile | High | Hammer, chisel, scraper | Very high (dust, debris) |
| Laminate | Medium | Pry bar, saw | Low |
| Hardwood | High | Reciprocating saw, pry bar | High (splinters, nails) |
Non-obvious tip: Some old adhesives contain solvents. Always ventilate well and wear a mask during removal. If you notice a strong chemical smell, open windows and use a fan.
Example: Removing tile is often the noisiest and messiest. Consider ear protection and have plenty of bags for heavy debris.
Preparing The Subfloor For New Flooring
A solid, level subfloor is the key to a long-lasting kitchen floor. Even small dips or bumps can cause issues later.
1. Clean Thoroughly
Vacuum up all dust, nails, and debris. Even tiny bits can affect how new flooring sits. A shop vacuum is more effective than a broom for fine dust.
2. Check For Level
Use a long level or straightedge. Any dips or high spots over 1/8 inch should be fixed. Place the level in several directions to check the entire area.
3. Patch And Sand
Use a floor-leveling compound for dips and sand down high spots. Let the compound cure as directed. For uneven wood subfloors, a belt sander can help.
4. Secure Loose Areas
Walk across the subfloor and listen for squeaks. Add screws into joists where needed. This is your last chance before the new floor goes down.
5. Check Moisture Levels
Subfloor should be dry before laying new floors. If you had a leak, allow extra drying time. Use a moisture meter if you’re unsure.
Practical tip: For concrete subfloors, check for cracks and repair them with patching compound. Uneven concrete can cause tiles or planks to shift over time.
Credit: www.reddit.com
Installing New Flooring Under Cabinets
Now comes the satisfying part: putting down your new kitchen floor. The type of material you choose affects the installation process.
Popular Flooring Options
1. Tile
Durable, water-resistant, and classic. Needs cement backer board over subfloor. Grout lines should be sealed to prevent staining.
2. Luxury Vinyl Plank (lvp) Or Tile (lvt)
Easy to cut and waterproof. Floats over underlayment. Many styles mimic wood or stone.
3. Laminate
Affordable and DIY-friendly, but less water-resistant. Needs a vapor barrier if installed over concrete.
4. Hardwood
Beautiful, but sensitive to moisture. Best for dry kitchens. Needs to be nailed or glued down.
5. Engineered Wood
Looks like hardwood but more stable and moisture-tolerant. Can be glued, stapled, or floated.
Here’s a quick comparison of common kitchen flooring options:
| Flooring Type | Water Resistance | DIY Difficulty | Cost (per sq ft) |
|---|---|---|---|
| Tile | Excellent | Hard | $3–$10 |
| LVP/LVT | Excellent | Easy | $2–$7 |
| Laminate | Fair | Easy | $1.50–$5 |
| Hardwood | Poor | Hard | $5–$15 |
| Engineered Wood | Good | Medium | $4–$10 |
Laying The New Floor
1. Dry Fit First
Lay out a few rows without adhesive or fasteners to check fit and pattern. This is especially important with patterned tiles or planks.
2. Start At A Reference Line
Snap a chalk line to ensure your first row is perfectly straight. This matters more than you think—crooked floors are obvious in kitchens, especially when cabinets and appliances are reinstalled.
3. Install Underlayment If Needed
Foam underlayment goes under laminate or LVP. Use cement board for tile. Don’t skip this step—proper underlayment prevents noise and moisture problems.
4. Cut Around Pipes And Vents
Measure carefully. Use hole saws or jigsaws for round cuts. Dry fit each piece before final installation to avoid mistakes.
5. Leave Expansion Gaps
Most floors expand and contract. Leave a 1/4-inch gap at walls and under cabinets. Use spacers to keep the gap even.
6. Stagger Seams
For planks or tiles, offset joints in each row for strength and appearance. Randomize the seams for a more natural look.
Non-obvious insight: When flooring under cabinets, don’t glue or nail the floor directly to the subfloor under the cabinets unless the manufacturer recommends it. Floating floors (like LVP) need room to move. If you lock them in, they can buckle or pop up later.
Extra tip: For tile floors, use a laser level to keep grout lines straight, especially in long kitchens.
Reinstalling Kitchen Cabinets
With the new floor down, it’s time to put everything back. This can be trickier than removal.
Steps To Reinstall Cabinets
1. Mark Studs On Walls
Find and mark wall studs for secure reattachment. Use a stud finder to avoid guesswork.
2. Set Base Cabinets In Place
Start with corner cabinets. Use shims to level each cabinet front-to-back and side-to-side. Check with a long level for best results.
3. Secure Cabinets Together
Clamp cabinets side by side and screw them together through the face frames. Tighten gradually to avoid shifting.
4. Attach Cabinets To Wall Studs
Drive screws through cabinet backs into marked studs. Use washers if screw heads pull through the wood.
5. Check For Level And Plumb
Adjust shims as needed before tightening all screws. Uneven cabinets cause countertop gaps and crooked doors.
6. Reinstall Countertops And Plumbing
Reconnect sink, dishwasher, and water lines. Use new supply lines if old ones are worn. Check for leaks after turning water back on.
Pro Tip: If your new floor is thicker than the old one, you might need to adjust the height of your dishwasher opening or cut down cabinet toe kicks. Don’t force appliances into tight spaces—adjust the floor or cabinet as needed.
Example: If your fridge used to slide easily under a cabinet, check the new opening height before reinstalling the cabinet above.
Handling Plumbing And Appliances
Kitchens are full of pipes, wires, and heavy machines. Here’s how to avoid trouble:
- Disconnect Water and Power: Always turn off before moving appliances. Use tape to label wires and hoses.
- Protect New Floors: Lay cardboard before sliding appliances back in place. For heavy fridges or stoves, use a moving blanket to prevent gouges.
- Check Connections: Inspect hoses, valves, and cords for wear. Replace if needed. Old hoses can crack and cause leaks after reinstallation.
- Level Appliances: Uneven floors mean stoves and fridges may wobble. Adjust their feet for stability. A level appliance works better and lasts longer.
Non-obvious tip: Test all appliances before pushing them fully into place. It’s easier to fix leaks or wiring problems while everything is accessible.
Common Mistakes And How To Avoid Them
Many homeowners run into avoidable problems. Watch for these:
1. Skipping Subfloor Repairs
Weak or uneven subfloors ruin new floors. Always patch and level. Rushing this step leads to squeaks and cracks later.
2. Not Leaving Expansion Gaps
Floating floors buckle when jammed tight against walls or cabinets. Use spacers during installation.
3. Wrong Fasteners
Use screws, not nails, for subfloor repairs and cabinet reinstallation. Screws hold better and are easier to remove for future repairs.
4. Forgetting Appliance Clearances
New floors can change height. Make sure dishwashers and fridges still fit. Measure twice before reinstalling cabinets.
5. Ignoring Moisture
Let everything dry fully before new installation, especially after leaks. Moisture trapped under floors causes mold and warping.
6. Damaging Cabinets
Support heavy cabinets on flat surfaces. Never drag them. Use moving blankets or dollies for transport.
7. Not Labeling Parts
Take photos and label every screw, bracket, and hinge. It’s easy to forget where things go after a few days.
Extra insight: If you’re unsure about any step, ask at your local hardware store or check the flooring manufacturer’s website for advice.

Credit: www.bestlaminate.com
Costs And Time Estimates
How much will this project cost and how long will it take? Here’s a general idea:
| Task | DIY Cost Range | Time Needed |
|---|---|---|
| Remove Cabinets | $0–$100 (tools/supplies) | 4–8 hours |
| Remove Old Flooring | $0–$200 | 4–12 hours |
| Subfloor Repairs | $50–$400 | 2–6 hours |
| Install New Floor | $500–$3,000+ (depends on material) | 8–24 hours |
| Reinstall Cabinets/Appliances | $0–$100 | 4–8 hours |
Total project time: 2–5 days (longer if drying or major repairs are needed). If you have work or family commitments, plan for meals outside the kitchen during this period.
Extra tip: Renting specialized tools (like a tile saw or floor scraper) can save time and effort for a small fee.
Pro Tips For A Professional Result
- Always dry fit cabinets and appliances before final attachment to catch problems early.
- Use cabinet jacks or T-braces to hold cabinets in place during reinstallation, especially if working alone.
- Buy extra flooring (10–15%) for cuts and future repairs. Styles and colors can be discontinued.
- Seal any cut edges of wood or laminate with waterproof paint to prevent swelling.
- If possible, upgrade plumbing lines and electrical outlets while everything is open. It’s much easier now than later.
- Use a laser level for long, straight grout lines on tile floors.
- Wipe up any spills or adhesives immediately to keep your new floor looking clean.
When To Call A Professional
Some situations require expert help:
- Structural Damage: If you find sagging joists, rotten beams, or black mold, hire a pro. These issues can affect your home’s safety.
- Stone Countertops: Granite or quartz are extremely heavy and need special handling. Dropping one can crack the stone or injure you.
- Complicated Layouts: Kitchens with islands, built-in appliances, or odd angles are harder. A pro can help with tricky cuts and tight spaces.
Hiring a contractor adds cost but can save you time, stress, and future problems. For most DIYers, though, careful planning and patience will get the job done.
Final Inspection And Cleanup
Once everything is reinstalled:
- Walk the floor and check for squeaks or soft spots. Step in different directions to make sure everything is solid.
- Check all cabinet doors and drawers for proper alignment. Adjust hinges if needed.
- Reconnect and test all appliances and plumbing. Look for leaks under the sink and at the dishwasher.
- Seal any gaps between floor and cabinets with flexible caulk. This keeps out crumbs and moisture.
- Clean up all dust, debris, and leftover materials. Recycle or donate old cabinets if possible.
Take a moment to appreciate your hard work—your kitchen now has a solid, beautiful foundation that should last for decades. A well-installed floor can make daily life easier and add real value to your home.
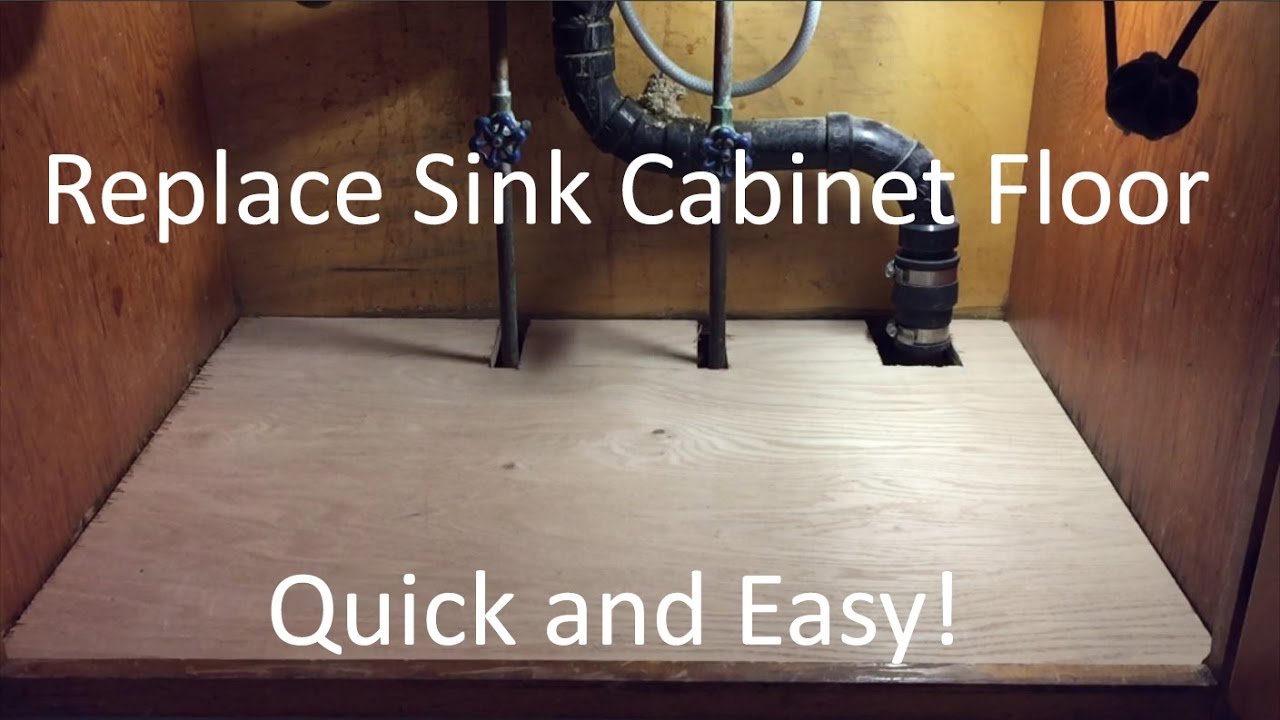
Credit: www.youtube.com
Frequently Asked Questions
How Do I Know If I Need To Replace The Subfloor Under My Kitchen Cabinets?
Check for soft spots, water stains, or a musty smell under your cabinets. If the subfloor feels spongy or crumbles when you poke it, it needs replacement. A level or straightedge can also reveal dips or bumps that might require repair. If you hear creaking or see discoloration, investigate further before installing a new floor.
Is It Better To Install Flooring Before Or After Cabinets?
Most experts recommend installing flooring before cabinets for a cleaner look and easier future repairs. However, for heavy stone countertops, some prefer installing cabinets first to reduce weight on the floor. Both methods work, but flooring first is usually best for DIYers. It also makes it easier to change cabinet layouts in the future.
What Type Of Flooring Is Best For Kitchens?
Tile and luxury vinyl plank (LVP) are most popular for kitchens. They handle moisture well and are easy to clean. Hardwood looks great but is more sensitive to water. Always choose a floor with good slip resistance and durability for kitchen use. Consider your family’s needs—pets, kids, and heavy traffic may need tougher floors.
Can I Reuse My Old Cabinets After Removing Them?
Yes, if you remove them carefully and protect them during the project. Label all parts, avoid damaging the frames, and store them on a flat, protected surface. Some minor scratches or dings can be repaired during reinstallation. Painting or refinishing cabinets is also easier while they’re out of the kitchen.
Do I Need A Permit To Replace My Kitchen Floor?
Usually, no permit is needed for flooring replacement alone. However, if you are moving plumbing, electrical, or making structural changes, check with your local building department. You can find more detailed rules at Family Handyman.
Taking on a kitchen floor replacement under cabinets is a big job, but with the right preparation, clear steps, and careful work, you can transform your kitchen for years to come. If you run into trouble, don’t hesitate to ask for advice—every expert was once a beginner, too.