
Resetting an oven door hinge might sound like a minor task, but it can quickly turn into a frustrating challenge if you don’t know what you’re doing. A misaligned or broken oven door not only looks bad—it also affects your cooking, lets heat escape, and can even be dangerous.
If you’ve ever struggled to close your oven door properly or noticed it hanging at an odd angle, the hinge is often the problem. Fixing it yourself can save money and time, but only if you approach the process with care.
Many people try to reset an oven door hinge without understanding how these mechanisms work. This leads to more damage, or worse, injuries. In this article, you’ll get a complete, step-by-step guide on how to reset your oven door hinge safely and correctly.
You’ll learn why oven door hinges fail, what tools you need, which mistakes to avoid, and how to troubleshoot if things don’t go as planned. Whether you’re a complete beginner or have some DIY experience, you’ll find clear explanations, practical tips, and real examples here.
Let’s get started and make your oven door as good as new.
Understanding Oven Door Hinges
Before you start resetting, it’s important to know what an oven door hinge does. The oven door hinge is a spring-loaded mechanism that allows the door to open and close smoothly. It holds the door securely, creates a tight seal for efficient cooking, and supports the door’s weight.
There are several types of oven door hinges:
- Standard hinges: Found in most residential ovens, these use a simple spring and lever system.
- Drop-down hinges: Common in older ovens, allowing the door to drop down flat.
- Side-opening hinges: Used in some premium or specialized ovens, opening to the side.
- Soft-close hinges: A newer design that prevents the door from slamming.
Most people have standard or drop-down hinges. Knowing your hinge type is essential because the reset process can be slightly different. You can usually find this information in your oven’s manual or by checking the manufacturer’s website.
Why Do Oven Door Hinges Fail?
Oven door hinges can fail for several reasons:
- Wear and tear: Years of opening and closing will eventually weaken the springs.
- Heat damage: High temperatures can degrade metal parts and springs.
- Improper use: Leaning or hanging heavy objects on the door puts extra stress on the hinges.
- Food spills: Grease and debris can clog the hinge mechanism, making it stiff.
Sometimes, the hinge doesn’t actually break, but slips out of position during cleaning or after removing the door. Resetting the hinge can often solve these issues without replacing parts.
Signs Your Oven Door Hinge Needs Resetting
Many people ignore the first signs of hinge trouble, but catching the problem early makes resetting much easier. Here are common warning signs:
- Door won’t close fully: A gap remains, letting heat escape.
- Door feels loose or wobbly: The seal is not tight and the door might rattle.
- Difficulty opening/closing: The door gets stuck or doesn’t move smoothly.
- Uneven alignment: One side of the door sits higher or lower than the other.
- Strange noises: Creaking, grinding, or snapping sounds when you use the door.
Don’t ignore these signs. A door that won’t close tightly can make your oven inefficient and increase your energy bills. In some cases, it can even cause burns if the hot door swings open unexpectedly.
Tools And Materials You’ll Need
Before you start the reset, gather these tools and materials:
- Screwdriver set (usually Phillips or flathead)
- Pliers (preferably needle-nose)
- Work gloves (to protect your hands from sharp edges)
- Flashlight (for better visibility inside the hinge slot)
- Oven door hinge locks or pins (if your model uses them)
- User manual (for model-specific instructions)
Having all tools ready before you start will make the process smoother and safer. Don’t use makeshift tools like butter knives—these can slip and cause injury.
Step-by-step Guide: How To Reset An Oven Door Hinge
Resetting an oven door hinge might look different depending on your oven brand and hinge type, but the general process is similar. Follow these steps carefully.
1. Turn Off And Cool Down Your Oven
Safety first. Make sure the oven is completely off and cool before you begin. Unplug the oven or turn off the circuit breaker if you have an electric model. If your oven is connected to gas, do not disconnect the line—just switch off the oven.
2. Open The Oven Door To The Broil Stop Position
Most oven doors have a broil stop position, usually about a quarter of the way open. This position allows you to access the hinges safely.
- Gently open the door until it stops naturally.
- You should feel a slight resistance.
If you don’t find the stop position, check your user manual or look for a notch along the hinge path.
3. Insert The Hinge Locks Or Pins
Many ovens have small holes in the hinge arms for hinge locks or insertion pins. These hold the hinges in place while you remove the door.
- Insert the hinge locks or pins into the holes.
- If you don’t have locks, use sturdy nails or Allen keys as a substitute, but be careful.
- Double-check that the locks are secure.
This step is crucial because the hinge spring is under tension. Skipping it can cause the hinge to snap shut, which can injure your fingers.
4. Remove The Oven Door
With the locks in place, lift the door gently:
- Grip both sides of the door near the hinges.
- Close the door slightly, then lift straight up.
- The door should come free from the hinge slots.
Place the door on a soft surface like a towel or rug. Never let the door hang by one hinge—this can bend the mechanism.
5. Check And Clean The Hinges
Inspect the hinge arms and slots for:
- Bent or broken parts
- Built-up grease or debris
- Loose screws or missing pins
Use a flashlight to see inside the hinge slot. Clean any debris with a dry cloth or brush. If you find broken pieces, you may need to replace the hinge instead of resetting it.
6. Reset The Hinge Position
This is the heart of the process.
- If the hinge arm is stuck, use pliers to gently move it back to its original position.
- Both hinge arms should be at the same angle.
- If the hinge has slipped out of the slot, reposition it carefully.
- For some models, you may need to manually compress the spring.
Non-obvious insight: Many people forget to check both the oven body and the door for alignment. Make sure both sides match before reassembly.
7. Reinstall The Oven Door
- Hold the door at the same angle as removal.
- Line up the hinge arms with the slots on the oven body.
- Slide the hinges into place until you hear or feel a click.
- Open the door fully to release the tension.
- Remove the hinge locks or pins.
If the door doesn’t fit smoothly, don’t force it. Remove and try again, making sure the hinges are aligned.
8. Test The Door
Open and close the door several times. It should move smoothly, stop at the broil position, and close tightly with a good seal.
- Check for gaps.
- Listen for unusual sounds.
- Make sure the door sits evenly.
If the door still doesn’t close properly, repeat the reset process or check for damaged parts.
9. Final Safety Check
Plug the oven back in or turn on the circuit breaker. Test the oven at low heat to make sure the seal holds and no heat escapes.
If you smell burning or hear odd noises, turn off the oven and recheck the hinges.
Oven Door Hinge Reset: Brand Variations
While the general reset steps are similar, some brands have unique hinge designs. Here’s a comparison of how hinge reset steps differ among popular brands.
| Brand | Hinge Lock Type | Door Removal Method | Special Notes |
|---|---|---|---|
| GE | Metal latch | Lift & pull | Often requires two people |
| Whirlpool | Pin lock | Open & lift | Watch for hidden screws |
| Bosch | Clip-on lock | Pull straight up | Spring is stronger—use gloves |
| Samsung | Locking lever | Swing up & remove | Check for plastic covers |
Always refer to the user manual for your specific oven model. Brands sometimes change hinge designs, even within the same product line.
Common Mistakes And How To Avoid Them
Resetting an oven door hinge is not difficult, but small mistakes can make the problem worse.
1. Skipping The Hinge Lock
Never skip the step of inserting hinge locks or pins. The spring is powerful and can snap shut quickly, causing injury or damaging the door.
2. Forcing The Door
If the door doesn’t slide into place easily, don’t force it. Realign the hinges and try again. Forcing can bend the hinge arms or even crack the oven frame.
3. Ignoring Debris
Dirt and grease can block the hinge movement. Always clean the hinge slots and arms before resetting.
4. Not Checking Both Sides
People often focus on one hinge. Always check both sides for alignment and damage.
5. Forgetting To Test
After resetting, always test the door before using the oven. Small misalignments are easier to fix before heating the oven.
Non-obvious insight: Some ovens have a hidden hinge screw under a trim or rubber seal. Missing this step keeps the hinge loose and the door won’t align.
Troubleshooting: When Resetting Doesn’t Work
Sometimes, resetting the hinge doesn’t solve the problem. Here’s what to do if you still have issues.
The Door Still Won’t Close
- Check for bent hinge arms.
- Look for obstructions in the slot.
- Make sure the locking pin was fully removed.
The Door Feels Loose
- Check for missing screws or pins.
- Examine the hinge receiver on the oven body.
The Spring Is Broken
If you see a broken or stretched spring, you’ll need to replace the hinge. Don’t try to repair a broken spring—it’s not safe.
The Door Is Uneven
- Make sure both hinge arms are at the same angle.
- Check the oven frame for warping.
The Door Makes Noise
Lubricate the hinge with a small amount of high-temperature grease. Do not use cooking oil, as it will burn off and create smoke.
If these fixes don’t help, it’s time to consider replacing the hinge or calling a professional.
When To Replace The Oven Door Hinge
Resetting works for most minor issues, but sometimes replacement is the only option.
Signs You Need A New Hinge
- The spring is broken or missing.
- The hinge arm is bent or cracked.
- The door cannot be realigned after several attempts.
Replacement hinges are usually available from the manufacturer or appliance parts stores. Always order the correct model for your oven.
Diy Vs. Professional Replacement
If you’re comfortable with basic tools and have followed the reset steps, you can often replace the hinge yourself. However, some ovens require removing the side panels or even the whole oven from the wall. In these cases, professional help is safer and faster.
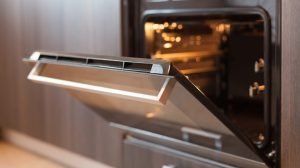
Credit: fantasticservicesgroup.com.au
Cost Comparison: Reset Vs. Replace
Here’s a comparison of costs for resetting and replacing an oven door hinge.
| Option | Average Cost (USD) | Time Required | Skill Level |
|---|---|---|---|
| Reset Hinge | $0 (DIY) | 30-60 minutes | Beginner to Intermediate |
| Replace Hinge (DIY) | $20-$60/hinge | 1-2 hours | Intermediate |
| Professional Repair | $100-$200 | 1-2 hours | Professional |
For most people, resetting the hinge saves money and time. Only replace the hinge if you see clear signs of damage.
Practical Tips For A Successful Reset
- Take photos as you disassemble the door. This helps with reassembly, especially if you forget how the hinge fits.
- Label screws and parts in small containers or bags.
- Ask for help if the door is heavy. Oven doors can weigh up to 40 pounds (18 kg).
- Use a flashlight to check alignment inside the slots.
- Keep the area clear to avoid tripping while carrying the oven door.
Non-obvious insight: Some hinges have a small set screw for fine adjustment. Tighten or loosen this screw after resetting to perfect the door alignment.

Credit: www.youtube.com
Preventing Future Hinge Problems
Once your oven door is working again, a few habits can keep the hinges in good shape.
- Avoid slamming the door: Let it close gently.
- Don’t hang heavy items: Never use the door as a shelf or seat.
- Clean spills immediately: Wipe away grease and crumbs to prevent buildup.
- Check hinges yearly: A quick inspection can catch small issues before they get worse.
- Use the broil stop position: When removing the door for cleaning, always use the correct position to avoid straining the hinges.
Regular care extends the life of your oven and keeps cooking safe and efficient.
Real-world Example
Let’s look at a real example. Sarah noticed her oven door wasn’t closing fully. She found the left hinge had slipped out of the slot after cleaning. By following the steps above, she:
- Turned off and cooled the oven.
- Inserted hinge locks.
- Removed the door.
- Realigned both hinges.
- Cleaned out crumbs from the hinge slot.
- Reinstalled the door.
After testing, her oven door closed tightly again. She saved over $100 by avoiding a service call. This shows that with care and the right steps, anyone can reset an oven door hinge successfully.

Credit: www.youtube.com
Comparison Of Hinge Types And Their Reset Difficulty
For those curious about the difficulty of resetting different hinge types, here’s a comparison.
| Hinge Type | Reset Difficulty | Common in |
|---|---|---|
| Standard hinge | Easy | Most home ovens |
| Drop-down hinge | Moderate | Older models |
| Side-opening hinge | Challenging | Premium ovens |
| Soft-close hinge | Moderate | Newer models |
If your oven has a side-opening or soft-close hinge, check the manual for model-specific steps.
When To Call A Professional
If you’ve tried all the steps and your oven door still doesn’t work, or you notice broken springs or bent frames, it’s time to call a professional. Attempting a repair beyond your skill level can cause more damage or void your warranty.
Professional technicians can:
- Replace broken or complex hinges.
- Realign warped doors or frames.
- Test the oven’s safety systems.
You can find certified appliance repair pros through your oven manufacturer’s website or local listings.
For more on how oven hinges work, see this Wikipedia article on ovens.
Frequently Asked Questions
Why Does My Oven Door Keep Popping Open After Resetting The Hinge?
If your oven door keeps opening on its own, the hinge spring may be too weak or the hinge arms are not fully seated in the slots. Check for broken springs, and make sure the hinge is locked firmly in the correct position.
Can I Reset An Oven Door Hinge Without The Original Hinge Locks?
Yes, you can use sturdy nails, Allen keys, or even small screwdrivers as substitute pins. However, always choose something strong enough to handle the hinge spring tension, and take extra care to avoid injury.
How Do I Know If My Hinge Needs To Be Replaced Instead Of Reset?
If you see a broken or stretched spring, bent metal, or if resetting does not restore smooth movement, it’s time to replace the hinge. Also, if the oven door remains uneven or loose after several reset attempts, replacement is the best option.
Are All Oven Door Hinges The Same?
No. There are several hinge types, and designs vary by brand and model. Always check your oven’s user manual or manufacturer’s website for specific hinge instructions. Using the wrong reset method can damage your oven.
Is It Safe To Use The Oven If The Door Doesn’t Close Tightly?
No, it’s not safe. A loose or open oven door lets heat escape, wastes energy, and may cause burns or fire hazards. Always fix or replace the hinge before using the oven again.
Resetting an oven door hinge is a valuable skill that can save you money and keep your kitchen running smoothly. By understanding how the hinge works, following the right steps, and knowing when to call for help, you can handle most oven door problems with confidence.