If you’ve ever noticed water dripping from behind your showerhead or found the showerhead wobbly in your hand, you’re likely dealing with a loose shower arm. This is a common issue in many homes, and while it may seem minor, a loose shower arm can lead to leaks, water damage, and even mold growth inside your bathroom walls.
Fixing it quickly and correctly is important for both your comfort and your home’s health.
Many people think tightening a shower arm is a job for a plumber. But with the right tools, a step-by-step approach, and some practical tips, you can do it yourself—even if you’ve never tackled a plumbing project before. This guide walks you through every detail, from understanding what a shower arm does to troubleshooting tricky leaks and ensuring your repair lasts for years.
Let’s get started.
Understanding The Shower Arm And Why It Matters
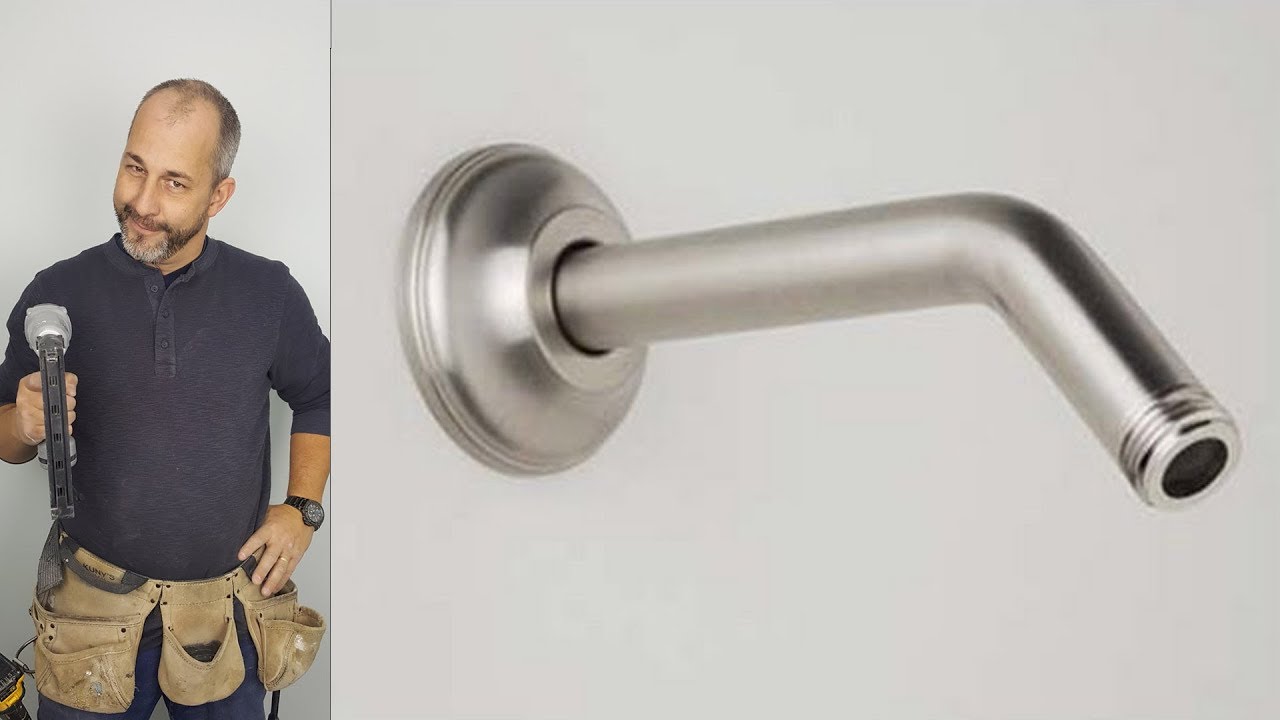
The shower arm is the metal pipe that connects the showerhead to the plumbing inside the wall. It’s usually bent at a right angle and extends out of the wall so you can attach a showerhead. Most shower arms are made of brass or stainless steel to resist rust and corrosion.
A tight, leak-free shower arm is important because:
- Water leaks from a loose arm can seep into the wall, causing hidden water damage.
- Mold and mildew can form if moisture gets trapped.
- A wobbly shower arm may break the pipe or the wall fitting if not fixed in time.
A properly tightened shower arm gives you peace of mind and keeps your bathroom safe.
What Causes A Shower Arm To Loosen?
Several factors can make a shower arm loose over time:
- Constant movement: Twisting or adjusting the showerhead often can slowly loosen the connection.
- Improper installation: If the arm wasn’t tightened correctly or if thread sealant was skipped, it will become loose.
- Water hammer: Sudden stops in water flow create vibration and pressure, shaking the shower arm.
- Aging materials: Old Teflon tape or worn threads lead to gaps and movement.
- House settling: As a building settles, pipes can shift, loosening connections.
Understanding these causes helps you prevent the problem from returning after you fix it.
Signs Your Shower Arm Needs Tightening
You don’t need to wait for a major leak to take action. Watch for these early warning signs:
- Dripping water from the point where the arm meets the wall
- Wobbling when you touch or move the showerhead
- Visible gaps around the shower arm escutcheon (the cover plate)
- Rust stains or mineral deposits near the connection
- Unusual water pressure changes when using the shower
If you spot any of these, it’s time to tighten your shower arm.
Tools And Materials Needed
Before you begin, gather the right tools and supplies. Having everything ready makes the process smoother.
| Tool/Material | Purpose |
|---|---|
| Adjustable wrench or channel-lock pliers | To grip and turn the shower arm |
| Teflon tape (plumber’s tape) | To seal threads and prevent leaks |
| Rag or cloth | To protect the finish on the shower arm |
| Flashlight | To see inside the wall fitting |
| Replacement shower arm (if needed) | If the current one is damaged |
| Step stool or ladder | If the showerhead is high up |
Pro tip: If your showerhead is old or hard to remove, have some penetrating oil ready to loosen stuck threads.
Step-by-step Guide To Tighten A Shower Arm
Now let’s go through the tightening process in detail. Even if you have little experience, just take it one step at a time.
1. Turn Off The Water Supply
You don’t need to shut off water to the whole house, but make sure the shower faucet is off. If you suspect a major leak inside the wall, turn off the main water supply to avoid any accidents.
2. Remove The Showerhead
Hold the shower arm with one hand to keep it steady. Use your adjustable wrench or pliers to loosen the showerhead by turning it counterclockwise. If it’s tight, wrap a rag around the showerhead to prevent scratches. Remove the showerhead and set it aside.
3. Inspect The Shower Arm And Wall Fitting
Shine a flashlight into the wall where the arm connects. Check for:
- Cracks or damage to the shower arm threads
- Signs of rust or water stains inside the wall fitting
- Old, worn Teflon tape on the threads
If you see cracks or significant rust, it’s better to replace the shower arm now rather than just tighten it.
4. Remove Old Teflon Tape
Peel off any old tape from the threads of the shower arm. Use a rag to clean off debris or mineral deposits. Old tape can prevent a watertight seal.
5. Apply Fresh Teflon Tape
Wrap the threads of the shower arm (the part that goes into the wall) with new Teflon tape. Wrap it clockwise (the same direction you’ll screw in the arm) so it doesn’t unravel. Two to three layers are enough. Smooth it down with your fingers.
6. Hand-tighten The Shower Arm
Insert the shower arm into the wall fitting and turn it clockwise by hand. Go slowly and keep it straight; cross-threading can damage the pipe.
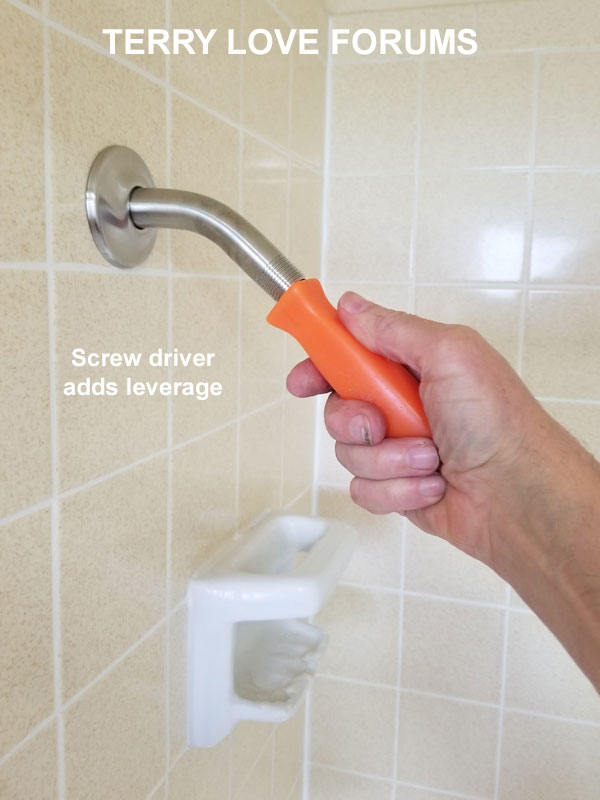
7. Use A Wrench For A Final Tighten
Once the arm is as tight as possible by hand, wrap a rag around it (to protect the finish) and use your wrench or pliers to give it a final snug turn. Don’t overtighten—too much force can crack the pipe or the fitting inside the wall.
Expert insight: Most leaks come from over-tightening or not using enough Teflon tape, not from under-tightening. Aim for “firm but not forced.”
8. Reattach The Showerhead
Clean the showerhead threads and add a small amount of Teflon tape if needed. Screw it back onto the arm by hand, then give it a gentle turn with the wrench if necessary.
9. Test For Leaks
Turn on the shower water slowly. Watch for drips at both the showerhead and where the arm meets the wall. If you see leaks, gently tighten a bit more with your wrench. Still leaking? You may need to remove the arm, add more tape, and try again.
10. Replace The Escutcheon Plate
The escutcheon is the round cover that hides the hole in the wall. Slide it back into place for a finished look.
What To Do If The Shower Arm Is Still Loose
Sometimes tightening doesn’t solve the problem. Here’s what you should check next:
- Stripped threads: If the threads on the shower arm or the wall fitting are worn out, the arm won’t stay tight. Replace the shower arm. If the wall fitting is stripped, you may need a plumber’s help.
- Loose wall fitting: If the fitting inside the wall moves, you may need to open the wall to secure it. This is uncommon but possible in older homes.
- Cracked arm: Any visible crack means you must replace the arm.
How To Replace A Shower Arm
If tightening fails, replacement is the best option. Here’s how to do it:
- Remove the old arm: Unscrew it (counterclockwise) with your wrench.
- Clean the threads: Remove old tape and debris from the wall fitting.
- Prepare the new arm: Wrap the threads with Teflon tape.
- Install the new arm: Insert and tighten by hand, then with the wrench.
- Reattach the showerhead: Finish as described above.
A new shower arm typically costs $10–$30 and can last for decades if installed correctly.
Comparing Shower Arm Materials And Their Durability
Choosing the right material can prevent future problems. Here’s a quick comparison of common options:
| Material | Pros | Cons | Expected Lifespan |
|---|---|---|---|
| Brass | Resists corrosion, strong, easy to tighten | More expensive | 20+ years |
| Stainless Steel | Rust-resistant, strong, affordable | Some cheaper models may corrode | 15–25 years |
| Chrome-plated Steel | Shiny finish, low cost | Prone to rust if scratched | 8–15 years |
| Plastic | Cheap, easy to install | Breaks easily, short lifespan | 2–5 years |
Insight: Always match your shower arm material to your showerhead’s finish for both appearance and corrosion resistance.
Credit: terrylove.com
Common Mistakes To Avoid When Tightening A Shower Arm
Many beginners make simple errors that lead to leaks or damage. Learn from these common mistakes:
- Skipping Teflon tape: Never screw in a shower arm without Teflon tape. The threads alone are not watertight.
- Over-tightening: More force is not always better. Stop once it’s snug.
- Cross-threading: Forcing the arm at an angle can destroy the threads.
- Using the wrong tools: Don’t use a regular wrench without a rag—metal-on-metal contact will scratch the finish.
- Ignoring leaks: Even a small drip can cause big problems inside the wall.
How To Tighten A Shower Arm In Tight Spaces
Some showers have little room to work. If you’re dealing with a cramped corner or a wall niche, try these tips:
- Use compact pliers or a small adjustable wrench.
- Remove the showerhead first for more space.
- If the escutcheon plate is loose, remove it temporarily for better access.
- Work slowly and carefully—rushed movements can damage the wall or fitting.
Credit: www.youtube.com
When To Call A Professional Plumber
Most shower arm tightening jobs are DIY-friendly, but call a plumber if:
- The wall fitting moves or spins inside the wall.
- There’s visible water damage, such as soft drywall or mold.
- You see signs of a leak inside the wall (peeling paint, damp smells).
- The threads inside the wall are stripped.
A pro can secure the fitting, repair water damage, and ensure everything is watertight.
Preventive Maintenance For Your Shower Arm
A little care can help your shower arm stay tight for years:
- Check for leaks or looseness every few months.
- Don’t hang heavy items (like shower caddies) from the arm.
- Avoid twisting the showerhead back and forth.
- Replace Teflon tape whenever you remove the shower arm.
- Clean mineral deposits regularly to prevent corrosion.
Small habits extend the life of your shower arm and prevent expensive repairs.
Troubleshooting Persistent Leaks
If you’ve tightened and retaped the shower arm but it still leaks, try these steps:
- Remove and inspect: Take the arm out and look for cracks, worn threads, or debris.
- Use more tape: Sometimes two layers aren’t enough—try three or four.
- Check the wall fitting: Shine a light in and check for cracks or movement.
- Try pipe thread sealant: Some plumbers prefer a liquid sealant instead of tape for a stronger seal.
- Replace the arm: If all else fails, a new arm is a small investment.
Real-world Example: Fixing A Loose Shower Arm
Let’s look at a quick example. Jane, a homeowner, noticed water stains on her bathroom ceiling. She found a small drip where the shower arm met the wall. After removing the showerhead, she saw old, brittle Teflon tape and some rust on the threads.
Jane cleaned the threads, applied fresh tape, tightened the arm with a wrench, and reinstalled the showerhead. After testing, the drip was gone and her ceiling dried out within days.
Key takeaway: Most leaks are caused by old tape or loose connections, not by major pipe problems.
Cost Comparison: Diy Vs. Hiring A Plumber
Many people wonder if fixing a shower arm themselves will save money. Here’s a side-by-side look:
| Method | Parts & Materials | Labor Cost | Total Cost |
|---|---|---|---|
| DIY Repair | $5–$30 (tape, wrench, possible new arm) | $0 (your time) | $5–$30 |
| Plumber | $5–$30 | $100–$200 (hourly rate) | $105–$230 |
Insight: A simple shower arm tightening is one of the easiest plumbing fixes to do yourself.
Advanced Tip: Using Pipe Thread Sealant
Some professionals use a pipe thread sealant (liquid or paste) instead of Teflon tape. It can provide a stronger, longer-lasting seal, especially in older homes with worn threads. If you choose this option:
- Apply a small amount to the threads before screwing in the arm.
- Wipe off any excess.
- Allow the sealant to cure as directed before using the shower.
This isn’t necessary for most jobs, but it’s a good option if you’ve had repeated leaks.
Shower Arm Tightening And Home Insurance
Water leaks can lead to claims on your home insurance—but only if you’ve taken care of your plumbing. Insurers may deny claims if they find “neglect” or “improper repair.” Doing the job right, keeping receipts, and documenting repairs can protect you in case of future problems.
For more on home water damage and prevention, see the official EPA guide to mold and moisture.
Frequently Asked Questions
Why Does My Shower Arm Keep Coming Loose?
A shower arm may come loose due to repeated twisting, vibration from water pressure changes, or improper installation. Old or worn Teflon tape and stripped threads are also common reasons. Regular checks and proper installation can prevent this problem.
Can I Use Plumber’s Putty Instead Of Teflon Tape?
No, plumber’s putty is not suitable for threaded pipe connections like a shower arm. It’s designed for sealing flat surfaces, not threads. Use Teflon tape or pipe thread sealant for a watertight fit.
How Tight Should A Shower Arm Be?
A shower arm should be hand-tight plus a quarter turn with a wrench. It should feel snug but not forced. Too much force can crack the pipe or wall fitting.
What If My Shower Arm Is Leaking Inside The Wall?
If you suspect water is leaking inside the wall (such as soft drywall or moldy smells), stop using the shower and call a professional plumber. Delaying can cause expensive water damage and mold growth.
How Often Should I Check My Shower Arm For Leaks?
It’s a good idea to check your shower arm and showerhead for leaks every few months, especially in older homes. Early detection helps you fix problems before they cause damage.
A tight, leak-free shower arm means more than just a comfortable shower—it protects your home from hidden water damage and costly repairs. By following these steps, choosing quality materials, and avoiding common mistakes, you can handle this repair with confidence.
With a little time and care, you’ll enjoy a worry-free shower experience for years to come.

Credit: www.youtube.com