
There’s something magical about the smell and taste of pizza baked in a wood-fired oven. The crisp crust, the smoky flavor, and the bubbling cheese make every bite unforgettable. But using a wood pizza oven is not as simple as turning a knob and waiting for the beep. It’s a craft that blends tradition, technique, and a bit of patience. If you’re new to the world of wood-fired cooking, this guide will take you from lighting your first fire to serving authentic, delicious pizza at home. Let’s explore everything you need to know, from oven setup to advanced tips for perfect results.
Understanding The Wood Pizza Oven
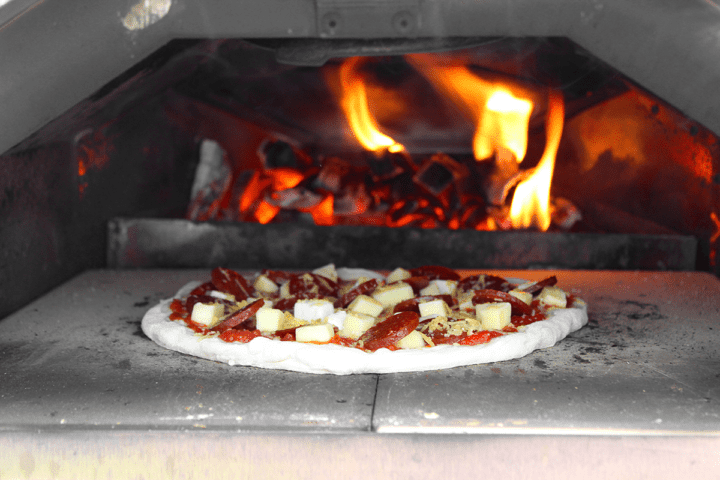
Before you start cooking, it’s important to know how a wood pizza oven works. These ovens use real wood as fuel, which burns inside a stone or brick chamber. The flames and hot air circulate, creating intense, even heat. Unlike conventional ovens, the temperature in a wood-fired oven can reach up to 900°F (480°C), which is perfect for authentic Neapolitan-style pizzas.
There are two main types of wood pizza ovens:
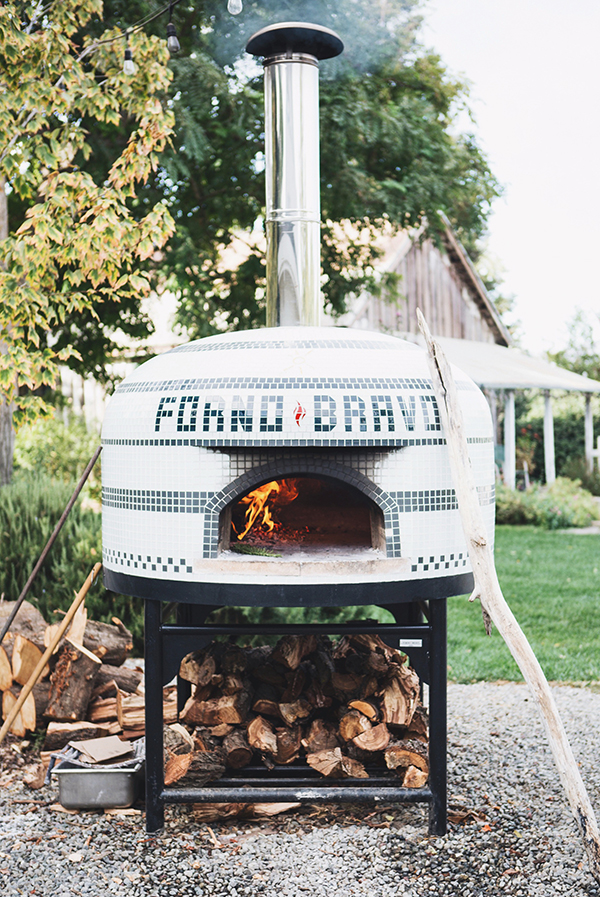
- Built-in ovens: These are permanent structures, usually made of brick or stone, installed in your backyard or patio.
- Portable ovens: These are smaller, lighter, and can be moved around. They’re often made from stainless steel or clay.
Both types use the same principles but may differ in size, heat retention, and startup time.
Why Wood-fired?
Wood-fired ovens aren’t just about nostalgia. The high heat cooks pizzas in as little as 90 seconds, creating a unique texture and taste that electric or gas ovens can’t easily match. The wood smoke adds flavor, and the hot stone base gives you that unbeatable crispy crust.
Choosing The Right Wood Pizza Oven
Selecting the best oven for your needs is the first big decision.
Key Factors To Consider
- Size: Larger ovens can cook multiple pizzas at once but require more wood and space. Smaller ovens heat up faster and are easier for beginners.
- Material: Brick retains heat well, while stainless steel heats quickly but cools faster.
- Portability: Do you want a fixed oven or one you can move or store?
- Budget: Prices vary widely. Small portable models can cost a few hundred dollars, while large built-ins can reach several thousand.
Common Buyer Mistakes
Many first-time buyers pick the largest oven they can afford, thinking bigger is always better. But larger ovens take longer to heat and use more wood, which can be overwhelming if you only want to cook for a few people.
Also, not all woods are suitable—avoid treated or resinous woods, as they release harmful chemicals.
Credit: www.thursdaynightpizza.com
Essential Tools And Accessories
A wood pizza oven requires a few special tools that make life much easier:
- Pizza peel: A flat paddle used to slide pizzas in and out of the oven.
- Oven brush: For cleaning ash and crumbs off the stone.
- Infrared thermometer: To check the temperature of the oven floor.
- Heat-resistant gloves: For handling hot tools and wood.
- Ash rake or shovel: For managing embers and cleaning the oven.
- Pizza cutter: For slicing your finished pizzas.
Investing in good-quality tools will save you time and frustration.
Fuel: Choosing And Preparing The Right Wood
The type of wood you use greatly impacts the flavor and heat.
Best Woods For Pizza Ovens
- Oak: Burns hot and long; gives a mild smoky flavor.
- Maple: Provides steady heat and a subtle sweetness.
- Beech: Clean-burning and easy to find in Europe.
- Hickory: Strong smoke flavor; use sparingly.
- Fruitwoods (apple, cherry): Add a gentle, sweet aroma.
Avoid pine, cedar, or other softwoods—they produce too much smoke and can make your food taste bad.
Preparing Wood
Use seasoned wood (dried for at least 6-12 months) with less than 20% moisture. Wet wood creates steam and makes it hard to reach high temperatures. Split wood into small pieces (kindling) for starting the fire and larger logs for maintaining heat.
Setting Up Your Wood Pizza Oven
Before your first pizza, you need to prepare your oven.
Seasoning A New Oven
If your oven is brand new, you must “cure” or slowly preheat it to drive out any moisture from the bricks or clay. Follow your manufacturer’s guidelines, but a typical process includes:
- Build small fires each day, increasing the size and temperature over 4-5 days.
- Let the oven cool completely between fires.
Skipping this step can cause cracks.
Placing The Oven
If you have a portable oven, put it on a stable, heat-proof surface away from flammable materials. Make sure there’s enough ventilation and clearance for smoke to escape.
Lighting The Fire: Step-by-step
Getting the fire started is one of the most important—and sometimes tricky—steps.
- Open the oven door and flue to ensure good airflow.
- Place kindling (small dry sticks) in the center of the oven floor.
- Add a few small logs on top, leaving space for air to move.
- Light the kindling with a long match or firestarter.
- Let the fire build for 10-15 minutes, adding more wood as needed.
- Move the fire to one side using your ash rake, creating a large bed of hot embers.
- Keep adding wood to maintain flames and temperature.
Don’t be discouraged if it takes a few tries. With practice, you’ll learn how your oven behaves.
Common Fire Starting Problems
Beginners often use too much wood at once, smothering the fire. Start small, and add more gradually. Don’t use lighter fluid or treated wood—these can ruin the taste and safety of your pizza.
Heating And Managing The Oven Temperature
A wood pizza oven needs to reach and hold the right temperature for perfect pizza.
Ideal Temperature
For Neapolitan pizza, aim for 800-900°F (425-480°C) on the oven floor. Other pizzas can be baked at lower temperatures, between 650-750°F (340-400°C).
How To Measure
Use an infrared thermometer to check the surface temperature of the stone or bricks where the pizza will sit. Oven air temperature is less important than the heat of the cooking surface.
Managing The Heat
- Add wood regularly to keep the fire burning.
- Move embers to spread heat evenly.
- Let the oven “soak” at full heat for 20-30 minutes before cooking.
If the oven floor gets too hot (over 950°F), let it cool for a few minutes or sprinkle a handful of flour—if it burns instantly, it’s too hot.
Pizza Dough And Toppings: Preparation Matters
Great pizza starts with the right dough and toppings.
Basic Pizza Dough Recipe
For a classic Neapolitan-style dough:
- 500g (3 ⅓ cups) 00 flour (or bread flour)
- 325ml (1 ⅓ cups) water
- 10g (2 tsp) salt
- 3g (1 tsp) dry yeast
Mix the ingredients, knead for 10 minutes, and let rise for 2 hours. Divide into balls, cover, and let rest another hour.
Topping Tips
Keep toppings simple and not too heavy. Overloading the pizza can make it soggy or hard to slide onto the oven floor. Use fresh mozzarella, tomato sauce, and a drizzle of olive oil for classic Margherita. Add toppings just before baking.
Non-obvious Insight
If you let dough sit at room temperature for several hours (up to 8), it will develop more flavor and be easier to stretch thin without tearing.

Credit: www.love-logs.com
Launching The Pizza: Getting It Right
Sliding the pizza into a wood oven takes a bit of skill.
- Flour the peel well to prevent sticking.
- Stretch the dough gently by hand—don’t use a rolling pin.
- Add toppings quickly, so the dough doesn’t stick.
- Shake the peel gently to ensure the pizza moves freely.
- Aim for the hottest spot (usually near the fire) and slide the pizza onto the oven floor with a quick, smooth motion.
If the pizza sticks, lift a corner with a spatula and blow a little flour underneath.
Baking: Timing And Turning
Pizzas cook very fast in a wood oven, usually 90 seconds to 2 minutes.
- Watch the edges—they’ll puff and char quickly.
- Use the peel to rotate the pizza every 20-30 seconds for even cooking.
- Lift the pizza to the dome for a few seconds to finish the top if needed.
Be careful not to burn the crust. Practice helps—your first few pizzas might be uneven, but you’ll learn quickly.
Example: Classic Margherita
- Oven at 850°F
- Cook for 90 seconds, rotating every 25 seconds
- Look for a leopard-spotted crust and bubbling cheese
Troubleshooting Common Problems
Even experienced pizza makers run into issues. Here’s how to handle them.
Crust Burned, Toppings Undercooked
- The oven floor may be too hot. Let it cool or use less wood.
- Try raising the pizza toward the dome to finish the top.
Pizza Sticking To The Peel
- Use more flour or semolina on the peel.
- Don’t overload with sauce or toppings.
Soggy Center
- Dough may be too thick, or oven not hot enough.
- Bake longer at a slightly lower temperature.
Uneven Browning
- Rotate the pizza more often.
- Spread embers evenly to balance heat.
Cleaning And Maintaining Your Wood Pizza Oven
Keeping your oven clean ensures great taste and a long life.
After Each Use
- Allow the oven to cool.
- Sweep out ash and crumbs with your oven brush.
- Wipe the stone with a damp (not wet) cloth if needed.
Deep Cleaning
- Every few months, remove all ash and inspect for cracks.
- For built-in ovens, check the chimney for blockages.
Seasoned User Tip
Don’t use soap or harsh chemicals on the oven floor—they can leave residues that spoil the flavor. A hot fire will burn off most grease naturally.
Credit: www.fornobravo.com
Other Foods You Can Cook
A wood pizza oven is more versatile than you might think. Besides pizza, you can bake:
- Bread: Use the falling heat after pizza baking for perfect crusty loaves.
- Roasted vegetables: Place in a cast iron pan near the embers.
- Meats: Cook steaks, chicken, or fish directly on the stone or in pans.
- Desserts: Try fruit tarts or baked apples in the gentle residual heat.
Temperature Range Comparison
Here’s how typical foods match oven temperatures:
| Food | Oven Floor Temperature (°F) | Cooking Time |
|---|---|---|
| Pizza | 800-900 | 1-2 minutes |
| Bread | 500-600 | 30-40 minutes |
| Roasted Vegetables | 450-550 | 20-30 minutes |
| Meats | 600-750 | Varies (10-30 mins) |
| Desserts | 350-450 | 20-40 minutes |
Safety Tips For Using A Wood Pizza Oven
Safety should never be an afterthought. Here’s how to protect yourself and others:
- Keep children and pets away from the oven while it’s hot.
- Wear heat-resistant gloves when handling tools or wood.
- Never use water to put out the fire—it can crack the oven.
- Have a fire extinguisher nearby, just in case.
- Store wood in a dry, safe place away from the oven.
Comparing Wood Pizza Ovens With Other Types
If you’re curious how wood pizza ovens stack up against gas or electric models, here’s a quick look:
| Feature | Wood Oven | Gas Oven | Electric Oven |
|---|---|---|---|
| Max Temperature | 800-950°F | 700-850°F | 600-700°F |
| Startup Time | 45-60 mins | 15-30 mins | 10-20 mins |
| Flavor | Smoky, authentic | Clean, less smoky | Neutral |
| Ease of Use | Intermediate | Easy | Very easy |
| Maintenance | Regular cleaning | Low | Very low |
Advanced Tips For Wood Pizza Oven Success
1. Experiment With Wood Blends
Mixing different woods (like oak and fruitwood) lets you customize the smoke flavor. Start with a base wood (oak or maple) and add small pieces of cherry or apple for aroma.
2. Use Residual Heat
After pizza night, use the leftover heat to roast vegetables or slow-cook meats overnight. The gentle temperature is perfect for these dishes and saves energy.
3. Practice Dough Shaping
Stretching dough by hand gives better results than rolling. If you’re new, watch videos or take a class to learn the right technique.
4. Track Oven Patterns
Every oven has hot and cool spots. After a few uses, you’ll learn where your pizza browns fastest. Use these areas for finishing or baking sides.
5. Try Cold Fermentation
Letting dough rise in the fridge for 24-72 hours develops extra flavor. Many pizzerias use this method for their signature taste.
6. Use A Steel Peel For Launch, Wood For Removal
Metal peels slide under raw dough more easily, while wooden peels are better for removing cooked pizzas without sticking.
7. Learn To Cook By Feel
With practice, you’ll be able to judge oven heat and pizza doneness by sight and smell, not just timers or thermometers.
Hosting A Pizza Party
A wood pizza oven is a social centerpiece. Invite friends or family to make their own pizzas. Prepare dough balls and toppings ahead of time. Let guests shape, top, and bake their own creations. It’s a fun way to share the experience and learn together.
Pro Party Tips
- Set up a topping station with labeled bowls.
- Have a few extra peels so multiple people can prepare pizzas at once.
- Offer other foods (like salads or desserts) to balance the menu.
Caring For Your Oven Year-round
Ovens need protection from the elements, especially if they’re outdoors.
- Use a weatherproof cover when not in use.
- If possible, store portable ovens indoors during winter.
- Inspect for cracks or water damage after storms.
Well-cared-for ovens can last for decades and become a family tradition.
Frequently Asked Questions
How Long Does It Take To Heat A Wood Pizza Oven?
Most wood pizza ovens need 45 to 60 minutes to reach the ideal pizza-baking temperature. Smaller portable ovens may heat up a bit faster, while large brick ovens can take longer. Let the oven “soak” at full heat for 20-30 minutes before baking for the best results.
What Is The Best Wood To Use In A Pizza Oven?
The best woods are hardwoods like oak, maple, and beech. These burn hot and clean, producing steady heat and a gentle smoky flavor. Fruitwoods like apple or cherry add a sweet aroma. Avoid softwoods (pine, cedar) as they create too much smoke and can give an unpleasant taste.
Can I Cook More Than Just Pizza In My Wood Oven?
Absolutely. Wood pizza ovens are perfect for bread, roasted vegetables, meats, and even desserts. Use the oven’s falling heat after pizza baking for slower-cooked dishes. Be sure to adjust the cooking time and temperature for each type of food.
How Do I Clean My Wood Pizza Oven?
Let the oven cool, then sweep out all ash and crumbs with a brush. For deeper cleaning, remove ash and check for cracks every few months. Never use water to clean a hot oven or harsh chemicals on the stone.
A hot fire will naturally burn off most residues.
Where Can I Learn More About Wood-fired Cooking Techniques?
Many resources are available online and in books. A good starting point is the Wikipedia entry on wood-fired ovens for history and technical details. Local cooking classes and demonstration events are also great for hands-on experience.
A wood pizza oven is more than just a tool—it’s an experience that brings people together. With some practice, patience, and care, you’ll be serving up the kind of pizza that friends and family will remember for years. Enjoy the journey, and happy baking!