If you love ice cream, making it at home opens a world of fresh flavors and creativity. The Kitchenaid Ice Cream Maker is a popular tool for turning your kitchen into a dessert shop. It attaches to your Kitchenaid stand mixer and lets you craft creamy, smooth ice cream, sorbet, gelato, and frozen yogurt right on your countertop. But for many first-time users, the process can feel a bit confusing. Maybe your first batch turned out icy or soupy, or you’re not sure how to clean the bowl. With the right steps and some helpful tips, you can get delicious results every time.
This guide will walk you through everything you need to know about using the Kitchenaid Ice Cream Maker. We’ll cover setup, preparation, churning, troubleshooting, cleaning, and even some creative ideas to take your ice cream to the next level. Along the way, you’ll learn how to avoid common mistakes and make sure your frozen treats turn out just right.
Whether you’re new to homemade ice cream or want to improve your technique, you’ll find clear, practical advice here.
What Is The Kitchenaid Ice Cream Maker?
The Kitchenaid Ice Cream Maker is an attachment for Kitchenaid stand mixers. It includes a double-walled, insulated bowl that you freeze before use, a dasher (the paddle that churns the mixture), and a drive assembly to connect it to your mixer. When attached, your mixer powers the churning process, while the frozen bowl freezes the mixture as it moves.
With this tool, you don’t need a separate electric ice cream machine. If you already have a Kitchenaid stand mixer, it’s a smart way to expand its use. The bowl fits most tilt-head and bowl-lift models (except the Artisan Mini and a few others). It can make up to 2 quarts (about 1.9 liters) of ice cream or sorbet in one batch.
Benefits Of Homemade Ice Cream With Kitchenaid
Why bother making ice cream at home? Here are a few reasons to use the Kitchenaid Ice Cream Maker:
- Control over ingredients: You know exactly what’s in your dessert—no artificial colors, flavors, or preservatives.
- Custom flavors: Invent your own combinations, use fresh fruit, or adjust sugar levels to your taste.
- Texture: Homemade ice cream can be extra creamy and smooth when you follow the right steps.
- Fun activity: Making ice cream is a great way to involve family or friends.
- Cost-effective: Over time, making your own can be cheaper than buying premium store brands.
Many people are surprised how much better homemade ice cream can taste—especially when it’s freshly churned and soft.
How The Kitchenaid Ice Cream Maker Works
The magic of this attachment is its freezer bowl. Inside the double walls is a liquid that freezes solid when placed in your freezer. As you churn your ice cream base in this bowl, the cold surface freezes the mixture quickly. The dasher stirs and scrapes the bowl, incorporating air and keeping the mixture smooth, not icy.
Here’s a simple breakdown of the process:
- Freeze the bowl for at least 15 hours.
- Prepare your ice cream base and chill it.
- Set up the attachment and start your mixer.
- Pour in the base and let it churn for 20–30 minutes.
- Scoop out your finished ice cream and freeze it to firm up.
Let’s look at every step in detail.
Preparing The Kitchenaid Ice Cream Maker
Freezing The Bowl
The most important step is freezing the bowl completely before use. Place it in the coldest part of your freezer (usually the back). The bowl should be upright, with nothing inside. Most users find that 15–24 hours is needed for a thorough freeze. If you hear sloshing when you shake it, it’s not ready.
Pro tip: Keep your bowl in the freezer at all times if you make ice cream often. That way, it’s always ready when you need it.
Checking Your Mixer Model
Not all Kitchenaid mixers use the same drive assembly. Double-check your mixer’s compatibility. Tilt-head models and bowl-lift models use slightly different setups. Always follow your attachment’s instruction manual for assembly.
Assembling The Attachment
- Place the frozen bowl on your mixer’s base and lock it in place.
- Insert the dasher (paddle) into the bowl.
- Attach the drive assembly to the mixer head and connect it to the dasher.
- Lower the mixer head (tilt-head models) or raise the bowl (bowl-lift models) to the locked position.
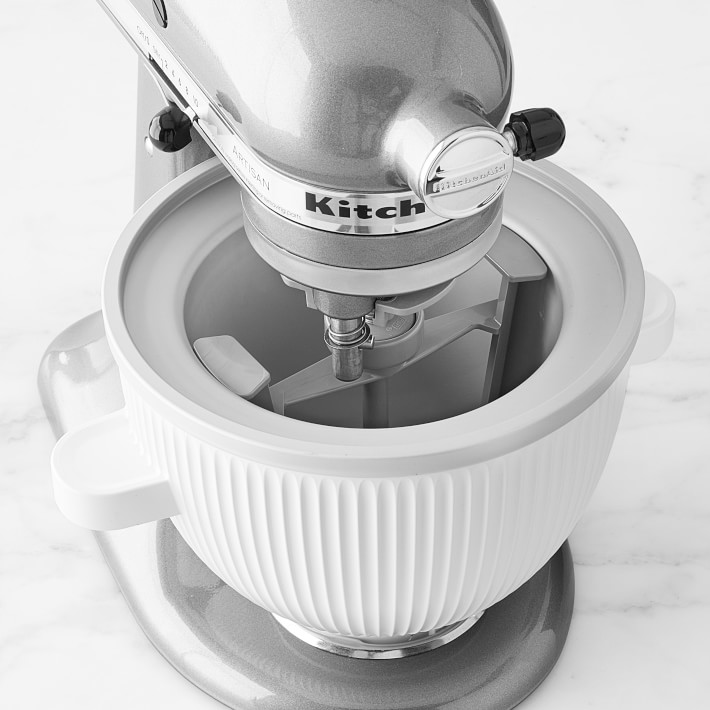
Make sure everything is secure—otherwise, the dasher won’t turn correctly.
:max_bytes(150000):strip_icc()/KitchenAid_KitchenAttachments_IceCreamMaker_HeroSquare-69e0830dacf64623807477369c6540e6.jpg)
Credit: www.thespruceeats.com
Making The Ice Cream Base
Your ice cream’s taste and texture depend on the base recipe. The Kitchenaid Ice Cream Maker can handle custard-style (egg-based), Philadelphia-style (no eggs), frozen yogurt, sorbet, and even dairy-free recipes.
Classic Vanilla Ice Cream Base
Here’s a simple, reliable recipe for classic vanilla ice cream.
Ingredients:
- 2 cups (480 ml) heavy cream
- 1 cup (240 ml) whole milk
- ¾ cup (150 g) granulated sugar
- 1 tablespoon pure vanilla extract
- Pinch of salt
Instructions:
- In a bowl, whisk together the milk and sugar until the sugar dissolves.
- Stir in the heavy cream, vanilla, and salt.
- Cover and refrigerate for at least 2 hours (overnight is best).
Why chill the base? Cold base mixtures freeze faster and more evenly. If your base is warm, your ice cream can turn icy.
Custard-style Ice Cream
For a richer texture, use eggs:
- 2 cups heavy cream
- 1 cup whole milk
- 5 egg yolks
- ¾ cup sugar
- 1 tablespoon vanilla
Cook the yolks, sugar, and milk gently until thickened, then strain and combine with cream and vanilla. Cool completely before churning.
Non-dairy, Sorbet, And Frozen Yogurt
The Kitchenaid can also handle fruit-based sorbets, coconut milk ice cream, and yogurt. Just make sure the base is well chilled.
Non-obvious insight: Adding a small amount of alcohol (like vodka or liqueur) to your base can help keep it soft, because alcohol doesn’t freeze solid. Don’t overdo it—1–2 tablespoons per batch is enough.
Churning With The Kitchenaid Ice Cream Maker
Setup Steps
- Freeze the bowl: At least 15 hours.
- Chill your base: At least 2 hours.
- Assemble the attachment: Make sure the dasher and drive assembly are in place.
- Start the mixer: Turn it on to the “Stir” or lowest speed BEFORE pouring in the base. This prevents the base from freezing instantly to the bowl.
Churning Process
Slowly pour the chilled base into the bowl while the mixer is running. The dasher will turn, scraping the sides and mixing air in. Churn for 20–30 minutes (timing depends on recipe and temperature).
Signs it’s done:
- The mixture thickens and pulls away from the sides.
- It reaches a soft-serve consistency.
- The dasher may start to struggle or stop turning if the ice cream is very thick.
Don’t over-churn. Once thick, stop the mixer and scoop out the ice cream with a rubber spatula.
Adding Mix-ins
Add chocolate chips, fruit, nuts, or cookie pieces during the last 2–5 minutes of churning. If you add them too early, they’ll sink or become soggy.
Smart tip: Freeze your mix-ins first so they don’t melt the ice cream.
Transferring And Hardening
Spoon the ice cream into a shallow, airtight container. Press a piece of parchment paper or plastic wrap directly on the surface to prevent ice crystals. Freeze for 2–4 hours to harden.
Serving size: The bowl makes about 2 quarts—enough for 8 generous servings.
Cleaning And Storing The Attachment
Cleaning is simple but important for long-lasting use.
Cleaning Steps
- Unplug the mixer and remove the drive assembly, dasher, and bowl.
- Wash the bowl by hand with warm, soapy water. Never use hot water or a dishwasher—it can damage the bowl’s freezing liquid.
- Wash the dasher and drive assembly by hand. Dry everything thoroughly.
- Store the bowl in the freezer or a dry, cool place.
Caution: Never refreeze the bowl while wet, as ice can build up on the surface and cause damage.
Common Mistakes And How To Avoid Them
Even with a good recipe, small errors can ruin your ice cream. Here are the most frequent mistakes:
- Bowl not frozen enough: If you hear sloshing or your ice cream stays soupy, the bowl isn’t cold enough.
- Base not chilled: Warm base won’t freeze properly and can become icy.
- Overfilling the bowl: Leave space for air and expansion, or your ice cream will overflow.
- Adding mix-ins too early: They’ll sink to the bottom or make the mixture watery.
- Storing in a warm freezer: If your freezer isn’t cold enough (0°F or -18°C is best), the bowl may not freeze fully.
- Dishwasher cleaning: Only hand-wash the bowl to protect its freezing capability.
Non-obvious insight: Use a kitchen thermometer to check your freezer’s temperature. Freezers often run warmer than the setting says, especially if the door is opened often.
Customizing Your Ice Cream
One of the best parts of making ice cream at home is customizing it. Here are ways to get creative with your Kitchenaid Ice Cream Maker.
Flavors And Add-ins
- Swirl in caramel or fudge sauce after churning.
- Add crushed cookies or candies for texture.
- Mix in roasted fruit, nuts, or coconut.
- Use extracts (mint, almond, lemon) for unique flavors.
- Make “grown-up” ice cream with a splash of rum, bourbon, or coffee liqueur.
Healthier Options
- Substitute part of the cream with whole milk or Greek yogurt.
- Use natural sweeteners like honey or maple syrup.
- Try dairy-free bases with coconut, almond, or oat milk.
Unique Styles
- Make gelato: Use more milk and less cream for a denser treat.
- Try sorbet: Blend fruit, sugar, and water for a refreshing, fat-free dessert.
- Create frozen yogurt: Use plain or flavored yogurt as your base.
Layering And Swirling
To get beautiful swirls, layer ice cream and sauces (like berry purée or melted chocolate) in your container before the final freeze. Drag a knife through for a marbled effect.
Troubleshooting Problems
Sometimes, things go wrong. Here’s how to fix common issues with your Kitchenaid Ice Cream Maker.
Ice Cream Is Too Soft
- Bowl wasn’t frozen long enough.
- Base was too warm.
- Room or kitchen temperature is too high.
- Solution: Refreeze the bowl, chill the base longer, and churn in a cooler room.
Ice Cream Is Hard And Icy
- Not enough fat or sugar in the base.
- Over-churned or under-churned.
- Freezer is too cold after churning (let ice cream sit 10 minutes before scooping).
- Solution: Adjust recipe for more cream and sugar, and churn only until soft-serve stage.
The Dasher Stops Turning
- Ice cream is too thick.
- Overfilled the bowl.
- Solution: Remove some mixture, or stop and transfer ice cream to a container.
Bowl Is Damaged Or Leaking
- Frozen liquid leaking means the bowl’s seal is broken—replacement is needed.
- Don’t use sharp tools inside the bowl.
Comparing Kitchenaid Ice Cream Maker To Other Machines
How does the Kitchenaid attachment compare to standalone machines? Here’s a quick look.
| Feature | Kitchenaid Ice Cream Maker | Compressor Machine | Manual Ice Cream Maker |
|---|---|---|---|
| Capacity | 2 quarts | 1.5–2 quarts | 1–2 quarts |
| Prep Time | Freeze bowl 15+ hrs | No freezing needed | Freeze bowl or use ice/salt |
| Price Range | Medium | High | Low–Medium |
| Cleaning | Hand-wash only | Some dishwasher safe | Varies |
| Noise | Low–Medium | Medium | Low |
Kitchenaid Pros: Uses your existing mixer, compact, makes large batches, easy to store.
Cons: Bowl must be frozen in advance, can only make one batch per freeze.
Kitchenaid Ice Cream Maker: Quick Reference Guide
Sometimes you just want a simple, at-a-glance summary.
| Step | What to Do | Tips |
|---|---|---|
| 1. Freeze Bowl | 15–24 hours, upright | Keep in freezer if possible |
| 2. Make Base | Mix and chill | Refrigerate overnight for best results |
| 3. Assemble | Attach bowl, dasher, drive | Check for secure fit |
| 4. Churn | Start mixer, pour in base | Add mix-ins near end |
| 5. Transfer & Freeze | Move to container, harden in freezer | Cover with parchment to avoid ice |
| 6. Clean | Hand-wash only | Dry fully before storing |
Credit: www.shakesandcones.com
Advanced Tips For Better Ice Cream
For users who want to go beyond the basics, here are some expert tips.
- Use invert sugar: Ingredients like corn syrup, honey, or glucose help prevent iciness and improve texture.
- Age your base: Let your mixture rest in the fridge 12–24 hours. This allows fat to crystallize and flavors to blend, leading to smoother ice cream.
- Strain your custard: For egg-based recipes, strain through a fine sieve to remove any cooked egg bits for a silkier mouthfeel.
- Weigh your ingredients: Use a kitchen scale for consistent results, especially with eggs and sugar.
- Work quickly: The bowl starts to warm up as soon as it’s out of the freezer. Assemble and churn without delay.
Experience-based tip: If you want ultra-smooth ice cream, chill your container before transferring the churned ice cream. This slows melting and reduces ice crystals.
Cleaning, Maintenance, And Storage
Your Kitchenaid Ice Cream Maker can last for years with proper care.
- Always hand-wash the bowl with mild soap and water. Rinse and dry completely.
- Never use abrasive pads or cleaners; they can scratch the interior.
- Store the bowl in the freezer, covered or wrapped, to prevent freezer odors.
- Keep the dasher and drive assembly dry and stored with your mixer accessories.
- If you notice cracks, leaks, or changes in performance, contact Kitchenaid support for help.
Creative Ice Cream Recipes To Try
Ready to experiment? Here are a few recipe ideas suited for the Kitchenaid Ice Cream Maker.
Strawberry Cheesecake Ice Cream
- 2 cups heavy cream
- 8 oz cream cheese, softened
- 1 cup whole milk
- ¾ cup sugar
- 1 cup chopped strawberries
- 1 teaspoon vanilla
- ½ cup crushed graham crackers
Blend everything except strawberries and crackers until smooth. Chill, churn, then add fruit and crackers in the last 5 minutes.
Vegan Chocolate Coconut Ice Cream
- 2 cans (13.5 oz each) full-fat coconut milk
- ¾ cup sugar
- ½ cup cocoa powder
- 1 tablespoon vanilla extract
Whisk all together, chill, churn, and enjoy dairy-free chocolate ice cream.
Lemon Sorbet
- 2 cups water
- 1 cup sugar
- 1 cup fresh lemon juice
- 1 tablespoon lemon zest
Heat water and sugar until dissolved. Chill, add juice and zest, churn, and freeze.
Pro tip: Sorbets freeze harder than ice cream—let them soften at room temperature before scooping.
Safety And Usage Precautions
Always follow these safety tips:
- Don’t run the mixer without the dasher in place; it can damage the bowl.
- Don’t use metal utensils in the bowl.
- Don’t refreeze the bowl while wet.
- Don’t overfill; ice cream expands as it freezes.
- Supervise children—moving parts and cold surfaces can be risky.
Environmental And Cost Considerations
The Kitchenaid Ice Cream Maker is reusable and reduces packaging waste from store-bought ice cream. Over time, it can also save money if you make ice cream regularly.
- Typical batch cost: About $3–$5 for 2 quarts, depending on ingredients.
- Store-bought premium ice cream: $5–$7 for 1 quart.
By making your own, you can reduce single-use plastic and choose more sustainable ingredients.
Where To Find More Information
For more recipes and technical support, visit the official Kitchenaid Ice Cream Maker page. You’ll find detailed guides, troubleshooting, and creative ideas.

Credit: www.youtube.com
Frequently Asked Questions
How Long Does It Take To Make Ice Cream With The Kitchenaid Ice Cream Maker?
From start to finish, making ice cream takes about 24 hours (including freezing the bowl and chilling the base). The actual churning takes 20–30 minutes.
Can I Make More Than One Batch In A Row?
No, the bowl must be completely refrozen between batches. For multiple batches, you’ll need extra bowls.
What Should I Do If My Ice Cream Is Too Icy?
Try increasing the fat or sugar in your recipe, chill your base longer, and use the bowl only when fully frozen.
Is The Kitchenaid Ice Cream Maker Dishwasher Safe?
No, only hand-wash all parts. Dishwasher heat can damage the bowl’s freezing liquid.
Can I Use The Kitchenaid Ice Cream Maker For Gelato Or Frozen Yogurt?
Yes, it works well for gelato (lower fat, more milk) and frozen yogurt. Just follow suitable recipes and chill your base well.
—
Homemade ice cream is a treat worth mastering, and the Kitchenaid Ice Cream Maker makes it possible for anyone with a stand mixer. With the right preparation and a few smart tips, you can enjoy creamy, flavorful ice cream whenever you want.
Experiment, have fun, and soon you’ll be making frozen desserts that impress everyone who tries them.