
Using a sandwich maker may seem simple, but there’s a world of flavor and convenience waiting for you if you know how to use it well. Many people buy a sandwich maker, try it once or twice, and then leave it forgotten in a cabinet.
This is a missed opportunity. With a little know-how, you can create quick breakfasts, tasty snacks, and even full meals with just a few minutes’ effort. Whether you’ve never touched a sandwich maker or you want to level up your skills, this guide will help you unlock its true potential.
A sandwich maker is more than a kitchen gadget; it’s a tool that can save you time, reduce mess, and inspire creativity. In this article, you’ll learn everything from the basic setup to advanced tips, cleaning hacks, and even troubleshooting.
You’ll see how to make classic sandwiches and try new recipes. If you’re ready to make your sandwich maker your new favorite kitchen partner, let’s get started.
What Is A Sandwich Maker?
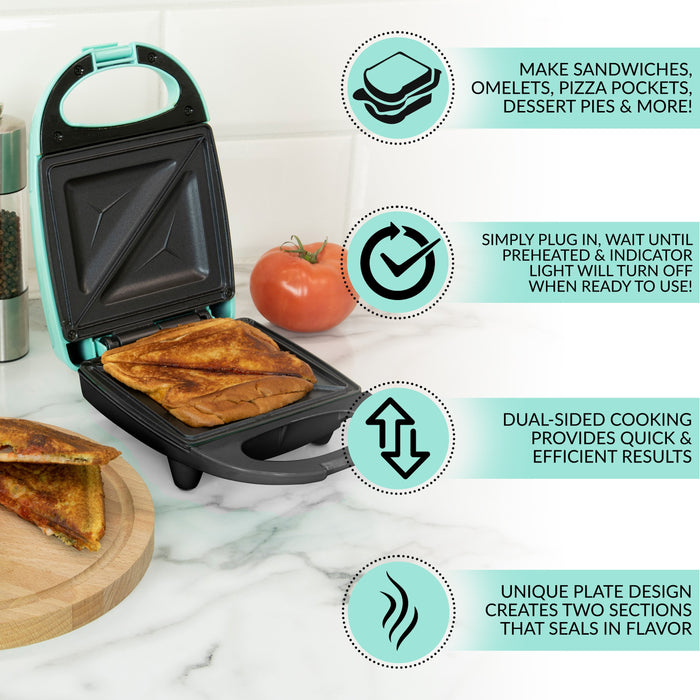
A sandwich maker is a small kitchen appliance designed to heat and seal bread slices with your choice of fillings. Most models have two heated plates that press together to cook the sandwich evenly on both sides. Some call it a sandwich press, sandwich toaster, or grill, depending on the design.
There are two main types:
- Traditional sandwich makers – These have triangle-shaped plates, sealing the sandwich and cutting it in half.
- Grill or panini press – These have flat or ridged plates, perfect for making paninis or grilled sandwiches without sealing the edges.
Sandwich makers are popular because they are fast, easy to use, and require little cleaning. They’re perfect for busy mornings, kids’ snacks, and even late-night cravings.
How Does A Sandwich Maker Work?
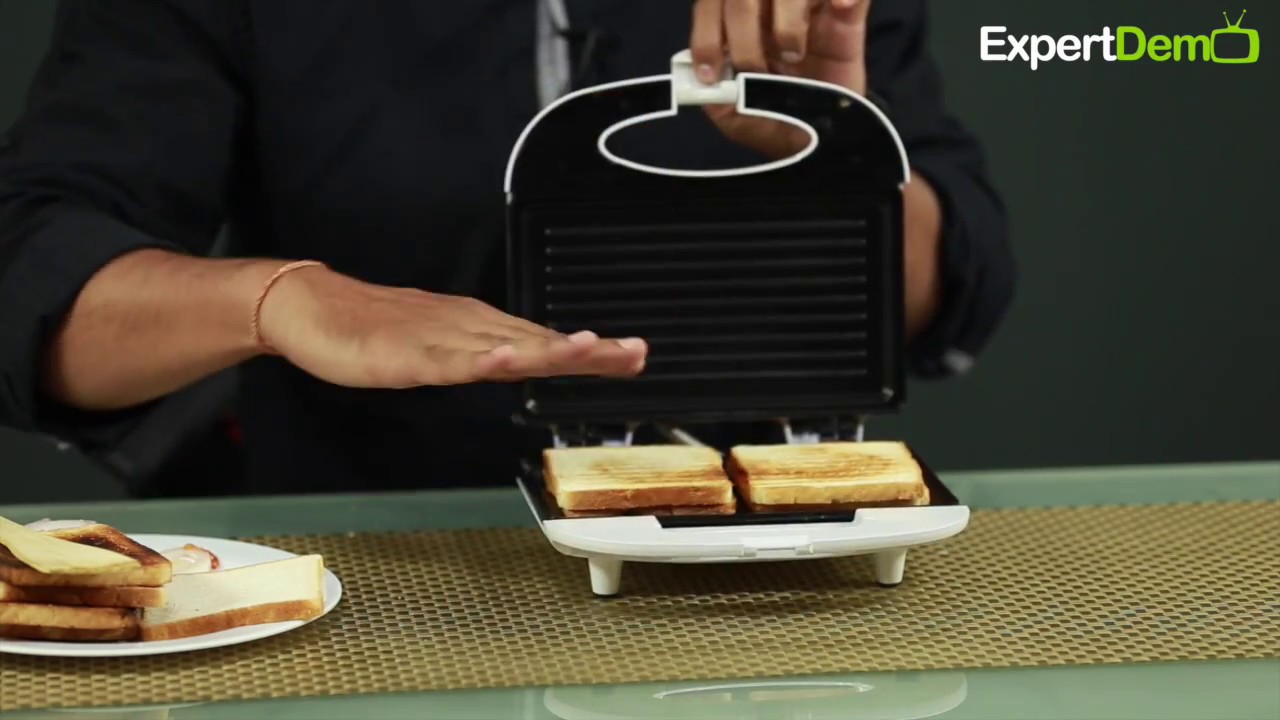
Sandwich makers use electric heating elements inside the plates. When plugged in and turned on, the plates heat up. Placing a sandwich inside and closing the lid cooks the bread and filling together. The heat seals the edges (in traditional models), keeping the filling inside and making a crispy crust.
Most models have an indicator light. This shows when the appliance is hot and ready to use. Some advanced versions allow you to adjust the temperature.
Credit: www.youtube.com
Preparing To Use Your Sandwich Maker
Before you make your first sandwich, it’s important to set up your sandwich maker correctly. This helps you get better results and avoid common mistakes.
- Read the manual: Every brand and model is a bit different. Always check the instructions before the first use.
- Clean the plates: Wipe the plates with a damp cloth or sponge. This removes dust or residue from the factory.
- Find a safe spot: Place the sandwich maker on a stable, heat-resistant surface. Leave space around it for ventilation.
- Check the cord: Make sure the cord is not near water or hanging off the counter.
- Preheat the plates: Plug in the sandwich maker and close the lid. Wait for the indicator light to show it’s ready. This usually takes 3–5 minutes.
Why Preheating Matters
Preheating ensures the bread cooks quickly and evenly. If you skip this step, the bread may stick, and your sandwich will be soggy instead of crisp.
Choosing The Right Bread And Fillings
Not every bread or filling works well in a sandwich maker. Here’s how to choose the best ingredients.
Best Breads For Sandwich Makers
- White bread: Thin and soft, browns quickly.
- Whole wheat bread: Healthier, but takes a bit longer to crisp.
- Multigrain bread: Adds flavor and crunch.
- Panini rolls or ciabatta: Ideal for grill-type sandwich makers.
- Gluten-free bread: Works if you need a gluten-free diet, but check for extra moisture.
Avoid very thick or very hard breads, as they may not heat through properly.
Fillings That Work Best
Classic combinations include cheese and ham, or tomato and mozzarella. Here are tips for choosing fillings:
- Don’t overfill: Too much filling can leak out and make a mess.
- Use cooked meats: Raw meat won’t cook thoroughly in a sandwich maker.
- Dry your ingredients: Wet vegetables (like tomatoes) can make the bread soggy. Pat them dry before adding.
- Cheese is your friend: Cheese melts and helps stick the sandwich together.
Creative Filling Ideas
- Leftover roast chicken, pesto, and cheese
- Peanut butter and banana
- Tuna, corn, and mayonnaise
- Spinach, feta, and sun-dried tomatoes
- Nutella and strawberries
Experiment, but remember: less is often more in a sandwich maker.

Credit: www.youtube.com
How To Use A Sandwich Maker: Step-by-step
Let’s walk through the process, from start to finish, for perfect results every time.
1. Preheat The Sandwich Maker
Always start with preheating. Plug in your sandwich maker, close the lid, and wait for the ready light. This usually takes 3–5 minutes.
2. Prepare Your Sandwich
While the sandwich maker is heating:
- Lay out two slices of your chosen bread.
- Add your fillings evenly, avoiding the edges.
- Press the slices together gently.
3. Grease The Plates (optional)
Some sandwich makers are non-stick, but adding a light coating of butter or oil can:
- Help crisp the bread
- Prevent sticking
- Add extra flavor
Use a pastry brush or paper towel to spread a little butter or oil on the plates.
4. Place The Sandwich Inside
Open the sandwich maker. Place your sandwich on the lower plate, centered. If your model has triangle shapes, line up the bread carefully.
5. Close The Lid
Gently close the lid, pressing down slightly. Don’t force it; the latch should click easily. For grill-type makers, press only as much as needed to make contact.
6. Cook For The Recommended Time
Most sandwiches take 3–5 minutes. The exact time depends on:
- Bread thickness
- Amount and type of filling
- Your sandwich maker’s heat
Check the manual for guidance.
7. Open And Check
After 3–5 minutes, open the lid carefully. The sandwich should be golden brown and crisp. If not, close and cook for another minute.
8. Remove The Sandwich
Use a wooden or silicone spatula to lift out your sandwich. Metal tools can scratch non-stick surfaces.
9. Let It Cool
Hot cheese and fillings can burn your mouth! Wait 1–2 minutes before eating.
10. Unplug And Cool Down
Always unplug your sandwich maker when you’re done. Let it cool before cleaning.
Cleaning Your Sandwich Maker
Keeping your sandwich maker clean helps it last longer and keeps your food safe.
Cleaning Steps
- Unplug and cool down: Never clean a hot or plugged-in appliance.
- Wipe off crumbs: Use a dry cloth or soft brush to remove loose crumbs.
- Wipe the plates: Dampen a cloth or sponge with warm, soapy water. Wipe the plates gently.
- Rinse and dry: Use a clean, damp cloth to remove soap, then dry thoroughly.
- Clean the outside: Wipe the outside with a damp cloth if needed.
Never immerse the sandwich maker in water. For stubborn spots, let a damp cloth sit on the area for a few minutes to soften it.
Non-obvious Cleaning Tips
- If cheese or filling leaks and burns, sprinkle a little baking soda on the spot with a damp cloth. This helps lift the residue without scratching.
- For strong smells, wipe the plates with a little lemon juice, then rinse and dry.
Credit: nostalgiaproducts.com
Safety Tips When Using A Sandwich Maker
Sandwich makers are safe if used correctly, but they get very hot. Here’s how to avoid accidents:
- Keep away from children: The outside can get hot. Teach kids to ask for help.
- Don’t overfill sandwiches: Leaking cheese or fillings can cause smoke and even fire.
- Never use metal utensils: These scratch the plates and can cause electric shock.
- Allow to cool before cleaning: Touching hot plates can cause burns.
A common beginner mistake is leaving the sandwich maker plugged in and forgetting about it. Always unplug after use.
Comparing Sandwich Maker Types
There are many sandwich makers on the market. Here’s a comparison of the main types:
| Type | Best For | Pros | Cons |
|---|---|---|---|
| Traditional (Triangle) | Classic sealed sandwiches | Seals edges, easy to use | Limited to standard bread size |
| Grill/Panini Press | Paninis, grilled sandwiches, more variety | Fits rolls and thick bread, versatile | Doesn’t seal edges, fillings can escape |
| Multifunction (Interchangeable plates) | Sandwiches, waffles, grilling meat | More uses, easy cleaning | Usually more expensive |
If you plan to use your sandwich maker for more than just sandwiches, a grill or multifunction model is a smart choice.
Common Mistakes And How To Avoid Them
Many users struggle with the same issues. Here’s how to fix them:
- Soggy sandwiches: Use less wet filling, pat veggies dry, and preheat the maker.
- Sticking bread: Add a light layer of butter or oil to the plates or bread.
- Uncooked fillings: Only use cooked meats and avoid thick, cold fillings.
- Overflowing cheese: Don’t overfill, and keep cheese away from edges.
- Uneven browning: Always preheat fully and don’t open the lid too soon.
A tip that beginners often miss: the first sandwich may cook slower because the plates are still heating up. Later sandwiches will cook faster.
Advanced Tips For Better Sandwiches
If you want to get even more from your sandwich maker, try these less obvious tricks:
- Add a little crunch: Sprinkle breadcrumbs or grated cheese on the outside of the bread before toasting for a crispy crust.
- Sweet sandwiches: Use brioche bread and fill with cream cheese and berries for a dessert treat.
- Breakfast sandwiches: Crack a thin layer of beaten egg onto the bread before adding filling. The sandwich maker will cook it inside.
- Reheat pizza or pastries: You can use a grill-type sandwich maker to reheat leftovers for a crisp finish.
- Mini omelets: Pour a beaten egg with herbs and cheese directly onto the plates (for non-triangle models). Cook until set for a quick omelet.
Trying new ideas is part of the fun. Just remember not to overload, or you’ll have more mess than meal.
Sandwich Maker Recipes To Try
Here are three recipes to get you started, with clear steps and quantities.
Classic Cheese And Ham Toastie
- 2 slices white bread
- 2 slices cooked ham
- 2 slices cheddar cheese
- 1 tsp butter (for greasing)
- Preheat sandwich maker.
- Place cheese and ham between bread slices.
- Brush a little butter on the outside of each slice.
- Place in the sandwich maker and toast for 3–4 minutes.
- Remove, cool, and enjoy.
Veggie Delight
- 2 slices whole wheat bread
- 3 thin tomato slices (patted dry)
- 3 cucumber slices
- 2 tbsp grated mozzarella
- 1 tbsp chopped spinach
- 1 tsp olive oil
- Preheat sandwich maker.
- Layer veggies and cheese inside bread.
- Brush olive oil on the outside.
- Toast for 4–5 minutes.
Chocolate Banana Treat
- 2 slices brioche or white bread
- 2 tbsp chocolate spread (like Nutella)
- ½ banana, sliced
- Preheat sandwich maker.
- Spread chocolate on bread.
- Add banana slices.
- Toast for 3–4 minutes.
These recipes are just a start. Swap ingredients to suit your taste.
How To Choose The Best Sandwich Maker
Buying a sandwich maker? Here’s what to look for:
- Size: For one or two people, a small maker is enough. For families, buy a model that makes 4 sandwiches at once.
- Plate material: Non-stick is easier to clean. Removable plates are even better.
- Temperature control: Adjustable heat gives you more control.
- Indicator lights: Look for ready and power lights.
- Cord storage: Handy if you have limited space.
- Warranty and brand: Trusted brands usually last longer and offer better support.
| Feature | Why It Matters | Common Options |
|---|---|---|
| Plate type | Affects what you can cook | Triangle, grill, waffle |
| Capacity | How many sandwiches at once | 1, 2, or 4 slots |
| Cleaning | Removable plates are easier | Fixed, removable |
| Power | Faster heating and cooking | 600–2000 watts |
A common mistake is buying a cheap model that is hard to clean or doesn’t heat evenly. Sometimes, spending a little more saves time and frustration.
For more on appliance choices, you can check out the Wikipedia Sandwich Toaster page.
Troubleshooting Sandwich Maker Problems
Even good sandwich makers sometimes have issues. Here’s how to solve common problems:
Sandwiches Stick To The Plates
- Make sure the plates are clean and dry before use.
- Grease the plates lightly with butter or oil.
- Use bread with less sugar, as high sugar burns and sticks.
Uneven Cooking
- Preheat fully every time.
- Don’t open the lid during cooking.
- If your model heats unevenly, rotate the sandwich halfway.
Bread Burns Before Filling Is Hot
- Use thinner bread or less filling.
- Lower the temperature if your model allows.
- Try using a slice of cheese near the filling, not next to the bread.
Appliance Won’t Heat
- Check the power cord and socket.
- Make sure the plates are closed during preheating.
- If the problem continues, contact the manufacturer.
Foul Smell Or Smoke
- Clean the plates thoroughly.
- Don’t use too much oil or butter.
- Avoid overfilling with cheese or sugary spreads.
Many users ignore small problems, but fixing them early can extend your sandwich maker’s life.
Using Your Sandwich Maker For More Than Sandwiches
A sandwich maker can do more than you think. Here are creative ways to use it:
- Grill vegetables: Slices of zucchini, bell pepper, or mushrooms cook well in a grill model.
- Waffles: Some makers have interchangeable plates for waffles.
- Quesadillas: Tortillas with cheese and fillings work beautifully.
- French toast: Dip bread in egg and milk, then cook in the maker.
- Hash browns: Shredded potatoes pressed and cooked until crisp.
Just be careful not to overload the plates, and always clean thoroughly after each use.
Storing Your Sandwich Maker
Proper storage keeps your sandwich maker working well:
- Let it cool and dry completely before storing.
- Wind the cord neatly (if there’s a storage feature).
- Store upright to save space.
- Keep it in a dry place to prevent rust or mold.
If your model has removable plates, store them with the machine so you don’t lose them.
Frequently Asked Questions
How Do I Prevent My Sandwich From Sticking?
To prevent sticking, always preheat the sandwich maker and apply a light layer of butter or oil to the plates or the outside of your bread. Non-stick plates help, but even these can benefit from a little extra grease, especially as they age.
Can I Use Parchment Paper Or Foil In My Sandwich Maker?
Using parchment paper is generally safe and can help keep the plates clean, but make sure it doesn’t touch the heating element. Aluminum foil can be used in some models, but always check your manual first. Never use wax paper—it melts and creates a mess.
What Types Of Bread Are Best For Gluten-free Diets?
For gluten-free diets, use gluten-free sandwich bread that is designed for toasting. Make sure it’s not too thick or moist. Some brands work better than others, so experiment to find your favorite.
Why Is My Sandwich Soggy After Cooking?
A soggy sandwich usually means there’s too much moisture in the filling or the bread. Pat vegetables dry, use less sauce, and always preheat your sandwich maker so the bread toasts quickly.
Is It Safe For Children To Use A Sandwich Maker?
Children can use a sandwich maker with adult supervision, but never alone. The plates and exterior get very hot. Teach kids to be careful, and always handle hot sandwiches with utensils, not bare hands.
Sandwich makers are simple, but with the right tips, they become powerful tools for quick, tasty meals. Whether you’re a student, a parent, or just someone who loves good food, learning how to use your sandwich maker well will save you time and add variety to your kitchen.
Try new combinations, keep it clean, and don’t be afraid to experiment. Your next great meal might be just a sandwich away.