
Using a silicone muffin pan may seem simple at first, but a few smart techniques can make a big difference in your baking results. Many people switch to silicone pans because they’re nonstick, flexible, and easy to clean. However, if you’ve ever ended up with undercooked muffins or found your baked goods stuck in the pan, you’re not alone.
Learning how to use a silicone muffin pan correctly can help you bake everything from fluffy cupcakes to egg bites with less mess and frustration.
This guide covers everything you need to know—from choosing the right pan, prepping it properly, and filling it for best results, to cleaning and storing your pan so it lasts for years. You’ll find advice for both beginners and experienced bakers, plus a few expert secrets that most people miss.
Whether you’re baking for family or preparing treats for a party, these tips will help you get perfect results every time you use your silicone muffin pan.
What Is A Silicone Muffin Pan?
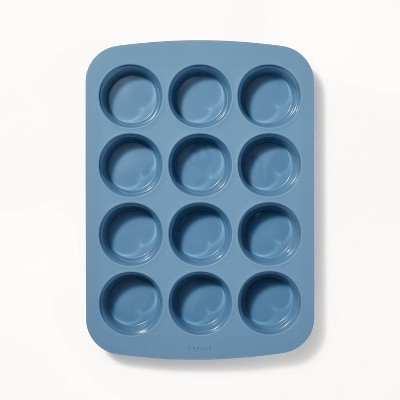
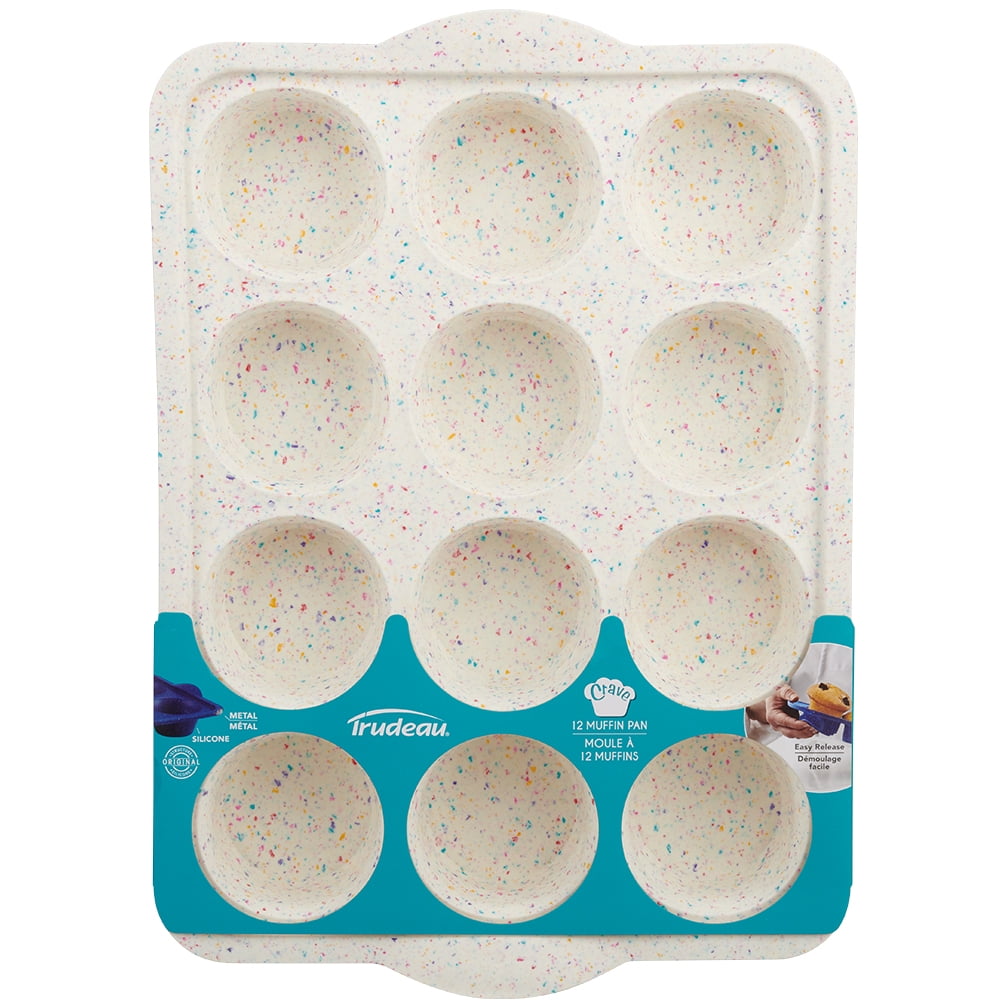
A silicone muffin pan is a baking tray made from flexible, food-grade silicone. Unlike metal or ceramic pans, silicone pans can bend easily. This flexibility lets you pop muffins out without breaking them. They come in many sizes, like mini, standard, or jumbo, and can have 6, 12, or even 24 cups.
Key features:
- Nonstick surface – Muffins and cupcakes release easily.
- Heat resistance – Most can handle up to 450°F (232°C).
- Cool quickly – They don’t stay hot long after baking.
- Lightweight – Easier to handle than heavy metal pans.
Silicone muffin pans are popular for baking muffins, cupcakes, egg bites, and even mini cheesecakes. Some people use them for freezing individual portions of soup or batter.
Why Choose A Silicone Muffin Pan?
Silicone pans offer several benefits over traditional metal or glass pans:
- Effortless release: Baked goods rarely stick, so you don’t need to scrape or use paper liners.
- Easy cleaning: Most residue washes away with water and mild soap.
- Flexible use: You can use them in the oven, microwave, freezer, or dishwasher.
- No rusting: Unlike metal pans, silicone does not rust or corrode.
- Safe handling: The pan cools quickly, reducing the risk of burns.
People also like that silicone muffin pans are lightweight and don’t dent. However, there are a few things to keep in mind, such as needing a steady surface when filling the pan and sometimes needing to adjust baking times.
How To Choose The Right Silicone Muffin Pan
Not all silicone pans are the same. Here’s what matters when choosing one:
1. Food-grade Quality
Check for 100% food-grade silicone. Some cheap pans are mixed with plastic fillers, which can affect taste and safety. High-quality silicone pans are safe, odorless, and pass FDA or LFGB standards.
2. Cup Size And Number
Decide what you’ll bake most often:
- Standard (2.5-inch cups): Good for regular muffins and cupcakes.
- Mini (1.75-inch cups): Great for bite-sized treats.
- Jumbo (3.5-inch cups): For large muffins or breakfast egg cups.
Choose a 6-cup, 12-cup, or 24-cup size depending on how many you usually bake.
3. Thickness And Sturdiness
Thicker pans hold their shape better. Flimsy silicone bends too much, making it hard to move when filled. Some pans have a metal rim for extra stability.
4. Temperature Range
Check the pan’s temperature rating. Most quality pans are safe up to 450°F (232°C). Never use silicone above its rated temperature.
5. Brand Reputation
Read reviews and look for well-known brands. Some brands are tested for safety and durability, and they often provide a warranty.
Comparison: Silicone Vs. Metal Muffin Pans
Here’s a quick look at how silicone pans compare to classic metal ones:
| Feature | Silicone Muffin Pan | Metal Muffin Pan |
|---|---|---|
| Nonstick | Excellent | Good (needs greasing) |
| Flexibility | High | Low |
| Durability | Good (if high quality) | Excellent |
| Heat Distribution | Even but slower | Very even and fast |
| Ease of Cleaning | Very easy | Easy (can rust) |
| Cost | Moderate | Varies |
Preparing Your Silicone Muffin Pan
Proper preparation is key for best results. Don’t skip these steps, even though silicone is nonstick.
1. Wash Before First Use
Wash your new pan with warm soapy water to remove any factory residue. Rinse well and dry completely.
2. Light Greasing (optional But Helpful)
While many people skip this, lightly greasing the cups with oil or spray helps, especially for sticky batters or when the pan is new. After a few uses, this may not be needed, but a light coat never hurts.
3. Placing On A Baking Sheet
Silicone pans are floppy when filled. Always place your pan on a metal baking sheet before filling. This keeps the pan steady and prevents spills.
4. Preheating The Oven
Always preheat your oven. Silicone pans can take a little longer to heat up than metal ones, so accurate oven temperature is important for even baking.
5. Filling The Cups
Use a spoon or batter scoop to fill each cup about 2/3 to 3/4 full. Overfilling can cause batter to spill over the flexible sides.
Pro Tip: Avoid Overmixing
Mix batter gently. Overmixed batters create dense, tough muffins. This is especially important in silicone, where the heat is a bit gentler.
Baking With A Silicone Muffin Pan
Baking in silicone is easy, but a few adjustments help:
1. Adjust Baking Time
Silicone heats up more slowly than metal. Your muffins may need 2-5 minutes longer than the recipe says. Start checking with a toothpick at the regular time, but don’t worry if it takes a bit longer.
2. Place In The Center Of The Oven
For even cooking, place your muffin pan in the center rack. This helps with even heat distribution.
3. Don’t Overcrowd The Oven
Give your pan space so hot air can circulate. This prevents soggy or uneven muffins.
4. Use The Toothpick Test
Check doneness by inserting a toothpick in the center of a muffin. If it comes out clean or with just a few crumbs, they’re ready.
5. Let Cool Before Removing
Wait at least 5-10 minutes after baking before trying to remove the muffins. This helps them firm up and makes release easier.
Example: Banana Muffin Baking Time
Suppose your metal pan recipe says 18 minutes. In a silicone pan, check at 18 minutes, but expect to bake 20–22 minutes for the same result.
Table: Typical Baking Time Differences
| Recipe Type | Metal Pan Time | Silicone Pan Time |
|---|---|---|
| Standard Muffins | 18 min | 20–22 min |
| Mini Muffins | 10 min | 12–14 min |
| Egg Bites | 15 min | 17–19 min |
| Brownie Bites | 14 min | 16–18 min |
Removing Muffins From A Silicone Pan
One big advantage of silicone is easy release. Still, there are steps to avoid tearing or sticking:
1. Cool Properly
Wait until muffins are cool enough to handle. If you try to remove them hot, they may break apart.
2. Flex The Pan
Gently push up from the bottom of each cup. The muffin should pop out without force.
3. Use A Silicone Spatula
If needed, run a thin silicone spatula around the edge. Don’t use metal utensils—they can cut or tear the pan.
4. Invert For Sticky Bakes
For sticky or cheesy items, invert the whole pan over a wire rack and press the bottoms to release.
Common Mistakes To Avoid
- Removing muffins while still too hot (can break or stick)
- Using sharp knives or metal tools (can damage pan)
- Not greasing enough (rare but happens with sticky recipes)
Cleaning And Caring For Silicone Muffin Pans
Cleaning is easy, but a few tips will keep your pan in top shape:
1. Hand Wash Is Best
Use warm water and mild soap. Scrub with a soft sponge. Avoid abrasive cleaners.
2. Dishwasher Safe
Most silicone pans are dishwasher safe (top rack). However, hand washing can extend the life of the pan.
3. Remove Grease Residue
Sometimes, oil can build up and make the pan feel sticky. Soak in hot water with a little vinegar, then wash as usual.
4. Dry Thoroughly
Let the pan dry completely before storing. This prevents odors and keeps the pan clean.
5. Store Flat Or Hang
Store your pan flat to avoid bending, or hang it by a corner hole if available.
Table: Cleaning Methods And Results
| Cleaning Method | Effectiveness | Best For |
|---|---|---|
| Hand Wash | Excellent | Everyday cleaning |
| Dishwasher | Good | Quick cleanups |
| Vinegar Soak | Excellent | Removing grease/stickiness |
Advanced Tips For Better Results
Some tips are not obvious, but they can help you get bakery-quality results at home.
1. Use A Piping Bag For Batter
For cleaner, faster filling, pour your batter into a piping bag or a zip-top bag with the corner cut off. Squeeze batter into each cup without drips.
2. Freeze Portions
Silicone muffin pans work in the freezer too. You can freeze smoothie cubes, baby food, or even mini cheesecakes right in the cups.
3. Bake Evenly With A Metal Sheet
Always place your silicone muffin pan on a metal baking sheet. It provides support and helps with even heat distribution, preventing uneven bottoms.
4. Avoid Broiler And Direct Flame
Never use a silicone pan under a broiler or on a stovetop. High, direct heat can damage or melt the pan.
5. Try Non-baking Uses
Use your silicone muffin pan to make:
- Homemade soap bars
- Ice molds for punch
- Single-serve desserts (cheesecakes, mousse)
- Portion-controlled snacks
6. Rotate Halfway
For the most even bake, rotate your silicone muffin pan halfway through baking. Some ovens have hot spots, so this prevents uneven browning.
7. Don’t Stack Hot Pans
Let pans cool fully before stacking or storing. Stacking while hot can cause warping or retain odors.
Credit: www.target.com
Troubleshooting Common Issues
Even with the best pans, problems can happen. Here’s how to solve them:
Muffins Not Rising
- Check baking powder/freshness.
- Don’t overmix the batter.
- Make sure the oven is fully preheated.
Muffins Too Pale
- Bake a few minutes longer.
- Move the oven rack up one level for more browning.
Sticky Or Soggy Bottoms
- Place the pan on a metal sheet for better heat.
- Don’t add too much oil or butter to the batter.
- Let muffins cool in the pan for only 5-10 minutes, then transfer to a rack.
Muffins Stick To Pan
- Lightly grease before use, especially with new pans.
- Let muffins cool before removing.
Silicone Pan Smells
- Wash with vinegar or baking soda solution.
- Air out the pan after cleaning.
Recipes You Can Make In A Silicone Muffin Pan
Silicone pans are not just for muffins! Here are a few ideas:
1. Classic Blueberry Muffins
Mix flour, sugar, baking powder, salt, eggs, milk, oil, and fresh blueberries. Fill cups 2/3 full. Bake at 375°F (190°C) for about 22 minutes.
2. Egg Bites
Beat eggs with cheese, spinach, and cooked bacon. Pour into greased cups. Bake at 350°F (177°C) for 18 minutes.
3. Mini Cheesecakes
Mix cream cheese, sugar, egg, and vanilla. Spoon into cups over crushed graham crackers. Bake at 325°F (163°C) for 22 minutes.
4. Chocolate Lava Cakes
Fill cups halfway with chocolate batter, add a spoonful of chocolate ganache, then top with more batter. Bake at 400°F (204°C) for 10 minutes.
5. Frozen Yogurt Bites
Fill cups with yogurt and fresh fruit. Freeze until firm, then pop out for a cool snack.

Credit: untrainedhousewife.com
Safety And Care Tips
Silicone is generally safe, but keep these points in mind:
- Only use food-grade silicone pans.
- Don’t bake above the maximum temperature.
- Avoid sharp knives or metal utensils.
- Never use a damaged pan (cracks or tears).
- Wash after every use to remove oils and odors.
Non-obvious Insights Most Beginners Miss
- A light greasing is still useful. Many assume you never need to grease silicone, but it helps with sticky batters and new pans.
- Support matters. Always use a metal tray under your silicone muffin pan. This makes moving it easier and ensures even baking. Skipping this step is a common mistake.
Storing Your Silicone Muffin Pan
Silicone pans don’t take up much space, but proper storage helps them last:
- Store flat in a drawer or cabinet.
- Hang by a loop if the pan has one.
- Avoid folding or bending tightly, which can cause weak spots.
- Keep away from sharp objects to prevent cuts or tears.
If your kitchen is humid, make sure the pan is dry before storing. This prevents mold or odor buildup.
When To Replace Your Silicone Muffin Pan
A quality silicone pan lasts many years. Replace your pan if you see:
- Cracks or tears in the silicone
- Warping that makes the pan uneven
- Bad smells that don’t wash away
- Sticking that doesn’t improve with cleaning
Don’t use a damaged pan, as pieces could break off into your food.
Credit: www.walmart.com
Environmental Impact And Recycling
Silicone bakeware lasts longer than many metal or nonstick pans. It doesn’t rust and resists wear. However, recycling options are limited in many areas. Check with your local recycling center if you need to dispose of an old pan.
Reusing is best: old pans can be used as organizers for craft supplies, hardware, or small toys.
For more about silicone’s safety and recycling, visit the Wikipedia page on silicone.
Frequently Asked Questions
How Do I Know If My Silicone Muffin Pan Is Food-grade?
Check for labels like “100% food-grade silicone,” “BPA-free,” or “meets FDA/LFGB standards. ” Trusted brands mention this in their packaging. If the pan smells strongly of chemicals, it may contain fillers and is not safe for baking.
Can I Put A Silicone Muffin Pan In The Dishwasher?
Yes, most silicone muffin pans are dishwasher safe. Place them on the top rack. However, hand washing with mild soap keeps them in better shape longer.
Do I Need To Grease A Silicone Muffin Pan Every Time?
Greasing is optional, but a light coat helps, especially with sticky recipes or new pans. Over time, as the surface gets seasoned, you may not need to grease at all.
Why Are My Muffins Sticking To My Silicone Pan?
Sticking can happen with new pans, sticky batters, or if muffins are removed too soon. Try greasing lightly, letting muffins cool before removing, and using a flexible spatula if needed.
Can I Use Paper Liners In A Silicone Muffin Pan?
Yes, paper liners can be used in silicone pans. This makes cleanup even easier and is helpful when baking for a crowd or when you need to transport muffins.
With the right technique, a silicone muffin pan can make baking easier, more fun, and less messy. Remember these tips, and you’ll get perfect muffins, cupcakes, and more—every time.