Rock salt concrete finish is a popular choice for outdoor spaces like patios, walkways, and pool decks. The look is unique—rough and textured, with a style that hides dirt and adds slip resistance. But despite its popularity, not everyone knows the challenges that can come with this finish. If you’re considering it for your next project or already have it, it’s smart to learn about the common problems and how to avoid them.
Many people see the rock salt finish as low-maintenance and durable. However, problems can appear months or even years after installation. Cracks, flaking, discoloration, and uneven texture are only a few. Some issues show up because of weather, others because of mistakes during installation.
In this guide, you’ll discover the causes, signs, and solutions for the main rock salt concrete finish problems. Whether you’re a homeowner, contractor, or designer, you’ll find helpful information and practical tips to protect your investment.
What Is Rock Salt Concrete Finish?
A rock salt concrete finish is a decorative surface treatment for concrete. During installation, coarse rock salt grains are pressed into the wet concrete. After the concrete sets, the salt is washed away. This leaves tiny holes and a slightly rough, pitted texture on the surface.
The finish gives concrete a natural, slip-resistant look. It’s especially popular around swimming pools and outdoor living spaces. The process sounds simple, but small details matter. If not done correctly, the finish can develop problems that are hard to fix later.
Why Choose Rock Salt Finish?
People pick rock salt finish for several reasons:
- Slip resistance: The small pits make the surface less slippery, especially when wet.
- Appearance: The texture hides stains, dirt, and minor cracks.
- Affordability: It costs less than stamped or exposed aggregate concrete.
- Customization: You can use different colors or combine with other finishes.
But these advantages can fade if installation or maintenance is poor. Understanding possible problems helps you plan better.

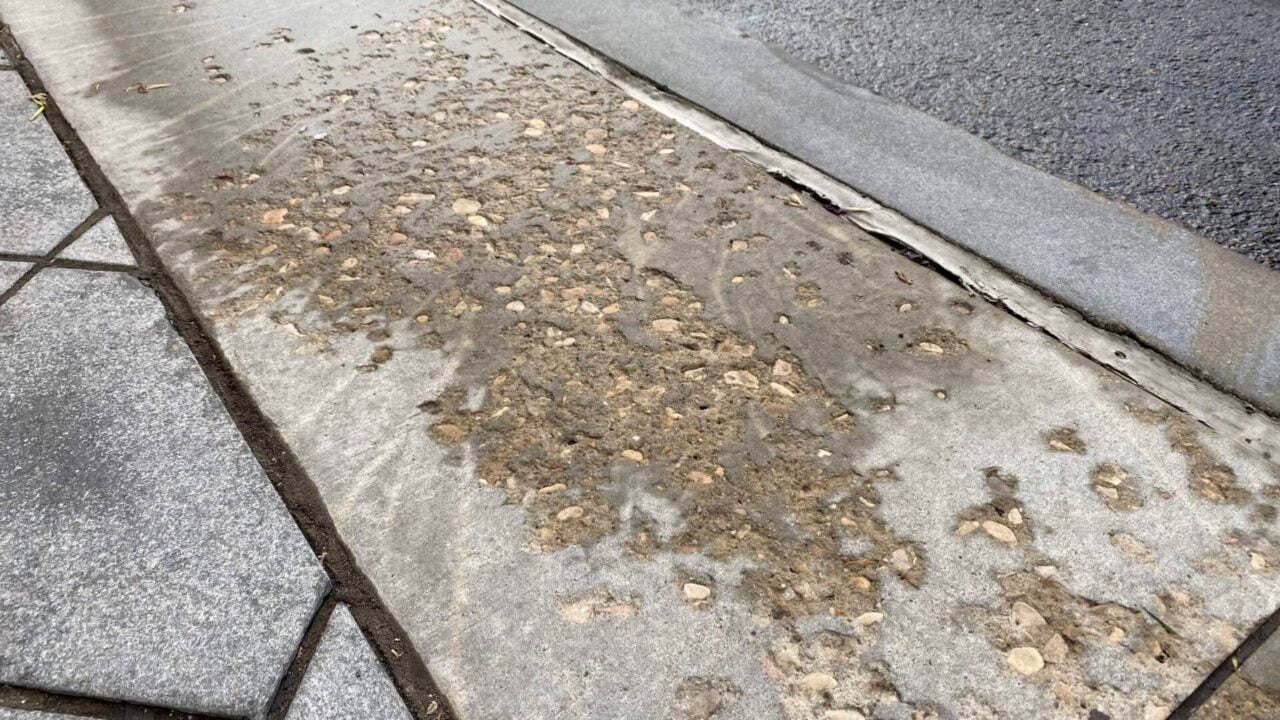
Credit: www.reddit.com
Common Rock Salt Concrete Finish Problems
Rock salt concrete is not problem-free. Below are the most common issues, what causes them, and how to spot early warning signs.
1. Surface Scaling
Surface scaling means the top layer of concrete flakes or peels away. This leaves the surface rough, patchy, and unattractive.
Causes:
- Applying salt too early or late during installation
- Using too much water in the mix (known as “water-rich” concrete)
- Freezing temperatures before the concrete fully cures
- De-icing chemicals during winter
How to spot: Small, thin flakes or chips appear on the surface, often after a freeze-thaw cycle or after snow melts.
Prevention: Use air-entrained concrete, avoid excessive water, and protect fresh concrete from freezing. Do not use de-icers during the first winter after installation.
Fix: For small areas, patch with a concrete resurfacer. For large-scale scaling, removal and replacement may be needed.
Key Insight: Many beginners don’t realize that even a few hours of unexpected cold weather can start surface scaling, especially if the slab wasn’t covered or insulated.
2. Pop-outs
Pop-outs are small holes or craters where pieces of the surface suddenly break away. They can be shallow or deep, depending on the cause.
Causes:
- Salt particles not fully removed during washing
- Impurities or soft stone in the concrete mix
- Freeze-thaw cycles
How to spot: Circular, shallow holes ranging from the size of a pea to a quarter. Sometimes, you’ll see white marks around the pop-out.
Prevention: Use clean, high-quality salt, and make sure all salt is thoroughly washed out. Choose good quality aggregates for the concrete mix.
Fix: Fill holes with a concrete patching product. Severe cases may need surface grinding and resealing.
Practical Tip: Beginners often rush the salt removal stage. If salt remains trapped, it expands with moisture and causes pop-outs weeks later.
3. Discoloration
Discoloration means uneven or blotchy color patches. Instead of a uniform look, you may see dark or light spots.
Causes:
- Using different batches of concrete or water
- Uneven curing or drying times
- Inconsistent finishing techniques
- Chemical reactions from sealers or de-icers
How to spot: Areas with clear color differences, sometimes appearing as streaks or patches.
Prevention: Mix and pour all concrete at the same time. Use the same water and materials. Protect the slab from sun, wind, and rain during curing.
Fix: Lightly grind and reseal the surface, or use a concrete stain to even out color.
Important Note: Discoloration can also signal deeper issues, like improper sealing or moisture intrusion.
4. Inconsistent Texture
Inconsistent texture happens when the surface is not evenly rough or pitted. Some areas may look smooth, while others are too rough.
Causes:
- Uneven pressing of rock salt
- Different salt grain sizes
- Inconsistent timing of salt application and removal
How to spot: Parts of the slab have more or fewer holes, or the surface feels uneven to the touch.
Prevention: Use even salt coverage and pressure during installation. Remove salt at the right curing stage.
Fix: Light grinding can smooth rough patches. Deep unevenness may need resurfacing.
5. Cracking
Cracking is one of the most common and frustrating problems. Cracks can be small hairlines or wider and longer.
Causes:
- Poor subgrade preparation
- Rapid drying or curing
- Lack of control joints
- Heavy loads or movement beneath the slab
How to spot: Lines or splits appear, sometimes following the shape of control joints, sometimes randomly.
Prevention: Prepare a solid, compacted base. Use control joints and cure the concrete slowly.
Fix: For small cracks, use a flexible concrete filler. For large or deep cracks, professional repair or replacement is needed.
Hidden Risk: Many homeowners don’t realize that skipping control joints almost guarantees random cracking, especially on large slabs.
6. Sealant Issues
A sealant protects the concrete from water, stains, and UV rays. But sealant problems are common and can ruin the finish.
Causes:
- Using the wrong sealer type
- Not waiting for concrete to cure before sealing
- Applying too thick or thin a layer
- Poor surface cleaning before sealing
How to spot: Cloudy, sticky, or peeling areas. Loss of color or gloss. Water no longer beads on the surface.
Prevention: Choose a sealer made for decorative concrete. Follow the manufacturer’s instructions for curing time and application.
Fix: Strip the old sealer, clean the surface, and reapply a proper sealer.
Pro Tip: Always test a small area before sealing the entire slab to check for reactions.
7. Efflorescence
Efflorescence is a white, powdery deposit on the surface. It’s actually salt from the concrete, not the rock salt used for the finish.
Causes:
- Moisture moving up through the slab
- High salt content in the mix or base
- Poor drainage under or around the slab
How to spot: White streaks or patches, especially after rain or snow.
Prevention: Use low-alkali cement and ensure good drainage. Seal the surface to block moisture entry.
Fix: Brush off powder with a stiff broom. For stubborn cases, use a mild acid wash (with care).
Additional Insight: Efflorescence can come and go depending on humidity. It’s unsightly but usually not dangerous.
8. Freeze-thaw Damage
Outdoor concrete faces freeze-thaw cycles in cold climates. Water enters the surface, freezes, expands, and causes cracks or scaling.
Causes:
- Poor air entrainment (lack of tiny air bubbles in concrete)
- Thin or weak concrete layers
- Using de-icing salts too soon
How to spot: Cracks, scaling, pop-outs, or breaking edges after winter.
Prevention: Use air-entrained concrete. Avoid de-icers in the first year. Seal the slab before winter.
Fix: Patch small areas, but large freeze-thaw damage may need replacement.
Non-Obvious Insight: Not all damage appears right after winter. Some cracks show up weeks later as thawing continues.
9. Poor Drainage
If water pools on or under the slab, it can cause long-term problems.
Causes:
- Slab not sloped for runoff
- Blocked drains or landscaping issues
- Heavy soil that holds water
How to spot: Water pooling on the surface or soft ground around the slab after rain.
Prevention: Make sure the slab slopes at least 2% away from buildings. Keep drains clear and landscape for good runoff.
Fix: Add surface drains or re-grade the area. In severe cases, remove and re-pour the slab.
10. Mold And Algae Growth
The rough texture of rock salt finish can trap moisture and organic matter, making it a good place for mold or algae.
Causes:
- Poor sunlight exposure
- Constant moisture from sprinklers, rain, or leaks
- Organic debris left on the surface
How to spot: Green, black, or brown patches, usually in shaded or damp areas.
Prevention: Keep the surface clean and dry. Trim plants to let sunlight in. Use a sealer with mold inhibitors.
Fix: Clean with a pressure washer and mild detergent. For stubborn growth, use a diluted bleach solution.
11. Weak Or Thin Surface Layer
Sometimes the top layer of concrete (where the salt finish is made) is too thin or weak.
Causes:
- Over-finishing (working the surface too much)
- Using too much water on the surface during installation
- Poor mix design
How to spot: The surface chips or powders easily, even with light foot traffic.
Prevention: Use the right mix and finishing methods. Don’t add water to the surface during finishing.
Fix: Resurface with a thin overlay product.
12. Delamination
Delamination is when the surface layer separates from the concrete below, creating hollow spots.
Causes:
- Finishing while bleed water is still on the surface
- Applying salt too early
- Trapped air under the surface
How to spot: Hollow sound when tapped, or the surface peels off in sheets.
Prevention: Wait for bleed water to disappear before finishing. Use the correct timing for salt application.
Fix: Remove loose areas and patch with a bonding agent and overlay.
13. Incomplete Salt Removal
If rock salt is not fully removed after setting, leftover salt can cause problems later.
Causes:
- Rushing the washing process
- Using too much salt
- Weather changes during curing
How to spot: Rough, sharp patches, or visible salt crystals days or weeks later.
Prevention: Wash all salt out at the right time—usually 12-24 hours after application.
Fix: Scrub with a stiff brush and water. For stubborn spots, use a pressure washer.
14. Embedded Debris
Outdoor projects can pick up leaves, dirt, or even insects during curing.
Causes:
- Wind or rain during installation
- Not covering the slab while curing
How to spot: Small bumps, stains, or dark spots under the surface.
Prevention: Cover the slab with plastic sheeting or a curing blanket.
Fix: Light grinding or sanding for shallow debris. Deep stains may need patching.
15. Loss Of Slip Resistance
Over time, the surface can become smoother, especially in high-traffic areas.
Causes:
- Wear from foot traffic or cleaning
- Sealers filling in the pits
- Over-polishing during maintenance
How to spot: Surface feels slick when wet, or people slip more often.
Prevention: Use the right sealer and avoid over-polishing.
Fix: Apply an anti-slip additive to the sealer. For worn surfaces, re-etch or resurface.
16. Edge Crumbling
Edges of slabs are more vulnerable to damage.
Causes:
- Not enough support at slab edges
- Heavy equipment or traffic near edges
- Freeze-thaw cycles
How to spot: Chipped or broken edges, especially along walkways or driveways.
Prevention: Use thicker edges and proper forms during pouring.
Fix: Patch with epoxy or concrete edge repair kits.
17. Staining
Certain materials can stain the porous, pitted surface.
Causes:
- Leaves, berries, or plant matter left on the surface
- Oil or chemical spills
- Rust from metal furniture
How to spot: Brown, green, or rust-colored patches.
Prevention: Clean spills quickly and move plant debris regularly.
Fix: Use a concrete stain remover or poultice. Some stains may need light grinding.
18. Shadowing
Shadowing means you see faint outlines where salt grains were placed or moved.
Causes:
- Uneven salt distribution
- Salt grains moving during finishing or washing
How to spot: Light or dark lines, usually following the pattern of salt placement.
Prevention: Use careful, even salt distribution and avoid disturbing the surface after placing salt.
Fix: Minor shadowing fades with time. For severe cases, a surface stain or colorant may help.
19. Shortened Lifespan
Many of the problems above can add up to a much shorter useful life for your concrete.
Causes:
- Poor installation or lack of maintenance
- Weather extremes
- Ignoring early warning signs
How to spot: Multiple issues like cracks, scaling, and discoloration within a few years.
Prevention: Hire experienced installers, follow maintenance schedules, and repair problems early.
Fix: Some slabs may need full replacement if problems are severe and widespread.
Comparing Rock Salt Finish To Other Concrete Finishes
To better understand the unique problems of rock salt finish, it helps to compare it with other popular finishes.
| Finish Type | Main Feature | Common Problems | Maintenance Needs |
|---|---|---|---|
| Rock Salt Finish | Rough, pitted texture | Scaling, pop-outs, discoloration | Moderate (resealing, cleaning) |
| Stamped Concrete | Patterned, colored | Cracking, fading, pattern loss | High (resealing, color touch-ups) |
| Broom Finish | Linear textured lines | Wear, dirt build-up, fading | Low (sweeping, rare resealing) |
| Exposed Aggregate | Stone/pebble surface | Aggregate loss, staining | Moderate (resealing, cleaning) |
How Installation Quality Impacts Finish Problems
Rock salt finish problems often start during installation. Here are the main steps where mistakes can lead to trouble:
- Mix Design: Too much water or poor quality materials weaken the slab.
- Salt Application: Salt must be pressed evenly and at the right time.
- Curing: Concrete needs to cure slowly and be protected from weather.
- Salt Removal: All salt must be washed out, not just most of it.
- Sealing: The right sealer, applied at the right time, makes a big difference.
Example: A contractor who rushes through these steps can leave behind problems that only show up later. Even experienced installers sometimes make mistakes during busy periods or when weather changes quickly.
Maintenance Mistakes That Worsen Problems
After installation, poor maintenance can make small issues much worse. The most common mistakes include:
- Skipping regular cleaning, allowing dirt and organic matter to build up
- Using harsh chemicals or pressure washing too aggressively
- Not resealing the surface every 2–3 years
- Ignoring small cracks or stains until they spread
| Mistake | Consequence |
|---|---|
| No resealing | Surface absorbs water, stains, and scales |
| Harsh cleaning | Wears down texture, increases slickness |
| Delayed repairs | Small cracks become large, costly problems |
Tip: Even if your concrete looks fine, a simple walk-through every few months helps spot early warning signs.
Credit: www.brickform.com
Weather And Environmental Factors
Certain climates are harder on rock salt finish than others. Cold regions with freeze-thaw cycles, or areas with lots of rain, cause more scaling and pop-outs. Hot, dry weather can cause rapid curing, leading to cracks and delamination. Salty coastal air can add to efflorescence and color changes.
Key points for weather care:
- In cold climates, always use air-entrained concrete and avoid de-icers on new slabs.
- In hot weather, keep the slab moist during curing and avoid midday pours.
- In rainy or humid climates, seal the surface well and ensure good drainage.
How To Minimize Rock Salt Finish Problems
It’s impossible to guarantee a problem-free slab, but you can lower risks by:
- Hiring experienced contractors: Ask for references and photos of past work.
- Choosing the right mix: Use air-entrained, low-water concrete.
- Watching the weather: Schedule pours for dry, mild days, and cover the slab if weather changes.
- Proper curing: Keep the slab moist for at least 7 days.
- Careful salt application and removal: Follow timing and technique.
- Sealing and resealing: Use a quality sealer and reapply as needed.
Real-world Case Study
A homeowner in Illinois had a 400-square-foot rock salt patio installed in late October. Within the first winter, surface scaling and pop-outs appeared. Analysis showed the contractor poured the slab during a cold snap and applied de-icer two weeks later.
The concrete was not air-entrained, and the sealant was applied too soon.
Lesson learned: Rushing the job and ignoring local weather led to costly repairs and a shortened lifespan. Spending a bit more time and money upfront would have prevented most problems.
Professional Repair Vs. Diy Fixes
Some rock salt finish problems are easy for homeowners to fix, while others need professional help.
- DIY repairs: Small cracks, minor stains, and light mold can usually be fixed with store-bought products and a little labor.
- Professional repairs: Large cracks, wide-scale scaling, delamination, or deep pop-outs often need grinding, overlays, or slab replacement.
Warning: Trying to fix major problems without the right tools or skills often makes things worse and increases long-term costs.
Typical Costs For Repair And Maintenance
Repair costs depend on the size and severity of the problem.
- Minor patching: $3–$7 per square foot
- Resurfacing: $6–$15 per square foot
- Full slab replacement: $8–$20 per square foot
- Resealing: $1–$3 per square foot
A well-maintained rock salt finish should last 15–25 years, but neglected slabs may need replacement in less than 10.
When To Replace Instead Of Repair
If more than 30% of the surface is damaged, or the base is unstable, replacement is the best choice. Frequent freeze-thaw damage, deep cracks, or widespread delamination are signs the slab is at the end of its life.
Tip: Always get a professional assessment before investing in expensive repairs.
Is Rock Salt Finish Right For You?
Rock salt finish is a good choice for:
- Outdoor areas with moderate foot traffic
- Homeowners who want a unique, slip-resistant look
- Climates without extreme freeze-thaw or heavy rain
It may not be the best for:
- Areas with frequent heavy vehicle traffic
- Regions with harsh winters or rapid weather changes
- People who want a perfectly smooth, easy-to-clean surface
Other Finish Options To Consider
If you’re unsure about rock salt finish, here are some alternatives:
- Broom finish: Simple, slip-resistant, easy to maintain
- Stamped concrete: More decorative, but higher cost and maintenance
- Exposed aggregate: Durable, good for high-traffic, but can be rough on bare feet
Each finish has its own strengths and weaknesses. Consider your climate, budget, and maintenance preferences before making a final choice.

Credit: www.brickform.com
Expert Tips For Long-lasting Rock Salt Finish
- Always use a reputable contractor with proven experience
- Schedule installation for mild, dry weather
- Protect new concrete from foot traffic and chemicals for at least a month
- Reseal every 2–3 years or as soon as water stops beading on the surface
- Inspect regularly for signs of cracking, scaling, or discoloration
Bonus Insight: Many problems can be delayed or prevented by simply following good maintenance habits and addressing small issues quickly.
Frequently Asked Questions
What Is The Main Cause Of Rock Salt Concrete Finish Problems?
Most problems start from poor installation, especially mistakes during mixing, salt application, and curing. Weather and poor maintenance also play major roles.
Can I Repair Pop-outs And Scaling Myself?
Small pop-outs and scaling can be patched with concrete repair products. For large or widespread areas, it’s better to call a professional.
How Often Should I Reseal A Rock Salt Concrete Finish?
Reseal every 2–3 years, or whenever water stops beading on the surface. High-traffic or harsh weather areas may need more frequent resealing.
Is Rock Salt Finish Safe Around Swimming Pools?
Yes, the texture is slip-resistant when wet, making it popular for pool decks. However, mold and algae can grow if not cleaned regularly.
Where Can I Find More About Concrete Maintenance And Finishes?
You can read more detailed guidance and best practices from the Concrete Construction website.
Rock salt concrete finish can add beauty and safety to outdoor spaces, but only with the right preparation, installation, and care. By understanding common problems and their solutions, you can enjoy a durable, attractive surface for many years. Take the time to choose skilled professionals, use quality materials, and keep up with simple maintenance—your investment will pay off with fewer surprises and repairs down the road.