
Adding a shower to a basement can change everything. It can turn an empty space into a guest suite, a gym with its own wash area, or even add value to your home. But installing a shower in a basement is not simple. The main challenge? Gravity. Most basements are below the main sewer line, so water can’t drain out naturally. That’s where a step up shower for basement comes in. This system is designed to move water up and out, making basement showers possible even when gravity isn’t on your side.
This article explains what a step up shower is, how it works, why you might need one, and how to choose, install, and maintain it. You’ll also learn about costs, real-world examples, and answers to the most common questions. If you’re thinking about adding a shower in your basement, this is your complete guide.
What Is A Step Up Shower For Basement?
A step up shower is a shower system designed to work below the main sewer line of a house. In simple terms, instead of letting water flow down and out by gravity, it uses a pump to push the water up and out to the sewer or septic line.
Why “step Up”?
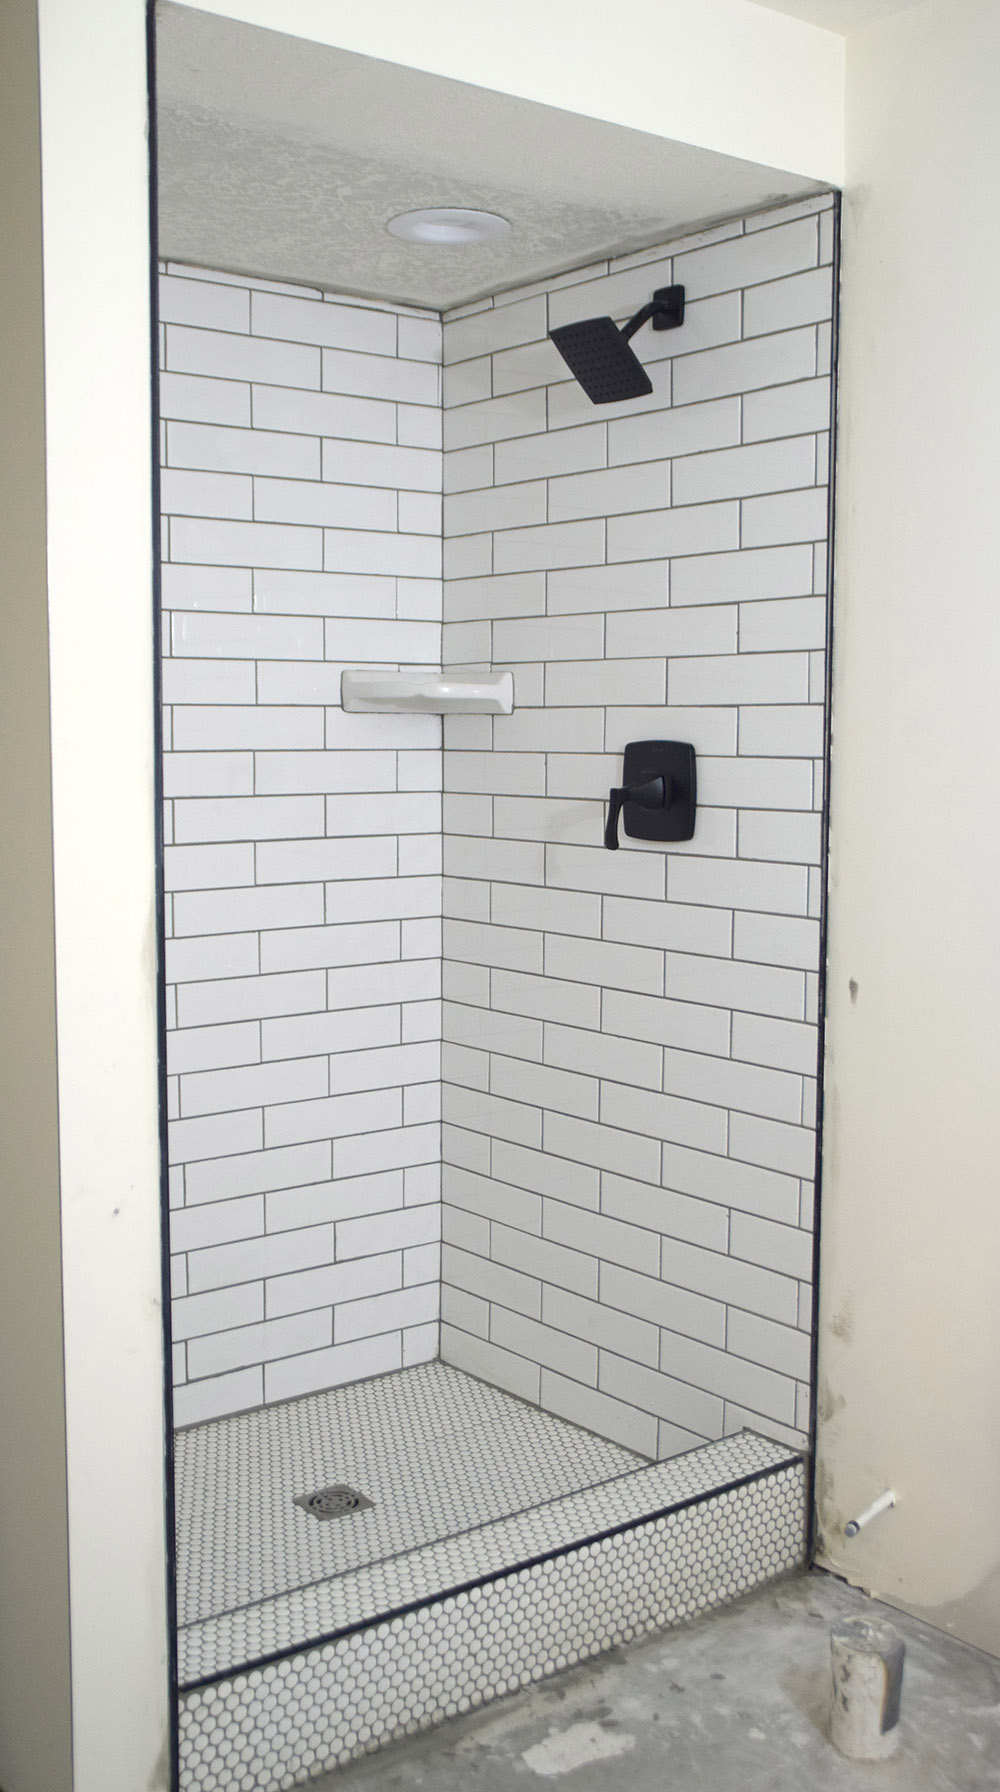
The name comes from the fact that you usually have to step up into the shower. The base of the shower is raised higher than the floor. This extra height creates space for a drainage pump system underneath.
How Does It Work?
- Water collects in a small tank under the shower.
- A sump pump or macerating pump turns on automatically when water fills the tank.
- The pump pushes the water up through pipes, over the “hump” of the sewer line, and out of the house.
This setup allows you to have a working shower even when the basement drain is below the main line.
Why Would You Need A Step Up Shower?
Not all basements need this kind of system. Here’s why a step up shower may be necessary:
- Your basement floor is below the main drain line. Water can’t flow out by gravity, so you need a pump.
- You want to add a new shower far from the main stack. If the distance is too long or the slope is too shallow, water may not drain well.
- You want to avoid breaking up the concrete floor. Installing a standard drain means digging up the slab—a messy, expensive job.
A step up shower can solve all these problems with less mess and less cost.
Key Components Of A Step Up Shower System
Let’s break down the main parts that make a step up shower for basement possible.
1. Raised Shower Base
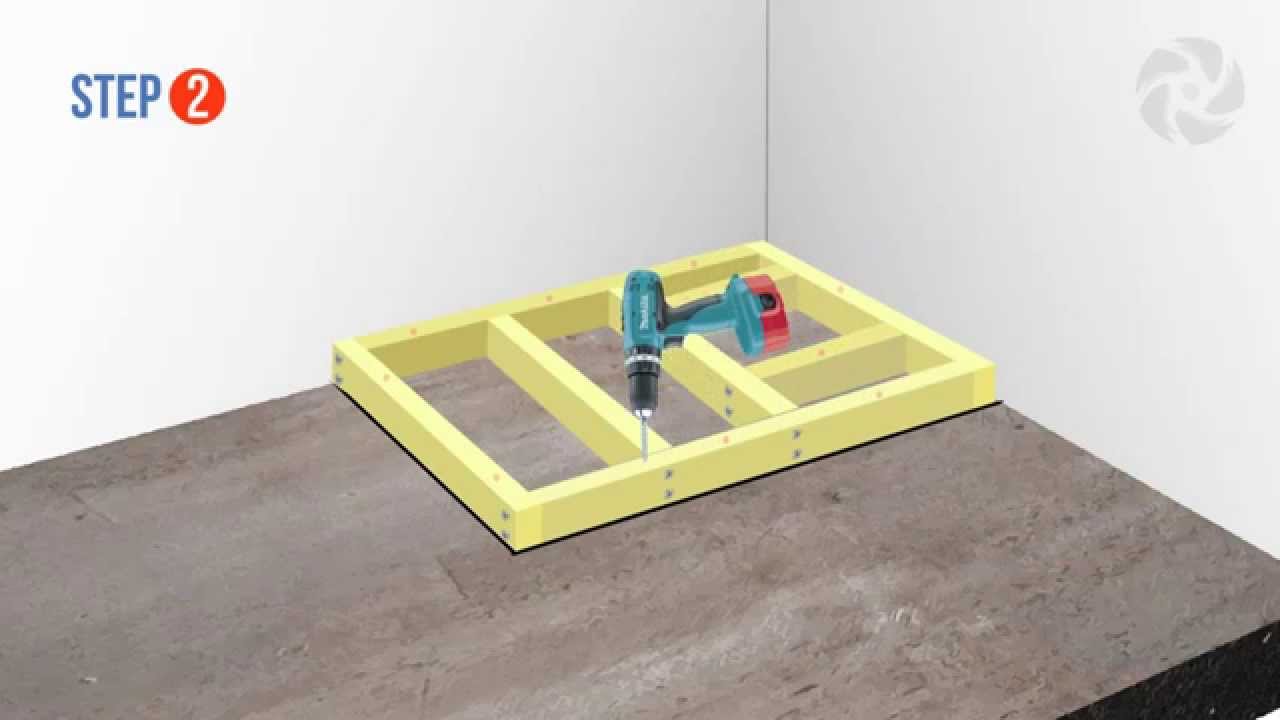
The shower pan or base sits several inches above the basement floor. This space is essential for installing the pump and drainage pipes.
- Typical height: 6 to 12 inches above floor level.
- Material: Fiberglass, acrylic, or tile-ready.
2. Sump Basin Or Tank
Under the shower, a basin collects the used water. When the basin fills up, a pump is activated.
- Size: Usually 2-5 gallons for showers.
- Access: Must be easy to reach for cleaning.
3. Drainage Pump
The heart of the system. There are two main types:
- Macerating pump: Chops up solids (used for full bathrooms).
- Standard sump pump: Handles only shower water (no solids).
The pump pushes water up, sometimes several feet, until it reaches the main drain line.
4. Discharge Pipe
A strong pipe (usually 1-2 inches wide) carries the pumped water from the tank to the house drain or sewer stack.
5. Venting
Proper venting is critical to avoid clogs and smells. A vent pipe lets air into the system, balancing pressure.
6. Electrical Connection
The pump needs power. Most use a standard 120V outlet but may require a dedicated circuit.
7. Waterproofing
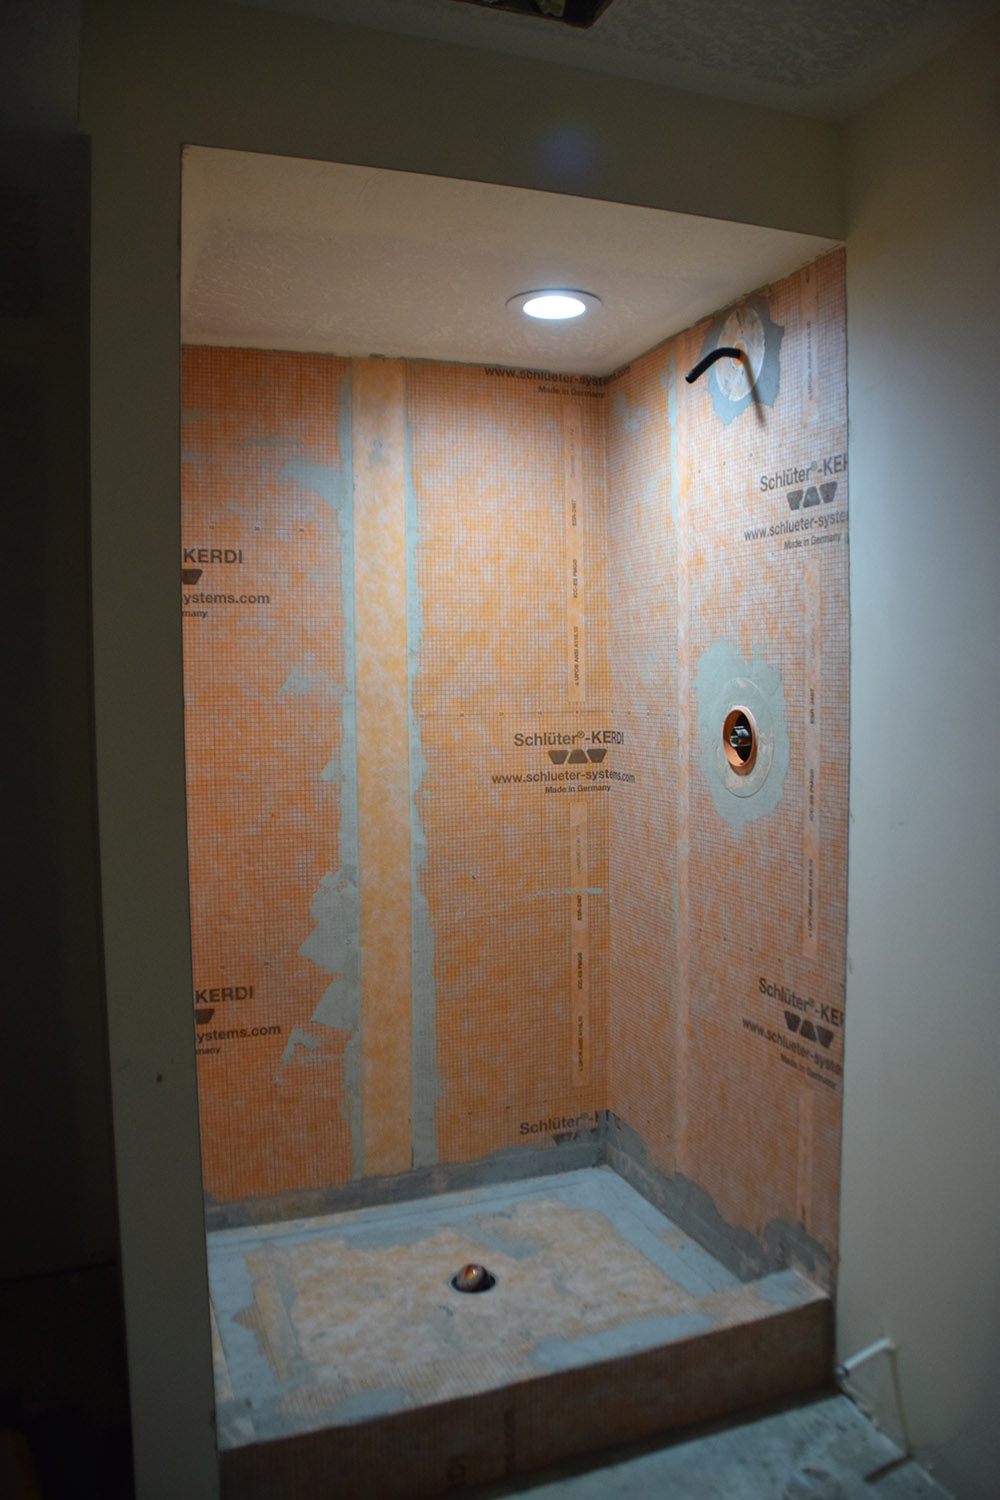
Since the system is above floor level, good waterproofing around the base is necessary to prevent leaks.
Advantages Of Step Up Showers In Basements
There are several benefits to choosing a step up shower for basement installations:
- No need to dig up the floor: Save money and avoid construction mess.
- Flexible placement: Put the shower anywhere in the basement, not just next to the main drain.
- Works below sewer level: Even very low basements can have a shower.
- Quick installation: In many cases, these systems can be installed in one or two days.
- Good for renovations: Great for adding a shower to old homes with tricky plumbing.
Credit: www.homedepot.com
Disadvantages And Limitations
Like any system, there are some downsides:
- “Step up” height: You must step up into the shower, which may not suit people with limited mobility.
- Pump noise: The pump makes a humming sound when working.
- Electrical dependency: If power goes out, the pump won’t work.
- Maintenance: Pumps and tanks need regular cleaning.
- Limited flow: Most pumps can’t handle multiple fixtures at once.
Step Up Shower Vs. Traditional Shower Drains
The best way to understand the differences is to see them side by side.
| Feature | Step Up Shower | Traditional Shower Drain |
|---|---|---|
| Location | Below sewer line | Above sewer line |
| Installation | Above floor, no slab cutting | Requires floor excavation |
| Pumping Required? | Yes | No |
| Noise | Some pump noise | Silent (gravity only) |
| Best For | Retrofits, finished basements | New builds, major remodels |
Types Of Step Up Shower Systems
Different homes need different solutions. Here are the main types of step up shower systems you’ll find:
1. All-in-one Step Up Shower Kits
These kits include a pre-made raised shower base, a pump, a tank, and all the necessary plumbing. They are popular for DIYers and quick installations.
- Pros: Easy to install, all parts included.
- Cons: Limited customization; may not fit all spaces.
2. Custom-built Step Up Showers
A plumber or contractor builds a raised platform, installs a standard shower base, and adds a separate pump system.
- Pros: Fits any size or shape; more design freedom.
- Cons: Higher cost, requires more planning.
3. Macerating Shower Systems
These use a pump that can handle waste from toilets, sinks, and showers. Great for adding a full bathroom in the basement.
- Pros: Supports multiple fixtures.
- Cons: More expensive; pump is larger and louder.
4. Low-profile Step Up Showers
Some systems use a slimline pump and a shallower base, keeping the step up as low as possible.
- Pros: Easier access; better for kids or seniors.
- Cons: May cost more; lower flow rates.
How To Choose The Right Step Up Shower System
Picking the right system can be overwhelming. Here’s what you should consider:
Location And Space
- Measure your ceiling height. You need enough space for the raised base and still be able to stand comfortably.
- Check nearby drains and vent lines. The closer to a drain stack, the easier installation will be.
User Needs
- Mobility: For anyone with trouble stepping up, choose a low-profile system.
- Shower size: Larger showers require bigger pumps and tanks.
Pump Power
- Head height: This is how high the pump needs to push water. Measure from the base to the main drain line.
- Flow rate: Most showers need at least 10-15 gallons per minute.
Noise Levels
- Check decibel ratings if noise is a concern. Some pumps are much quieter than others.
Maintenance
- Access panel: Make sure you can reach the tank and pump for cleaning.
- Brand reputation: Choose pumps with good reviews for reliability.
Budget
- All-in-one kits: $800–$1,800 (not including labor)
- Custom setups: $1,200–$3,500 or more, depending on materials and labor
Common Mistakes When Installing Step Up Showers
Many homeowners and even some contractors make mistakes with these systems. Here are the most common problems:
- Improper slope or pipe size: Using pipes that are too small or not sloped correctly can cause clogs.
- Poor venting: Skipping the vent pipe can lead to slow drainage and foul smells.
- Weak pump selection: Choosing a pump that’s too weak means poor performance and backups.
- No access panel: If you can’t reach the pump, you can’t fix it quickly when problems happen.
- Ignoring local codes: Every area has plumbing codes. Not following them can mean fines or having to redo the work.
Tip: Always check local plumbing codes before starting. Consider hiring a licensed plumber for at least part of the job.
Step-by-step: Installing A Step Up Shower In Your Basement
If you’re handy, you might try installing a step up shower yourself. Here’s a simplified overview of the process:
- Plan the location. Pick a spot with enough headroom, close to water and electrical lines.
- Build or buy a raised base. The base must be strong enough to hold the shower and users.
- Install the pump and tank. Place the basin under the base, with the pump inside.
- Connect the drain. Run a drain line from the shower pan to the basin.
- Connect the discharge pipe. Run a strong pipe from the pump to the nearest approved drain.
- Add venting. Install a vent pipe to prevent vacuum and keep drains flowing.
- Wire the pump. Plug into a GFCI outlet or hardwire if required.
- Seal and waterproof. Use silicone and membranes to prevent leaks.
- Test the system. Run water and make sure it drains quickly and quietly.
Note: This is a simplified outline. Many projects need permits and inspections.
Cost Breakdown: Step Up Shower Vs. Traditional Install
Here’s a sample cost comparison for a typical basement shower (prices in USD, 2024):
| Item | Step Up Shower | Traditional Basement Shower |
|---|---|---|
| Shower Kit/Base | $500–$1,000 | $300–$900 |
| Pump & Tank | $400–$1,000 | Not needed |
| Labor | $800–$2,000 | $1,500–$4,000 |
| Floor Excavation | Not needed | $1,000–$3,000 |
| Total Cost | $1,700–$4,000 | $2,800–$7,900 |
Insight: While the pump adds to the cost of a step up shower, the savings on not breaking the floor usually make it cheaper overall.
Maintenance: Keeping Your Step Up Shower In Top Shape
A step up shower needs a bit more care than a standard one. Here’s how to keep it running smoothly:
- Clean the tank and pump every 6–12 months. Soap, hair, and dirt can build up inside.
- Check the pump screen or filter. Remove any debris to prevent clogs.
- Inspect for leaks around the base and pipes.
- Test the pump monthly—run water and listen for odd noises.
- Flush with hot water occasionally to remove soap scum.
Advanced tip: Some pumps have alarms for high water. Test these alarms twice a year.
Real-world Examples
It helps to see what other homeowners have done with step up showers in their basements.
Example 1: Compact Guest Bathroom
In a 1940s house, the owners wanted a guest bathroom in the basement. The main drain was above the floor, so they installed a 7-inch raised shower base and a compact pump. The whole project took three days. The shower has worked well for years, and they avoided breaking up the floor.
Example 2: Home Gym Shower
A finished basement gym needed a quick rinse-off area. The owners used a low-profile step up shower kit. The step was only 5 inches high, making it easy to enter, and the pump was nearly silent. Installation was done over a weekend.
Example 3: Full Bathroom Addition
For a basement rental unit, the owner installed a macerating system that handles the shower, toilet, and sink. The cost was higher, but it made a full bathroom possible without major construction.
Environmental And Energy Considerations
Step up showers use electricity to run the pump, but the energy usage is low—about the same as a small aquarium pump. Using efficient pumps and low-flow showerheads can cut water and energy use.
Non-obvious tip: Avoid using harsh chemicals to clean the pump or tank. They can damage seals and pipes. Use mild soap and water instead.
Credit: www.youtube.com
Legal And Code Issues
Most cities require permits for plumbing work, especially in basements. Inspections ensure safe connections and prevent sewer backups. Always check with your local building office before starting.
Some areas require backflow prevention devices. These stop sewage from backing up into your shower if there’s a main line blockage.
Pros And Cons At A Glance
To summarize, here’s a quick look at the main advantages and disadvantages:
Pros:
- No floor breaking
- Flexible location
- Fast installation
- Good for older homes
Cons:
- Step up height
- Pump noise
- Needs power and maintenance
Credit: www.homedepot.com
Step Up Shower Brands And Where To Buy
Some well-known brands include Saniflo, Liberty Pumps, and Zoeller. You can buy kits and pumps at major home stores or plumbing suppliers. Online reviews and ratings can help you compare models.
Professional Vs. Diy Installation
A step up shower is easier to install than a traditional system, but there are still challenges:
- DIY: Cheaper, but you must follow codes and be comfortable with plumbing and electrical work.
- Professional: More expensive, but offers peace of mind and warranty.
If you’re unsure, get several quotes from licensed plumbers. They can help you avoid common mistakes.
Step Up Showers For Accessibility
If someone in your home has mobility issues, look for low-threshold or ADA-compliant step up showers. These have lower bases, grab bars, and non-slip floors.
Hidden challenge: The raised base can still be a barrier. Consider a small ramp or built-in seat for safety.
Step Up Showers And Home Value
Adding a shower to your basement can raise your home’s value, especially in areas where extra bathrooms are in demand. However, a poorly installed system or one that is hard to access (very high step) may turn off buyers. Quality matters.
Troubleshooting Common Problems
Here are some typical issues and how to handle them:
- Pump won’t start: Check for power at the outlet. Inspect the float switch in the tank.
- Slow draining: Clean the pump screen and check for pipe blockages.
- Unusual noise: Could be debris in the pump or worn bearings.
- Bad smells: Clean the tank, and check for proper venting.
If problems persist, call a plumber familiar with basement pump systems.
Upgrades And Enhancements
You can make your step up shower even better:
- Heated floors: Install electric heating under the raised base.
- Waterproof LED lighting: Safe for wet areas, adds style.
- Custom tile: Use tile-ready bases for a luxury look.
- Built-in seating: Add a bench for comfort and safety.
Insight: Plan all upgrades before you build the base. Retrofitting is harder and more expensive.
Comparing Step Up Showers To Other Basement Shower Solutions
Let’s compare step up showers to two alternatives: upflush toilets with shower drains and traditional gravity drains.
| Solution | Best For | Cost | Maintenance | Installation Difficulty |
|---|---|---|---|---|
| Step Up Shower | Showers in finished basements | Medium | Medium | Medium |
| Upflush Toilet System | Full basement bathrooms | High | High | Hard |
| Traditional Gravity Drain | New builds, major remodels | High | Low | Hard |
Takeaway: Step up showers offer a good balance of cost, ease, and maintenance for most basement shower projects.
Frequently Asked Questions
How Long Does A Step Up Shower Pump Last?
Most quality pumps last 7 to 10 years with regular maintenance. Cleaning the tank and checking for debris can extend life. Some brands offer warranties up to five years.
Can I Install A Step Up Shower Myself?
If you are comfortable with basic plumbing and electrical work, you can install it yourself. However, you must follow local codes and may need a permit. Mistakes can be costly, so many people hire a pro for at least the pump and drain connections.
Is A Step Up Shower Safe For Kids And Seniors?
The raised base can be a tripping hazard for small kids or anyone with mobility issues. Choose a low-profile system and add non-slip flooring and grab bars for safety.
How Much Electricity Does The Pump Use?
Most pumps use 100–300 watts when running, similar to a small appliance. Since the pump only runs when the shower is used, the impact on your energy bill is small.
Where Can I Find More Information Or Standards About These Systems?
The International Association of Plumbing and Mechanical Officials (IAPMO) provides codes and standards. You can learn more at IAPMO’s official site.
Adding a step up shower to your basement can make your home more useful, comfortable, and valuable. With the right planning and system, you can enjoy all the benefits of a basement shower—without the mess and cost of digging up your floor.