
A clean commercial kitchen floor is more than just a nice-to-have—it’s a must for any food business that cares about safety, health, and efficiency. Every day, kitchen floors face heavy foot traffic, spills, grease, and food debris. If you don’t clean them properly, they can quickly become a hazard, leading to slips, pest infestations, and even failed health inspections.
Many kitchen managers think a quick mop at the end of the day is enough. But keeping a commercial kitchen floor truly clean demands a clear system, the right tools, and an understanding of what makes these floors so challenging.
This article will guide you step by step through the complete process of cleaning a commercial kitchen floor. You’ll learn not just the basics, but also expert tips, common mistakes, and practical advice that most beginners miss. We’ll look at the best cleaning products, show you how to choose tools, and explain how to set up a cleaning schedule that fits your kitchen’s needs.
Whether you run a small café or a large restaurant, you’ll find everything you need to keep your kitchen floors spotless, safe, and up to code.
Understanding Commercial Kitchen Floor Challenges
Commercial kitchen floors are not like household floors. They face unique problems that make cleaning harder and more important.
Heavy Foot Traffic
In a busy kitchen, dozens of staff walk back and forth throughout the day. Shoes track in dirt, grease, and food particles from all areas. Over time, this grime builds up, especially in corners and under equipment.
Grease And Oil Buildup
Cooking with oils and fats leads to spills and splashes. Grease is stubborn—it sticks to the floor and attracts more dirt. If not removed correctly, it creates a slippery layer that’s hard to clean with just water.
Food Spills And Residue
Dropped ingredients, sauces, and crumbs can stick to the floor or get trapped in grout lines. If left too long, they can become breeding grounds for bacteria or attract pests like cockroaches.
Water And Moisture
Kitchens use a lot of water for cooking and cleaning. Excess moisture can make floors slippery and encourage mold or mildew growth, especially in areas with poor ventilation.
Health And Safety Regulations
Most countries have strict rules for kitchen cleanliness. The U. S. Food Code, for example, says that floors must be “clean and in good repair. ” Failing to clean floors properly can lead to fines or even a shutdown.
Choosing The Right Cleaning Supplies
Not all cleaning products are safe or effective for commercial kitchen floors. Using the wrong ones can damage the floor, leave dangerous residues, or make cleaning harder.
Floor Type Matters
First, identify your floor material. Common types include:
- Ceramic tile: Durable but grout lines can trap dirt.
- Quarry tile: Very slip-resistant, often found in kitchens.
- Vinyl: Easy to clean, but some cleaners can damage it.
- Concrete: Strong, but porous and stains easily.
Each floor type may need different products and tools.
Essential Cleaning Chemicals
For most commercial kitchens, you’ll need:
- Degreaser: Breaks down oils and fats. Pick a food-safe, non-toxic formula.
- Disinfectant: Kills bacteria and viruses. Must be approved for food areas.
- Neutral floor cleaner: For regular cleaning without damaging the floor.
Avoid using bleach on colored grout or natural stone, as it can cause fading or damage.
Must-have Cleaning Tools
- Stiff-bristle brooms: For sweeping up large debris.
- Mops and mop buckets: Microfiber mops are best; avoid cotton, which holds grease.
- Floor scrubber or buffer: For deep cleaning large areas.
- Squeegees: Helps move water and cleaning solution toward drains.
- Scrub pads or brushes: For corners and grout lines.
- Wet/dry vacuum: Useful for quickly removing dirty water.
Safety Equipment
Protect your staff with:
- Non-slip shoes
- Gloves
- Eye protection (when using strong chemicals)
- Wet floor signs
Quality Over Quantity
Some managers try to save money by using cheap cleaners or old mops. But poor-quality supplies often leave floors dirtier or make cleaning take longer. Investing in the right products pays off with safer, cleaner floors.
Step-by-step Cleaning Process
A clear cleaning process keeps your kitchen floors in top condition and reduces the risk of accidents. Here’s a proven routine for daily cleaning, plus extra steps for deep cleaning.
1. Prepare The Area
- Remove all movable furniture and equipment from the cleaning area.
- Sweep the floor thoroughly with a stiff-bristle broom.
- Check for and pick up any large food scraps or trash.
- Place wet floor signs at entrances to alert others.
2. Dry Sweep First
Dry sweeping is often skipped, but it’s essential. Removing dry debris before mopping stops dirt from spreading and scratching the floor.
3. Apply Degreaser
- Mix the degreaser according to the label instructions.
- Spread it over greasy areas, especially near fryers and grills.
- Let it sit for the recommended time (usually 5–10 minutes) to break down oils.
Pro Tip: Use a scrub brush to work the degreaser into grout lines and corners where grease hides.
4. Scrub The Floor
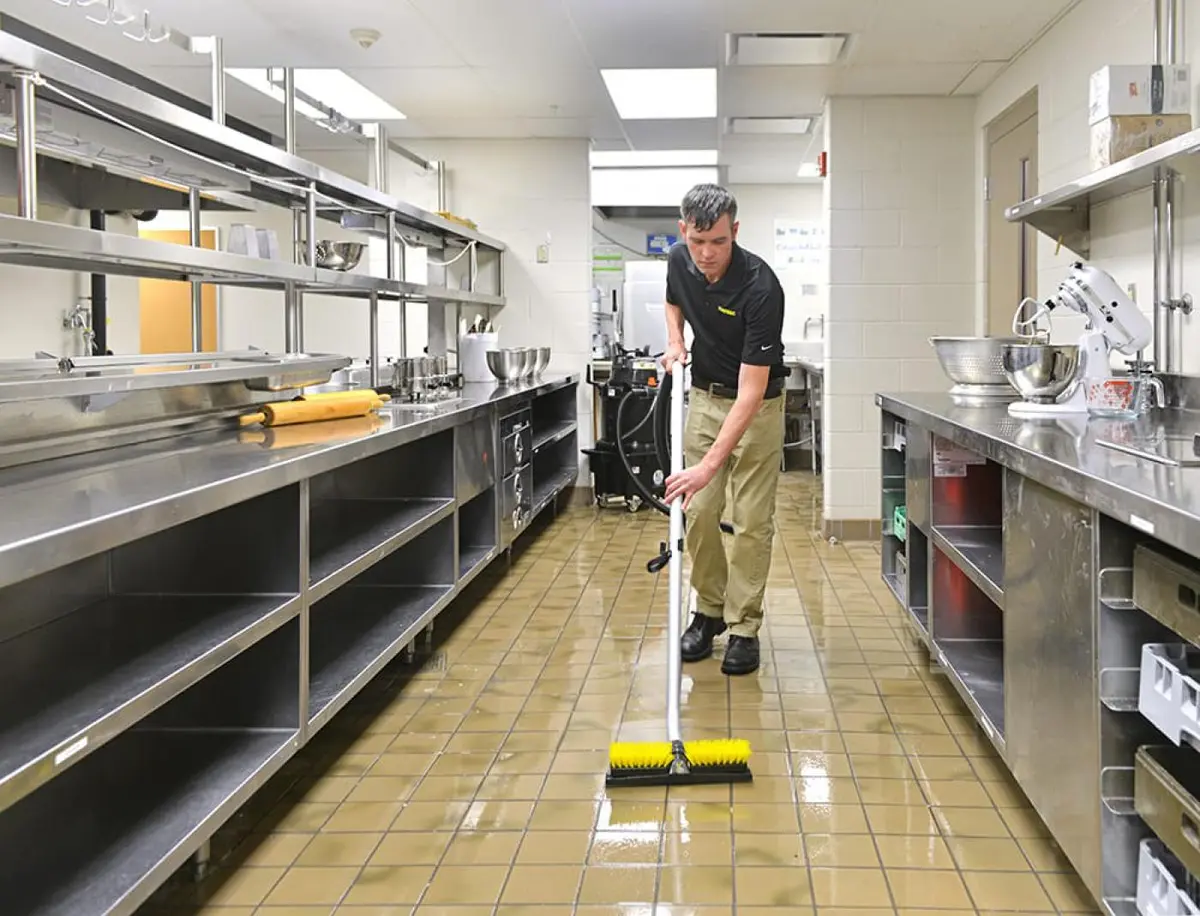
- Use a mop, scrub pad, or floor scrubber to agitate the surface.
- Focus on high-traffic and extra-dirty spots.
- For textured tiles, use a brush with stiff bristles to get into grooves.
5. Rinse Thoroughly
- Mop up the dirty degreaser with clean water.
- Rinse twice if needed to remove all residue. Leftover cleaner can make the floor sticky or slippery.
- Use a squeegee to push excess water toward floor drains.
6. Disinfect
- Apply a food-safe disinfectant to the entire floor.
- Let it sit for the required contact time (often 5–10 minutes).
- Mop up or allow to air dry if the product allows.
7. Dry The Floor
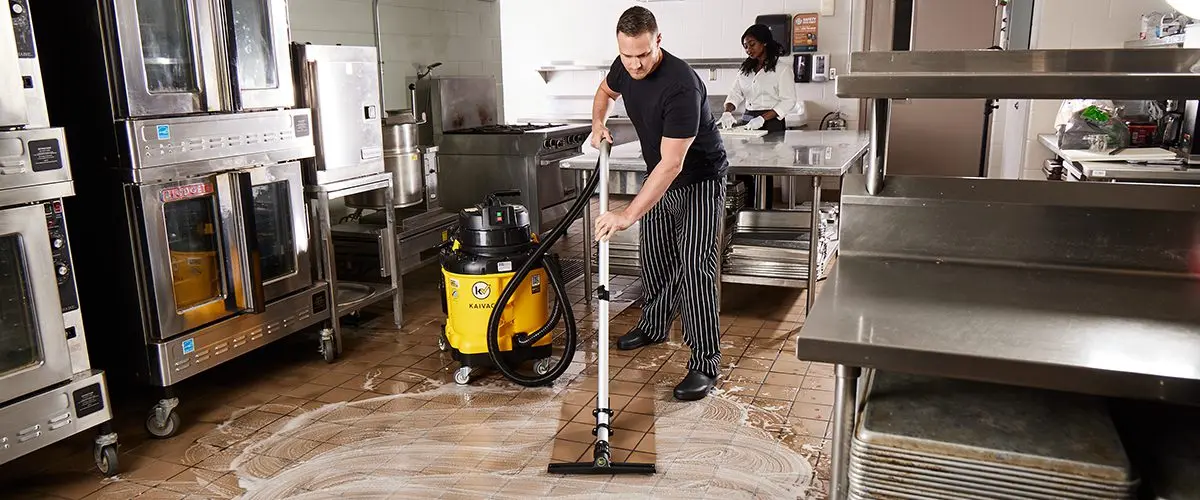
- Use a wet/dry vacuum or squeegee to remove water.
- Allow the floor to air dry fully before moving equipment back.
Non-Obvious Insight: Many staff rush the drying step, but a wet floor not only increases slip risk—it also attracts new dirt and grease faster.
Deep Cleaning And Special Situations
Daily cleaning is important, but even the best routine misses some spots. Set a regular schedule for deep cleaning to prevent long-term buildup.
Deep Cleaning Schedule
Most commercial kitchens need a deep clean at least once a week. High-volume kitchens (like fast food or catering) may need it more often.
Deep Clean Steps
- Move all equipment (including under-counter units) to clean underneath and behind.
- Use a grout brush to scrub between tiles.
- Apply a stronger degreaser to stubborn stains or old grease.
- Use a floor buffer or machine scrubber for large areas.
- Inspect drains for clogs and clear them as needed.
- Check for any damage or wear on the floor and arrange repairs if needed.
Cleaning After Spills
Not all spills are equal. For example, a dropped pot of oil needs a different approach than a spill of flour or water.
- For grease/oil spills: Cover with absorbent powder or paper towels. Remove bulk oil before mopping.
- For food or liquid spills: Wipe up immediately, then clean the area with the normal routine.
- For chemical spills: Follow the safety data sheet instructions and wear protective gear.
Seasonal Or Monthly Tasks
- Strip and reseal floors (if required for your floor type).
- Inspect grout for cracks or missing sections.
- Clean floor drains and grease traps.
- Audit cleaning supplies and replace worn-out mops or brushes.
Handling Stubborn Stains
Some stains are very tough to remove, especially in grout. Try a paste of baking soda and water as a gentle abrasive, or a commercial grout cleaner for heavy buildup. Always test new products in a small area first to avoid damage.
Setting Up An Effective Cleaning Schedule
A good cleaning schedule makes sure the floor is always clean, no matter how busy the kitchen gets. It also helps you stay organized and avoid missed spots.
Frequency Guidelines
- Sweep and spot clean: Every hour during service
- Full mop and disinfect: At least once daily, usually after closing
- Deep clean: Weekly or as needed
Assigning Responsibilities
- Clearly state who does each task (e.g., morning prep staff sweeps, night crew mops).
- Use a checklist to track completed jobs.
- Rotate deep cleaning tasks to prevent burnout.
Example Weekly Cleaning Schedule
| Day | Task | Responsible |
|---|---|---|
| Monday | Full mop, disinfect | Night crew |
| Tuesday | Spot clean, sweep hourly | All staff |
| Wednesday | Deep clean under equipment | Maintenance |
| Thursday | Full mop, disinfect | Night crew |
| Friday | Spot clean, sweep hourly | All staff |
| Saturday | Full mop, deep grout clean | Night crew |
| Sunday | Check floor for damage, replace cleaning tools | Manager |
Non-obvious Insight: Timing Matters
If you clean the floor right before a busy meal rush, it can get dirty again in minutes. Plan your main cleaning after peak hours, but never skip spot cleaning during service.
Best Practices For Grease And Grout
Grease and grout are two of the toughest cleaning challenges in any kitchen. Here’s how to deal with them:
Keeping Grease Under Control
- Place mats near fryers and grills to catch splashes.
- Wipe up small spills immediately.
- Use enzyme-based degreasers for stubborn buildup. These break down grease naturally and are safer for the environment.
Grout Maintenance
Grout is porous, so it absorbs liquids and stains easily. Clean it regularly with a stiff brush and the right cleaner.
- Avoid using too much water, which can make mold grow in grout lines.
- Seal grout lines every 6–12 months to protect them from stains.
Comparing Grout Cleaning Products
Here’s a look at how different products perform on kitchen grout:
| Product | Effectiveness on Grease | Time to Clean | Safe for Food Areas? |
|---|---|---|---|
| Enzyme Degreaser | High | Moderate | Yes |
| Bleach Solution | Medium | Fast | Use with caution |
| Baking Soda Paste | Low | Slow | Yes |
| Commercial Grout Cleaner | Very High | Fast | Check label |
Pro Tip: Don’t mix cleaning chemicals, especially bleach and ammonia. This can create toxic fumes.
Credit: kaivac.com
Mistakes To Avoid When Cleaning Kitchen Floors
Even experienced staff make errors that can undo all their hard work.
Using Too Much Water
Flooding the floor may seem like it cleans better, but excess water can seep into grout and under equipment. This leads to mold, bacteria, and even floor damage.
Skipping The Pre-sweep
If you mop without sweeping first, dirt and crumbs just get pushed around. This leaves sticky, dirty patches.
Not Changing Mop Water
Dirty mop water spreads grease and bacteria. Change the water at least every 10–15 minutes or whenever it looks cloudy.
Ignoring Corners And Under Equipment
Floors may look clean in open areas but hide grime in corners, under shelves, or behind appliances. These spots can become health hazards if ignored.
Rushing The Job
Speed leads to missed spots, leftover residue, and even accidents. Take the time to do it right.
Not Following Product Instructions
Using too much or too little cleaner can either leave dangerous residue or not clean well enough. Always read and follow the label.
Not Training Staff
Assume nothing: train every staff member on the correct way to clean. Don’t just say “mop the floor”—show how to mix chemicals, use tools, and check their own work.
Comparing Floor Cleaning Tools
Choosing the right tool can make floor cleaning much easier and more effective.
| Tool | Best Use | Pros | Cons |
|---|---|---|---|
| Microfiber Mop | Daily cleaning | Traps grease, easy to clean | Can be expensive |
| Cotton Mop | Large spills | Absorbent, low cost | Holds grease, hard to clean |
| Floor Scrubber | Deep cleaning | Fast, thorough, less labor | Bulky, expensive |
| Scrub Brush | Grout, corners | Targeted cleaning | Labor-intensive |
| Squeegee | Rinsing, drying | Removes water quickly | Not for scrubbing |
Non-Obvious Insight: Microfiber mops, while more expensive upfront, last much longer and don’t hold odors like cotton mops do.
Training Staff For Consistent Results
Even with the best products and tools, your kitchen floor will only stay clean if everyone on the team knows exactly what to do.
Clear Instructions
- Write simple step-by-step instructions for each cleaning task.
- Use photos or diagrams if possible, especially for staff who speak different languages.
Hands-on Demonstrations
Show new staff how to use each tool and product. Let them practice under supervision until they are confident.
Ongoing Supervision
Managers should check the floor regularly and give feedback. Praise good work and correct mistakes early.
Tracking And Accountability
- Use a cleaning log to record who did what and when.
- Review logs in weekly meetings to spot patterns or problems.
Rewarding Good Performance
Recognize staff who do a great job keeping the floor clean. This motivates everyone to care more about cleanliness.
Going Beyond: Preventive Maintenance And Hygiene
Clean floors are just one part of a healthy, efficient kitchen. Combine cleaning with good maintenance and hygiene habits.
Preventing Slips And Falls
- Use anti-slip mats in high-risk areas.
- Fix any loose or broken tiles quickly.
- Keep walkways clear of clutter.
Pest Control
- Clean up food and spills right away.
- Empty trash bins regularly.
- Check for signs of pests and act fast if you see any.
Air Quality
Good ventilation helps floors dry faster and prevents mold or mildew. If your kitchen feels humid or smells musty, check your ventilation system.
Record Keeping
Maintain records of all cleaning, repairs, and inspections. This helps prove compliance during health inspections and keeps your team accountable.
Credit: kaivac.com
Real-world Example: Cleaning A Restaurant Kitchen Floor
Let’s look at how a typical restaurant handles floor cleaning:
- At closing, all staff sweep and spot clean their areas.
- The night crew uses a degreaser near fryers, then scrubs the floor with a buffer.
- They rinse twice, then squeegee water toward the drains.
- After disinfecting, they use fans to speed up drying.
- Every Saturday morning, a maintenance worker deep cleans grout lines and checks for damage.
This approach reduces accidents, keeps the kitchen smelling fresh, and impresses health inspectors.
Frequently Asked Questions
How Often Should A Commercial Kitchen Floor Be Deep Cleaned?
Deep cleaning should be done at least once a week in most kitchens. Very busy kitchens, or those with heavy grease use, may need deep cleaning two or three times weekly.
What Is The Best Way To Remove Grease From Kitchen Floors?
Use a food-safe degreaser and let it sit for several minutes before scrubbing. For old or heavy grease, use an enzyme-based cleaner and a floor scrubber for best results.
Can I Use Bleach To Clean Commercial Kitchen Floors?
Bleach can disinfect, but it may damage grout or certain floor types and leaves strong fumes. Use it only if the floor manufacturer says it’s safe, and always rinse well.
What Is The Fastest Way To Dry A Kitchen Floor After Cleaning?
Use a wet/dry vacuum or squeegee to remove water, then set up fans for faster air drying. Never let staff walk on wet floors without non-slip shoes.
Do Health Inspectors Check Kitchen Floors During Inspections?
Yes, inspectors look closely at floor cleanliness, especially in corners and under equipment. Dirty floors can lead to citations or even closures. Learn more about food safety at the FDA Food Code.
A clean commercial kitchen floor is the foundation of a safe, efficient, and successful food business. By following the right steps, using quality supplies, and training your staff, you can keep your floors spotless and your kitchen running smoothly. Remember, it’s not just about looking clean—it’s about protecting your team, your customers, and your business every single day.
Credit: cleanmethod.com