
Many homeowners install Closetmaid pantry systems inside kitchen cabinets to organize food, appliances, or cleaning products. These systems usually include wire shelves, brackets, and tracks. While they’re practical for a while, needs often change. Maybe you want deeper shelves, more space for pots, or a custom look. Or perhaps those wire racks just collect dust and make cleaning difficult.
If you’re ready to remove Closetmaid pantry shelves from your kitchen cabinets, you’re not alone. But it’s not as simple as grabbing a screwdriver and yanking them out. Poor removal can leave holes, damage, and frustration. This article will walk you through the entire process—from planning, gathering tools, and safe removal, to repairing your cabinets and setting up a new system.
Along the way, you’ll find practical tips, real-life examples, and answers to problems most beginners never expect. Let’s reclaim your kitchen space with confidence.
Understanding Closetmaid Pantry Systems
Before starting, it’s important to know what you’re working with. Closetmaid pantry systems are modular, which means they’re made of different parts: wire shelves, wall brackets, support rods, and mounting hardware. Some systems use simple clips; others have rails, anchors, or screws drilled into the cabinet walls.
Why does this matter? If you don’t know how your system is attached, you may cause unnecessary damage or miss hidden fasteners. Closely inspect your pantry interior. Look for:
- Wire shelves resting on side clips or brackets
- Vertical rails mounted to the cabinet walls
- Screws, anchors, or toggle bolts in wood or drywall
- Extra supports at the back or bottom
Take photos with your phone from several angles before removing anything. This will help later if you need to explain, repair, or reinstall something.
Planning For Removal
Preparation saves time and cabinets. Don’t skip this step. Mistakes here can cause scratches, gouges, or even break a cabinet wall.
Tools And Supplies You’ll Need
- Screwdriver set (Phillips and flathead)
- Cordless drill (optional, speeds up screw removal)
- Pliers for pulling nails or stubborn brackets
- Utility knife for caulk or paint seams
- Putty knife for scraping off glue or patches
- Bucket or tray for old hardware
- Protective gloves and eye protection
- Drop cloth or old towel for the cabinet floor
Pro tip: If your cabinets are painted, have touch-up paint and a small brush ready for later.
Clear Out The Pantry
Empty every shelf. Remove food, containers, and anything on the cabinet floor. Wipe down dust and crumbs. If you leave things inside, you’ll risk breaking them or making the job harder.
Protect Surrounding Surfaces
Lay a drop cloth on the floor of the cabinet and nearby counters. Removing metal shelves can scratch wood or paint. This is especially important in small kitchens where space is tight.
Non-obvious insight: Tape a thin piece of cardboard or plastic against the inside cabinet wall near the brackets. This prevents your screwdriver from slipping and marring the wood.
Step-by-step Removal Of Closetmaid Pantry Shelves
Most Closetmaid systems are designed for easy assembly and disassembly. But after years of use, some parts may be stuck, painted over, or rusted. Here’s how to handle each part.
1. Remove Pantry Shelves
Start at the top shelf. Most wire shelves rest on side brackets or clips. Lift the front edge slightly, then slide the shelf out of the brackets. If it’s stuck, gently wiggle or tap with your palm.
If painted over: Run a utility knife along the seam where the shelf meets the bracket to free it.
If glued: Use a putty knife to gently pry and loosen adhesive.
2. Take Out Shelf Brackets And Clips
Check for screws holding the brackets. Use the correct screwdriver (Phillips or flathead). Don’t force a mismatched tool—it can strip the head.
If the bracket won’t budge: It may have a hidden locking tab. Look for a small plastic or metal tab near the back and depress it with a flathead screwdriver.
3. Remove Vertical Rails And Support Bars
If you see vertical rails (attached to the cabinet wall), these are usually held by screws or wall anchors. Unscrew all fasteners.
Anchored into drywall: Some Closetmaid systems use toggle bolts or anchors. Unscrew the bolt. If the anchor spins, grip with pliers and gently pull while unscrewing. For toggle bolts, the toggle may fall inside the wall—this is normal.
4. Detach Any Extra Support Pieces
Some pantries have rear supports or center posts. Remove these in the same way—unscrew or gently pry loose.
Tip: Label or bag hardware as you remove it. This helps if you want to reuse parts or need them as a size reference for repairs.
5. Inspect For Damage Or Stuck Parts
After all visible pieces are out, check for:
- Hidden screws behind brackets
- Small nails or brads
- Patches of dried glue or caulk
Non-obvious insight: Use a flashlight to check corners and seams. It’s easy to miss a small nail or bracket, especially in dark cabinets.
Dealing With Common Problems
Even with good planning, problems can pop up. Here’s how to handle the most frequent issues.
Stubborn Brackets Or Rusted Screws
If a screw is rusted or stripped, don’t force it. Spray a little WD-40, wait five minutes, then try again. Use the correct size driver. If it still won’t move, grip the screw head with pliers and twist gently.
For stuck brackets: Slide a putty knife behind the bracket and wiggle gently to loosen old paint or glue.
Damaged Cabinet Walls
Sometimes, removing anchors or screws leaves a hole or chips the wood. Don’t panic—most of these can be repaired easily (see next section).
Avoid using a hammer inside the cabinet unless absolutely necessary. The vibration can split thin cabinet walls or shake other fasteners loose.
Hidden Anchors Or Fasteners
If a bracket won’t move and no screws are visible, gently pry it with a putty knife. Some older Closetmaid systems use snap-in brackets held by friction or hidden tabs.
Never yank hard—this can tear out a chunk of wood or drywall.
How To Repair And Restore Your Cabinets
Once the Closetmaid system is out, you’ll likely see holes, marks, or even small cracks in your cabinet walls. Repairing these is essential for both looks and function, especially if you plan to add new shelves.
Patching Screw Holes
Small holes (from screws or nails) are easy to fix:
- Wipe the hole with a damp cloth to remove dust.
- Fill the hole with wood filler (for solid wood or plywood) or spackle (for painted MDF or drywall).
- Let it dry fully—check the package instructions (usually 30–60 minutes).
- Sand lightly with fine-grit sandpaper until smooth.
- Wipe away dust and touch up with paint if needed.
Repairing Larger Holes Or Damage
If a wall anchor pulled out a big chunk, you’ll need a stronger repair.
- For holes up to 1/2 inch wide, fill with two-part epoxy wood filler.
- For larger holes, press a small piece of wood or hardboard into the gap, then fill and sand.
- Prime and paint after the repair dries.
Pro tip: If the damage is on a thin cabinet back, glue a thin piece of wood behind the hole as support before filling.
Fixing Paint Or Finish Scratches
If your screwdriver slipped and scratched the cabinet:
- For painted cabinets, use touch-up paint with a small brush.
- For stained wood, use a wax repair stick or wood stain marker in a matching color.
Cleaning Up Glue Or Caulk
Scrape dried glue or caulk with a putty knife. If it’s stubborn, soften with a little warm vinegar or adhesive remover, then wipe clean.
Choosing What To Do Next With Your Cabinets
Now that your Closetmaid pantry is gone, you have options. Each choice has pros, cons, and costs.
1. Install New Shelving
You can add solid wood or melamine shelves for a custom fit. These are easier to clean, hold more weight, and give a polished look.
- Measure carefully—cabinet walls are rarely perfectly square.
- Use adjustable shelf pins if you want flexibility.
- Paint or finish shelves before installing.
2. Add Pull-out Drawers Or Baskets
Pull-out drawers help reach items at the back of deep cabinets. You can buy pre-made kits or custom-fit options.
- Make sure drawers fit the cabinet opening.
- Test movement with a drawer before installing all.
3. Leave Cabinets Open For Bulk Storage
If you store large appliances or containers, leaving the space open can make access easier. Line the base with a non-slip mat to protect the finish.
4. Reinstall An Updated Closetmaid Or Similar System
If you liked some features but want a new layout, consider an updated pantry system. New Closetmaid models have better finishes, smoother edges, and sturdier hardware.
Pro tip: Always measure your cabinet depth and width before buying a new system. Older cabinets are often less deep than today’s pantry kits.
5. Hire A Professional
For complex layouts or if you want a high-end look, a professional carpenter can build custom shelving or cabinetry.
Cost: Expect to pay $200–$600 for a small pantry cabinet overhaul, depending on materials and labor.
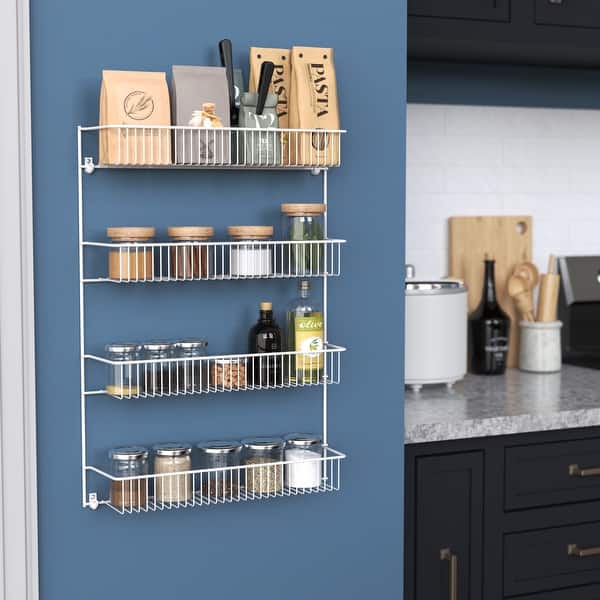
Credit: www.bedbathandbeyond.com
Real-life Example: Sarah’s Cabinet Makeover
Sarah, a homeowner in Ohio, decided to remove her Closetmaid pantry after noticing the wire shelves sagged and small items fell through. She followed these steps:
- She photographed the setup, then emptied all shelves.
- Using a drill, she removed brackets and vertical rails, finding three anchors had pulled out large holes in the MDF.
- Sarah patched the holes with wood filler, sanded, and painted.
- She measured and installed solid wood shelves on new adjustable pins.
- The result: She gained more usable space, and cleaning became much easier.
Key lesson: Taking time to repair and repaint after removal can make old cabinets look brand new.
Mistakes To Avoid When Removing A Closetmaid Pantry
Many people rush the process and regret it. Here’s how to avoid common pitfalls.
Not Taking Photos
You may think you’ll remember how everything fits—but you probably won’t. Photos help if you need to reinstall or explain to a handyman later.
Using The Wrong Tools
Forcing a large screwdriver into a small screw can strip the head. Always match the tool to the fastener.
Ignoring Hidden Damage
Check every hole and bracket spot for chips, cracks, or soft spots. Ignoring these can lead to bigger repairs later.
Skipping Repairs
Leaving holes or damage can make new shelves unstable, let in pests, or cause future problems. Always patch and paint before moving on.
Reinstalling Without Cleaning
Old dust, food crumbs, and grease can cause new shelves or systems to fit poorly. Always clean the cabinet thoroughly after removal.
Comparing Pantry Storage Options After Removal
Here’s a quick comparison of the main options you have after removing your Closetmaid pantry system:
| Option | Pros | Cons | Estimated Cost |
|---|---|---|---|
| Solid Wood Shelves | Strong, easy to clean, custom fit | Requires measuring and installation | $20–$80 per shelf |
| Pull-Out Drawers | Easy access, great for deep cabinets | More expensive, needs installation | $80–$300 per drawer |
| Open Space | Simple, flexible for bulk items | Less organized for small items | Free |
| New Closetmaid System | Modular, familiar setup | Can repeat old problems, less custom | $60–$200 per kit |
| Custom Cabinetry | Best fit, high-end look | Most expensive, needs pro help | $200–$600+ |
Data: Common Reasons Homeowners Remove Closetmaid Pantries
Why do people take out these systems? A recent survey found:
| Reason for Removal | Percentage of Homeowners (%) |
|---|---|
| Desire for more storage space | 37 |
| Switching to solid shelves | 28 |
| Cleaning difficulties | 15 |
| Broken or sagging shelves | 12 |
| Upgrading kitchen | 8 |
Insight: Most people remove Closetmaid pantries not because they’re broken, but because their needs change or they want a cleaner, more durable solution.

Credit: www.lowes.com
Best Practices For A Smooth Removal
- Work from top to bottom. Start with the highest shelf and move down to avoid injury or damage.
- Store all hardware. Bag and label screws, brackets, and odd pieces.
- Test new shelf placement before drilling new holes.
- Ventilate your kitchen. Some fillers and paints have strong smells.
- Take your time. Rushing leads to mistakes that are harder to fix later.
Non-obvious tip: If your cabinet is old, check for signs of pests (crumbs, droppings) during removal. Address these before reinstalling anything.
When To Call A Pro
While most people can handle removing a Closetmaid pantry, call a professional if:
- You find electrical wiring or plumbing inside the cabinet.
- The damage is severe (large holes, rotten wood).
- You want custom shelving with a perfect finish.
A skilled handyman or carpenter can save hours and prevent costly mistakes.
Frequently Asked Questions
How Long Does It Take To Remove A Closetmaid Pantry System From Kitchen Cabinets?
Most homeowners can remove a typical Closetmaid pantry in one to two hours. If there is damage or complex hardware, it may take longer. Allow extra time for repairs and cleanup.
Can I Reuse The Closetmaid Pantry System After Removal?
Yes, if you remove shelves and brackets carefully, you can reuse most parts. Clean them, check for rust or damage, and keep all hardware. You can reinstall in another cabinet or donate to a local charity.
Will Removing The Pantry Shelves Damage My Kitchen Cabinets?
Minor damage is common, such as small holes or scratches. Most can be repaired with wood filler, spackle, and paint. Careful removal reduces the risk of big problems.
What Is The Best Alternative To Wire Pantry Shelves?
Solid wood or melamine shelves are the most popular upgrade. They’re strong, easy to clean, and can be custom fit to your cabinet. Pull-out drawers are also a good choice for deep cabinets.
Where Can I Find More Information About Kitchen Storage Solutions?
You can read more at the Family Handyman kitchen storage guide for professional tips and DIY ideas.
Final Thoughts
Removing a Closetmaid pantry from your kitchen cabinets is a smart move if you need more space, better function, or a fresh look. The process is simple with the right tools and preparation, but it’s important to work carefully and repair any damage.
Take your time, plan each step, and don’t skip the cleanup and touch-ups—these details make all the difference. Whether you install new shelves, drawers, or just enjoy open space, your kitchen will feel more organized and personalized. With these tips, you can tackle the project confidently and enjoy a better pantry for years to come.

Credit: www.amazon.com