
Installing kitchen cabinets on a tile floor can feel challenging, even for experienced DIYers. Yet, with careful planning, the right tools, and a clear understanding of each step, you can get professional-looking results that last for years. This guide will take you through the entire process, from preparation to final adjustments, using clear language and practical tips.
You’ll learn not only the “how-to” but also the “why” behind each key step—helping you avoid common mistakes and costly damage to both your tiles and your new cabinets.
Why Installing Cabinets On Tile Is Different
Most people think installing kitchen cabinets is the same on any surface. However, tile floors have unique challenges. First, tiles can crack under pressure. Drilling through tile takes special care. Also, the height of the floor changes with tile thickness, which can affect cabinet alignment. Finally, any mistake can damage both the cabinets and the expensive tile—fixing these errors is harder than on wood or cement.
Understanding these differences helps you prepare the right way and prevents hidden problems later.
Tools And Materials You Will Need
Gathering the right tools before you start saves time and reduces mistakes. Here’s a full list for this project:
- Measuring tape
- Pencil and notepad
- Chalk line or laser level
- Stud finder
- Drill (with tile drill bits and standard bits)
- Screwdriver (manual or powered)
- Level (24-inch or longer)
- Shims (plastic or wood)
- Cabinet screws (2.5–3 inches, corrosion-resistant)
- Masonry anchors (if wall studs are not available)
- Painter’s tape
- Vacuum or broom
- Safety glasses and gloves
- Drop cloths or cardboard (to protect tiles)
Optional but helpful:
- Cabinet jack or third hand support
- Oscillating multi-tool (for minor tile adjustments)
- Shop vac (for dust control)
Having every tool ready reduces trips back to the hardware store and helps you stay focused.
Planning Your Kitchen Cabinet Layout
Before you touch a tool, you need a solid plan. Cabinet installation is not just about screwing boxes to the wall—it’s about making everything fit and function.
Measure Everything Twice
Start by measuring the entire kitchen space. Don’t guess or rely on old plans. Measure the length of each wall, the height from floor to ceiling, and the position of windows, doors, plumbing, and electrical outlets.
Check if the tile floor is level. Even new tile may have small dips or rises, which can make cabinets crooked.
Mark Cabinet Locations
Use a chalk line or laser level to mark where the base cabinets and wall cabinets will go. Mark the top edge of the base cabinets and the bottom edge of wall cabinets. Remember, standard base cabinets are 34.5 inches tall, and the countertop adds another 1.5 inches.
Pro tip: Cabinets must be level, not just follow the floor. If the tile is uneven, you’ll need to use shims under the cabinets, not cut the cabinets themselves.
Plan For Appliances
Leave proper gaps for dishwashers, refrigerators, stoves, and sinks. These appliances often need a little extra width—check each one’s manual for recommendations.
A common beginner mistake is forgetting to allow for the thickness of the tile and thinset. This can make appliance openings too small.
Check For Wall Studs
Use a stud finder to locate wall studs. Cabinets must be anchored to studs, not just drywall or tile. Mark each stud location above and below the cabinet layout lines.
If your walls have metal studs or unusual construction, use the correct anchors.
Protecting Your Tile Floor
Your tile floor is valuable and easy to scratch or chip during cabinet installation. Protecting it is an important step that many DIYers skip.
- Lay drop cloths, cardboard, or old blankets along the floor where you’ll be working.
- Never drag cabinets across the tile. Always lift or use a helper.
- Keep all tools and hardware off the bare tile.
If you need to cut or drill, vacuum up all dust and debris right away. Even a small tile chip can be an eyesore in a finished kitchen.
Drilling Into Tile: What You Must Know
Attaching cabinets often requires drilling through the tile floor (for toe kicks, filler strips, or special cabinet legs). Drilling into tile is different from drilling into wood or drywall.
Choose The Right Drill Bit
Use a carbide-tipped masonry bit or a diamond-tipped drill bit for porcelain tiles. Standard wood or metal bits will burn out or break the tile.
Drill Slowly And Carefully
- Place a piece of painter’s tape where you plan to drill. This prevents the drill bit from slipping on the shiny tile.
- Start drilling at low speed, applying light pressure. Let the drill bit do the work.
- Once through the tile, switch to a wood bit if you need to drill further into the subfloor.
- Always wear safety glasses—tile chips can fly!
Never force the bit or use a hammer drill setting. That will almost always crack the tile.
Installing Base Cabinets On Tile
Base cabinets are installed first. They support the countertop and must be perfectly level and secure.
Step 1: Place And Level The Cabinets
Set the first base cabinet (usually a corner unit) in position. Use a long level to check front-to-back and side-to-side.
If the floor isn’t perfectly flat, use shims under the cabinet sides and back. Stack shims until the cabinet is level. Mark the wall behind the cabinet where the shims are placed. You will need to support the whole run of cabinets the same way.
Non-obvious tip: Don’t install shims directly under the cabinet’s thin bottom panel; place them under the thicker side edges to prevent sagging.
Step 2: Attach Cabinets To The Wall
Drill through the cabinet’s back panel at the stud locations you marked earlier. Pre-drill to prevent splitting.
Use 2.5–3 inch cabinet screws to anchor the cabinet to the wall studs. Tighten each screw until snug, but do not overtighten—this can crush the cabinet or strip the stud.
If there is tile behind the cabinet, use a masonry bit for the tile part, then switch to a wood bit.
Step 3: Connect Cabinets Together
When two cabinets meet, clamp them together at the front. Drill small pilot holes through the face frames (if they have them) and secure with screws. This gives a seamless look and keeps the cabinets aligned.
Continue leveling and shimming each cabinet, attaching to the wall and to each other as you go.
Step 4: Secure Toe Kicks And Fillers
Toe kicks (the recessed space at the bottom front) should match the tile floor height. If you need to secure them to the floor, pre-drill through the tile and use short anchors. Never nail or screw directly into tile without pre-drilling.
If you need to add filler strips, cut them to fit and attach them with screws from inside the cabinet.
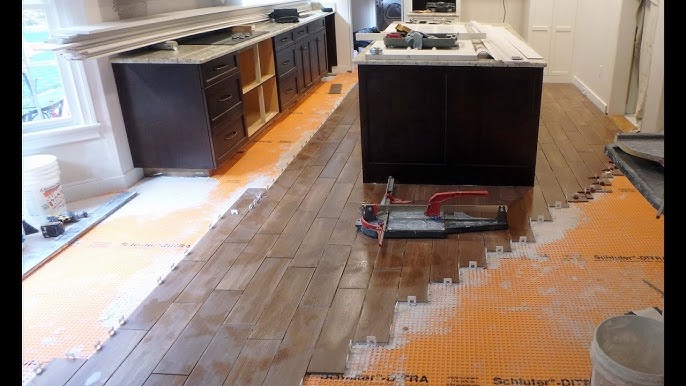
Credit: www.youtube.com
Installing Wall Cabinets Over Tile Floor
Wall cabinets are installed after base cabinets. Here’s why: you can rest heavy wall cabinets temporarily on the base cabinets, making the job easier and safer.
Step 1: Mark The Bottom Line
Mark the bottom edge of the wall cabinets using your previous layout lines. Standard height is 18 inches above the countertop (or 54 inches from the floor).
Step 2: Pre-drill Wall Cabinet Holes
Mark where wall studs are, and pre-drill holes in the back of each wall cabinet. This saves time during mounting.
Step 3: Mounting The Cabinets
If you have a helper, lift the first wall cabinet and rest it on a temporary support (like a ledger board screwed to the wall or the already installed base cabinets).
Check for level and screw the cabinet to the wall studs. Continue with each cabinet, connecting them side-by-side using clamps and screws.
Experience-based tip: Always start with the corner cabinet. If the wall isn’t straight, adjust as you go with small gaps at the ends, not in the middle.
Step 4: Secure And Adjust
After all wall cabinets are up, check for perfect level and plumb (vertical alignment). Adjust screws or add thin shims behind the cabinet if needed.
Adjusting For Uneven Tile Floors
Most tile floors are not perfectly flat. If you skip this step, your cabinets will look crooked and doors may not close properly.
- Use a long level to check the high and low spots along your cabinet run.
- Add extra shims under low spots. Stack them until the cabinet is perfectly level.
- Mark the location of each shim for easy access later.
After all cabinets are installed, trim any visible shims with a utility knife or oscillating tool.
Securing Cabinets To The Floor (when Needed)
Most base cabinets are attached to the wall, not the floor. However, some situations require extra floor anchoring—especially with island cabinets or when the wall isn’t suitable for mounting.
- Use short masonry anchors for tiles (1–1.5 inches).
- Drill at a grout line if possible (tiles are less likely to crack at grout).
- Use plastic or metal anchors designed for tile and concrete.
Always check the cabinet manufacturer’s instructions. Over-securing can do more harm than good.
Making Cutouts For Plumbing And Electrical
You may need to cut holes in the back or bottom of cabinets for pipes, wires, or vents.
- Mark all cutout locations before moving the cabinet into place.
- Use a hole saw or jigsaw for clean cuts.
- Seal the edges with caulk or edge banding to prevent moisture damage.
Cutting after the cabinet is installed is much harder and risks damaging both the cabinet and the tile.
Finishing Touches: Doors, Drawers, And Trims
Once all cabinets are installed and secured, add the finishing elements.
- Hang all doors and attach drawer fronts. Adjust hinges for even gaps.
- Install end panels, crown molding, and light rail as needed.
- Attach toe kick covers with construction adhesive or clips, not nails.
- Fill all visible screw holes with color-matched wood filler.
Clean up all dust and debris. Wipe cabinets and tiles with a damp cloth.
Common Mistakes And How To Avoid Them
Even careful DIYers can make errors. Here are the most common mistakes and how to prevent them:
- Skipping shims: This leads to uneven cabinets and sticky drawers.
- Not checking for level: Always use a long level, not just a short one.
- Drilling too fast into tile: This often cracks the tile. Go slow and steady.
- Forgetting tile thickness: Measure from the finished tile, not the subfloor.
- Not anchoring to studs: Cabinets must be secured to studs for safety.
- Dragging cabinets on tile: Always lift, never drag, to prevent scratches.
- Improper screw length: Too short, and cabinets are loose. Too long, and you damage the wall.
Pro insight: If you have expensive or delicate tile (like handmade or glass), test drilling on a leftover tile first.
Comparing Floor Types For Cabinet Installation
To understand why tile floors are unique, compare them with other common kitchen floors:
| Floor Type | Ease of Cabinet Installation | Special Precautions Needed | Risk Level |
|---|---|---|---|
| Tile | Moderate to Difficult | Drilling, shimming, crack prevention | High |
| Laminate | Easy | Avoid water under cabinets | Low |
| Hardwood | Moderate | Expansion gaps | Medium |
| Concrete | Moderate | Heavy-duty anchors | Medium |
Tile requires the most care, especially to prevent cracks and chips.
How To Choose Cabinet Screws And Fasteners
The right fasteners make a big difference for safety and durability. Here’s how to pick the best ones for installing cabinets on tile floor:
| Type of Cabinet | Recommended Screw/Anchor | Length | Notes |
|---|---|---|---|
| Base Cabinets (to wall) | Cabinet screw | 2.5–3 inches | Into wall studs |
| Base Cabinets (to floor) | Masonry anchor | 1–1.5 inches | For islands/peninsulas |
| Wall Cabinets | Cabinet screw | 2.5–3 inches | Into wall studs only |
| Connecting Cabinets | Trim screw | 1–1.25 inches | Through face frames |
Always use corrosion-resistant screws in kitchens, where moisture is common.
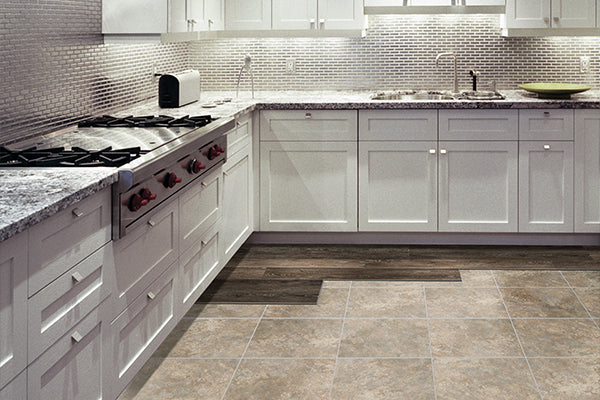
Credit: www.metroflor.com
Cleaning Up And Inspecting Your Work
The final stage is just as important as installation. Here’s how to finish strong:
- Remove all shims that stick out from the cabinet base.
- Check that every cabinet is still level and aligned.
- Test all doors and drawers for smooth operation.
- Clean all surfaces with a damp, non-abrasive cloth.
- Check for any cracked or chipped tiles and repair as needed.
Take your time with this step—rushing now can hide small errors that will bother you later.
Troubleshooting Problems
Sometimes, things don’t go as planned. Here’s how to handle common issues:
- Tile cracks during drilling: Stop immediately. Fill the crack with epoxy or replace the tile before continuing.
- Cabinet won’t sit level: Recheck your shims and add more if needed. Sometimes a thin tile or grout joint can cause a gap.
- Anchors won’t hold in tile: Switch to a different anchor type, like toggle bolts or heavy-duty masonry anchors.
- Wall is not straight: Scribe the cabinet back to fit the wall, or use caulk to hide small gaps.
Don’t rush fixes—doing it right now saves trouble later.
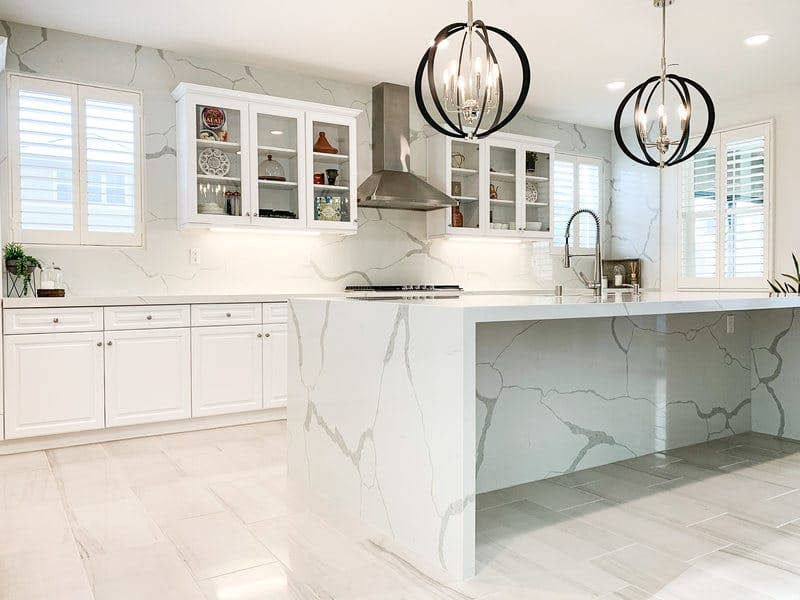
Credit: prolinerangehoods.com
Professional Tips For A Flawless Finish
- Use a cabinet jack or “third hand” support when working alone. It makes lifting and holding cabinets much safer.
- Always anchor cabinets at the top and bottom, not just one spot.
- If you need to remove a tile for plumbing or electrical, score it carefully with an angle grinder before prying up.
- Buy extra tiles before starting. If you break one, you’ll have a perfect match.
- Double-check all measurements before cutting or drilling. “Measure twice, cut once” is true for a reason.
When To Hire A Professional
While many homeowners can install cabinets on tile with patience, some situations call for an expert:
- Very expensive or delicate tile (like glass or stone mosaics)
- Uneven, sloped, or heated tile floors
- Heavy custom cabinets (solid wood, stone tops)
- Complicated layouts with many angles
A good installer brings years of experience and can often spot problems before they cost you money.
Estimating Time And Cost
Most average kitchens (10–15 cabinets) take a weekend for two people. Here’s a rough breakdown:
| Task | Estimated Time | Estimated Cost (USD) |
|---|---|---|
| Measuring & Layout | 2–3 hours | Free |
| Tile Protection & Prep | 1 hour | $20–$50 |
| Base Cabinet Installation | 4–6 hours | $0–$20 (for shims, screws) |
| Wall Cabinet Installation | 3–5 hours | $0–$20 |
| Finishing & Cleanup | 2 hours | $0 |
Professional installers typically charge $50–$100 per cabinet, depending on your area and complexity.
Frequently Asked Questions
How Do I Prevent Cracking My Tile When Drilling For Kitchen Cabinets?
To avoid cracks, always use a carbide or diamond-tipped bit, drill slowly, and place painter’s tape on the tile to keep the bit steady. Do not use a hammer drill function. If possible, drill at grout lines instead of through tile.
Do I Need To Attach Cabinets To The Tile Floor Or Just The Wall?
Most cabinets only need to be attached to the wall studs. Secure to the tile floor only for islands, peninsulas, or if wall mounting isn’t possible. Use proper tile anchors and never glue cabinets to the floor.
Can I Install Cabinets Before Laying The Tile?
It’s possible, but not recommended for most kitchens. Installing tile first gives a clean look and prevents future height problems. If you plan to change your kitchen layout later, having tile under cabinets helps flexibility.
What Do I Do If My Floor Is Not Level?
Shim under the cabinet edges (not just the middle) until the cabinet is perfectly level. Check with a long level across the whole run. Never try to “bend” cabinets to fit the floor.
Is It Safe To Install Heavy Wall Cabinets Over Tile Floors?
Yes, as long as you anchor the cabinets into the wall studs, not just tile or drywall. The tile floor does not support wall cabinets; the wall does. For extra-heavy cabinets, use more screws and check the manufacturer’s instructions.
Installing kitchen cabinets on a tile floor takes time and care, but the results are worth the effort. By planning carefully, using the right tools, and avoiding common mistakes, you can have a beautiful, long-lasting kitchen that adds value to your home. For more in-depth guides and tips, you may also find resources like Family Handyman useful. Take your time, measure twice, and enjoy your new kitchen space for years to come.