
Organizing your kitchen can feel overwhelming, especially when it comes to the pantry. Many people dream of a neatly arranged space where every ingredient is easy to find. Pull out pantry drawers offer a smart solution. They use every inch of space, reduce clutter, and make everyday cooking much easier.
But to enjoy these benefits, you need a solid plan for organizing them. With the right approach, your pull out pantry can be more than just tidy—it can help you save time, money, and stress.
This guide will show you how to organize pull out pantry drawers from start to finish. You’ll learn what tools and materials you need, how to sort your items, where to store different foods, and even how to keep things organized long term.
Whether your drawers are narrow or wide, deep or shallow, these tips will help you make the most of your kitchen space. If you’re ready for a pantry that works for you, not against you, keep reading.
Understanding Pull Out Pantry Drawers
Pull out pantry drawers are shelves or baskets mounted on slides. They can be made from wood, metal, or plastic. Instead of reaching deep inside a cabinet, you pull the drawer toward you and see everything at a glance. This design is perfect for storing food, snacks, spices, or even cleaning supplies.
There are several benefits to using pull out drawers:
- You can access items at the back easily.
- No more lost cans or expired food.
- They help small kitchens feel bigger.
However, pull out drawers are not a magic fix. Without good organization, they quickly become messy. Items can fall over or get mixed up. That’s why a smart system is important.
Types Of Pull Out Pantry Drawers
Not all drawers are the same. Here are the most common types:
- Full-extension drawers: These come all the way out, so you see everything.
- Half-extension drawers: These stop halfway. Good for small spaces.
- Wire baskets: Air flows through, which is nice for onions or potatoes.
- Deep drawers: Store tall bottles, cereal boxes, or bulk items.
- Shallow drawers: Perfect for spices, tea, or snacks.
Each type has its strengths. Knowing what you have helps you plan your organization.
Preparing To Organize
Before you start, it’s important to get ready. A little preparation makes the whole process smoother and less stressful.
Gather Materials And Tools
You don’t need to buy expensive organizers. But a few key items can help:
- Bins or baskets: For grouping similar items.
- Drawer dividers: To keep things in place.
- Labels: For quick identification.
- Shelf liner: Prevents sliding and protects surfaces.
- Step stool: For reaching higher drawers.
It’s best to measure your drawers before shopping. That way, bins and dividers will fit perfectly.
Empty And Clean The Drawers
Take everything out of your pantry drawers. Place items on the counter or a table. This is the perfect time to:
- Check expiration dates.
- Throw away old or spoiled food.
- Wipe down the drawers with a damp cloth.
A clean start helps your new system last longer.
Sort Pantry Items
Group your pantry items by type. Common categories include:
- Canned goods
- Grains and pasta
- Spices and seasonings
- Snacks
- Baking supplies
- Breakfast foods
- Beverages
- Condiments
- Root vegetables
- Paper goods
Sorting helps you see what you have and how much space each group needs.

Credit: www.neathousesweethome.com
Planning Your Pantry Layout
A well-planned layout saves time and reduces stress. When you know where everything belongs, shopping, cooking, and cleaning all get easier.
Assess Your Space And Needs
Every kitchen is different. Ask yourself:
- How many drawers do you have?
- How deep and wide is each drawer?
- Which items do you use most often?
For example, if your family eats cereal every morning, breakfast foods should be easy to reach.
Map Out Zones
Organizing by zones makes your pantry more efficient. Consider these ideas:
- Daily use zone: Snacks, breakfast, coffee, tea.
- Cooking zone: Oils, spices, canned goods, grains.
- Baking zone: Flour, sugar, chocolate, baking powder.
- Bulk storage zone: Large bags or backup items.
- Kids’ zone: Healthy snacks at a lower level.
Assign each group to a drawer or part of a drawer. Write your plan on paper or use sticky notes as temporary labels.
Place Heaviest Items On The Bottom
Heavy items like cans or bottles should go in the lowest drawers. This prevents accidents and makes drawers easier to open. Lighter items, like snacks or spices, can go higher up.
Make Use Of Vertical Space
If your drawers are deep, add stackable bins or risers. This way, you can store two layers of goods without piling things on top of each other.
Step-by-step: How To Organize Pull Out Pantry Drawers
Now it’s time to put your plan into action. Follow these steps for a smooth process.
1. Install Drawer Liners
Drawer liners keep items from sliding around. They also protect the drawer’s surface from spills and scratches. Cut liners to size and place them flat on each drawer.
2. Place Large Or Heavy Items First
Start by adding your heaviest or tallest pantry items. This includes:
- Bottles of oil or vinegar
- Soda or juice cartons
- Bags of flour or sugar
Put these at the back or sides, depending on your drawer’s design.
3. Add Bins, Baskets, Or Dividers
Next, set up your bins or baskets. Use them to group similar items together. For example:
- One bin for pasta and rice
- One for snacks
- One for baking supplies
Drawer dividers are helpful for spices, tea packets, or small bags. They stop items from tipping over or mixing together.
4. Store By Category
Arrange items by category within each drawer. Keep like with like—this makes it much easier to find what you need. For example:
- Place all breakfast items together.
- Keep all canned goods in one section.
This method is faster than searching through mixed drawers.
5. Label Everything
Clear labels save time and avoid confusion. You can use a label maker, write by hand, or print labels from your computer. Label both bins and drawer fronts if possible.
Labels are especially helpful if more than one person uses the kitchen.
6. Adjust For Accessibility
Every family is different. Adjust your setup based on your habits:
- Place kids’ snacks in a lower drawer so they can help themselves.
- Store treats or sweets on a higher shelf to control access.
- Keep emergency or backup supplies at the back.
The goal is to match your layout with your daily routine.
7. Fill In The Gaps
Use any extra space for small items that don’t fit into other groups. For example:
- Baking soda or powder
- Tea infusers
- Small gadgets
Don’t overfill. Leave some breathing room so you can add new groceries later.
8. Step Back And Review
Once everything is in place, pull out each drawer and check:
- Can you see and reach everything easily?
- Are any items likely to fall or spill?
- Are the most-used items at the front?
Make changes as needed. It’s normal to adjust your system after a few days.
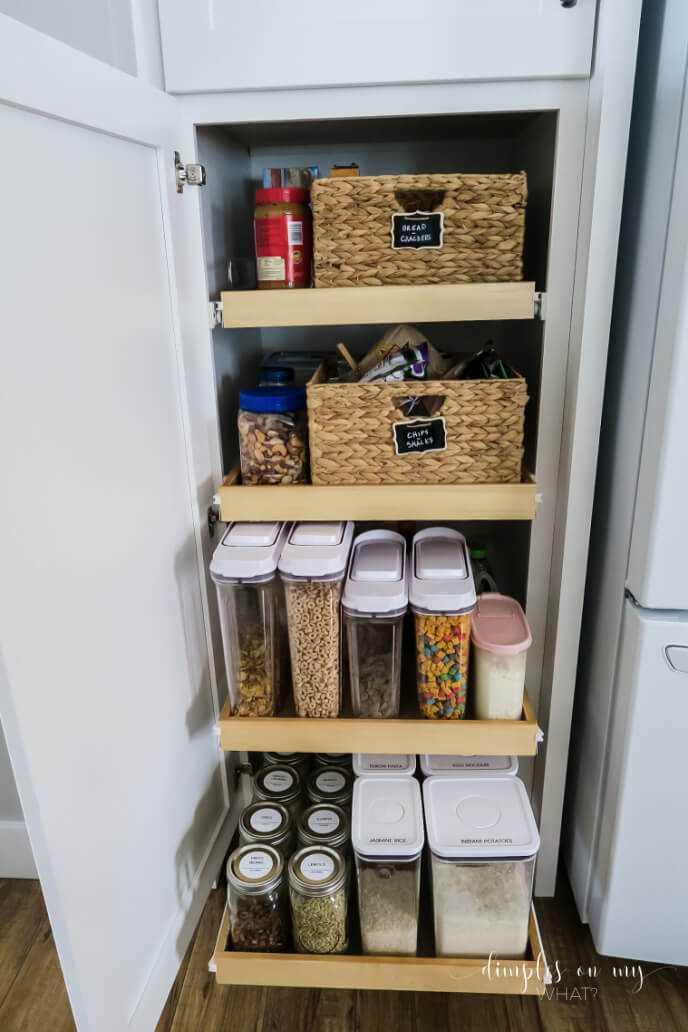
Credit: dimplesonmywhat.com
Practical Tips For Different Drawer Sizes
Not all pantry drawers are created equal. Here are tips for maximizing every type.
Deep Drawers
- Use tall bins to keep bottles upright.
- Store bulky items like rice bags or cereal boxes.
- Stack lightweight items, but keep heavy ones on the bottom.
Shallow Drawers
- Perfect for spices, seasoning packets, or tea.
- Use flat organizers or trays.
- Line up jars or cans label-side up for quick scanning.
Narrow Drawers
- Store long, thin items like pasta or foil rolls.
- Use slim bins or vertical dividers.
- Avoid overloading—these drawers can jam if too full.
Wide Drawers
- Divide into zones with several bins.
- Place rarely used items at the sides or back.
- Store baking sheets or trays vertically if the drawer is tall enough.
Corner Drawers
- Use rotating organizers or lazy Susans for easy access.
- Store less-used items in the far corners.
Keeping Your Pantry Organized Long Term
A tidy pantry can quickly become messy if you don’t have a maintenance plan. These strategies will help your system last.
Make A Shopping List Before Restocking
Check your drawers before you buy groceries. This prevents overbuying and keeps stock levels reasonable.
Practice The “first In, First Out” Rule
When you bring home new groceries, put them at the back and move older items forward. This way, you use up food before it expires.
Schedule Monthly Cleanups
Once a month, take five minutes to tidy up:
- Wipe down surfaces.
- Throw out expired food.
- Rethink any problem areas.
Regular upkeep is easier than a big overhaul.
Involve The Whole Family
Teach everyone where things go. If kids or partners know the system, they’re more likely to put things back correctly.
Update Labels As Needed
If you change how you use a drawer, update the label. Flexible labels (like chalkboard or dry erase) make this easy.
Advanced Pantry Organization Ideas
After you’ve mastered the basics, consider these extra tips to take your pantry to the next level.
Use Clear Containers
Decanting food into clear jars or bins lets you see what you have at a glance. This is perfect for:
- Grains
- Pasta
- Snacks
- Baking ingredients
Plus, it keeps food fresher and reduces packaging waste. Just remember to label containers with the food name and expiration date.
Try A “backstock” Bin
Keep a bin in the lowest drawer for backup or overflow items. When you run out of something in the main area, refill from your backstock. This avoids double buying.
Add A Snack Station
Dedicate one drawer to healthy snacks. Use small bins or baskets for granola bars, nuts, fruit cups, or crackers. This makes it easy to grab a quick bite.
Store Spices Flat
If you have a shallow drawer, lay spice jars flat with labels facing up. This makes it easy to find the right one. You can buy special spice drawer inserts, or make your own with foam board.
Use Clip-on Baskets
Clip-on baskets hang from the top of a drawer, adding a second layer. Use them for small packets, seasoning mixes, or instant soup.
Create A Meal Prep Zone
Group all the items you use for meal prep—like rice, beans, and canned tomatoes—in one drawer. Add a notepad for meal ideas or shopping lists.
Use Technology
Some people take a photo of their pantry after organizing. This helps with grocery shopping and meal planning.
Common Mistakes To Avoid
Even with the best plans, it’s easy to make a few missteps. Here are the most common mistakes and how to fix them.
Overfilling Drawers
It’s tempting to pack as much as possible, but overcrowded drawers are hard to use. Leave some empty space for new groceries.
Ignoring Expiry Dates
Don’t hide old food behind new purchases. Use the “first in, first out” method, and check dates regularly.
Forgetting About Accessibility
If you store everyday items in hard-to-reach places, your system won’t last. Keep the most-used foods at the front and within arm’s reach.
Mixing Unrelated Items
Random storage leads to confusion. Always group similar items together, and use labels to keep things clear.
Neglecting Maintenance
A one-time cleanup is not enough. Set a reminder to tidy up regularly.
Comparing Storage Solutions
Many people wonder if bins, baskets, or dividers are best. Here’s a quick comparison to help you decide:
| Solution | Best For | Pros | Cons |
|---|---|---|---|
| Bins | Grouping similar items | Easy to move, keeps items together | Takes up more space, needs correct size |
| Baskets | Produce and snacks | Good air flow, easy to grab | Not always stackable |
| Dividers | Spices, small packets | Prevents mixing, customizable | Can be fiddly, needs measuring |
Real-life Example: Organizing A Family Pantry
Let’s look at how one family transformed their messy pantry.
The Smith family had three deep pull out drawers. Their old system had snacks mixed with cans, and expired food at the back. Here’s what they did:
- Emptied all drawers and cleaned them.
- Measured each drawer and bought bins that fit perfectly.
- Grouped all snacks in one drawer, cans and jars in another, and baking supplies in the third.
- Used drawer dividers for small packets.
- Labeled every bin and drawer front.
- Created a snack station for their kids at the lowest level.
The result? The family saved time each morning and reduced food waste. A photo of their organized pantry helped them shop more efficiently.
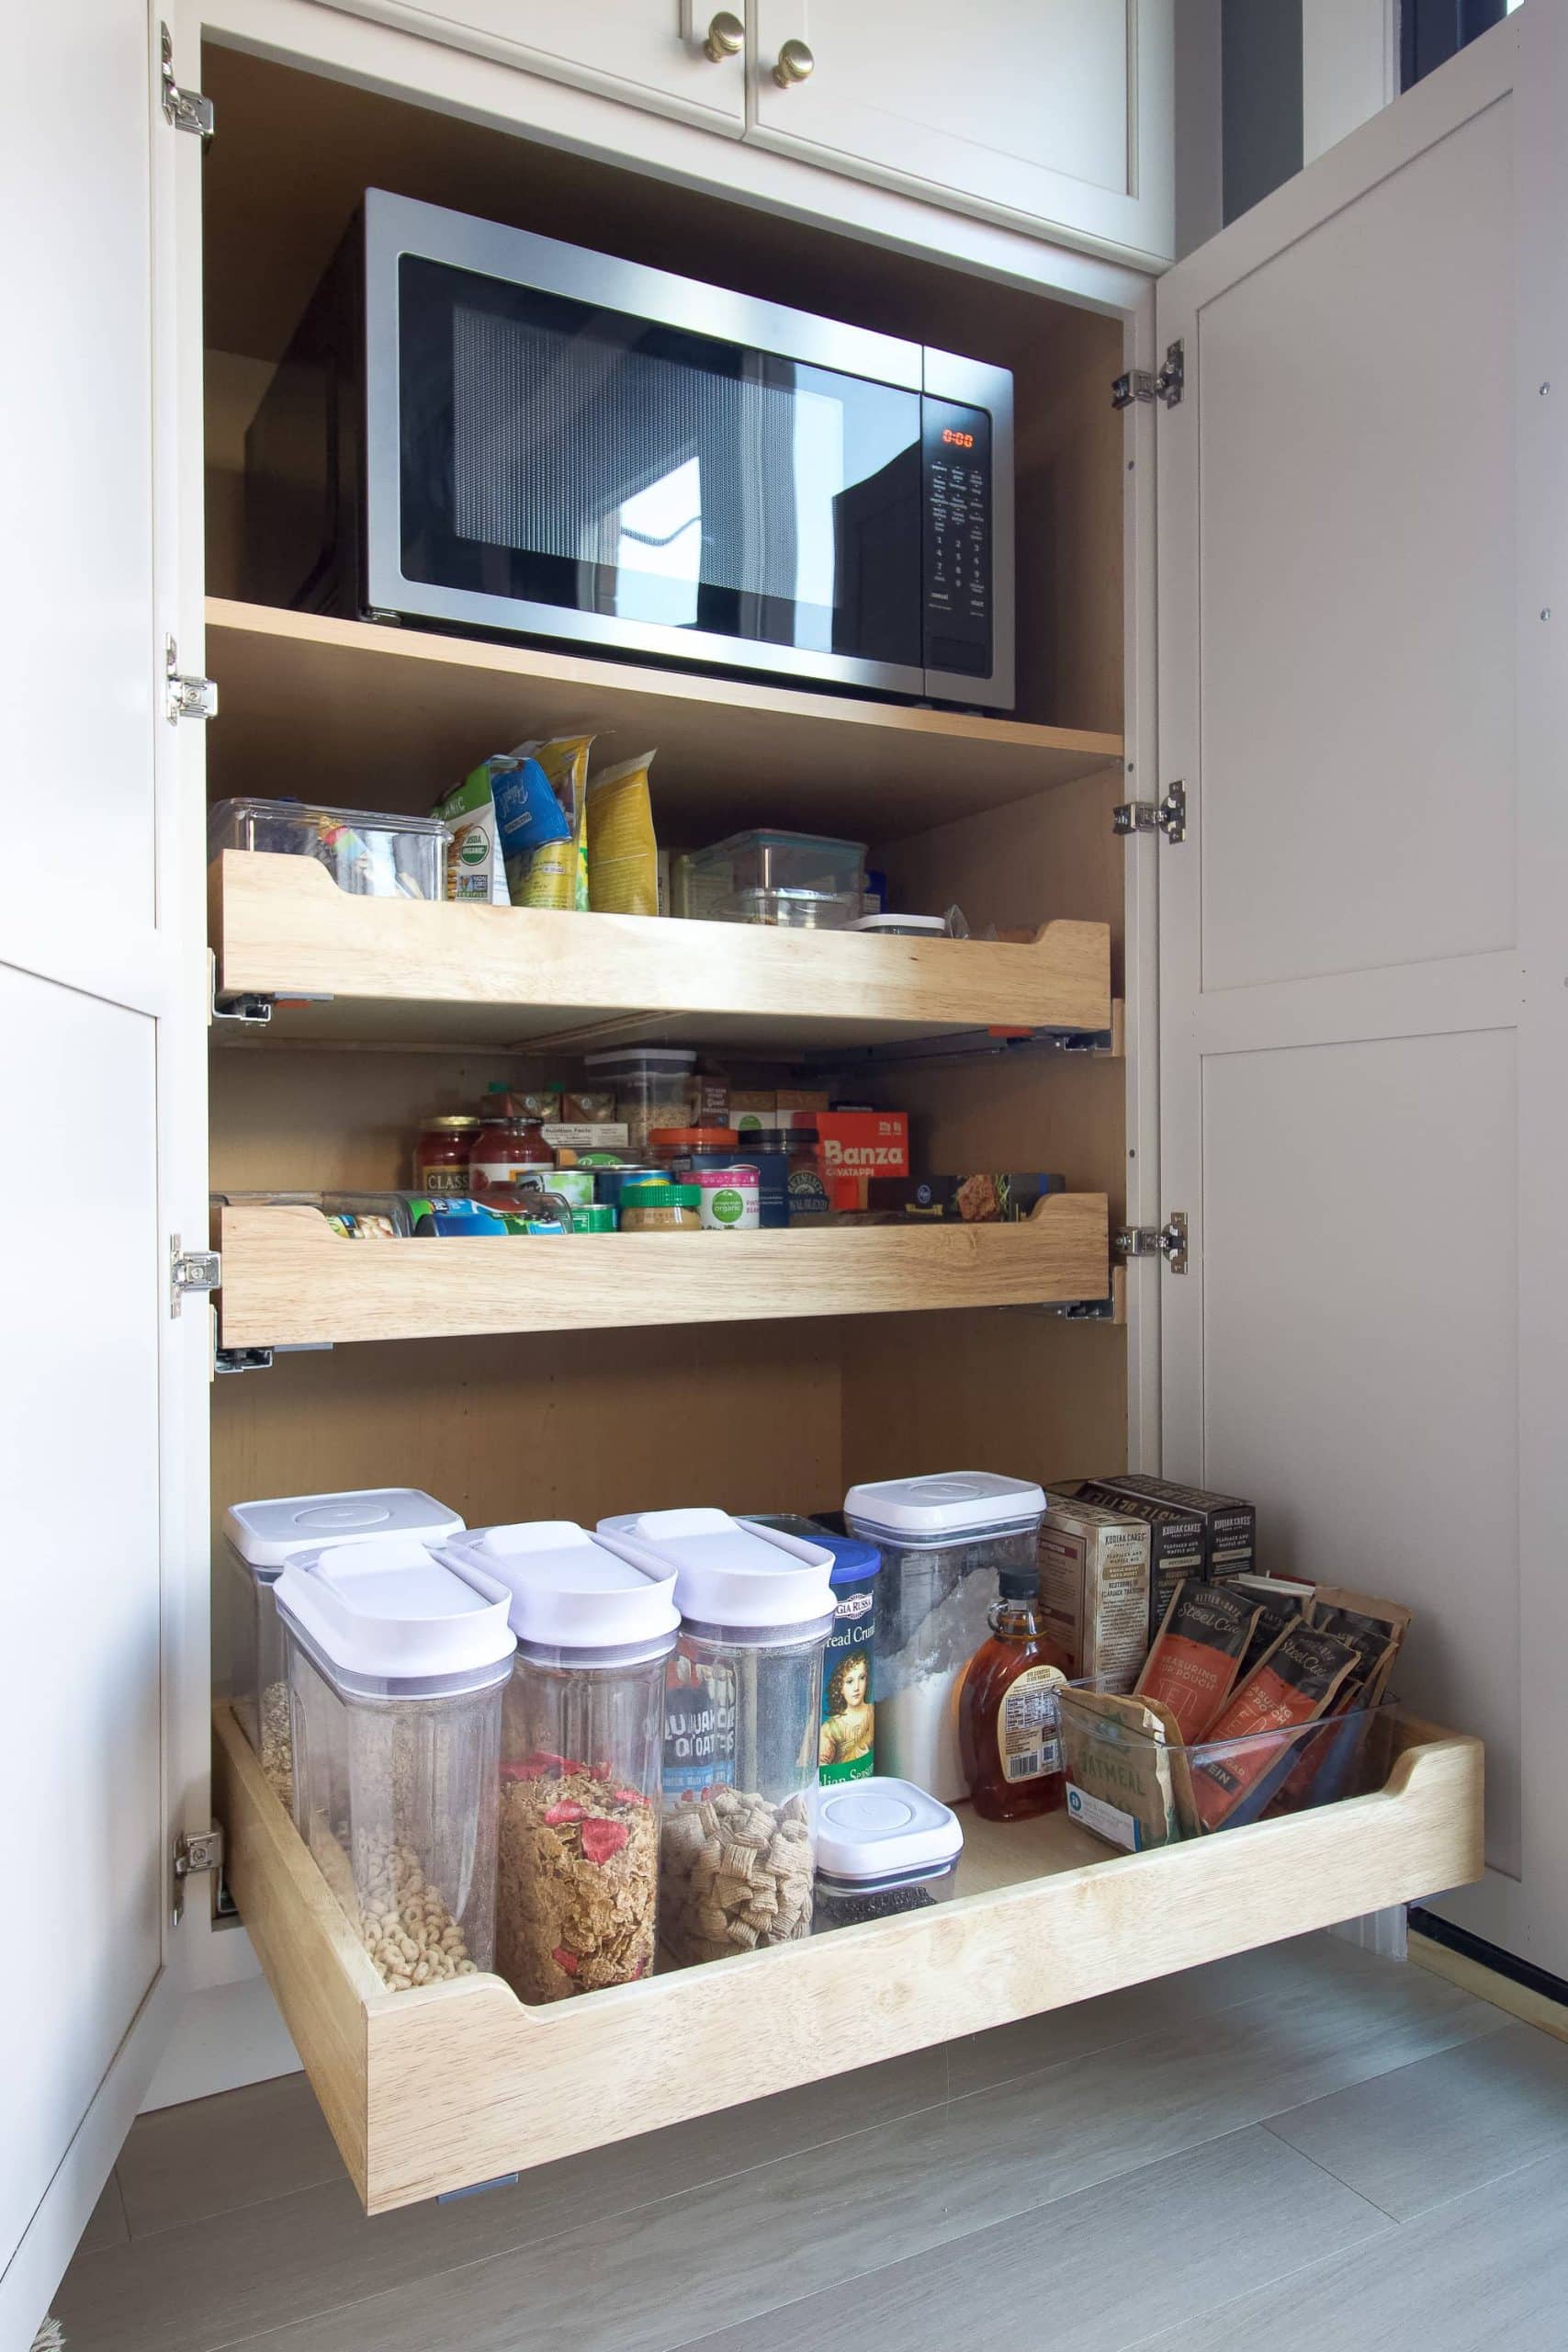
Credit: thediyplaybook.com
Data: Time And Money Saved With Organized Drawers
A well-organized pantry does more than look good. It saves you time and money. Here’s some data from a recent home organization survey:
| Benefit | Average Saved |
|---|---|
| Time spent looking for items | Up to 30 minutes/week |
| Money wasted on duplicate purchases | $20-50/month |
| Food thrown away (expired) | 10-20% less |
These numbers show that a little effort goes a long way.
Organizing Pull Out Drawers Vs. Traditional Shelves
How do pull out drawers compare with regular pantry shelves? Here’s a side-by-side look:
| Feature | Pull Out Drawers | Traditional Shelves |
|---|---|---|
| Accessibility | High—see everything at a glance | Low—hard to reach back items |
| Organization | Easier to group and label | Items can get mixed or lost |
| Space usage | Maximizes every inch | Wasted space at back |
| Installation | More complex/expensive | Simple, low cost |
If you want more tips on kitchen storage, visit Consumer Reports for expert advice.
Frequently Asked Questions
How Do I Keep My Pull Out Pantry Drawers From Getting Messy Again?
Use bins, labels, and regular cleanups. Teach everyone in the household to put items back in the right spot. Don’t overfill your drawers—leave space for new groceries.
What Can I Store In Deep Pull Out Pantry Drawers?
Deep drawers are great for tall or bulky items like cereal boxes, bottles, big bags of rice or flour, and backstock. Use tall bins to keep things upright and easy to reach.
Are Pull Out Pantry Drawers Worth It Compared To Shelves?
Yes, for most kitchens. They make items easier to see and reach, so you waste less food and spend less time searching. They are more expensive to install but offer better long-term organization.
Should I Use Clear Containers In My Pantry Drawers?
Clear containers are helpful for seeing what you have and how much is left. They keep food fresh and reduce packaging waste. Just make sure to label them with the contents and expiry date.
How Often Should I Reorganize My Pantry Drawers?
Do a quick tidy every month and a deeper clean two to three times a year. Update your system if your family’s needs change or if you notice clutter building up.
A well-organized pull out pantry isn’t just about looks—it’s about making your kitchen work for you. With a little planning and the right habits, you’ll save time, reduce waste, and make daily meals less stressful. Whether your space is large or small, these strategies can help you create a pantry that’s both practical and pleasant to use.