
Finding kitchen storage space can be a daily puzzle, especially when your kitchen has no drawers. Many people—students in studio apartments, families in older homes, or renters—face this challenge. Utensils pile up quickly, and without drawers, it’s easy for spatulas, whisks, and peelers to end up in a messy heap. But a drawer-free kitchen doesn’t have to feel chaotic. With the right strategies, you can keep all your kitchen utensils organized, easy to reach, and looking good.
Let’s explore practical, creative, and affordable ways to store kitchen utensils without drawers. You’ll find solutions for every kitchen—big or small, old or modern. Along the way, you’ll discover tips most people miss, plus advice on avoiding common mistakes.
Why Drawer-free Kitchens Are Common (and Not A Problem)
Many people think drawers are essential for utensil storage. In reality, kitchens without drawers are common for several reasons:
- Historic homes often have built-in cabinets but few or no drawers.
- Tiny apartments sometimes skip drawers to save space.
- Open shelving is a popular design choice for a modern look.
- Rental properties may have missing or broken drawers.
Not having drawers can even help you keep only what you need. You’ll see your utensils often, which makes you more likely to declutter. The key is to use your vertical, horizontal, and even hidden spaces wisely.
Understanding Your Kitchen Utensil Needs
Before buying organizers or hooks, take a moment to think about your utensils:
- Sort by use: Which utensils do you use every day? Which ones only sometimes?
- Group by size: Long spoons, short knives, large ladles—grouping by size helps you plan storage.
- Material matters: Metal, wood, and plastic utensils each have different storage needs.
Non-obvious insight: Many people try to store everything together. But separating daily-use utensils from occasional tools saves time and keeps your space tidy.

Credit: www.reddit.com
The Best Utensil Storage Solutions Without Drawers
Let’s look at a wide range of storage ideas. Each option has its pros, cons, and ideal uses.
1. Countertop Utensil Holders
Utensil holders are classic for a reason. A sturdy jar, crock, or container on the countertop keeps everyday tools close.
- Material: Ceramic, stainless steel, glass, or even repurposed pitchers.
- Best for: Spoons, spatulas, tongs, whisks.
- Tip: Choose a heavy base so the holder doesn’t tip.
Non-obvious insight: Using two holders—one for cooking, one for serving—keeps things even more organized.
2. Wall-mounted Rails And Hooks
A rail with S-hooks can turn any wall into a utensil station. It’s a favorite of professional chefs because it keeps tools visible and reachable.
- Best for: Ladles, spatulas, pasta servers, whisks.
- Installation: Needs screws or strong adhesive strips.
- Space saver: Great for small kitchens.
3. Magnetic Strips
We often think of magnetic strips for knives, but they also work for metal utensils like tongs and peelers.
- Pro: Frees up counter space.
- Safety: Keeps sharp tools out of drawers and off counters.
- Cons: Only works for metal utensils.
Example: In a galley kitchen, a 16-inch magnetic strip can hold 8-10 metal tools.
4. Pegboards
Pegboards are not just for garages. In kitchens, they let you create a customizable wall of utensils.
- Flexibility: Move hooks or baskets as your needs change.
- Visual: You can see all your tools at a glance.
- Style: Paint the pegboard for a custom look.
Non-obvious insight: Add small baskets to hold light items, like measuring spoons or peelers.
5. Countertop Caddies With Compartments
A caddy with dividers keeps utensils upright and separated. Some have rotating bases for easy access.
- Best for: Keeping wooden and metal tools apart.
- Tip: Choose one with a non-slip base.
6. Over-the-cabinet Organizers
These smart racks hang over cabinet doors. No need for drilling or permanent changes.
- Best for: Rental kitchens or when you can’t install shelves.
- Downside: May not fit on thick doors.
7. Mason Jars And Repurposed Containers
Mason jars are cheap, stylish, and easy to clean. Line up three jars for spoons, forks, and knives.
- Creative tip: Use old coffee cans or flower pots for a rustic look.
- Safety: Add felt pads to the bottom to avoid scratching counters.
8. Baskets And Bins
Woven or plastic baskets can sit on counters or shelves. They keep utensils together and can be moved easily.
- Pro: Great for large or odd-shaped tools (rolling pins, graters).
- Tip: Label each basket to stay organized.
9. Hanging Baskets
Hanging baskets attach under cabinets or from the ceiling. They use space that’s usually wasted.
- Best for: Lightweight utensils, measuring cups, or even small pots.
- Consideration: Make sure they’re easy to reach.
10. Cabinet Door Racks
Mount a slim rack inside a cabinet door to hold flat tools or small gadgets.
- Pro: Keeps tools hidden but handy.
- Downside: Only fits slim utensils.
11. Freestanding Shelving Units
If you have floor space, a small shelving unit can hold baskets, jars, and caddies.
- Best for: Studio apartments with no built-in cabinets.
- Data: A 3-tier shelf can store up to 25-30 utensils plus small appliances.
12. Under-shelf Baskets
These slide onto existing shelves and add a “floating” basket underneath.
- Best for: Maximizing vertical space in cabinets or open shelving.
- Tip: Use for flat utensils, not bulky items.
13. Tension Rods With Hooks
A tension rod between two walls or cabinets can hold hooks for utensils.
- Non-damaging: No nails or screws needed.
- Moveable: Change location anytime.
14. Lazy Susans
A rotating tray (lazy Susan) makes it easy to grab utensils from the center of a table or shelf.
- Best for: Families who want everyone to reach tools.
- Tip: Choose a version with dividers for better organization.
15. Drawer Replacement Trays
If you have a drawer cavity but no drawer, set a tray on a shelf to mimic a drawer.
- Affordable: Less costly than new cabinetry.
- Limit: Must be easy to lift out.
16. Wall Pockets Or Pouches
Fabric or plastic wall pouches can hold light utensils and gadgets.
- Best for: Keeping children’s utensils or measuring spoons handy.
- Tip: Choose washable materials.
17. Magnetic Jars
Small spice jars with magnets can hold toothpicks, small whisks, or corn holders.
- Stick to: Fridge, metal shelves, or a magnetic strip.
- Limit: Not for heavy items.
18. Rolling Carts
A small kitchen cart can hold caddies, baskets, or jars. Roll it to wherever you cook.
- Best for: Shared or multi-use kitchens.
- Data: A cart with three shelves can hold up to 40 utensils and gadgets.
19. Overhead Pot Racks
While made for pots, these racks also hold S-hooks for utensils.
- Pro: Uses ceiling space, freeing counters and walls.
- Consideration: Needs strong installation.
20. Window Sill Storage
A wide window sill can double as a mini shelf for jars or caddies.
- Non-obvious: Sunlight can dry out wooden utensils, so rotate items often.
Comparison Of Storage Solutions
Here’s a side-by-side look at popular options:
| Storage Method | Best For | Installation | Capacity |
|---|---|---|---|
| Countertop Holder | Everyday utensils | None | 10-15 items |
| Wall Rail & Hooks | Cooking tools | Screws/adhesive | 8-20 items |
| Pegboard | Mixed utensils | Screws | 20+ items |
| Tension Rod | Light utensils | None | 6-10 items |
| Rolling Cart | Multi-use storage | None | 40+ items |
How To Choose The Right Storage For Your Kitchen
Every kitchen is unique. Here’s how to pick the best options for your space and style:
- Measure your available space. Walls, counters, and cabinets—know your dimensions before buying anything.
- Think about access. Store daily-use utensils within easy reach, and rarely used items higher or further away.
- Match your kitchen style. Stainless steel looks modern, woven baskets feel rustic.
- Check for moisture risks. Do not store wooden utensils near sinks or windows—they can warp or mold.
Non-obvious insight: Too many storage types can make a kitchen look cluttered. Stick to 2-3 main solutions for a cohesive look.
Common Mistakes And How To Avoid Them
Even with clever solutions, people often make these mistakes:
- Overfilling holders: If you cram too many utensils in one jar, it’s hard to grab anything.
- Ignoring weight limits: Cheap adhesive hooks can fall off with heavy spatulas or ladles.
- Poor cleaning: Dust and grease collect on open utensils; wash holders and rails monthly.
- Blocking key areas: Avoid placing storage where it blocks cabinets, windows, or prep space.
- Not decluttering: Store only what you use—extras just take up space.
Diy And Budget-friendly Ideas
You don’t need to spend a lot for effective storage. Try these:
- Tin cans: Clean, paint, and use as utensil holders.
- Shoe organizers: Hang on a pantry door for lightweight gadgets.
- PVC pipes: Cut and glue to a board for a modern wall rack.
- Binder clips: Use large clips on shelves for hanging tools.
Non-obvious insight: The best DIY solutions often use what you already have. Look around your home before buying new containers.
Keeping Your Storage Clean And Safe
Utensils touch food, so cleanliness is essential.
- Wash holders weekly to prevent mold or bacteria.
- Avoid storing wet utensils—they can rust or attract pests.
- Check for cracks in plastic containers and replace when worn.
Non-obvious: Some caddies have removable bases for easy cleaning. Always check before buying.
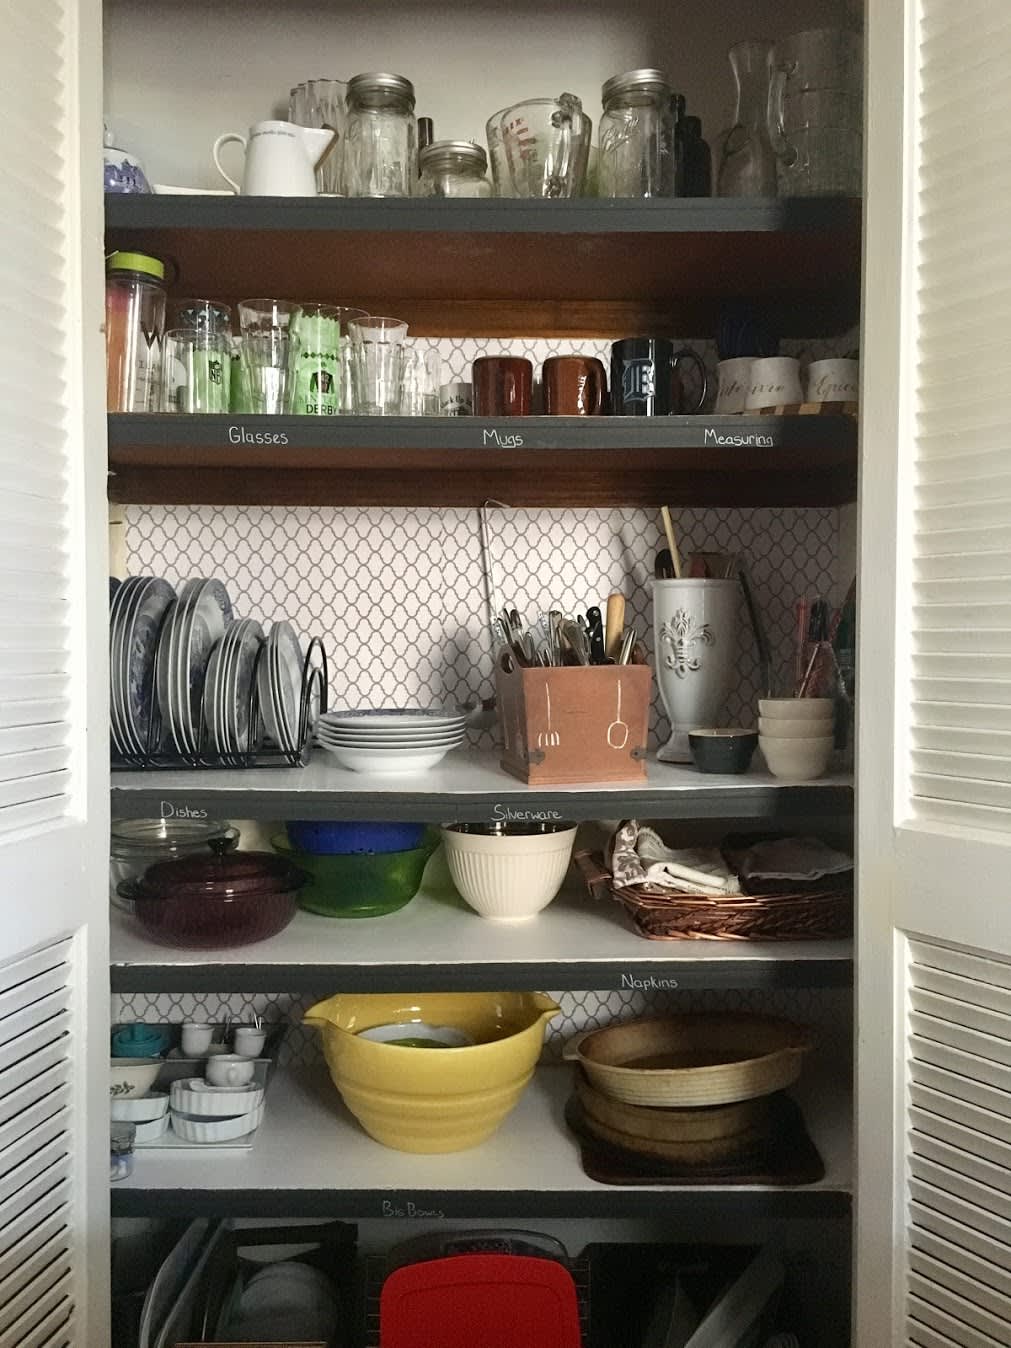
Credit: www.thekitchn.com
Safety Considerations
Safety matters, especially in busy kitchens.
- Keep sharp tools (like knives or peelers) on a magnetic strip, not loose in a jar.
- Secure wall racks with proper anchors, especially if you rent.
- Avoid glass containers if you have small children.
Making Storage Look Good
A neat kitchen is more inviting. Here’s how to make storage part of your decor:
- Use jars or holders in matching colors.
- Arrange by height for a tidy look.
- Add labels for a professional touch.
Example: Three white ceramic crocks side-by-side look cleaner than a mix of random mugs and jars.

Credit: www.dnainfo.com
Maximizing Small Spaces
If your kitchen is tiny, every inch counts. Try these space-saving tricks:
- Hang utensils under cabinets with stick-on hooks.
- Use inside-cabinet space for racks or pouches.
- Double up: Store two types of utensils in one holder with a divider.
Data: According to a survey by Houzz, 57% of small-kitchen owners use wall-mounted racks to save counter space.
Maintenance Tips For Long-lasting Organization
To keep your system working:
- Review monthly: Remove unused or broken tools.
- Wipe down holders and walls to prevent grease build-up.
- Rotate utensils so everything gets used.
Non-obvious: Mark your calendar for a “utensil audit” every 3 months—it keeps clutter from creeping back.
Table: Pros And Cons Of Popular Storage Types
Here’s a quick look at the strengths and weaknesses of different methods:
| Storage Solution | Pros | Cons |
|---|---|---|
| Utensil Holder | Easy access, low cost | Uses counter space |
| Wall Rail & Hooks | Saves counter space, stylish | Needs installation |
| Pegboard | Highly customizable | May look cluttered |
| Rolling Cart | Portable, large capacity | Needs floor space |
| Mason Jars | Affordable, decorative | Limited capacity |
Real-life Examples And Success Stories
Let’s see how people solved their drawer-free kitchen challenges:
- Studio apartment cook: Used two mason jars for wooden spoons and a wall rail for spatulas. Result: No more digging in boxes, and everything looks tidy.
- Family in an old home: Installed a pegboard next to the stove. Each family member got a hook for their favorite tools. Result: Cooking became faster and kids enjoyed helping.
- Renter with no cabinets: Bought a rolling cart and three baskets. Moved utensils to wherever they prepared food. Result: Flexible setup, easy to clean.
Non-obvious: In small kitchens, storing only the essentials often leads to better meals—less clutter means less stress.
Sustainability And Eco-friendly Storage Options
You can organize your kitchen and help the planet at the same time.
- Choose bamboo or recycled holders instead of plastic.
- Repurpose containers (glass jars, tin cans) instead of buying new.
- Donate extra utensils to local charities.
Tip: Eco-friendly options are often sturdier and last longer.
When To Upgrade Or Change Your Storage
Your needs may change over time. Here’s when to rethink your setup:
- New cooking habits: Start baking more? Add a basket for whisks and spatulas.
- Family grows: More cooks need more hooks.
- Moving: Portable solutions like rolling carts make moving easy.
Non-obvious: Review your storage after every big kitchen clean-out. Your habits change, and so should your organization.
How To Store Special Or Odd-shaped Utensils
Not all utensils fit in jars or baskets. For these:
- Rolling pins: Hang with wall hooks or store vertically in a tall jar.
- Graters and zesters: Use slim racks inside cabinet doors.
- Kitchen scissors: Keep on a magnetic strip for safety.
Tip: If you rarely use an odd-shaped tool, consider donating or storing it elsewhere.
Cost Comparison: Budget Vs. Premium Storage Options
Not sure how much to spend? Here’s a quick cost guide:
| Storage Type | Budget Option (USD) | Premium Option (USD) |
|---|---|---|
| Countertop Holder | $5 (tin can) | $40 (designer crock) |
| Wall Rail & Hooks | $12 (basic) | $60 (stainless, pro-grade) |
| Pegboard | $15 (DIY) | $80 (custom, painted) |
| Rolling Cart | $30 (basic plastic) | $150 (wood or metal) |
| Mason Jars | $1 (reused) | $25 (set, decorated) |
Tip: Most kitchens do well with a mix of budget and premium solutions.
Where To Find More Inspiration
You can see real-life photos, video tutorials, and expert reviews on storage ideas from sites like Apartment Therapy. Search by kitchen size, style, or budget for more ideas.
Frequently Asked Questions
How Do I Keep Utensils Organized If I Have No Drawers Or Cabinets?
Focus on vertical storage—use walls, sides of cabinets, and backs of doors. Try rails, hooks, pegboards, or hanging baskets. Store similar utensils together in jars or caddies on counters or shelves. Review your setup monthly to stay organized.
What’s The Best Way To Store Sharp Utensils Safely?
Use a magnetic strip for knives and peelers, mounted out of children’s reach. Never keep sharp tools loose in jars or baskets. If you don’t want to mount anything, use a lidded container or a knife block on a shelf.
How Can I Avoid Clutter When Using Open Storage?
Limit your open storage to everyday utensils. Store extras or rarely used items elsewhere. Use matching containers for a tidy look, and label holders or baskets. Clean and sort your tools regularly to prevent mess.
Is It Okay To Store Wooden Utensils In Open Holders?
Yes, but keep them away from sinks, stoves, or windows to avoid moisture or heat. Make sure wooden utensils are completely dry before storing. Clean the holder often to prevent mold.
What Are Some Affordable Storage Options For Small Kitchens?
Repurpose jars, cans, or baskets you already own. Use wall hooks, over-the-door racks, or tension rods with S-hooks. Shoe organizers and under-shelf baskets are also budget-friendly and easy to install.
A well-organized, drawer-free kitchen is possible with a mix of creative solutions and smart planning. By using walls, shelves, and even the sides of cabinets, you can keep your utensils at hand and your kitchen tidy. Try out a few ideas, adjust as you go, and you’ll discover that you don’t need drawers to cook like a pro.