
If you love baking but feel frustrated when your scones come out uneven or messy, you are not alone. Many home bakers face this problem. Luckily, there is a simple solution: a scone pan. This special baking pan makes it easy to shape, bake, and serve perfect scones every time. But what exactly is a scone pan? How do you use it correctly? And what mistakes should you avoid if you want bakery-quality results? In this guide, you will learn everything you need to know about using a scone pan—from choosing the right one to cleaning it after use. Whether you are new to baking or want to improve your results, this article will give you clear, step-by-step help.
What Is A Scone Pan?
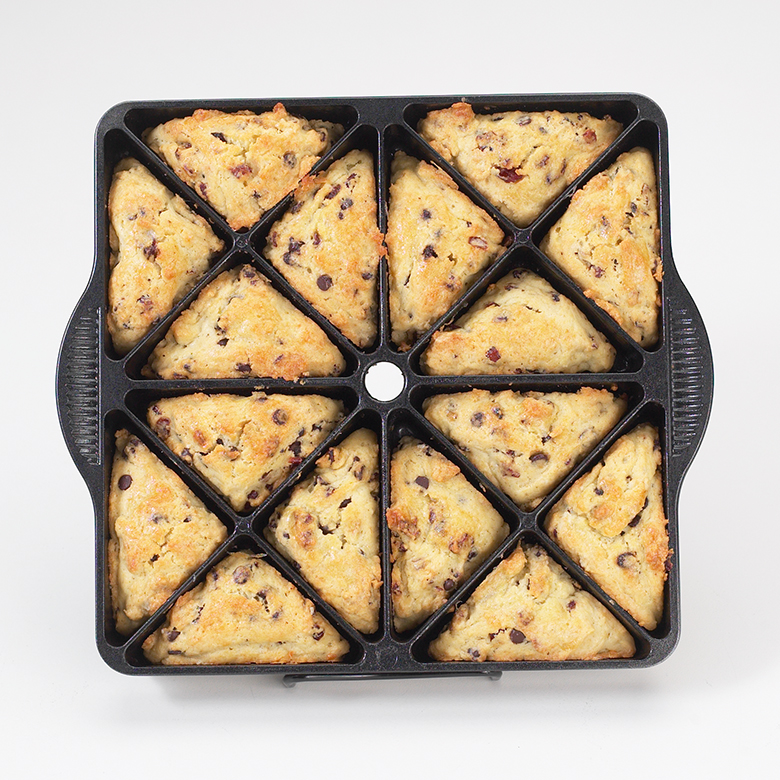
A scone pan is a round or wedge-shaped baking pan with dividers that separate the dough into equal portions. Most scone pans have 8 or 12 wedge-shaped sections, making it easy to create evenly shaped scones. Some pans are made from cast iron, others from non-stick metal, and a few are made from silicone.
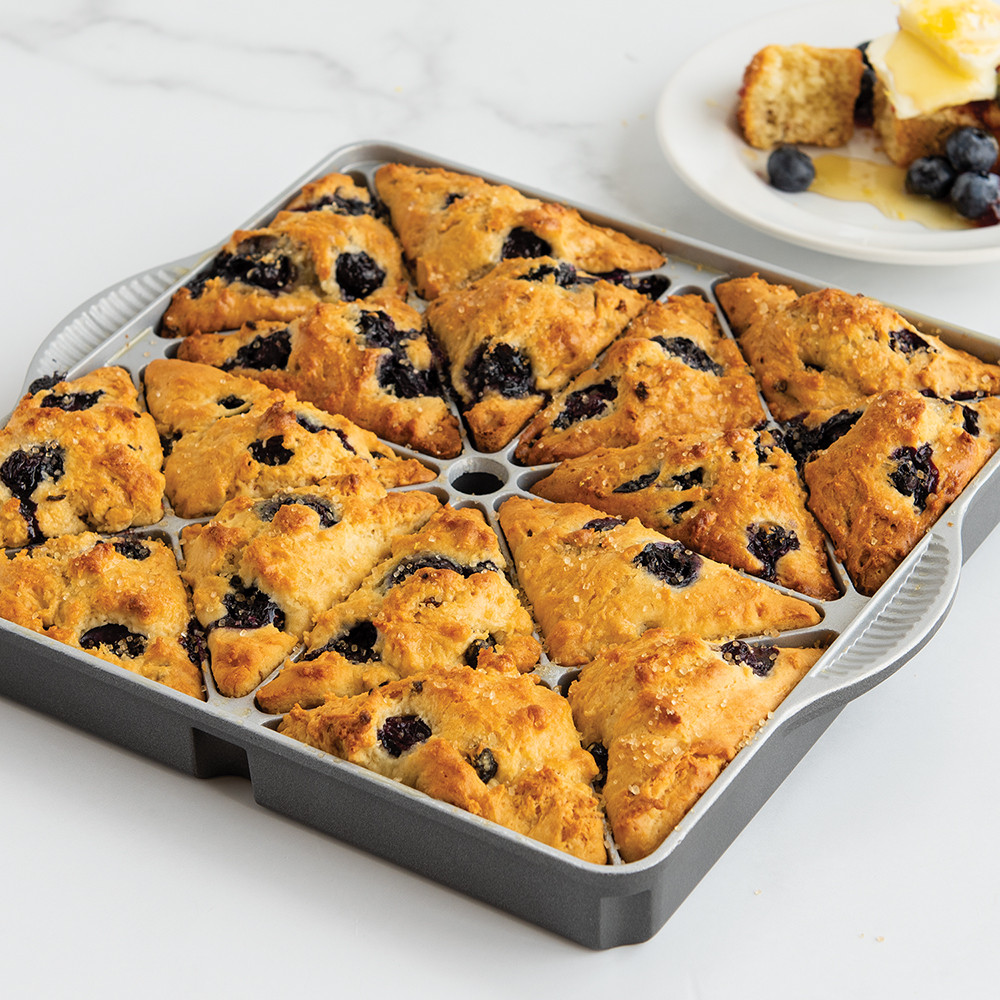
The main benefit of a scone pan is consistency. Each wedge is the same size and shape, so your scones bake evenly. This is helpful for beginners who struggle to shape scones by hand. The pan also prevents the dough from spreading, keeping your scones tall and fluffy.
Some scone pans are versatile and can be used for cornbread, brownies, or even mini cakes. Before buying one, it helps to know the main types available.
Main Types Of Scone Pans
- Cast Iron Scone Pans – Heavy, durable, and hold heat well. They create a crispy crust and keep scones warm after baking.
- Non-Stick Metal Scone Pans – Lightweight, easy to clean, and affordable. Scones release easily without sticking.
- Silicone Scone Pans – Flexible, easy to store, and do not need greasing. Best for softer scones.
Each type has its strengths. Cast iron pans are best for serious bakers who want traditional results. Non-stick pans are good for busy people or beginners. Silicone pans are perfect if you want a pan that never sticks.
Why Use A Scone Pan Instead Of Freehand Shaping?
Many recipes tell you to pat the dough into a circle and cut wedges with a knife. So, why use a pan? The answer is in the details.
- Uniform Size and Shape: All scones bake evenly. No more burnt edges and raw centers.
- Less Mess: The dough stays in the pan, so your hands and counters stay cleaner.
- Faster Prep: Just press the dough into the pan and bake. No need to shape each wedge by hand.
- Beginner-Friendly: Even first-time bakers can make professional-looking scones.
Not only do scone pans make baking easier, but they also help you avoid common problems like spreading, uneven browning, and dry edges.
How To Choose The Right Scone Pan
Buying the right scone pan can improve your baking results. But with so many choices, how do you pick the best one? Here’s what to look for:
Material Matters
- Cast Iron: Heats evenly and lasts a lifetime. Needs seasoning and is heavy.
- Non-Stick Metal: Lighter and easy to clean, but can scratch if you use metal utensils.
- Silicone: Flexible and great for easy release, but may not brown scones as well.
Size And Shape
Most scone pans are 8-10 inches in diameter and have 8 or 12 sections. If you bake for a family, choose a bigger pan. For small batches, a smaller pan is fine.
Heat Resistance
Check the pan’s maximum temperature. Cast iron and metal pans handle high heat well. Some silicone pans have lower heat limits.
Handles And Ease Of Use
Some pans have side handles for easy lifting. Others have a smooth rim. Handles are helpful if you bake often.
Cleaning And Storage
Non-stick and silicone pans are usually dishwasher safe. Cast iron needs gentle hand washing and seasoning.
Here’s a quick comparison:
| Type | Pros | Cons | Best For |
|---|---|---|---|
| Cast Iron | Heats evenly, long-lasting, crispy crust | Heavy, needs seasoning, hand wash | Traditional bakers |
| Non-Stick Metal | Easy to clean, lightweight, affordable | Can scratch, sometimes warps | Everyday use |
| Silicone | Easy release, dishwasher safe, flexible | Does not brown well, can bend | Beginner bakers |
Non-obvious tip: If you want crispy edges, avoid silicone. If you bake scones often, invest in a good cast iron pan—it will last for years.
Preparing Your Scone Pan
Before you add dough, prepare your pan to avoid sticking and help scones rise. Here’s how:
Greasing Or Lining
Even non-stick pans need a light coating of butter or cooking spray. For cast iron, rub with a thin layer of oil. Silicone pans usually do not need greasing, but a quick spray can help.
If you want extra easy cleanup, cut parchment paper triangles to fit the bottom of each wedge. This trick is especially useful for sticky fruit scones.
Preheating The Pan (optional)
Some bakers preheat cast iron pans before adding dough. This can help create a crisp bottom crust. For metal or silicone pans, do not preheat empty—add the dough first.
Checking For Cleanliness
Make sure your pan is dry and free of old crumbs or oil. Leftover bits can burn and affect the taste of your scones.
Beginner insight: Many people skip greasing non-stick pans, but scone dough is rich and sticky. A little grease prevents frustration later.
Credit: www.nordicware.com
Making Scone Dough For The Pan
Now, let’s talk about the dough. Scone dough is different from bread or cake dough. It is rich, crumbly, and needs gentle handling.
Basic Scone Dough Recipe
A simple scone dough includes:
- 2 cups all-purpose flour
- 1/4 cup sugar
- 1 tablespoon baking powder
- 1/2 teaspoon salt
- 6 tablespoons cold butter (cut into cubes)
- 2/3 cup heavy cream (plus extra for brushing)
- 1 large egg
- 1 teaspoon vanilla extract
Optional add-ins: 1/2 cup dried fruit, chocolate chips, or nuts.
Mixing The Dough
- Combine dry ingredients: Mix flour, sugar, baking powder, and salt in a bowl.
- Cut in butter: Use a pastry cutter or your fingers to mix butter into flour until it looks like coarse crumbs.
- Add wet ingredients: Whisk cream, egg, and vanilla. Pour into dry mix and stir gently.
- Add extras: Fold in fruit or chocolate if using. Do not overmix.
Handling Tips
- Keep the butter cold for flaky scones.
- Work quickly so the dough does not get warm.
- The dough should be slightly sticky but not wet.
Beginner mistake: Overmixing makes scones tough. Stop as soon as everything is combined.
Shaping And Filling The Scone Pan
Shaping scone dough is easier with a scone pan, but there are still a few tricks.
Filling The Pan Evenly
- Lightly flour your hands to prevent sticking.
- Press the dough gently into the pan, making sure each wedge section is filled.
- Do not pack the dough too tightly—light pressure is best.
- Level the top with your hands or a spatula for even baking.
Dividers And Edges
If your pan has raised dividers, press the dough into the corners. This ensures each scone separates easily after baking.
If your pan does not have dividers, use a knife to score lines into the dough before baking. This helps guide the bake and makes cutting easier after.
Non-obvious insight: For a more rustic look, leave the tops slightly uneven. For a bakery look, smooth the surface and brush with cream or egg wash.
Baking Scones In A Scone Pan
Ready to bake? The right temperature and timing make a big difference.
Baking Instructions
- Preheat your oven to 400°F (200°C). Check your recipe for exact temperature.
- Place the pan on the middle rack for even heat.
- Brush the tops with cream or egg wash for a golden crust.
- Bake for 18-22 minutes or until the scones are golden brown and firm to the touch.
Checking For Doneness
- Insert a toothpick into the center of a scone. It should come out clean.
- The scones should rise and pull slightly away from the pan edges.
- If baking with add-ins (like berries), the bake time may be a few minutes longer.
Removing Scones From The Pan
Let the pan cool for 5 minutes. Run a small knife around the edges if needed, then gently lift out each wedge.
Pro tip: Do not leave scones in the pan too long—they can become soggy from steam.
Advanced Scone Pan Techniques
Once you master basic scones, try these ideas:
Sweet And Savory Variations
- Sweet: Add orange zest, cinnamon, or mini chocolate chips.
- Savory: Try cheddar and chive, bacon bits, or sun-dried tomatoes.
Layered Scones
Split the dough in half. Press one layer in the pan, add a filling (like jam or cheese), then add the rest of the dough. Press gently and bake.
Mini Scones
Some pans have 12 smaller sections. Adjust your dough amount and baking time (smaller scones bake faster).
Freezing Dough In The Pan
Shape the dough in the pan, cover with plastic wrap, and freeze. Bake straight from the freezer, adding 5-7 minutes to the bake time.
Using A Scone Pan For Other Foods
Try cornbread, brownies, or even individual frittatas in your scone pan. The divided sections make perfect portions.
Beginner insight: Scone pans can help with portion control—each wedge is the same size, which is handy for calorie tracking.
Cleaning And Caring For Your Scone Pan
Good care keeps your pan working well for years.
After Each Use
- Let the pan cool.
- Wash with warm, soapy water (hand wash cast iron).
- Dry completely to prevent rust.
Seasoning Cast Iron
Rub a thin layer of oil on cast iron pans after washing. Bake upside-down at 350°F (175°C) for an hour to keep the surface non-stick.
Storing Your Pan
- Store in a dry place.
- Avoid stacking heavy items on top of silicone pans—they can warp.
- For cast iron, store with a paper towel inside to absorb moisture.
Dealing With Stuck-on Dough
Soak the pan in warm water for 10-20 minutes. Use a soft brush, not metal, to avoid scratching. For cast iron, never soak more than 30 minutes.
Non-obvious tip: Never use harsh cleaners or metal scouring pads—they damage non-stick surfaces and seasoning.
Common Mistakes When Using A Scone Pan
Even with a good pan, mistakes can happen. Here are some to watch for:
- Not greasing the pan enough – Even non-stick pans can stick. Use a little butter or spray.
- Overfilling sections – Scones need space to rise. Fill each section about 3/4 full.
- Packing the dough too tight – Light pressure is enough. Pressing too hard makes dense scones.
- Using warm butter – Keep ingredients cold for flaky layers.
- Forgetting to check oven temperature – Too hot or cold and scones will be raw or burnt.
- Leaving scones in the pan too long – Remove after 5-10 minutes to avoid soggy bottoms.
- Improper cleaning – Soap and water are enough. Avoid harsh tools or soaking cast iron too long.
- Using metal tools in non-stick pans – Use silicone or wooden utensils to avoid scratches.
- Not adjusting for add-ins – Wet ingredients like berries need a little extra flour.
- Storing pans when wet – Always dry completely to prevent rust or mold.
Comparing Scone Pan Vs. Freehand Scone Baking
Many people ask: is a scone pan really better than shaping by hand? Here’s a side-by-side look.
| Feature | Scone Pan | Freehand |
|---|---|---|
| Shape Consistency | Even wedges every time | Varies, harder for beginners |
| Ease of Use | Beginner-friendly | Requires practice |
| Time Needed | Faster prep | More time-consuming |
| Cleanup | One pan to wash | Messier counter, more tools |
| Versatility | Can use for other foods | Not applicable |
Scone Pan Troubleshooting Guide
If your scones are not coming out right, here are quick fixes:
Scones Stick To The Pan
- Grease the pan better next time.
- Let scones cool a few minutes before removing.
Scones Are Dry
- Do not overbake.
- Use heavy cream or buttermilk for moisture.
- Do not pack dough too tight.
Scones Did Not Rise
- Check baking powder is fresh.
- Do not overwork the dough.
- Oven may be too cold.
Scones Are Pale
- Brush tops with cream or egg wash before baking.
- Try a slightly higher oven temperature, but watch closely.
Scones Spread Too Much
- Dough was too warm or wet.
- Chill dough before baking.
- Fill each section only 3/4 full.
Beginner insight: Many problems come from not measuring flour correctly. Spoon flour into the measuring cup, then level off for best results.
Credit: www.nordicware.com
Creative Ideas For Your Scone Pan
Your scone pan can do more than just scones. Here are a few ideas:
- Mini cakes: Pour cake batter into each section for personal-sized desserts.
- Cornbread wedges: Use your favorite cornbread recipe for perfect portions.
- Brownie bites: Each section becomes a chewy, crusty brownie.
- Savory breakfast: Fill with egg, cheese, and veggies for baked omelets.
- Rice crispy treats: Press mixture into pan for easy serving.
How To Store And Serve Scones
Fresh scones are best eaten the same day, but you can keep them for later.
Storing
- Cool completely before storing.
- Keep in an airtight container at room temperature for 1-2 days.
- For longer storage, freeze scones in a bag for up to 2 months.
Reheating
- Warm in a 300°F (150°C) oven for 5-8 minutes.
- Do not microwave—they become tough.
Serving Suggestions
- Serve with clotted cream, butter, or jam.
- Try savory scones with soup or salad.
- For a special touch, dust with powdered sugar or drizzle with icing.
Non-obvious tip: Scones taste best slightly warm. If serving later, reheat briefly for bakery-fresh flavor.
Scone Pan Maintenance: Long-term Tips
Taking care of your pan means better scones and a longer-lasting tool.
- Season cast iron pans after every few uses.
- Check non-stick pans for scratches—replace if coating peels.
- Do not cut scones in the pan with metal knives.
- Store in a dry, cool area.
- If stacking pans, place a soft cloth or paper towel between them.
For more detailed care, see guides from respected baking sites like King Arthur Baking.
Frequently Asked Questions
What Is The Best Material For A Scone Pan?
Cast iron is best for a crispy crust and even baking, but it is heavy and needs seasoning. Non-stick metal pans are easy to use and clean. Silicone is best for easy release and storage, but does not brown scones as well.
Do I Need To Grease A Non-stick Scone Pan?
Yes, a light coating of butter or spray prevents sticking, even in non-stick pans. Scone dough is rich and sticky, so a little grease helps with easy removal.
Can I Use A Scone Pan For Other Recipes?
Absolutely! Scone pans work for cornbread, brownies, mini cakes, and even savory dishes like baked eggs. The divided sections are great for portion control.
How Do I Prevent My Scones From Sticking?
Grease the pan well, do not overbake, and let scones cool for 5 minutes before removing. For extra insurance, use parchment paper in the bottom of each section.
What Should I Do If My Scones Come Out Dry?
Reduce baking time, check oven temperature, and use heavy cream or buttermilk in your dough. Do not overwork the dough, and avoid packing it too tightly into the pan.
Using a scone pan can transform your baking, making perfect wedges every time. With the right pan, careful prep, and these tips, you will soon enjoy bakery-quality scones at home—without the mess or stress. Happy baking!

Credit: www.kingarthurbaking.com