
Camping brings you close to nature, and for many, the day doesn’t truly begin without a hot cup of coffee. While instant coffee is quick, it rarely matches the taste and satisfaction of freshly brewed coffee. This is where the percolator shines. Using a percolator while camping is a classic, reliable method to make rich, flavorful coffee, even miles away from electricity. But if you’re new to percolators, the process can feel confusing. How do you set it up? How long should you let it brew? And what makes percolator coffee so special in the outdoors?
This guide will help you master using a percolator on your camping trips. Whether you’re a beginner or want to improve your technique, you’ll find everything you need here. From understanding the parts of a percolator to step-by-step instructions, tips for better taste, cleaning advice, and common mistakes to avoid, you’ll learn how to enjoy great coffee in the wild.
Let’s dive into the world of percolator camping and make your next outdoor morning unforgettable.
What Is A Percolator And Why Use It For Camping?
A coffee percolator is a simple device that brews coffee by cycling boiling water through coffee grounds using gravity and steam pressure. Unlike drip coffee makers or French presses, percolators don’t need electricity or filters. They are made for open flames, which makes them perfect for camping.
Key Advantages Of A Percolator For Camping
- Durability: Most camping percolators are made from stainless steel or aluminum. They handle rough use and high heat.
- No electricity needed: Works on a campfire, portable stove, or even hot coals.
- Brew large batches: Some models make 8-12 cups at once.
- Classic taste: Many campers love the strong, old-fashioned flavor percolators produce.
The Percolator’s Place In Outdoor Culture
Percolators have a long history in camping. Before lightweight gear and instant coffee, percolators were the go-to choice. They are still popular among outdoor lovers who want a real coffee experience. Enjoying coffee from a percolator, surrounded by fresh air, is a camping tradition that connects people to simpler times.
Types Of Camping Percolators
Choosing the right percolator impacts your coffee quality and camping experience. Let’s look at the main types you’ll find.
| Type | Material | Capacity | Best For |
|---|---|---|---|
| Stovetop Percolator | Stainless steel, aluminum | 2-12 cups | Most campers |
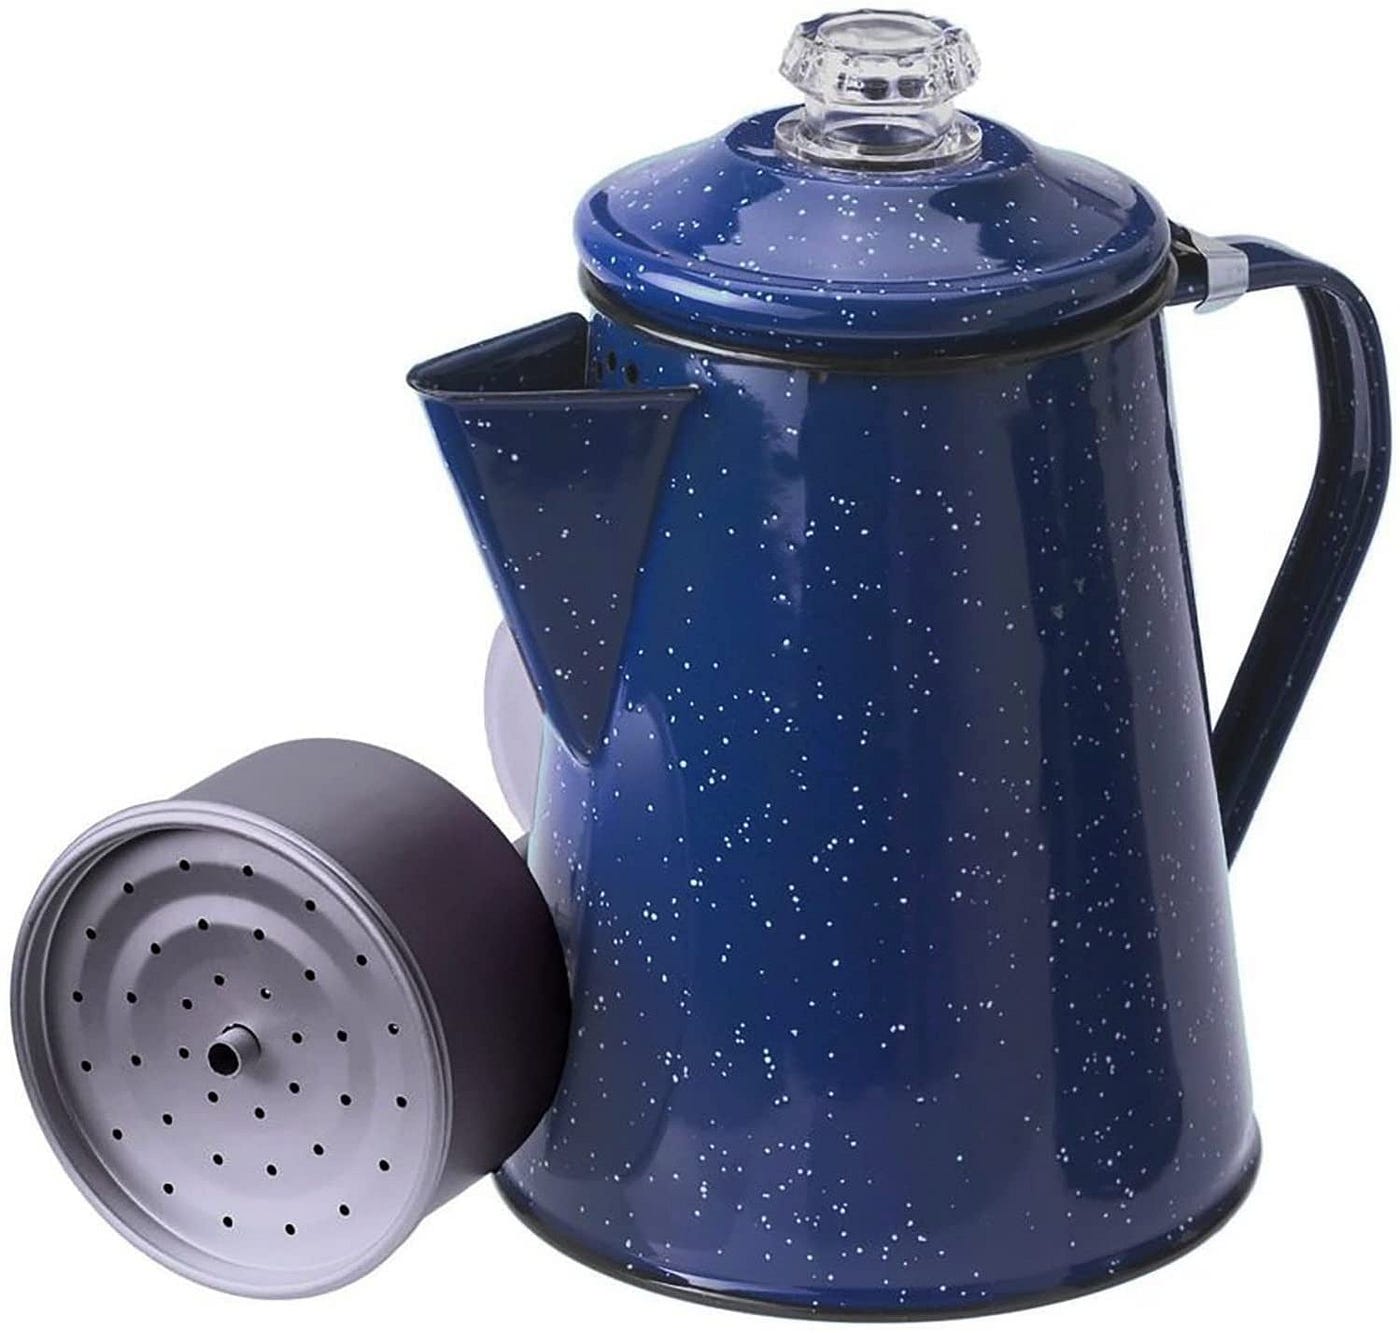
| Enamelware Percolator | Enamel-coated steel | 6-12 cups | Car camping, retro style |
| Portable Percolator | Aluminum, lightweight steel | 1-4 cups | Solo backpacking |
| Electric Percolator | Stainless steel, plastic | 4-12 cups | RV or cabin camping (with power) |
Non-obvious Insight
Many beginners think aluminum percolators are lighter and always better for backpacking. While this is true for weight, aluminum heats up quickly and can scorch coffee if not watched carefully. Stainless steel models are heavier but usually last longer and are more forgiving with heat.
Credit: medium.com
Essential Parts Of A Camping Percolator
Understanding the parts of your percolator makes setup and cleaning easier. Most percolators have:
- Pot or Kettle: The main body that holds water.
- Basket: Holds coffee grounds and sits above the water.
- Perk Tube: A thin metal tube that runs from the bottom to the top, allowing hot water to rise and “percolate” over the grounds.
- Basket Lid: Covers the basket to keep grounds in place.
- Glass or Plastic Knob: On top of the lid, lets you see when percolation starts (water bubbles inside).
- Handle: For pouring, usually insulated.
- Lid: Secures everything and keeps heat in.
Some models have extra features like measurement markings inside or heat-resistant bases.
How A Percolator Works
A percolator is simple but clever. Here’s how the process works:
- You fill the pot with water.
- Coffee grounds go in the basket.
- As the water heats, steam pressure pushes hot water up the perk tube.
- Hot water rains down over the grounds, extracts flavor, and drips back into the pot.
- This cycle repeats until you remove the percolator from heat.
The result: a strong, aromatic pot of coffee. The longer it percolates, the stronger the brew.
Step-by-step: How To Use A Percolator When Camping
Making coffee with a percolator is easy if you follow these steps carefully.
1. Gather Your Gear
Before you start, you’ll need:
- A clean camping percolator
- Fresh coffee grounds (medium-coarse grind is best)
- Water (filtered or bottled tastes best)
- Heat source (campfire, portable stove, or grill)
- Mug and spoon
2. Add Water
Open the percolator. Fill with cold water up to the desired cup line or marked measurement. Use the rule of thumb: 6 to 8 ounces per cup. For example, to make four cups, add 24–32 ounces.
Non-obvious tip: If you’re at high altitude, water boils at a lower temperature. You may need to brew a little longer for full flavor.
3. Add Coffee Grounds
Place the basket on the center post. Add medium-coarse coffee grounds to the basket. Use about one heaping tablespoon per cup of water. You can adjust this based on how strong you like your coffee.
Gently shake the basket to level the grounds. Place the basket lid on.
4. Assemble The Percolator
Insert the basket assembly into the pot. Make sure the perk tube is seated in the bottom. Close the percolator lid securely.
5. Place On Heat
Set the percolator on your campfire grate or stove. Medium heat is best. Too much heat can make coffee bitter and over-extract flavors.
- If using a campfire, place on a stable grate, not directly in flames.
- For a portable stove, start at medium and lower as needed.
6. Wait For Percolation
Watch the glass or plastic knob on top. After a few minutes, you’ll see water bubbling up every few seconds. This is called “perking. ”
- For mild coffee: Let it perk for 5–6 minutes.
- For strong coffee: 8–10 minutes is plenty.
Don’t let it boil hard—gentle perking makes smoother coffee.
7. Remove From Heat And Let Settle
Carefully remove the percolator from heat using a glove or cloth (handles can be hot). Let it sit for 1–2 minutes. This allows grounds to settle and avoids gritty coffee.
8. Serve And Enjoy
Hold the lid or use the locking feature if your model has one. Pour slowly into mugs. Add milk, sugar, or flavorings as you like.
Example: Making 6 Cups Of Coffee
- Add 36–48 ounces of water.
- Use 6 heaping tablespoons of medium-coarse grounds.
- Perk for 7 minutes for average strength.
- Let settle, then pour and enjoy.
Tips For Perfect Camp Coffee With A Percolator
Making great coffee outdoors takes practice. Here are tips to improve your results:
Use Fresh Water And Coffee
Water makes up 98% of coffee. Use filtered or bottled water when possible. Bring freshly ground coffee in a sealed bag or container for best flavor.
Choose The Right Grind
A medium-coarse grind is best. Too fine and grounds slip into your coffee. Too coarse and the flavor is weak.
Watch The Perk
If the percolator boils rapidly, coffee can taste burnt. Adjust the pot’s position or lower the flame. Aim for steady, gentle bubbling.
Clean Between Uses
Even outdoors, rinse all parts after brewing. Leftover grounds and oils can make coffee taste stale or rancid.
Try Adding A Pinch Of Salt
A small pinch of salt in the basket can reduce bitterness and highlight the coffee’s sweetness. Many experienced campers use this trick.
Avoid Over-percolating
More time doesn’t always mean better coffee. Over-percolation leads to harsh, bitter flavors. Set a timer or watch closely.
Common Mistakes To Avoid
Many campers struggle with their first few pots. Here’s what to avoid:
- Using too fine coffee: Causes gritty, muddy coffee.
- Letting it boil: Boiling makes coffee bitter.
- Not cleaning: Old grounds build up fast.
- Wrong water-to-coffee ratio: Leads to weak or overpowering coffee.
- Pouring too soon: Grounds may float into your mug.
Non-obvious insight: Cold weather can make percolators take much longer to brew. Windy conditions may also cool the pot, so shield it if possible.
Choosing The Right Percolator For Camping
Picking the right percolator depends on your camping style, group size, and preferences. Here’s what to consider:
Capacity
Think about how many people you’ll serve. Percolators range from 2 to 12 cups. For solo campers, a small 2–4 cup model saves space and weight. For families or groups, an 8–12 cup version is better.
Material
- Stainless steel: Strong, rust-resistant, lasts for years.
- Aluminum: Lighter, but can dent and transfer flavors.
- Enamelware: Stylish, easy to clean, but may chip.
- Plastic parts: Avoid if using over open flames.
Weight And Size
Backpackers need lightweight options. Car campers have more flexibility for heavier, larger pots.
Handle And Lid Design
Heat-resistant handles are safer. Locking lids are handy for pouring without spills.
Price
Good percolators range from $20–$60. Don’t go too cheap; thin metal can warp or burn coffee.
| Feature | Why It Matters | Best For |
|---|---|---|
| Large Capacity (8-12 cups) | Serves groups, less refilling | Family/group camping |
| Lightweight Aluminum | Easy to pack, quick heating | Solo or backpackers |
| Stainless Steel Build | Durable, easy to clean | All campers |
| Glass Knob | Lets you see perking | Beginners, precise brewing |
| Heat-Resistant Handle | Prevents burns | Open fire use |

Credit: cafely.com
Cleaning And Caring For Your Percolator
A well-cared-for percolator lasts for years and makes better coffee. Here’s how to keep yours in top shape.
After Each Use
- Let the percolator cool.
- Disassemble all parts.
- Rinse pot, basket, and tube with hot water.
- Scrub with a soft brush if needed.
- Dry all parts before reassembling.
Deep Cleaning
If oils build up or coffee tastes off:
- Fill percolator with water and a teaspoon of baking soda.
- Assemble and run a full percolation cycle.
- Discard water, rinse well, and air dry.
Avoiding Damage
- Don’t use abrasive cleaners; they scratch metal and enamel.
- Don’t store with water inside; this causes rust or bacteria.
- Never force parts; bent tubes or baskets affect brewing.
Non-obvious tip: A pipe cleaner or drinking straw brush works great for cleaning the perk tube.
Making Percolator Coffee Over Different Camp Heat Sources
Each heat source changes how you use your percolator. Let’s compare methods.
Campfire
- Classic and fun, but heat can be uneven.
- Use a grate or flat rock for stability.
- Rotate the pot for even heating.
Portable Gas Stove
- Offers precise control.
- Set to medium-low for gentle perking.
- Good for windy or wet weather.
Charcoal Grill
- Steady heat, but watch for ash.
- Place percolator off direct coals.
Propane Fire Pit
- Consistent flame, easy to adjust.
- Keep the pot out of direct wind.
Non-obvious insight: On a wood fire, embers give steady heat—better than flames for percolating.

Credit: www.youtube.com
Enhancing Your Camp Coffee Experience
Want more than just a basic cup? Try these ideas:
Add Spices
Drop a pinch of cinnamon or nutmeg into the basket before brewing for a warm, spicy flavor.
Use Flavored Syrups
Bring a small bottle of vanilla or hazelnut syrup to sweeten your coffee.
Make “cowboy Coffee” With A Percolator
If you forgot the basket, put coarse grounds directly in the water. Let coffee settle after brewing, then pour slowly. It’s not perfect, but works in a pinch.
Cold Weather Tricks
Wrap your percolator in a towel or scarf while brewing to keep heat in. Use a windscreen around your stove for faster perking.
Iced Percolator Coffee
After brewing, let coffee cool and pour over ice. Add condensed milk for a sweet, creamy treat.
Packing And Transporting Your Percolator
To avoid damage or mess in your gear:
- Store all percolator parts inside the pot during travel.
- Place in a soft bag or wrap in a towel.
- Bring a small brush for quick cleaning.
- Carry pre-measured coffee grounds in zip bags.
Non-obvious tip: If space is tight, put mugs, sugar, and a lighter inside the percolator.
Comparing Percolators To Other Camp Coffee Methods
How Does A Percolator Stack Up Against Other Options?
| Method | Pros | Cons |
|---|---|---|
| Percolator | Brews many cups, classic taste, no paper filters | Can be bitter if over-brewed, needs cleaning |
| French Press | Rich, smooth flavor, simple to use | Small batches, glass can break |
| Pour-Over | Clean taste, easy cleanup | Needs filters, small batches |
| Instant Coffee | Fast, no cleanup | Flavor usually weaker, less satisfying |
| Cowboy Coffee | No equipment needed, strong brew | Can be gritty, hard to control strength |
Safety Tips When Using A Percolator While Camping
Camp coffee is rewarding, but safety matters.
- Always use gloves or cloth to handle hot pots.
- Place percolator on stable, level surfaces.
- Keep children and pets away from hot coffee and flames.
- Never leave a percolator unattended on an open fire.
- Extinguish all fires completely before leaving camp.
Troubleshooting Percolator Problems
My Coffee Tastes Weak.
- Add more grounds next time.
- Brew a minute longer.
My Coffee Is Bitter.
- Brew for less time.
- Lower the heat to avoid boiling.
Grounds Are In My Cup.
- Use a coarser grind.
- Let coffee settle longer before pouring.
The Pot Boils Over.
- Lower the heat.
- Don’t fill past the “max” line.
Non-obvious tip: If the perk tube clogs, clean it with a small brush or pipe cleaner for better flow.
Sustainable Camping With A Percolator
Percolators are eco-friendly:
- No paper filters to throw away.
- Stainless steel models last for decades.
- Coffee grounds can be scattered away from camp as compost.
For more on Leave No Trace principles, check out the Leave No Trace Center for Outdoor Ethics.
Frequently Asked Questions
How Do I Prevent Coffee Grounds From Getting Into My Cup?
Use medium-coarse coffee grounds. Fine grounds slip through the basket holes. Let the percolator sit for a minute after brewing; this helps grounds settle to the bottom. Pour slowly and steadily.
How Long Should I Let My Coffee Percolate?
Most campers find that 6–8 minutes gives a good balance of flavor and strength. If you like stronger coffee, let it percolate a bit longer, but avoid going over 10 minutes to prevent bitterness.
Can I Use Pre-ground Coffee From The Store?
Yes, but check the grind size. Most store-bought coffee is medium or fine, which can lead to gritty coffee. If possible, ask for a coarse grind or grind your own before the trip.
What’s The Best Way To Clean A Percolator In The Field?
Rinse with hot water right after use. Scrub with a soft brush or a bit of sand if you don’t have soap. Let all parts air-dry before packing. For stubborn stains, use a little baking soda and water.
Is Percolator Coffee Stronger Than Other Types?
Percolator coffee is usually stronger and has a richer flavor than drip or pour-over methods. That’s because water cycles through the grounds multiple times. Adjust your coffee-to-water ratio and brew time for your preferred taste.
Sipping a rich cup of coffee outdoors is one of camping’s simple joys. With the right percolator and a little practice, you can make delicious, satisfying coffee no matter where you set up camp. The percolator’s design is time-tested, and the process connects you to the tradition of outdoor brewing.
So pack your gear, remember these tips, and enjoy real coffee on your next adventure.