
Adding more shelves to your cabinet can change the way you use your space. Maybe your kitchen cabinets feel crowded, or your bathroom cabinet wastes vertical space. Sometimes, you just want to make your storage fit your needs better. The good news?
You don’t need to be a professional carpenter to add shelves to a cabinet. With a little planning and the right tools, you can do it yourself and get results that look clean and organized.
Let’s walk through everything you need to know. You’ll learn which materials to choose, how to measure for a perfect fit, and step-by-step instructions for different shelving types. Along the way, you’ll discover useful tips, common mistakes, and real examples from people who’ve improved their homes with just a few new shelves.
Why Add Shelves To A Cabinet?
Adding shelves isn’t just about making more space. It’s about making your cabinet work for you. Here’s why people add shelves:
- Better organization: No more stacking things on top of each other. Each item has its own spot.
- Maximize vertical space: Many cabinets have wasted space above items. Extra shelves help use every inch.
- Customize storage: Shelves at different heights fit what you actually need to store—plates, books, cleaning supplies, or toiletries.
- Save money: Instead of buying a new cabinet, adding shelves can solve your problem for much less.
For example, a survey by the National Kitchen & Bath Association found that over 60% of homeowners wish for better cabinet organization. Extra shelves are one of the most affordable ways to get there.
What You Need Before You Start
Before you start drilling, gather everything you need. Preparation makes the job smoother and helps you avoid mistakes.
Tools You’ll Need
- Measuring tape: For accurate shelf size.
- Pencil and notepad: To note measurements and mark spots.
- Drill or screwdriver: For installing shelf supports.
- Level: To keep shelves straight.
- Stud finder (optional): For heavy-duty cabinets or wall-mounted shelves.
- Clamps (optional): Helpful for holding wood in place while you work.
- Saw: Handsaw or power saw for cutting shelf boards if not pre-cut.
- Protective gear: Safety glasses and gloves.
Materials Needed
- Shelf boards: Plywood, MDF, melamine, or solid wood.
- Shelf supports: Brackets, pins, or adjustable tracks.
- Screws or nails: Right length for your cabinet material.
- Wood finish or paint (optional): To match your cabinet.
- Sandpaper: For smoothing cut edges.
Planning Your Shelves
Think about what you want to store. Measure the tallest item for each shelf. Leave a little extra room (about 2-3 cm) for easy access. Sketch your cabinet’s inside, marking where each shelf should go.
Pro tip: Test different layouts by stacking items inside the cabinet before marking shelf positions. This helps you find the best heights before you commit.
Types Of Shelves You Can Add
Not all shelves are the same. The type you choose depends on your cabinet and your needs. Here are the most common types and their pros and cons:
| Type | Strengths | Best For | Weaknesses |
|---|---|---|---|
| Fixed Shelves | Very sturdy, simple to install | Heavy items, permanent storage | Not adjustable |
| Adjustable Shelves | Flexible, easy to change | Varied items, changing needs | Less sturdy if overloaded |
| Pull-out Shelves | Easy access, good for deep cabinets | Pots/pans, cleaning supplies | More complex installation |
| Floating Shelves | No visible supports, clean look | Light items, modern style | Not for heavy loads |
Step-by-step Guide: How To Add Shelves To A Cabinet
Now, let’s get hands-on. The steps below cover the process for most cabinets. We’ll look at extra details for different shelf types as we go.
1. Measure Your Cabinet
Start by opening your cabinet and clearing everything out. Use your measuring tape to get:
- Width (side to side)
- Depth (front to back)
- Height (top to bottom)
Remember to measure inside the cabinet, not outside. Cabinets can have support strips or hinges that reduce the usable width.
Beginner tip: Always measure twice. Write down each number. Even a 1 cm mistake can mean your shelf won’t fit.
2. Decide On Shelf Placement
Look at what you want to store. Place your tallest item on the bottom, then plan shelf heights above it. Standard shelf spacing is 20–30 cm (8–12 inches), but adjust to your items.
Mark shelf positions on both sides of the cabinet with your pencil. Use your level to make sure marks are even.
3. Choose And Cut Your Shelf Material
Pick a material that matches your needs and your cabinet’s look.
| Material | Durability | Cost | Appearance |
|---|---|---|---|
| Plywood | Strong, resists warping | Medium | Can be painted or finished |
| MDF | Very smooth, stable | Low | Paints well, not for heavy loads |
| Melamine | Easy to clean, good for kitchens | Medium | White or wood-look finish |
| Solid Wood | Very strong, classic look | High | Natural finish, visible grain |
Cut your shelves to size. Subtract a little (2-3 mm) from the width to make sure they fit easily. Sand the edges for a smooth finish.
Extra insight: If you’re not confident with a saw, many hardware stores will cut boards to your measurements for a small fee.
4. Install Shelf Supports
There are three main ways to support your shelves:
- Shelf pins: Small metal or plastic supports that fit into holes in the cabinet sides. Good for adjustable shelves.
- Wooden cleats: Small strips of wood screwed to the cabinet sides. Very strong for fixed shelves.
- Brackets: Metal or plastic L-shaped pieces. Visible, but very sturdy.
For adjustable shelves, you’ll need to drill holes for the shelf pins at even heights on both sides. Use a jig or a template to keep holes straight and aligned.
For fixed shelves, screw cleats or brackets at your marked shelf positions. Always check with your level before tightening screws.
Mistake to avoid: Don’t use nails alone for supports. They can pull out over time, especially with heavy loads.
5. Place The Shelf
Once supports are in, lower the shelf into place. For adjustable shelves, make sure all four pins are supporting the board. For fixed shelves, rest the board on the cleats or brackets.
If you want the shelf to be permanent, you can screw it in from the sides or secure it with wood glue. Most people prefer adjustable shelves for flexibility.
6. Finish And Load
If you want a polished look, paint or finish the new shelf to match your cabinet. Let paint dry completely before loading items.
Start with lighter items first, checking for any wobble or sag. If the shelf bends, you may need a thicker board or a center support.
Little-known tip: Shelves wider than 80 cm (about 32 inches) are much more likely to sag, even with strong material. Add a center support or use thicker wood for long shelves.

Credit: kitchencabinetkings.com
Special Cases: Adding Shelves To Different Cabinet Types
Not all cabinets are the same. Here’s how to handle some common situations:
Kitchen Cabinets
Kitchen cabinets often have adjustable shelf holes already. If so, you only need new pins and a shelf board cut to size. For base cabinets (the ones under the counter), consider pull-out shelves for easy access.
Example: A family wanted to store small appliances in their lower kitchen cabinet. By adding a pull-out shelf on strong metal rails, they could easily slide out the toaster or blender when needed, saving counter space.
Bathroom Cabinets
Bathrooms can be humid, so choose water-resistant materials like melamine or sealed plywood. Don’t block plumbing or vents with your shelves. Measure carefully around pipes.
Corner Cabinets
Corner cabinets have angled or L-shaped interiors. You may need to custom-cut shelves to fit. Templates made from cardboard help you trace the right shape before cutting your wood.
Display Cabinets
For glass-front cabinets, aesthetics matter. Use finished wood, and consider glass shelves for a modern look. Support glass shelves with special clips, and don’t overload them.
Freestanding Cabinets
If your cabinet stands alone (not fixed to a wall), make sure shelves don’t make it top-heavy. Always load heavier items on lower shelves for stability.
Choosing The Right Shelf Support System
Shelf supports are more than just a detail—they affect strength and usability. Here’s a quick comparison of common options:
| Support Type | Max Load (per shelf, kg) | Ease of Installation | Adjustability |
|---|---|---|---|
| Shelf Pins | 15-25 | Easy | High |
| Wood Cleats | 30-50 | Medium | None |
| Metal Brackets | 35-60 | Medium | Low |
| Track Systems | 20-40 | Hard | Very High |
Insight: Track systems (metal rails with slots) give you the most flexibility, letting you move shelves any time. They’re good for offices or pantries where storage needs change often.
How To Make Shelves Stronger
A sagging shelf is frustrating and can even be dangerous. Here’s how to avoid it:
- Use thicker material: For shelves longer than 60 cm, use at least 18 mm thick wood.
- Add a center support: For very wide shelves, screw a vertical board under the middle.
- Choose the right supports: Use brackets or cleats for heavy loads.
- Don’t overload: Check weight limits for your supports and material.
Non-obvious tip: The direction of the wood grain matters. Place the shelf so the grain runs along the length, not the width. This makes the shelf less likely to bend over time.
Mistakes To Avoid When Adding Shelves
Many beginners make the same errors. Watch out for these:
- Measuring outside dimensions instead of inside the cabinet.
- Forgetting about hinges or doors, which can block shelf placement.
- Using thin or weak materials for heavy items.
- Not using a level, leading to tilted shelves.
- Not anchoring supports strongly, so shelves fall out with weight.
- Skipping the finish, causing shelves to absorb moisture or stain easily.
Another insight: If your cabinet is old or made of particleboard, drill pilot holes before adding screws. This prevents splitting and gives a stronger hold.
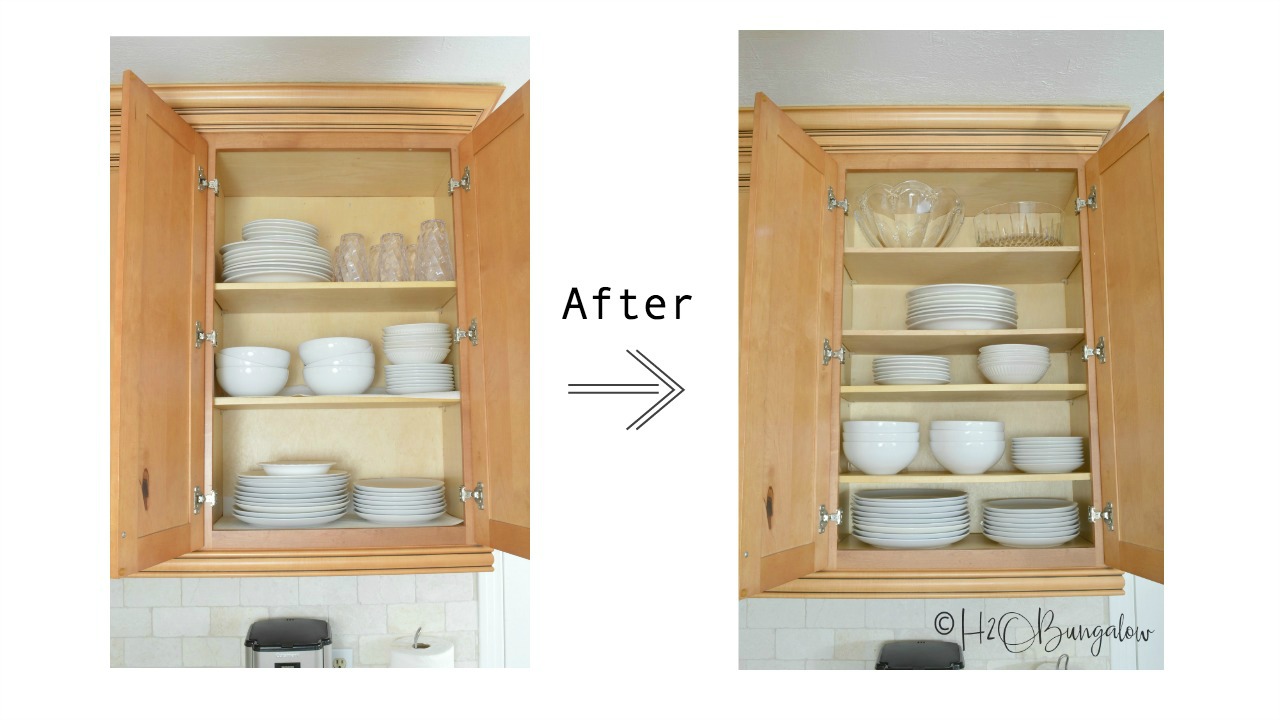
Credit: h2obungalow.com
Customizing Your Shelves For Specific Needs
Every cabinet is different. Here are some creative ways to make your new shelves work even better:
Add Shelf Liners
A liner protects the wood, keeps things from sliding, and makes cleaning easier. Choose plastic, cork, or rubber liners for different uses.
Install Lighting
For deep or dark cabinets, add battery-powered LED lights under each shelf. This makes it easier to find things, especially in kitchen or display cabinets.
Use Bins Or Baskets
Divide your shelf space using small bins. This is especially useful for small items like spices, toiletries, or craft supplies.
Label Each Section
If you share your cabinet with family or coworkers, add labels to each shelf or bin. This keeps things organized long-term.
Adjustable Dividers
Add vertical dividers that slide or clip in place. These are useful for storing baking trays, cutting boards, or folders.
Safety Tips For Adding Shelves
Safety is always important, even for small DIY projects:
- Wear safety glasses when cutting wood or drilling.
- Use a sturdy ladder or step stool to reach high cabinets.
- Secure heavy cabinets to the wall before loading new shelves.
- Check for electrical wires or plumbing if drilling into the cabinet sides.
Real-world Example: Adding Shelves To A Pantry Cabinet
Let’s look at an example. Maria had a tall pantry cabinet with just three shelves, leading to lots of wasted space. She wanted to store cans, boxes, and snacks more efficiently.
She measured the inside (60 cm wide, 40 cm deep, 180 cm high) and decided to add three more shelves. She bought melamine boards and adjustable shelf pins. By drilling new holes at 25 cm intervals, she was able to fit the new shelves perfectly.
Now, every item is easy to see and reach.
Maria spent less than $50 and a single afternoon on the project. She says, “It feels like I got a brand-new pantry. I wish I’d done this years ago. ”
Professional Vs. Diy: When To Call An Expert
Most people can add simple shelves themselves. But sometimes, it’s smarter to call a professional:
- Custom shapes: Odd-shaped or corner cabinets may need advanced cutting tools.
- Heavy loads: If you need to store very heavy items (over 50 kg per shelf), a pro can reinforce your cabinet.
- Fine finishes: High-end cabinets or antique furniture may need special tools and skills to match the look.
If you’re unsure, get advice from a local carpenter. Many offer free consultations.
Environmental Impact: Using Sustainable Materials
If you care about the environment, choose your materials wisely. Look for FSC-certified wood (from responsible sources) or use recycled boards. Avoid shelves made with too much formaldehyde (often found in cheap particleboard), as it can affect indoor air quality.
Painting or sealing wood with water-based finishes is also better for your health and the planet.
Cost Breakdown: What To Expect
Adding shelves is usually affordable, but costs can vary depending on your choices.
- Shelf boards: $10–$40 per shelf, depending on material and size.
- Supports: $2–$10 per shelf.
- Paint/finish: $5–$15.
- Tools (if needed): $20–$50, but many people already own the basics.
On average, adding two to three shelves to a standard cabinet costs $30–$80 in materials.
Money-saving tip: Reuse old shelves from other furniture or repurpose wooden planks for a rustic look.
Resources For Learning More
For more details, videos, and visual guides, check out Family Handyman. They offer step-by-step tutorials with photos and advice for all skill levels.
Frequently Asked Questions
How Do I Know If My Cabinet Can Hold Extra Shelves?
Most cabinets can support a few extra shelves, especially if they’re made from solid wood or plywood. Thin particleboard cabinets need careful support—use strong brackets and avoid overloading. If in doubt, test with a heavy book before loading up.
What’s The Best Material For Cabinet Shelves?
Plywood is strong and resists warping, making it a top choice for most uses. Melamine is easy to clean for kitchens and bathrooms. For heavy loads, use solid wood. Avoid thin MDF for shelves over 60 cm wide, as it can sag.
Can I Add Shelves Without Drilling Holes?
Yes. Some systems use adhesive brackets or tension rods. However, these usually support less weight. For best results and safety, drilling is recommended for most cabinets.
How Do I Fix Sagging Shelves?
Replace the shelf with thicker wood, add a center support, or install stronger brackets. If the supports are loose, screw them in more securely or use longer screws. Check the shelf length—wide shelves sag more easily.
Do I Need Special Tools To Add Shelves?
Basic shelves need only a measuring tape, drill, and screwdriver. For complex projects (like pull-out shelves), you may need a saw and level. Hardware stores often cut boards for you, so you can skip buying a saw if you don’t have one.
Adding shelves to your cabinet is a smart, affordable way to improve your home. With good planning and careful work, you’ll enjoy organized, useful storage for years to come.
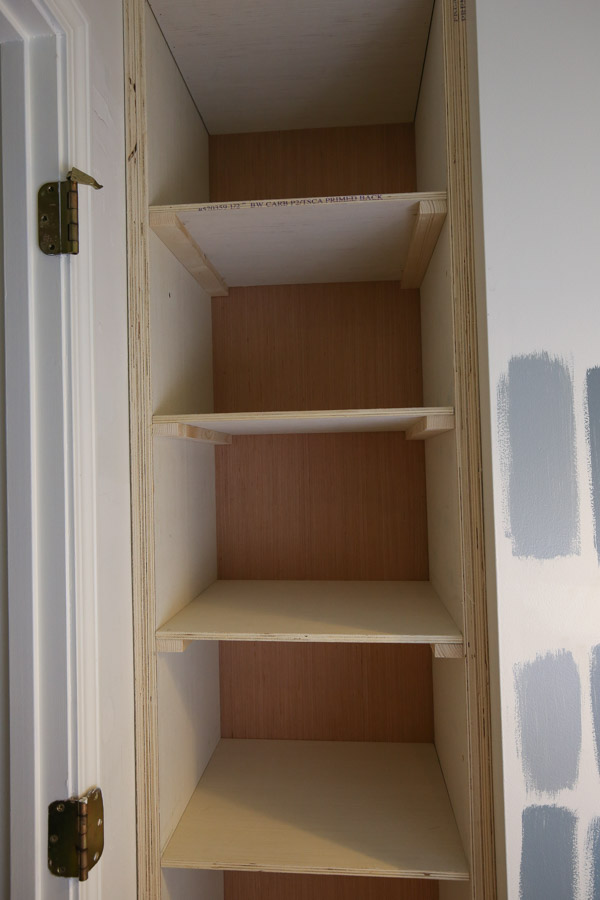
Credit: angelamariemade.com