
Many pool owners love the easy setup and fun experience of Summer Waves pools. But nothing disrupts summer fun faster than discovering a leaking drain plug. That slow drip, or even a steady trickle, can lead to wasted water, higher bills, and—worst of all—damage to your yard or pool base. If you find yourself wrestling with a leaky drain plug, you’re not alone. Thousands of owners face this problem every year, especially as their pool ages or after it’s been drained and refilled.
This guide gives you a complete, practical solution to fixing a leaking Summer Waves pool drain plug. You’ll learn why leaks happen, how to troubleshoot, and what repair methods really work. If you want to avoid costly mistakes, or if you’re just tired of wet feet around your pool, read on.
You’ll find clear instructions, expert tips, and answers to questions most beginners never think to ask.
Understanding The Summer Waves Pool Drain Plug
Before tackling the leak, it’s helpful to know what you’re dealing with. The drain plug is a small but vital part, usually located at the base of the pool wall. Its main job is to let you easily drain water at the end of swimming season or when cleaning the pool.
Most Summer Waves pools use a threaded plastic plug with a rubber gasket. Some newer models add a quick-connect hose adapter for easier draining. The plug must seal tightly to stop water from leaking, but it also needs to open for draining.
A perfect seal isn’t always guaranteed, especially after repeated use.
Key Features Of The Drain Plug System
- Threaded cap: Screws in to seal the drain.
- Rubber gasket: Provides a watertight seal.
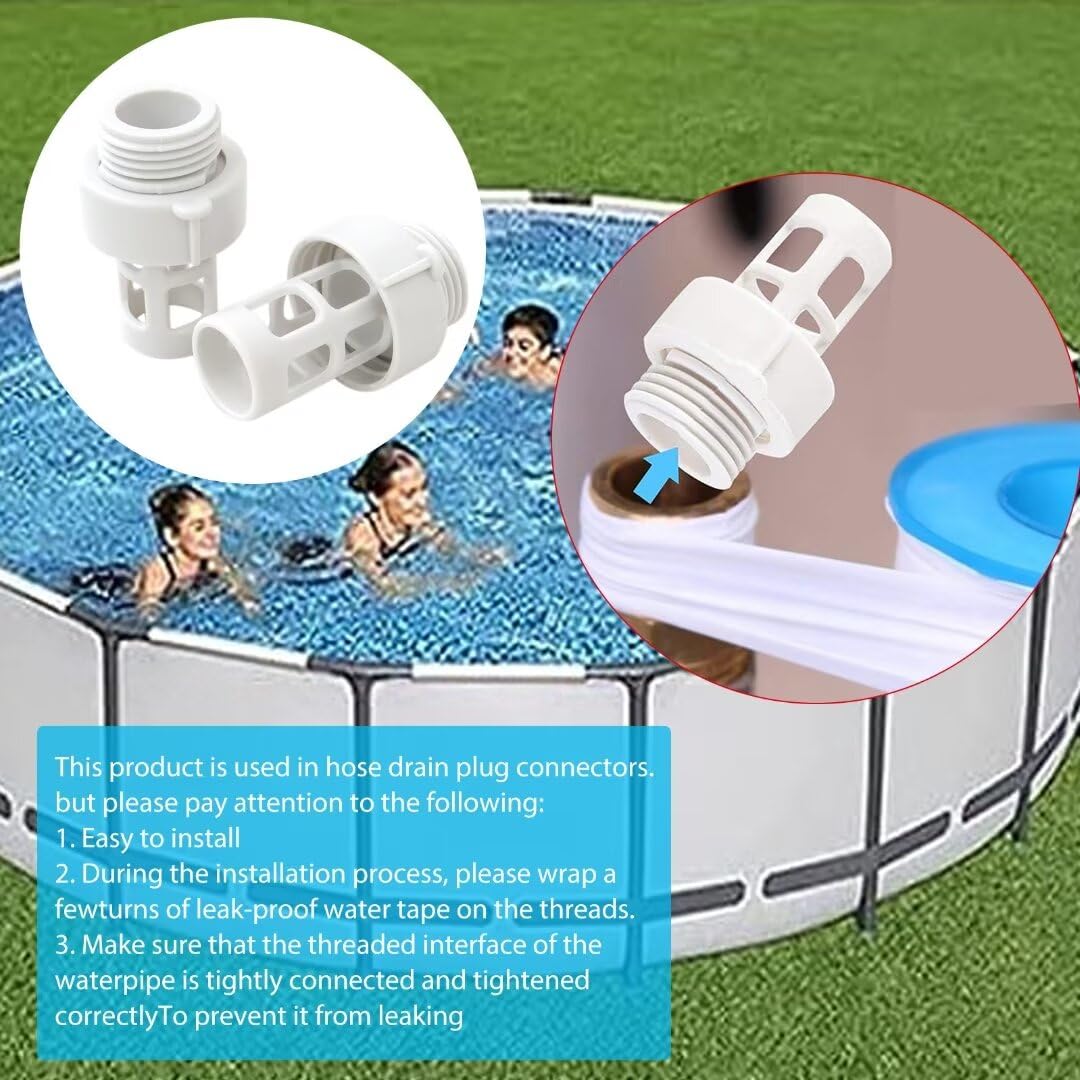
- Hose connector: Allows easy drainage (on some models).
- Plastic housing: Forms the drain’s body inside the pool wall.
Understanding these parts is important, because a leak can come from any of them—not just the plug itself.
Common Reasons For Drain Plug Leaks
Why do Summer Waves pool drain plugs start leaking? The answer is rarely simple. Several factors can lead to leaks, and sometimes it’s a combination of problems. Here are the most common causes:
1. Worn Or Damaged Gasket
The soft rubber gasket is supposed to create a watertight seal. Over time, it can dry out, crack, or flatten, which lets water slip through.
2. Cross-threaded Or Loose Plug
If the plug is not screwed in straight, or not tight enough, water can escape around the threads.
3. Debris Or Dirt In The Threads
Small bits of sand, leaves, or plastic can stop the plug from sealing completely.
4. Cracked Drain Housing
If the plastic around the drain cracks (often due to freezing or impact), water can leak out no matter how tight the plug is.
5. Improper Installation
Sometimes, the plug or gasket is installed backward or missing altogether.
6. Overtightening
Believe it or not, turning the plug too hard can flatten or damage the gasket, ruining the seal.
7. Chemical Damage
Strong pool chemicals can degrade rubber and plastic parts, especially if used in high doses.
8. Aging And Uv Exposure
After a few seasons under the sun, plastic and rubber can become brittle and less effective.
Most leaks have an obvious cause once you look closely. But sometimes, more than one problem is present. That’s why careful inspection is so important.
How To Diagnose A Leaking Drain Plug
Finding the root cause of a leak is the first step to fixing it. Here’s a step-by-step process for diagnosing your Summer Waves pool drain plug:
Step 1: Visually Inspect The Plug Area
Start by drying the area around the drain plug with a towel. Look for:
- Obvious cracks in the plastic drain housing
- Signs of water running down from the plug
- White chalky deposits (indicates slow leaks)
Step 2: Check The Tightness
Using your hand, gently tighten the drain plug. Do not use tools, as overtightening can cause damage. If it feels loose or crooked, unscrew and reinstall it straight.
Step 3: Examine The Gasket
Remove the plug and look at the rubber gasket. Is it cracked, missing, or flattened? If so, it’s likely the main culprit.
Step 4: Clean The Threads And Housing
Wipe away any debris from the plug threads and the drain opening. Even a small piece of grit can stop a proper seal.
Step 5: Perform A Leak Test
With the pool full, dry the area, then watch for new drips. If water appears immediately, the plug or gasket isn’t sealing. If water seeps out slowly, check for hairline cracks in the plastic.
This careful process helps you pinpoint whether the problem is the plug, the gasket, the housing, or something else.
Temporary Fixes: Quick Solutions When You Can’t Drain The Pool
Sometimes you discover a leak when the pool is full, and draining isn’t an option. Here are short-term fixes that can buy you time before a permanent repair:
1. Teflon Tape On Threads
Wrap plumber’s Teflon tape around the plug threads before reinstalling. This fills small gaps and can slow or stop minor leaks.
2. Waterproof Sealant
Apply a bead of waterproof silicone sealant around the plug edge. Let it dry as much as possible (some work even underwater). This method is not permanent but can last days to weeks.
3. Underwater Epoxy Putty
For cracks in the drain housing, use a two-part underwater epoxy putty. Knead, apply, and press into the crack. It hardens underwater and can stop leaks until you’re ready for a real fix.
4. Rubber Patch
If the leak is slow, a strong adhesive rubber patch (like those for pool liners) can be pressed over the area to contain the leak.
Important: These solutions are for emergencies. They can prevent water loss and yard damage but should not replace a proper repair.

Credit: www.amazon.com
Permanent Solutions: How To Fix A Leaking Drain Plug
For a long-lasting fix, you’ll need to repair or replace the faulty part. Here’s a detailed guide for each scenario:
Replacing The Gasket
A worn or cracked gasket is the number one cause of leaks. Here’s how to replace it:
- Buy the right gasket: Check your pool model and order a replacement. Summer Waves pools usually use a flat O-ring or rubber washer.
- Drain water below the plug: You only need to lower the water until it’s below the drain.
- Unscrew and remove the plug: Take out the old gasket.
- Clean the area: Remove debris and dry the surfaces.
- Install the new gasket: Place it in the correct position (usually on the plug itself).
- Reinstall and hand-tighten: Do not overtighten.
- Refill and check for leaks: Watch for any new drips.
Replacing the gasket is simple and cheap—often under $10 in parts.
Reseating The Plug
If the plug was cross-threaded or not seated straight, remove it, clean the threads, and reinstall carefully. Hand-tighten only.
Replacing The Entire Plug
If the plug is cracked or stripped, you’ll need a new one:
- Order a compatible plug for your pool.
- Lower water level below the drain.
- Remove the old plug and gasket.
- Clean threads and housing.
- Install new plug with fresh gasket.
- Tighten by hand and inspect.
Repairing A Cracked Drain Housing
A crack in the pool’s plastic drain housing is more serious. Here’s what you can do:
- Lower water level well below the crack.
- Dry the area fully (use towels and a hair dryer if needed).
- Sand the area lightly to roughen the surface.
- Apply underwater epoxy or a pool patch kit.
- Let cure as directed (usually 24 hours).
- Refill and monitor.
If the crack is large, or the repair doesn’t hold, you may need professional help or a full drain fitting replacement.
Upgrading To A Better Plug System
Some owners replace the original plug with a universal pool drain plug or a hose adapter valve. These can offer a better seal and easier draining, but make sure the size matches your pool’s threads.
What To Do If The Leak Persists
If you’ve replaced the gasket and plug, cleaned everything, and even patched cracks—but the leak remains—consider these steps:
- Double-check for hairline cracks around the drain area.
- Inspect inside and outside the pool wall for hidden damage.
- Test with food coloring: Add a few drops near the plug and watch if it’s drawn into a crack.
- Contact Summer Waves support: They can offer advice or replacement parts.
Sometimes, a leak is due to a manufacturing defect. Don’t hesitate to use your warranty if the pool is still covered.
Preventing Future Drain Plug Leaks
Once you’ve fixed the problem, you’ll want to avoid it happening again. Here’s how:
1. Regular Inspection
Check the drain plug and gasket at the start and end of each swim season. Look for cracks, hardness, or signs of wear.
2. Proper Installation
Always hand-tighten the plug—never use tools. Overtightening is a leading cause of gasket damage.
3. Keep Threads Clean
Rinse the plug and drain area before closing the pool. Dirt and sand cause many leaks.
4. Replace Gaskets Every 2-3 Years
Even with good care, rubber gaskets wear out. Change them before they fail.
5. Winterize Carefully
If you leave your pool out in winter, always drain it fully and remove the plug. Freezing water expands and can crack the drain housing.
6. Avoid Harsh Chemicals
Don’t pour shock or strong chemicals near the drain area. These can degrade rubber and plastic.
7. Cover The Drain In Storage
If you store your pool, cover the drain opening to keep out spiders, dirt, and debris.
Taking these steps will greatly reduce your chances of another leak and add years to your pool’s life.
Common Mistakes When Fixing Pool Drain Plug Leaks
Many DIYers make the same errors, which can lead to repeat leaks or bigger problems. Here’s what to avoid:
1. Using Tools To Tighten The Plug
This can strip threads or flatten the gasket, making leaks worse.
2. Ignoring Small Drips
A tiny leak can grow quickly, especially with water pressure.
3. Installing The Gasket On The Wrong Side
The gasket must be between the plug and the drain opening—not the outside.
4. Using Petroleum Jelly Or Grease
These can break down rubber over time. Use silicone-based lubricant if needed.
5. Patching Without Cleaning
Epoxy or patches won’t stick to dirty or wet surfaces.
6. Not Checking For Cracks
Focusing only on the plug can miss cracks in the housing.
7. Buying The Wrong Size Parts
Always check your pool model and measure carefully before ordering replacements.
Avoiding these mistakes can save you hours of frustration and wasted money.
Credit: www.amazon.com
Cost Comparison: Diy Fix Vs. Professional Repair
Some leaks are easy to fix yourself, but others may need a pro. Here’s a cost comparison to help you decide:
| Repair Method | DIY Cost (USD) | Pro Cost (USD) | Time Needed | Difficulty |
|---|---|---|---|---|
| Replace Gasket | $5 – $12 | $50 – $100 | 30 min | Easy |
| Replace Plug | $8 – $18 | $60 – $110 | 30 min | Easy |
| Epoxy Patch Crack | $10 – $25 | $80 – $200 | 1-2 hours (plus cure) | Medium |
| Full Drain Fitting Replacement | $20 – $50 | $150 – $350 | 2-3 hours | Hard |
DIY repairs can save you a lot, especially for simple gasket or plug replacements. For large cracks or complicated jobs, hiring a pro may be safer and less stressful.
How To Choose The Right Replacement Parts
Not all drain plugs and gaskets are the same. Here’s what matters when choosing replacements:
1. Model Compatibility
Check your pool’s manual or the label on the frame for the model number. Many Summer Waves pools use similar but not identical plugs.
2. Size
Measure the diameter of your existing plug and gasket. Most are 1.25 to 1.5 inches, but this varies.
3. Material Quality
Choose replacement gaskets made from chlorine-resistant rubber. Cheaper ones degrade faster.
4. Brand
Whenever possible, buy OEM (original equipment manufacturer) parts from Summer Waves or a trusted pool supply. Generic parts sometimes don’t fit or seal as well.
5. Return Policy
Select a seller who accepts returns, in case the part doesn’t fit.
Here’s a quick comparison of common replacement part types:
| Part Type | Material | Average Lifespan | Cost Range | Fit Reliability |
|---|---|---|---|---|
| OEM Plug & Gasket | High-grade plastic, rubber | 3-5 years | $8 – $20 | Excellent |
| Generic Plug & Gasket | Standard plastic, rubber | 1-3 years | $5 – $12 | Good |
| Universal Adapter Valve | Plastic, silicone gasket | 3-4 years | $12 – $25 | Variable |
Spending a little more for quality parts is a smart investment, especially if you want to avoid repeat leaks.
Real-life Example: Fixing A Persistent Drain Plug Leak
Let’s look at a real scenario. Jane, a Summer Waves pool owner in Texas, noticed a slow drip from her drain plug two weeks into the season. At first, she tried tightening the plug—no luck. She wrapped Teflon tape around the threads, which slowed the leak but didn’t stop it.
Jane followed these steps:
- Drained water below the plug
- Removed the plug and gasket
- Found the gasket cracked and flattened
- Bought a new OEM gasket online
- Cleaned the threads and drain housing
- Installed the new gasket and plug, hand-tightened only
- Refilled pool and checked for leaks
The leak stopped immediately. Jane now checks the gasket every spring, and her pool has stayed dry at the base for three years.
Many owners try quick fixes first, but most persistent leaks are due to a bad gasket or damaged plug—problems that are simple to fix if you follow the right steps.
The Environmental Impact Of Pool Water Leaks
A leaking drain plug doesn’t just waste water—it can affect your local environment. For example, a small leak of just one drip per second can lose over 2,000 gallons of water per month. This wasted water can:
- Soak your yard, causing muddy patches or plant damage
- Lead to pooling near your foundation, risking structural problems
- Carry pool chemicals into the soil, which can harm grass and local wildlife
Fixing leaks quickly is better for your wallet and the planet.

Credit: www.troublefreepool.com
When To Replace Your Pool Instead Of Repairing
Sometimes, leaks are a sign your pool is reaching the end of its life. Consider replacement if:
- The drain area has multiple or large cracks
- The liner is brittle, stained, or has many patches
- The frame is rusty or unstable
Most Summer Waves pools last 3 to 7 years with good care. If your drain plug leaks are just one of many issues, it may be time to invest in a new pool.
Advanced Troubleshooting: Hard-to-find Leaks
Occasionally, leaks can be hard to locate. Try these advanced tips:
- Use a dry towel to check for dampness every few hours
- Mark the water level and check for overnight drops
- Add food coloring near the plug and watch for color movement
- Check both inside and outside the pool for wet spots
If you’re still stuck, a pool leak detection company can use sonic or dye tests to find hidden leaks.
Frequently Asked Questions
What Size Drain Plug Does A Summer Waves Pool Use?
Most Summer Waves pools use a 1.25-inch or 1.5-inch threaded drain plug. Always check your pool’s manual or measure the opening before buying a replacement.
Can I Use Plumber’s Putty To Seal A Leaking Drain Plug?
Plumber’s putty is not recommended. It can wash away in water and is not safe for pool use. For leaks, use Teflon tape, silicone sealant, or a new gasket.
How Often Should I Replace The Drain Plug Gasket?
A good rule is every 2-3 years or if you see cracks, flattening, or leaks. Check the gasket at the start of each season.
Is It Safe To Swim If The Drain Plug Is Leaking?
Swimming with a small leak is possible, but it’s better to fix the problem quickly. Leaks can get worse and lead to water loss, damage, and chemical imbalances.
Where Can I Buy Replacement Parts For Summer Waves Pools?
You can find official parts at pool supply stores, online retailers, or the Summer Waves website. For more info, visit the Polygroup Store, the official Summer Waves parts supplier.
—
Dealing with a Summer Waves pool drain plug leaking might seem stressful, but with the right steps, you can fix most issues quickly and confidently. Remember, small problems are easiest to repair before they become big headaches. By inspecting, maintaining, and using the right parts, you can keep your pool safe, fun, and leak-free for years to come. Enjoy your summer swims—without the puddles!