
Few things in the bathroom are more mysterious to a DIY beginner than the toilet flange cap. It’s a small, round piece, often made of plastic, that covers the pipe where your toilet connects to the floor. If you’re installing a new toilet, renovating a bathroom, or fixing a leak, you might need to break the toilet flange cap to reach the pipe below. But how do you do this safely, without damaging the flange or the drain pipe? This guide will explain every detail, from what a flange cap is, to the best methods for breaking it, tools you’ll need, and mistakes to avoid. If you’re worried about making a mess or causing expensive damage, you’re in the right place.
What Is A Toilet Flange Cap?
Before you start breaking anything, it helps to understand what you’re dealing with. The toilet flange cap is a protective cover that sits on top of the toilet flange—the round fitting that connects your toilet to the drain pipe below the floor. These caps are usually made of plastic or sometimes metal. Their main job is to keep dirt, debris, and sewer gases from escaping the pipe when the toilet isn’t installed yet.
You’ll often see a flange cap on new construction sites, remodels, or after a toilet has been removed for repair. In most cases, you must remove or break the cap before you can install a new toilet or make repairs to the flange.
Why Break The Toilet Flange Cap?
Some flange caps are designed to pop off easily, but many are glued, snapped, or even solvent-welded in place. In these cases, the only practical way to remove them is by breaking them. Here are the main reasons you might need to break a toilet flange cap:
- Installing a new toilet: The cap must come off so you can access the drain and bolt down the toilet.
- Replacing a broken flange: You can’t repair or replace the flange with the cap in place.
- Clearing a blockage: Sometimes debris or buildup needs to be cleared before installing the toilet.
- Upgrading or remodeling: New pipes or flanges might need the cap removed.
If you try to force off a well-attached cap, you risk damaging the flange or even the pipe below. That’s why understanding the right way to break the cap is so important.
Understanding The Different Types Of Flange Caps
Not all flange caps are created equal. The method you use to break or remove them depends on their material and how they’re attached.
| Type of Flange Cap | Material | Attachment Method | Difficulty to Remove |
|---|---|---|---|
| Snap-on Cap | Plastic | Snaps into place | Easy |
| Glue-on Cap | Plastic | Solvent-welded/glued | Moderate |
| Threaded Cap | PVC or Metal | Screws in | Easy to Moderate |
| Metal Cap | Steel or Brass | Press-fit or Threaded | Hard |
Knowing what you’re working with helps you choose the right tools and method.
Tools And Safety Gear You Need
Breaking a toilet flange cap isn’t rocket science, but you’ll need the right tools for a clean, safe job. Here’s what you should have ready:
Basic Tools
- Hammer or rubber mallet
- Flathead screwdriver or pry bar
- Utility knife (for cutting plastic)
- Adjustable wrench (for threaded caps)
- Small hacksaw or oscillating tool (for stubborn caps)
Safety Gear
- Safety glasses (to protect your eyes from flying debris)
- Work gloves (to avoid cuts)
- Dust mask (if you expect dust or mold)
Optional Items
- Shop vacuum (to clean up debris)
- Old towels (to catch falling bits)
- Flashlight (for better visibility)
Using the right tool for your cap material is key. Never use brute force if a more precise tool will do the job.

Credit: www.reddit.com
Step-by-step: How To Break A Toilet Flange Cap
Let’s walk through the process, from preparation to finishing the job. Each step is designed to minimize risk and maximize success, whether you’re a first-timer or have some experience.
1. Prepare The Area
Clear the area around the flange. Remove any leftover wax ring, debris, or old bolts. Lay down towels or a drop cloth to catch any pieces that fall. Make sure you have good lighting and ventilation. Put on your safety glasses and gloves.
2. Inspect The Cap And Flange
Before you start breaking, check how the cap is attached. Is it glued? Snapped in? Threaded? This will help you pick the right tool and avoid damaging the flange or drain pipe.
3. Choose Your Method Based On Cap Type
Snap-on Plastic Cap
- Use a flathead screwdriver to pry up the edge gently.
- If it doesn’t come up easily, tap the handle with a hammer.
- Pull the cap off once it’s loose.
Glue-on Or Solvent-welded Cap
- Use a utility knife to score around the edge of the cap.
- Tap the edge with a hammer and screwdriver to create a crack.
- Use the pry bar or screwdriver to lift broken pieces.
- For tough caps, use a small hacksaw or oscillating tool to cut a slot, then pry.
- Remove all pieces carefully to avoid damaging the flange.
Threaded Cap
- Try turning the cap counterclockwise with your hand or an adjustable wrench.
- If it’s stuck, tap it gently with a hammer to loosen.
- If it refuses to budge, make a small notch with a hacksaw and use a screwdriver to turn.
Metal Cap
- These are rare and usually pressed or threaded.
- Try to unscrew or pry up, using lubricant if needed.
- For very stubborn caps, use a hacksaw or metal cutting blade to make a slot, then pry up.
4. Remove Debris And Inspect
Once the cap is removed, vacuum or pick up any pieces left in the pipe. Check the flange for cracks or damage. If the flange is broken, you’ll need to repair or replace it before installing a new toilet.
5. Test Fit Your Toilet
Before moving on, dry fit your toilet over the flange. Make sure the opening is clear and the toilet sits flat. If you see any problems, now’s the time to fix them.
Tips For Breaking Toilet Flange Caps Without Damage
Many beginners make simple mistakes that lead to costly repairs. Here are some expert tips to avoid trouble:
- Always use gentle force. If a tool isn’t working, don’t just hit harder—switch to a better tool.
- Cut or score the cap before prying if it’s glued. This reduces stress on the flange.
- If you’re not sure how the cap is attached, try moving it gently in different directions to feel for glue, threads, or snaps.
- Avoid using large power tools unless you have experience. Small hand tools give you more control.
- If you make a mistake and damage the flange, repair kits are available at most hardware stores.
What To Do If The Flange Gets Damaged
It’s easy to chip or crack a flange, especially if you’re dealing with brittle plastic or old pipes. Here’s what to do if that happens:
- Small cracks: Use a flange repair ring or flange support kit. These fit over or inside the existing flange and provide support for the toilet bolts.
- Major breaks: If the flange is badly damaged, you may need to cut it out with a saw and install a replacement flange. This can be more involved and sometimes requires a plumber.
- Loose flange: Use flange spacers or shims to build up the height and stabilize the toilet.
Most small cracks are fixable without a full replacement. Take your time and don’t rush the repair.
Comparing Methods For Breaking Toilet Flange Caps
Let’s compare the most common removal methods based on ease, safety, and cost.
| Method | Best For | Ease of Use | Risk of Damage | Cost |
|---|---|---|---|---|
| Pry with Screwdriver | Snap-on caps | Easy | Low | Low |
| Score and Tap | Glued caps | Moderate | Medium | Low |
| Cut with Saw | Thick or metal caps | Challenging | Medium-High | Medium |
| Turn with Wrench | Threaded caps | Easy | Low | Low |
Most DIYers find that a combination of prying and cutting works best for stubborn plastic caps.
Common Mistakes Beginners Make
Breaking a toilet flange cap seems simple, but many people make errors that can lead to leaks or extra repairs.
- Using too much force: This can crack the flange or pipe below.
- Not checking cap attachment: Trying to pry a glued cap without scoring it first can break the flange.
- Forgetting safety gear: Flying debris can cause eye injuries.
- Leaving debris in the pipe: Small pieces can cause blockages or prevent a good seal for the toilet.
- Skipping the flange inspection: A cracked flange will cause leaks later.
A little extra care at each step can save hours of work (and a plumber’s bill) later.
Real-world Example: Breaking A Glued Flange Cap
Let’s look at a real scenario. Maria was remodeling her bathroom and needed to install a new toilet. She found the flange cap was glued on and wouldn’t budge. Following the right process, she:
- Used a utility knife to score around the cap’s edge.
- Tapped a flathead screwdriver into the scored line to create a crack.
- Carefully pried up one section, then broke the rest into small pieces.
- Vacuumed up all debris and checked the flange.
- Successfully installed her new toilet with no leaks.
Maria avoided the most common mistake: she didn’t try to pop the cap off in one go, which could have broken the flange. Instead, she worked patiently and used the right tools.
When To Call A Professional
Most homeowners can break a toilet flange cap with patience and the right tools. But sometimes, you should call a plumber:
- The flange is cast iron or metal and won’t break with hand tools.
- The pipe or flange is old, brittle, or already damaged.
- You see water or sewer gas leaking up from the drain.
- You’re not comfortable using saws or power tools.
A professional can avoid further damage and make sure your repair is up to code.
How To Prevent Future Problems
Once you’ve broken the flange cap and installed your new toilet, a few extra steps can prevent trouble later:
- Use a good quality wax ring or rubber seal for a tight fit.
- Make sure the flange is level and secure before installing the toilet.
- Check for leaks around the base after installation.
- Keep the area around the toilet dry to avoid flange rust or rot.
A strong, level flange means fewer repairs and less risk of leaks in the future.
Credit: cualagaashop.ie
Environmental And Safety Considerations
Breaking a plastic cap isn’t hazardous, but always:
- Dispose of plastic or metal pieces safely.
- Avoid breathing in dust from old pipes or flooring.
- If you see signs of mold or water damage, address it before installing the toilet.
If you suspect the pipe or subfloor is damaged, get it inspected before moving forward.
The Hidden Challenge: Older Homes And Unusual Flanges
Many older homes have unique plumbing setups. You might find:
- Cast iron flanges: Much harder to break, often need a metal saw.
- Offset flanges: These are not centered and may have custom caps.
- Lead seals: Rare today, but sometimes seen in very old homes.
If you hit an unexpected material, stop and research before proceeding. For rare setups, you can find guides on specialist sites or ask a plumber for advice.
Credit: www.homedepot.com
Non-obvious Insights Most Beginners Miss
- Cap debris can block the drain: Even small pieces left in the pipe can cause future clogs. Always vacuum or reach in to ensure the pipe is clear.
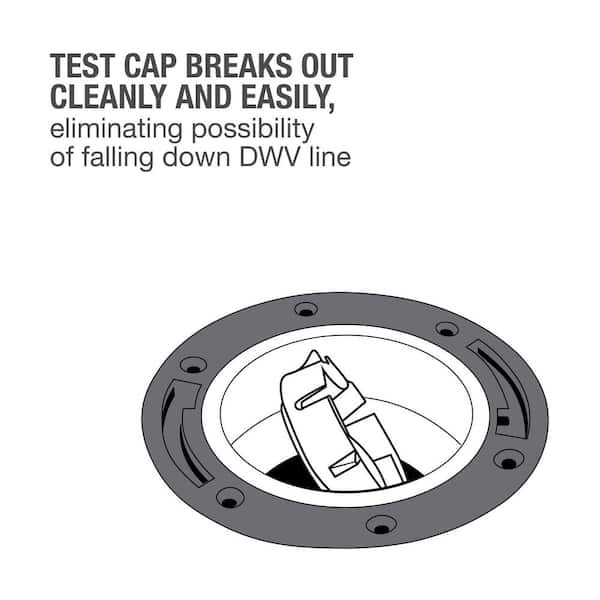
- Some caps are part of test plugs: In new construction, a flange cap might be a test plug for pressure testing the drain system. These often require a different removal method. If you see a rubber or expanding plug, check with your builder or plumber before breaking it.
- Toilet flanges come in various heights: After breaking the cap, check the height of your flange. If it sits below the finished floor, you may need a flange extender for a proper seal.
Cost Of Breaking And Replacing A Toilet Flange Cap
The actual cost is low if you do it yourself:
- Tools: Most people already have a screwdriver, utility knife, and hammer.
- Extra tools (if needed): $10-$40 for a small saw or oscillating tool.
- Flange repair kits: $10-$30, if you damage the flange.
- Professional plumber: $100-$250, if you need expert help.
Most homeowners can handle this job for the cost of basic tools.
Comparison: Diy Vs Professional Service
Here’s a quick look at the pros and cons of doing it yourself or hiring a pro.
| Option | Time Required | Skill Level | Cost | Risk |
|---|---|---|---|---|
| DIY | 30-60 minutes | Beginner to Intermediate | Low | Medium (if not careful) |
| Professional Plumber | 10-30 minutes | Expert | High | Low |
If you have the time and patience, DIY is safe and inexpensive. If you’re worried about damaging plumbing, a plumber is the safer bet.
Where To Find More Information
If you want more technical details or installation codes, check the Wikipedia page on toilet flanges. It offers diagrams and extra context for advanced projects.
Frequently Asked Questions
What If The Flange Cap Is Stuck And Won’t Break?
If the cap won’t break with a screwdriver or utility knife, try cutting a slot with a small hacksaw or oscillating tool. For metal caps, use a metal-cutting blade. Work slowly and avoid damaging the flange or pipe.
Can I Reuse A Toilet Flange Cap?
Most caps are not reusable after breaking. If you need to cover the flange again, buy a new cap or use a temporary plastic cover made for this purpose.
How Do I Know If I Damaged The Flange?
Inspect the flange after removing the cap. Look for cracks, chips, or loose areas. If you see damage, use a flange repair kit or call a plumber before installing the toilet.
Is It Safe To Break A Flange Cap Without Turning Off The Water?
Yes, the toilet flange cap covers the drain pipe, not the water supply. However, if you are removing an old toilet, always turn off the water and flush to empty the tank before starting work.
What’s The Best Tool For Breaking A Glued Plastic Cap?
A utility knife for scoring and a flathead screwdriver for prying work best. For very thick caps, a small hacksaw or oscillating tool makes the job easier and safer.
Breaking a toilet flange cap doesn’t have to be stressful. With the right approach and tools, you can handle this simple plumbing task confidently and safely, setting the stage for a trouble-free toilet installation.