
Building a floor to ceiling kitchen cabinet is an exciting project that transforms both the look and the function of your kitchen. These tall cabinets offer a seamless, built-in appearance and maximize storage in a way that standard cabinets cannot.
While the idea might sound complicated, with clear steps, proper tools, and a bit of planning, even someone new to DIY projects can succeed. This guide walks you through every stage, from planning your cabinet to installing it safely. Let’s dive into how you can create a custom, floor to ceiling kitchen cabinet that perfectly fits your space.
Why Choose Floor To Ceiling Kitchen Cabinets?
Floor to ceiling kitchen cabinets have become a top choice for modern kitchens. They provide a clean, continuous line, reduce dust collection on upper surfaces, and offer much more storage than traditional wall-hung cabinets.
Some key benefits include:
- Maximum storage: You can use every inch from floor to ceiling, which helps in small kitchens or for large families.
- Custom look: These cabinets make the kitchen look tailored and high-end.
- Less cleaning: No more hard-to-reach spaces above cabinets that collect grease and dust.
- Flexible design: You can create pantry sections, appliance garages, or display shelves.
- Adds value: Homes with clever storage solutions often attract higher prices.
Many people worry that building such a cabinet requires expert skills. In reality, with patience and attention to detail, it’s a project many homeowners can tackle themselves.
Planning Your Floor To Ceiling Cabinet
Before picking up any tools, careful planning is essential. Mistakes at this stage can lead to costly and frustrating problems later.
Measuring The Space
Start by measuring the wall where your cabinet will go:
- Height: Measure from the floor to the ceiling at several points. Ceilings aren’t always perfectly even.
- Width: Measure the total width and check for obstructions such as vents, pipes, or electrical sockets.
- Depth: Standard kitchen cabinets are usually 24 inches deep, but you can adjust based on space.
Write down all your measurements and double-check them. It’s a classic beginner mistake to cut wood before confirming the size. Remember, measure twice, cut once.
Considering Kitchen Layout
Think about how the cabinet will fit with your appliances, windows, and doors. If the cabinet is next to a refrigerator or oven, leave enough space for ventilation and opening doors. Some kitchens have uneven floors or ceilings, so plan for shims or filler strips if needed.
Sketching The Design
Draw a simple diagram of your cabinet. Divide it into sections: pantry shelves, pull-out drawers, open display shelves, or closed cupboards. Decide how many doors and shelves you want. This sketch helps you visualize the final product and guides your material list.
Selecting Materials
Your choice of materials affects durability, cost, and appearance. Common options include:
- Plywood: Strong, stable, and less likely to warp.
- MDF: Smooth and great for painting, but heavier.
- Solid wood: Beautiful but expensive and can expand or shrink with humidity.
- Melamine: Easy to clean, good for interiors.
A beginner’s tip: Use plywood for the main structure and MDF for doors and trim. This balances cost and quality.
Estimating Costs
Building your own cabinet is often cheaper than hiring a carpenter or buying custom cabinets. On average, expect to spend:
- $200–$600 for materials (plywood, MDF, hinges, handles)
- $50–$150 for finishing supplies (paint, primer, sandpaper)
- $50–$200 for tools if you need to buy or rent them
This is much less than the $1,500–$3,000 price tag for custom units from most stores.
Tools And Materials Checklist
Gathering everything before you start saves time and stress. Here’s a basic checklist:
Essential Tools
- Circular saw or table saw
- Drill and drill bits
- Screwdriver
- Measuring tape
- Carpenter’s square
- Level
- Stud finder
- Hammer or nail gun
- Clamps
- Sandpaper (various grits)
- Paintbrush and roller
Materials
- Plywood sheets (usually 3/4” thick for structure)
- MDF or plywood for doors and shelves
- Wood glue
- Screws (1 1/4” and 2 1/2”)
- Hinges and handles
- Paint or wood finish
- Edge banding (optional)
You might need a ladder for tall cabinets. Always wear safety gear: goggles, gloves, and a mask when cutting or sanding.
Design Options For Floor To Ceiling Cabinets
Your cabinet’s design should match both your kitchen style and your storage needs. Here are a few popular choices:
Full Pantry Cabinet
This is one tall unit with shelves from top to bottom. It’s perfect for storing dry goods, pots, and appliances. Adjustable shelves make it flexible.
Appliance Garage
A section with roll-up or lift-up doors can hide small appliances like toasters or coffee makers. This keeps your countertops clear.
Combination Cabinet
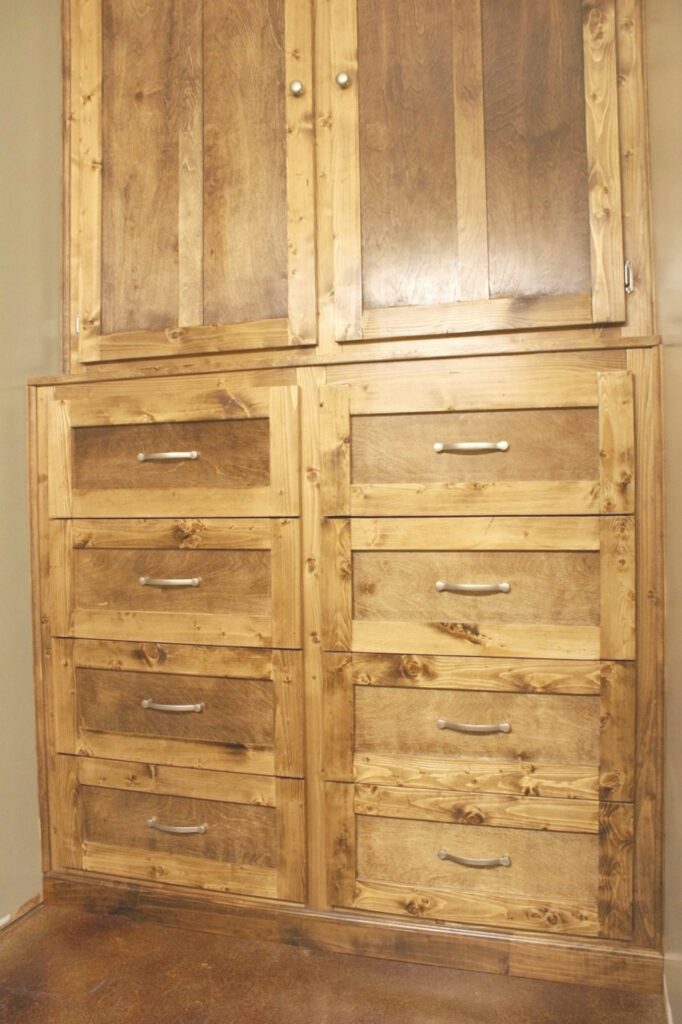
Divide the height into sections: closed cupboards at the top, open shelves in the middle, and deep drawers at the bottom. This design is both practical and attractive.
Built-in Look
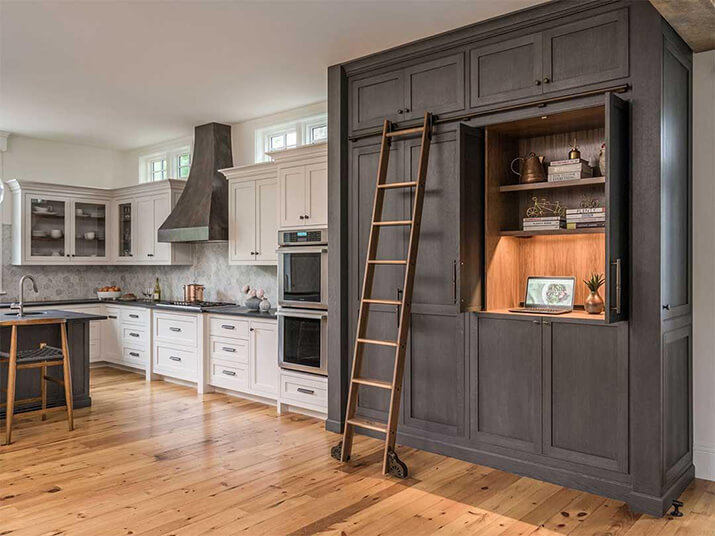
Add crown molding at the top and baseboard at the bottom to make the cabinet look like part of the wall. Paint it the same color as your other cabinets for a seamless look.
Glass Doors
Use glass for upper doors to display dishes or glassware. This adds a decorative touch and breaks up the solid mass of wood.
Step-by-step Guide: Building The Cabinet
Now comes the main part: construction. Follow these steps for a strong and beautiful floor to ceiling cabinet.
1. Preparing The Workspace
Clear the area where you’ll work. Cover floors with drop cloths to protect them. Set up your saw and tools near the kitchen if possible, but do big cuts outside to control dust.
2. Cutting The Panels
Refer to your sketch and measurements. Cut panels for:
- Two side pieces (full height)
- Top, bottom, and fixed shelf panels
- Back panel (optional, but adds strength)
- Doors (if using)
Label each piece with pencil so you don’t mix them up. Cut slowly for straight edges. For beginners, it’s easy to make mistakes here—always check measurements before cutting.
3. Drilling Pocket Holes And Assembly
For a strong structure, use pocket holes to join panels. Drill holes in the sides of shelves and cross pieces. Apply wood glue to the edges, then screw panels together. Work on a flat surface to avoid twisting.
Build the main box (two sides, top, and bottom). Slide in the fixed shelf at the height you want—most people put one about 36 inches from the floor.
4. Adding The Back Panel
Attach a plywood or MDF back panel. This keeps the cabinet square and sturdy. Nail or screw it to the sides and shelves. If the wall is uneven, you may need to scribe and trim the back edge.
5. Installing Shelves
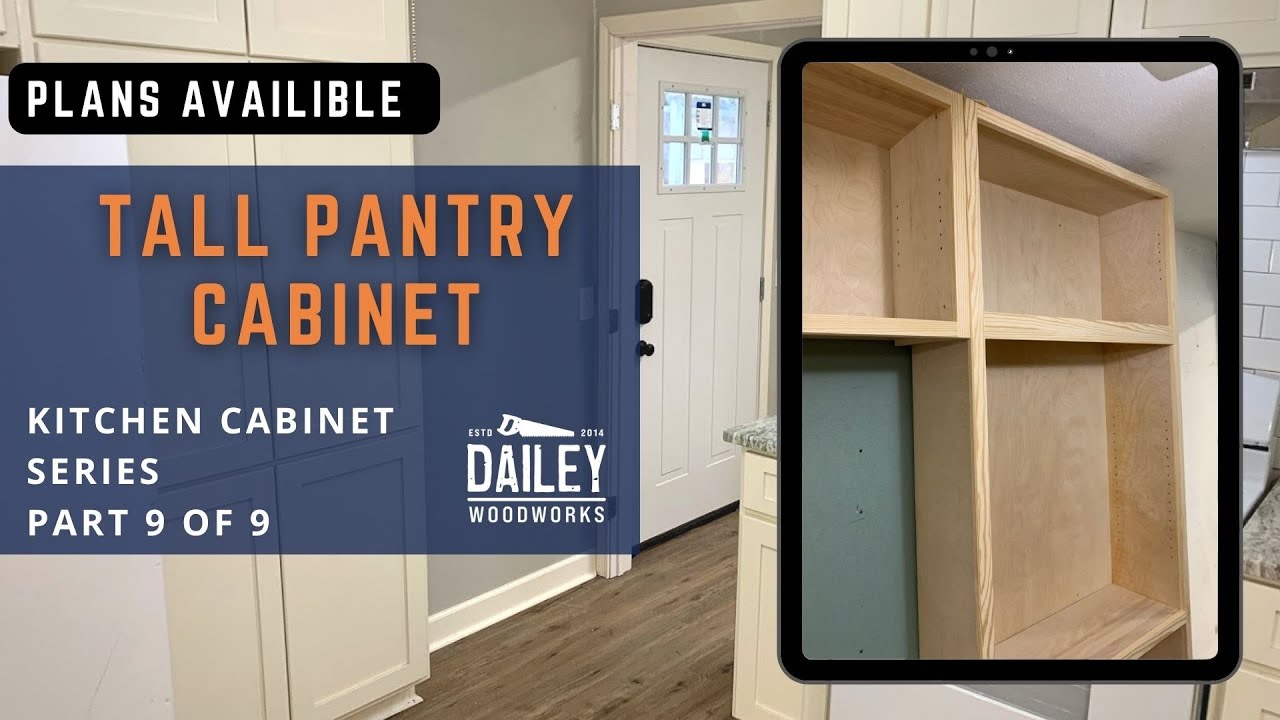
Decide if you want fixed or adjustable shelves. For adjustable shelves, drill a series of small holes in the sides and use shelf pins. Fixed shelves are screwed or nailed in place. Adjustable shelves are handy for changing needs.
6. Building And Hanging Doors
If you want doors, measure each opening carefully. Cut doors from MDF or plywood. Sand the edges smooth. Attach hinges to the doors, then screw them into the cabinet. Use a level to align everything.
A common beginner mistake: doors that don’t close evenly. To avoid this, check that the cabinet box is square before hanging doors.
7. Finishing Touches
Fill screw holes with wood filler. Sand all surfaces, starting with coarse and moving to fine sandpaper. Wipe away dust.
Paint or stain the cabinet. Use primer first if painting MDF. Apply two coats for a smooth finish. Let each coat dry fully before adding the next.
Add edge banding to raw plywood edges for a clean, professional look. Iron-on banding is quick and easy.
8. Installing The Cabinet
Move the cabinet into place. Use a level to check it is straight. If your floor or wall is uneven, slide shims under the base or behind the cabinet until it sits perfectly.
Screw the cabinet into wall studs using long screws. This step is critical for safety, especially for tall cabinets. Use a stud finder to locate solid wood behind the drywall. Secure at both the top and bottom.
9. Adding Doors, Drawers, And Hardware
Attach doors and adjust hinges so they swing smoothly. Install handles or knobs. If using drawers, slide them into place and check for smooth movement.
Add molding at the top for a finished look. Caulk any small gaps along the wall.
10. Organizing The Interior
Install shelf liners to protect the wood and make cleaning easy. Arrange items by use: heavy pots on lower shelves, everyday dishes in the middle, and rarely used items at the top.
A smart tip: Add pull-out trays or baskets for easy access to deep shelves.
Common Mistakes And How To Avoid Them
Even experienced DIYers make errors. Here’s how to avoid the most common problems:
- Skipping the wall check: Walls and floors are rarely perfectly straight or level. Always check and adjust with shims.
- Wrong measurements: Double-check every measurement before cutting. Write down numbers instead of relying on memory.
- Weak fasteners: Use screws, not just nails or glue, to hold the cabinet together and attach it to the wall.
- Poor painting prep: Sand and prime all surfaces, especially MDF, to avoid a rough finish.
- Not securing to studs: Attaching only to drywall is dangerous—find the studs and use long screws.
Credit: www.divinecabinetry.com
Advanced Tips For A Professional Finish
If you want your cabinet to look like it came from a high-end showroom, try these extra steps:
- Soft-close hinges: These prevent doors from slamming.
- Lighting: Install LED strip lights inside for a dramatic effect.
- Custom inserts: Add spice racks, tray dividers, or pull-out garbage bins.
- Crown molding: This creates a seamless look between the cabinet and ceiling.
- Paint matching: Take a door or drawer front to the paint store to match your existing cabinets.
A non-obvious tip: If your ceiling isn’t perfectly flat, leave a 1/2-inch gap at the top. Fill this with flexible caulk after installation for a neat finish.
Maintenance And Cleaning
Floor to ceiling cabinets need little maintenance, but a few habits keep them looking new:
- Wipe surfaces with a damp cloth regularly.
- Avoid harsh cleaners that damage paint or wood.
- Tighten screws and handles if they come loose over time.
- Check for moisture leaks, especially near sinks or dishwashers.
Every six months, check the alignment of doors and shelves. Small adjustments prevent wear and tear.
Floor To Ceiling Cabinets Vs. Standard Cabinets
To help you decide if floor to ceiling cabinets are right for you, compare them to standard units.
| Feature | Floor to Ceiling Cabinet | Standard Cabinet |
|---|---|---|
| Storage | Maximum – uses all vertical space | Limited by gap above cabinet |
| Cleaning | Minimal – no top surface to clean | Dust/grease collects on top |
| Visual impact | Modern, custom look | Traditional appearance |
| Installation | Challenging for beginners | Easier to install |
| Cost | Often higher | Usually lower |
Cost Comparison: Diy Vs. Professional Installation
Understanding costs helps you plan your project. Here’s a rough comparison:
| Item | DIY Build | Professional Install |
|---|---|---|
| Materials | $200–$600 | $200–$800 |
| Labor | Free (your time) | $500–$2,000 |
| Total Cost | $250–$800 | $700–$2,800 |
| Customization | Full control | Limited to carpenter’s options |
DIY saves money but takes time and effort. If you want a unique design and are comfortable learning, building it yourself is rewarding.
Safety Tips For Building And Installing
Safety should always come first:
- Wear safety goggles when cutting or drilling.
- Keep hands clear of saw blades.
- Use ear protection when using power tools.
- Work in a well-ventilated area, especially when painting.
- Don’t lift heavy panels alone—ask for help to avoid injury.
- Secure the cabinet to wall studs to prevent tipping.
A non-obvious safety insight: If you live in an earthquake-prone area, use extra brackets to anchor tall cabinets securely.
Real-life Examples And Inspiration
Many homeowners have built their own floor to ceiling cabinets and shared their success stories. For example, a family in California turned an awkward corner into a pantry with full-height cabinets, increasing storage by 40% and reducing kitchen clutter.
Another example: In a small apartment, a DIYer built a 12-inch deep, floor to ceiling cabinet beside the fridge to hold spices, baking sheets, and cleaning supplies. This added almost 20 cubic feet of storage without changing the kitchen’s footprint.
Pinterest and Houzz are full of inspiring photos. Notice how different finishes, door styles, and hardware create a unique look.
Credit: www.youtube.com
When To Call A Professional
Some projects are best left to experts, especially if:
- You need to move electrical or plumbing.
- The floor or wall is very uneven.
- The cabinet is wider than 48 inches (which can sag without extra support).
- You want a high-gloss finish that’s hard to do at home.
Hiring a pro costs more but saves time and ensures a perfect result. For more guidance, check resources like This Old House.
Frequently Asked Questions
How Do I Attach A Tall Cabinet Safely To The Wall?
Use a stud finder to locate wall studs. Drill long screws through the cabinet’s back and into at least two studs. Secure at both the top and bottom for maximum safety. Always check with a level to ensure the cabinet is straight.
What Is The Best Material For A Kitchen Cabinet?
Plywood is strong, resists warping, and holds screws well. MDF is smooth and great for painted finishes but is heavier. For most DIYers, plywood for structure and MDF for doors is a good balance.
How Much Space Should I Leave At The Top Of A Floor To Ceiling Cabinet?
Leave a 1/2-inch gap between the top of the cabinet and the ceiling. This makes installation easier and allows for small adjustments if the ceiling isn’t perfectly level. Fill the gap with caulk or molding for a seamless look.
Can I Build A Floor To Ceiling Cabinet If My Kitchen Ceiling Is Not Flat?
Yes, but you’ll need to shim the cabinet at the base and maybe scribe the top edge to match the ceiling’s shape. Flexible trim or caulk can hide small gaps.
How Long Does It Take To Build And Install A Floor To Ceiling Cabinet?
Most DIYers spend 2–3 full days on the project: one day for cutting and assembly, one for painting, and one for installation and finishing. Allow extra time for drying between paint coats.
Building a floor to ceiling kitchen cabinet is a project that pays off every day with cleaner lines, better storage, and a more organized kitchen. With the right tools, careful planning, and attention to detail, you can create a custom cabinet that rivals professional work.
Remember, patience and preparation are your best friends—take your time, measure carefully, and enjoy the process. Your kitchen will thank you for years to come.
Credit: www.woodshopdiaries.com