
Building your own kitchen pantry cabinet is a project that can transform your storage space and add value to your home. Whether you have a small kitchen or a large one, a well-designed pantry cabinet makes everyday cooking easier and keeps your kitchen organized.
Many people believe building a cabinet requires advanced skills, but with the right guidance, even beginners can achieve great results. This article will walk you through every step, from planning and choosing materials to construction, installation, and finishing touches. If you want a pantry cabinet that fits your kitchen perfectly and saves money compared to ready-made options, this guide is for you.
Why Build Your Own Kitchen Pantry Cabinet?
The main advantage of building your own pantry cabinet is customization. You can design a cabinet that fits your exact space and storage needs. Store your dry goods, spices, small appliances, and cleaning supplies in a way that makes sense for you. Many store-bought cabinets are either too small, too large, or do not match your kitchen style. By building your own, you control the size, design, color, and features.
There is also a cost benefit. Even with quality materials, building your own pantry often costs less than buying a pre-made cabinet. You can also use better materials for the same price.
Building your own cabinet can be a learning experience and a source of pride. Each time you open your pantry, you’ll know you built it yourself.
Planning Your Kitchen Pantry Cabinet
Understanding Your Needs
Before you start building, ask yourself these questions:
- How much space do you have for a pantry cabinet?
- What items do you want to store? (cans, dry goods, appliances, cleaning supplies, etc.)
- Do you want adjustable shelves, pull-out drawers, or fixed shelves?
- Will your pantry be freestanding or built-in?
Knowing the answers helps you make smart decisions about size, layout, and materials.
Measuring Your Space
Accurate measurements are essential. Measure:
- Height, width, and depth of the area where the cabinet will go
- Any obstacles, such as outlets, baseboards, or moldings
Write these measurements down. Remember, even a small error can cause big problems later.
Deciding On Cabinet Type
There are two main types:
- Freestanding Pantry Cabinet: Can be placed anywhere and moved if needed.
- Built-in Pantry Cabinet: Fixed to a wall or fitted between existing cabinets for a seamless look.
Choose based on your kitchen layout and personal preference.
Sketching Your Design
Make a simple sketch of your cabinet. Include:
- Overall dimensions
- Number and height of shelves
- Doors (single or double)
- Any extra features like drawers or spice racks
Sketching helps you visualize the final product and spot problems before you start.
Budgeting
List all the materials and tools you’ll need. Price them at your local hardware store or online. Add 10–15% extra for mistakes or changes. This step prevents surprises and helps you stay on track.
Choosing Materials For Your Pantry Cabinet
Wood Options
The choice of wood affects both the look and strength of your pantry. Common options include:
| Wood Type | Pros | Cons | Typical Cost |
|---|---|---|---|
| Plywood | Strong, stable, good for painting or staining | Edges need finishing | $$ |
| MDF (Medium Density Fiberboard) | Very smooth, easy to paint, affordable | Heavy, can swell with moisture | $ |
| Solid Wood | Natural look, very strong | More expensive, may warp | $$$ |
| Particle Board | Cheap, light | Weak, not moisture-resistant | $ |
For most projects, plywood is a good balance of strength and price. Use at least 3/4 inch (19mm) thick sheets for main panels. For doors and shelves, plywood or MDF both work well.
Hardware And Accessories
Don’t forget these essential items:
- Hinges: Choose strong, smooth hinges for doors.
- Drawer Slides: If adding drawers, use high-quality slides.
- Handles/Knobs: Match your kitchen style.
- Shelf Pins or Supports: For adjustable shelves.
- Screws and Fasteners: Use wood screws, not nails, for best strength.
Finishes
Think about how you want your cabinet to look. Popular finishes:
- Paint: For a clean, modern look.
- Stain and Clear Coat: Highlights wood grain.
- Laminate/Veneer: For a smooth, durable surface.
Pick a finish that matches your kitchen and is easy to clean.
Tools You Will Need
Building a pantry cabinet requires some basic tools. If you already do DIY projects, you may have most of these. If not, many hardware stores rent tools.
Essential tools:
- Circular Saw or Table Saw (for cutting panels)
- Drill/Driver with bits
- Measuring Tape
- Carpenter’s Square
- Level
- Clamps
- Screwdriver
- Hammer
- Sandpaper or Sander
- Paintbrushes or Roller
Optional but helpful:
- Jigsaw (for cutting curves or openings)
- Brad Nailer (for trim)
- Pocket Hole Jig (for hidden screws)
Always wear safety glasses and follow safety instructions when using power tools.
Creating Your Cabinet Cut List
A cut list is a plan showing every piece of wood you need, with its exact dimensions. This prevents waste and mistakes.
For a basic pantry cabinet (example: 80 inches tall, 30 inches wide, 16 inches deep), your cut list might look like this:
| Piece | Quantity | Dimensions | Material |
|---|---|---|---|
| Sides | 2 | 80″ x 16″ | Plywood |
| Top & Bottom | 2 | 28.5″ x 16″ | Plywood |
| Shelves | 5 | 28.5″ x 15″ | Plywood |
| Back Panel | 1 | 80″ x 30″ | 1/4″ Plywood |
| Doors | 2 | 40″ x 15″ | Plywood or MDF |
Adjust these measurements based on your own design and space.
Cutting And Preparing The Panels
Marking And Cutting
Lay out your panels on the plywood sheets. Mark each piece using a measuring tape and square for straight, accurate lines. Double-check all measurements before cutting.
Use a circular saw or table saw to cut the panels. Clamp a straight edge as a guide for cleaner cuts. Always cut slowly and steadily to avoid splintering.
Tip: Beginners often forget to account for saw blade thickness (the “kerf”). Always measure from the same edge, and allow for the kerf when planning multiple cuts from the same sheet.
Sanding
After cutting, sand all edges and surfaces with medium (120 grit) and then fine (220 grit) sandpaper. Smooth edges prevent splinters and help paint or finish look better.
Drilling Shelf Pin Holes (if Adjustable Shelves)
If you want adjustable shelves, drill small holes along the sides where shelf pins will go. Use a shelf pin jig for even spacing and straight rows.
Credit: www.thehandymansdaughter.com
Assembling The Cabinet Box
Dry Fit First
Before attaching anything, lay out all your pieces on the floor to check fit. This helps you spot mistakes before you use glue or screws.
Fastening The Panels
- Attach the top and bottom panels to the sides using wood glue and screws. Make sure everything is square using a carpenter’s square.
- Install fixed shelves the same way. For adjustable shelves, leave them out for now.
- Attach the back panel using small screws or nails. The back adds strength and keeps the box square.
Pro Insight: Many beginners skip the back panel or use very thin material. But a strong back panel is key to a sturdy cabinet. Use at least 1/4 inch plywood.
Installing Shelves
If your shelves are adjustable, insert shelf pins and place the shelves. Fixed shelves should be screwed or pinned in place.
Common Mistake: Not leaving enough space between shelves for tall items. Measure your tallest pantry items and plan shelf spacing accordingly.
Making And Attaching The Doors
Choosing Door Style
You can make slab doors (flat panels) or frame-and-panel doors (a frame with a center panel). Slab doors are easier for beginners.
Cutting Doors
Cut the doors to fit the cabinet opening, leaving a 1/8 inch (3mm) gap on all sides for clearance.
Attaching Hinges
Mark and drill pilot holes for hinges. Install hinges on the doors first, then hold the door in place and mark screw locations on the cabinet. Screw in the hinges.
Tip: Use a spacer block under the door to keep it level while you attach it.
Adding Handles Or Knobs
Drill holes for handles or knobs. Measure carefully so handles line up on both doors.

Credit: www.reddit.com
Finishing Your Pantry Cabinet
Filling And Sanding
Fill any screw holes or gaps with wood filler. Let it dry, then sand smooth.
Painting Or Staining
- If painting, use a primer first, then 2 coats of paint.
- If staining, apply stain with a cloth, wipe off excess, then add a clear protective finish.
Let each coat dry fully before adding the next. Sand lightly between coats for the best finish.
Attaching The Cabinet To The Wall (if Built-in)
For safety, especially in homes with children, anchor the cabinet to the wall. Find wall studs using a stud finder, and screw through the back panel into the studs.
Non-Obvious Insight: Always use screws long enough to go at least 1.5 inches into the stud. Short screws can pull out over time, especially with heavy pantry items.
Adding Custom Features
Pull-out Drawers Or Baskets
Adding pull-out drawers or wire baskets can make deep cabinets easier to use. Use quality drawer slides and follow the manufacturer’s instructions for installation.
Door Storage
Many store-bought pantry cabinets waste door space. Add spice racks, small baskets, or hooks to the inside of doors for extra storage.
Lighting
If your pantry is deep or in a dark corner, install LED strip lights or battery-powered puck lights inside. This makes it much easier to see what you have.
Labels And Organizers
For the finishing touch, use shelf labels or clear organizers to keep everything in its place. This helps even the most organized cabinets stay tidy.
Comparing Diy Vs. Store-bought Pantry Cabinets
If you’re still deciding whether to build or buy, here’s a quick comparison:
| Feature | DIY Pantry Cabinet | Store-Bought Pantry Cabinet |
|---|---|---|
| Customization | High | Low to Medium |
| Cost | Usually Lower | Usually Higher |
| Quality of Materials | Control over quality | Varies (often lower grade) |
| Time Required | High (several days) | Low (ready to use) |
| Skill Needed | Basic to Intermediate | None |
| Satisfaction | Very High (pride of building) | Varies |
Tips For A Successful Pantry Cabinet Build
- Take your time. Rushing leads to mistakes.
- Double-check all measurements before cutting.
- Practice drilling and screwing on scrap wood if you’re new to woodworking.
- Use the right screws for each job. For most joints, 1.25–1.5 inch wood screws are best.
- Label your parts as you cut them to avoid confusion.
- Dry fit before gluing or screwing anything permanently.
- Keep your workspace clean to avoid losing small parts.
- Paint or stain panels before final assembly for a neater finish (especially doors and shelves).
- Test doors and drawers for smooth operation before finishing.
- Ventilate your workspace when painting or staining.

Credit: www.youtube.com
Common Beginner Mistakes (and How To Avoid Them)
- Skipping the planning stage: Leads to cabinets that don’t fit or function well.
- Ignoring wall studs: Makes wall-mounted cabinets unsafe.
- Not leaving enough shelf clearance: Measure your tallest items and add a little extra space.
- Poor sanding or painting: Results in a rough or streaky finish. Take your time with prep.
- Using the wrong wood thickness: Thin panels can sag under weight. Use at least 3/4 inch for main panels.
- Over-tightening screws: Can split wood, especially near edges. Use moderate pressure.
Real-world Example: Building A Pantry In A Small Kitchen
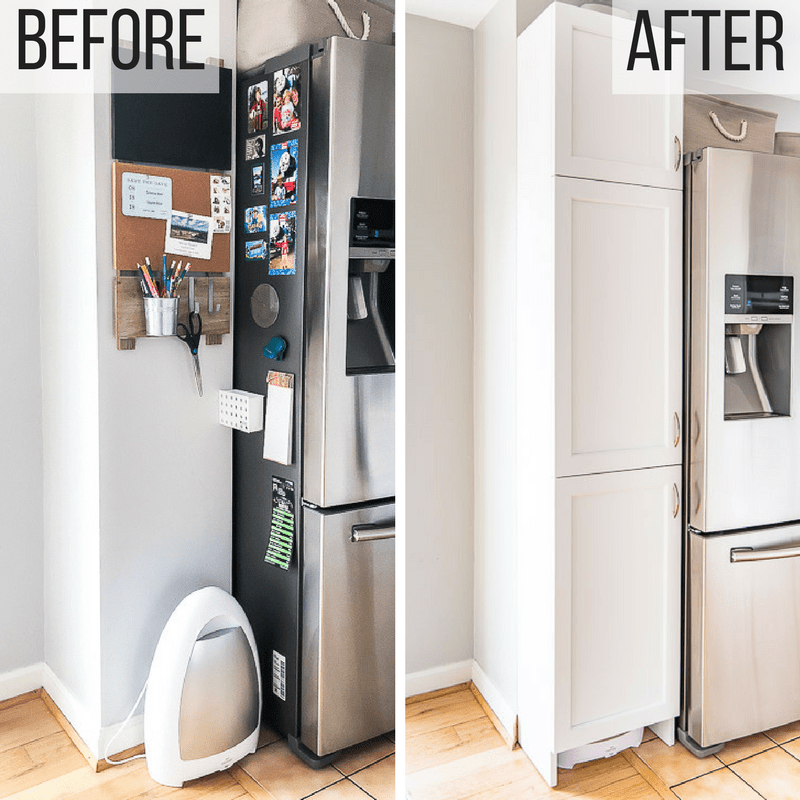
Maria wanted a pantry cabinet for her small apartment kitchen. She measured a corner space next to her fridge: 72 inches high, 24 inches wide, 15 inches deep. She made a simple sketch with four adjustable shelves and slab doors. Using plywood, she cut and assembled the box, added a back panel, and installed the shelves. She chose bright white paint to match her kitchen. The whole project cost under $200, including hardware and paint, and took one weekend. Now, Maria has space for all her dry goods and even a few small appliances. She says the most important step was careful measuring and planning before she started.
What Most People Overlook
- Ventilation: Pantries can get stuffy. Leave a small gap at the top or use louvered doors to let air flow.
- Floor Leveling: Kitchen floors are not always flat. Use adjustable feet or shims to level the cabinet so doors close properly.
- Future Needs: Build with extra shelf space or adjustable shelves to adapt as your storage needs change.
Maintaining Your Pantry Cabinet
To keep your pantry looking and working its best:
- Wipe up spills right away to prevent stains.
- Check hinges and handles every few months and tighten if needed.
- If you used paint, clean surfaces with a mild cleaner—not harsh chemicals.
- For wood cabinets, reapply a clear finish every few years to protect from moisture.
When To Get Professional Help
While most people can handle a basic pantry cabinet build, some situations call for expert help:
- If your pantry will be very large or floor-to-ceiling
- If you need electrical outlets or lights installed inside
- If your kitchen walls or floors are very uneven
- If you want a built-in look that matches existing cabinets exactly
Professionals can also help with custom features like pull-out trays, integrated lighting, and more.
Further Learning And Resources
If you want more detailed plans, videos, or design ideas, there are many helpful resources online. One recommended site is This Old House, which offers free project guides and videos for DIY home improvements.
Frequently Asked Questions
How Long Does It Take To Build A Kitchen Pantry Cabinet?
Most DIYers can build a basic pantry cabinet in 2–3 days, including painting or staining time. More complex designs or built-in cabinets may take longer.
What Is The Best Wood For A Pantry Cabinet?
Plywood is a great choice because it’s strong, stable, and widely available. Use at least 3/4 inch thick panels for sides and shelves. MDF is good for doors or panels that will be painted.
Do I Need Special Tools To Build A Pantry Cabinet?
You need basic woodworking tools: saw, drill, screwdriver, level, clamps, and sander. Some optional tools like a pocket hole jig or brad nailer can make the job easier but are not required.
How Can I Make My Pantry Cabinet More Organized?
Use adjustable shelves, add pull-out drawers or baskets, and use clear containers or labels. Door-mounted spice racks and shelf dividers also help maximize space.
Can I Build A Pantry Cabinet If I Have No Woodworking Experience?
Yes, but start with a simple design and take your time. Watch videos and read guides for each step. Practice on scrap wood before cutting your actual panels.
Building your own kitchen pantry cabinet is a rewarding project that can save money, improve your kitchen, and give you skills for future DIY projects. With careful planning and attention to detail, you can create a pantry that fits your space and makes your kitchen a more enjoyable place to cook and gather.