Canning green beans is a practical way to enjoy your summer harvest all year round. Many home cooks want faster, safer ways to preserve vegetables, and the Instant Pot often comes up as a possible solution. But can you safely can green beans in an Instant Pot?
The answer is more complex than you might expect. This guide will walk you through everything you need to know, from green bean preparation to safety steps, and will help you avoid common mistakes that even experienced home canners sometimes make.
This article is for anyone who wants to try canning green beans using an Instant Pot, whether you have years of experience or are just starting. You will learn every step, from selecting the right green beans to understanding the science behind pressure canning.
You will also get practical tips, safety warnings, and advice on how to get the best results. Let’s explore how to can green beans in an Instant Pot, so you can enjoy crisp, flavorful beans at any time.
Can You Safely Can Green Beans In An Instant Pot?
Before you start, it’s important to know the difference between pressure canning and pressure cooking. Most Instant Pots are pressure cookers, not canners. The U.S. Department of Agriculture and experts like the National Center for Home Food Preservation state that Instant Pots and other electric pressure cookers are not approved for pressure canning low-acid foods like green beans.
Why does this matter? Green beans are a low-acid vegetable, which means they need to be processed at high temperatures (at least 240°F/116°C) to safely kill bacteria like *Clostridium botulinum* that cause botulism. Standard pressure canners can reach and maintain these temperatures. Most Instant Pots cannot.
Key insight: Even if your Instant Pot has a “canning” button, it may not actually reach or hold the necessary temperature and pressure. The sensors and cycles are different from a true pressure canner. This can lead to unsafe food, even if the jar seals.
What does this mean for you? You can use the Instant Pot for small-batch pressure cooking or for processing high-acid foods (like fruit jams), but you should not use it as your only canning tool for green beans. For safe home canning, you need a tested pressure canner.
Selecting And Preparing Green Beans
Great canned green beans start with the right beans. Not all green beans are created equal, and the choices you make at this stage affect the final result.
- Type: Use fresh, young green beans. The beans should snap easily when bent. Avoid beans that are limp, wrinkled, or have rust spots.
- Varieties: Both string beans and snap beans work well. Avoid beans that are too mature, as they can get tough during canning.
- Amount: About 1 pound (450 grams) of green beans yields 1 pint (about 2 cups) of finished product. Plan for at least 2 pounds per quart jar.
Pro tip: Don’t use beans that have been sitting in the fridge for more than a week. The fresher the beans, the better the taste and texture.
How to prepare:
- Wash beans thoroughly in cool water.
- Trim off both ends.
- Cut or snap beans into 1- to 2-inch pieces.
Equipment You Need
For safe and effective canning, you need the right tools. Here’s a quick overview of what you should have:
- Pressure canner: Not just a pressure cooker. A true pressure canner has a locking lid, gauge, and a rack.
- Canning jars: Use only jars designed for home canning (Mason jars).
- New lids and bands: Old lids may not seal properly.
- Jar lifter: For safe handling of hot jars.
- Wide-mouth funnel: Makes filling jars easier and cleaner.
- Bubble remover: A plastic or wooden stick to release air bubbles.
- Towels and pot holders: For safety and to avoid burns.
Comparing Instant Pot Vs. Pressure Canner
Here’s how a typical Instant Pot stacks up against a traditional pressure canner for home canning safety:
| Feature | Instant Pot | Pressure Canner |
|---|---|---|
| Max Pressure | 11.6 psi | Up to 15 psi |
| Approved for Low-Acid Foods | No | Yes |
| Holds Temperature Steady | No | Yes |
| Batch Size | 2-4 pints | 7-9 quarts |
Insight: The pressure canner is the only safe option for green beans and other low-acid foods. If you want to can green beans, invest in a proper canner.
Step-by-step Guide: How To (safely) Can Green Beans
While you cannot pressure can green beans in a typical Instant Pot, you can use the Instant Pot for prepping beans or for small-batch pressure cooking. This guide focuses on the safe method—using a traditional pressure canner.
Step 1: Prepare Your Green Beans
- Wash, trim, and cut beans as described earlier.
- Blanching is optional, but it helps keep color and texture. For blanching, boil beans for 2-3 minutes, then transfer to ice water.
Step 2: Sterilize The Jars
- Wash jars, lids, and bands in hot, soapy water.
- Rinse well.
- Place jars in simmering water (not boiling) until ready to fill.
Step 3: Pack The Beans
- You can use the raw pack or hot pack method:
- Raw pack: Place raw beans tightly into jars.
- Hot pack: Heat beans in boiling water for 5 minutes, then pack.
- Fill jars with beans, leaving 1 inch (2.5 cm) headspace.
- Add boiling water to cover beans, maintaining the headspace.
Step 4: Remove Air Bubbles
- Slide a bubble remover or plastic knife around the inside of the jar.
- Add more water if needed.
Step 5: Wipe Rims And Apply Lids
- Wipe rims with a clean, damp cloth.
- Place new lids on jars and screw on bands until finger-tight.
Step 6: Set Up Your Pressure Canner
- Add the amount of water recommended by the manufacturer (usually 2-3 inches).
- Place jars on the rack inside the canner, not touching each other.
- Lock the lid in place.
Step 7: Vent And Heat
- Heat the canner on high.
- Let steam vent for 10 minutes before placing the weight or closing the vent.
Step 8: Process The Jars
- Process pint jars at 10 psi for 20 minutes.
- Process quart jars at 10 psi for 25 minutes.
- Adjust time and pressure for elevation above 1,000 feet (see next section).
Step 9: Cool And Remove Jars
- Turn off heat and let pressure return to zero naturally.
- Wait 5-10 more minutes, then carefully remove lid (away from your face).
- Use a jar lifter to transfer jars to a towel-lined counter.
- Let jars cool for 12-24 hours.
Step 10: Check Seals And Store
- After cooling, check lids. They should not flex up and down.
- Remove bands, wipe jars, label with date, and store in a cool, dark place.
Common mistake: Skipping the venting step can lead to under-processed food.
Altitude Adjustments For Pressure Canning
Your altitude affects the pressure needed to safely can green beans. Water boils at lower temperatures at higher altitudes, so you must increase pressure.
Here’s a simple reference:
| Altitude | Pressure (Weighted Gauge) | Pressure (Dial Gauge) |
|---|---|---|
| 0 – 1,000 ft | 10 psi | 11 psi |
| 1,001 – 2,000 ft | 15 psi | 11 psi |
| 2,001 – 4,000 ft | 15 psi | 12 psi |
| 4,001 – 6,000 ft | 15 psi | 13 psi |
| 6,001 – 8,000 ft | 15 psi | 14 psi |
Tip: Always check your local altitude and follow your canner’s instructions.
How The Instant Pot Can Help In Green Bean Canning
While you cannot use the Instant Pot for pressure canning green beans, it can still make parts of the process easier. For example:
- Blanching beans: Use the “Steam” function for quick blanching before packing.
- Sterilizing jars: Run jars through a short steam cycle (though not a replacement for boiling).
- Warming water: Quickly heat water for filling jars.
- Cooking small batches: You can pressure cook green beans to eat now, but not for long-term storage.
Non-obvious insight: Some people use the Instant Pot for “steam canning,” but this is only safe for high-acid foods like fruit jams, not for green beans.
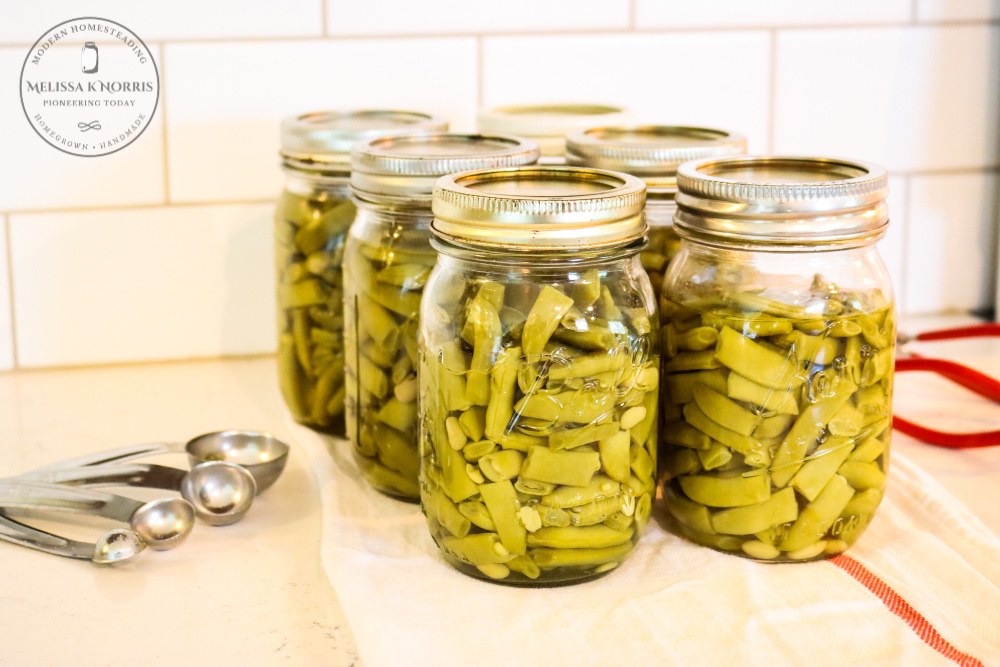
Credit: melissaknorris.com
How To Store Home-canned Green Beans
Safe storage ensures your hard work lasts. Here’s how to keep your canned green beans fresh:
- Store in a cool, dark place (50-70°F/10-21°C is ideal).
- Avoid direct sunlight, which can break down nutrients.
- Keep jars off the floor and away from heat sources.
- Check seals before using. If the lid is loose or bulges, discard the contents.
Properly canned and stored green beans can last up to 1 year with good flavor and quality.
Signs Of Spoilage And What To Do
Food safety is critical when canning low-acid foods. Learn the signs of spoilage to protect yourself and your family:
- Bulging lids: Means gas was produced by bacteria.
- Leaking jars: Indicates a failed seal.
- Cloudy liquid: Can be a sign of spoilage.
- Off smell or mold: Do not taste! Discard immediately.
If you see any of these signs, throw the food away. Botulism is odorless and tasteless, and even a small amount can be deadly.
Flavoring And Seasoning Your Green Beans
Home-canned green beans are usually preserved with just water and salt, but you can safely add flavor:
- Salt: 1/2 to 1 teaspoon per quart jar (optional).
- Garlic cloves or peppercorns: Add 1 or 2 to each jar for a subtle flavor.
- Herbs: Small sprigs of dill or thyme can enhance taste.
Never add oils, fats, or dairy to jars before canning, as these can cause spoilage.
Troubleshooting Common Green Bean Canning Problems
Even experienced canners sometimes run into problems. Here are some common issues and how to fix them:
- Jars do not seal: Old lids, improper cleaning, or over-tightening bands can cause this. Always use new lids and follow instructions.
- Beans float in the jar: This happens if beans are packed too loosely or if there are air bubbles. Pack beans tightly and remove air bubbles before sealing.
- Cloudy liquid: May be caused by hard water or using table salt instead of canning salt. Always use canning salt and filtered water.
- Soft or mushy beans: Over-processing or using overripe beans causes this. Use young beans and process for the recommended time only.
Pro tip: Always write down what you did, so you can adjust next time.
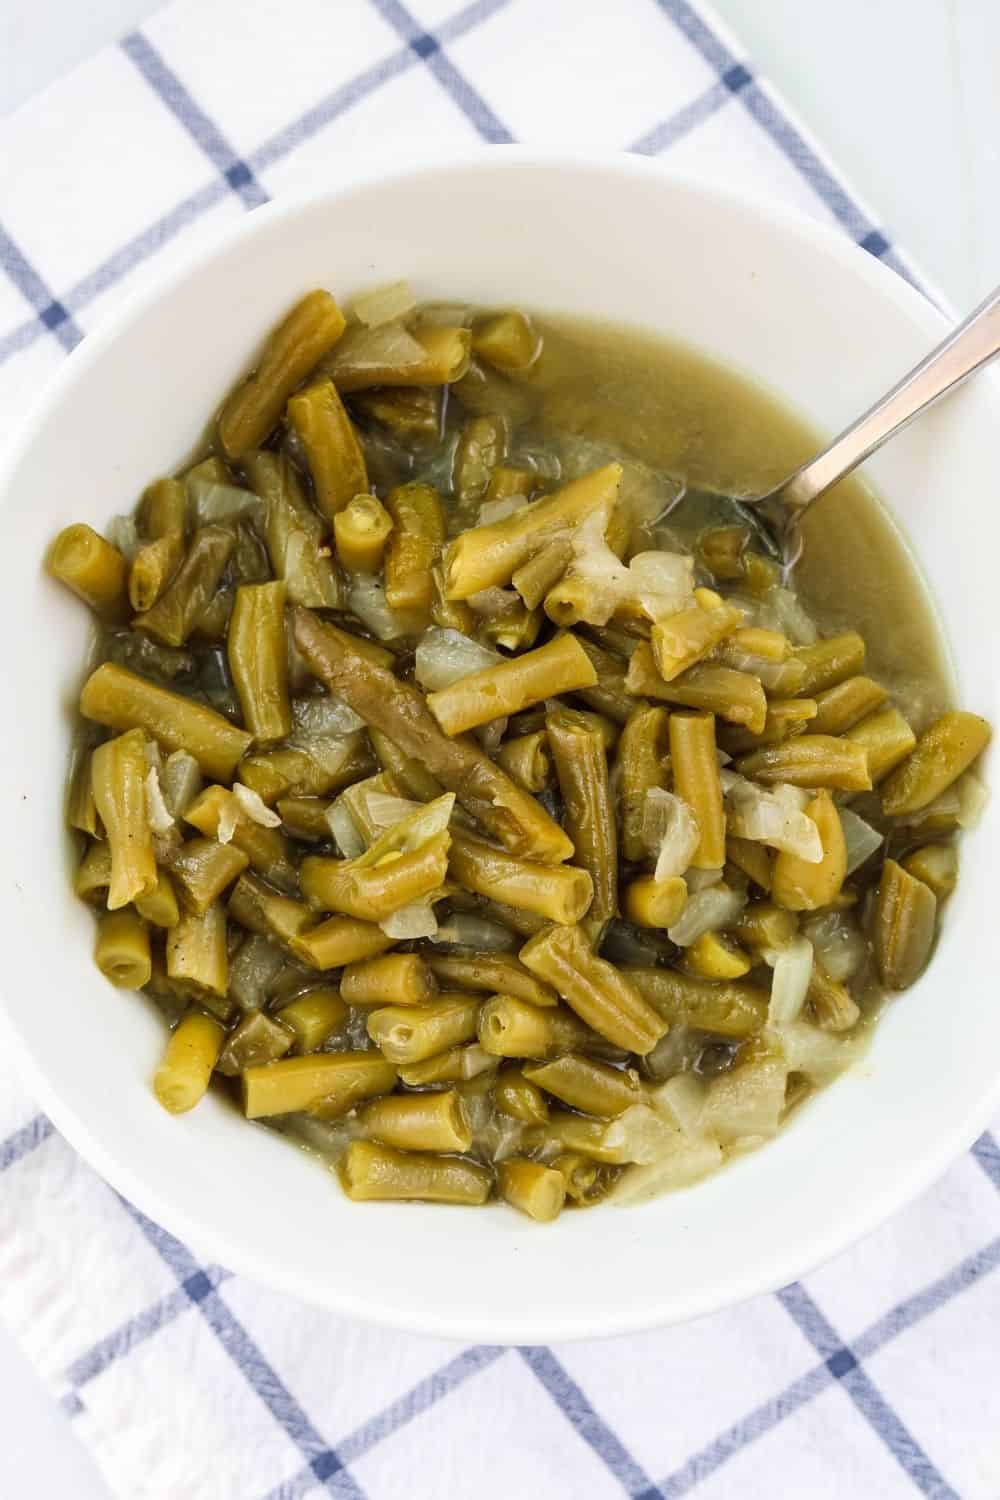
Credit: marginmakingmom.com
Why Pressure Canning Is Essential For Green Beans
Many people ask why you can’t just use a boiling water bath for green beans. The answer is simple: safety.
- Boiling water reaches 212°F (100°C), but botulism spores survive this temperature.
- Pressure canning reaches 240°F (116°C) or more, which is required to kill dangerous bacteria.
Never use the water bath method for green beans. This is a common and dangerous mistake.
Essential Safety Steps For Home Canners
Safe canning is more than just following a recipe. Here are the steps you should never skip:
- Always inspect jars and lids for cracks or dents before use.
- Follow tested, up-to-date recipes.
- Check your pressure canner’s gauge yearly for accuracy.
- Adjust for altitude as needed.
- Label jars with the date and contents.
Non-obvious insight: Avoid “hack” recipes from unverified blogs or videos. Stick to trusted sources like the USDA or university extension services.
How To Use Home-canned Green Beans
Canned green beans are versatile and can be used in many dishes:
- Soups and stews: Add beans near the end of cooking.
- Salads: Rinse and toss with oil, vinegar, and herbs.
- Side dishes: Sauté with a little butter and garlic.
- Casseroles: Mix into baked dishes for extra nutrition.
Tip: Home-canned beans are softer than fresh, so add them last in recipes to keep their shape.
Instant Pot For Small-batch Green Bean Cooking
If you do not plan to store green beans for months, you can use the Instant Pot to quickly cook and enjoy them. Here’s how:
- Add 1 cup water to the Instant Pot.
- Place green beans on the trivet or in a steamer basket.
- Cook at high pressure for 2-3 minutes.
- Quick-release pressure and season as desired.
Reminder: These beans must be eaten or refrigerated within a few days. They are not preserved for long-term storage.
The Science Behind Safe Canning
Canning is more than just a kitchen tradition—it’s food science. When you pressure can green beans, you:
- Remove air and create a vacuum seal, preventing new bacteria from entering.
- Use high heat and pressure to kill bacteria and spores.
- Keep food safe for months or even years.
Example: In 2018, the CDC reported several cases of botulism in the U.S. caused by improper home canning. Most incidents involved low-acid foods canned in water baths or electric pressure cookers.
Sustainable Canning: Reducing Food Waste
Home canning helps you avoid waste and save money. For example, a family with a large garden can preserve up to 20 pounds (9 kg) of green beans per year, reducing the need to buy canned vegetables at the store.
- Canning also reduces food packaging waste.
- You can reuse jars for years if handled carefully.
- Home-canned beans contain no preservatives or additives, making them healthier for your family.
Where To Find Tested Canning Recipes
There are many resources for safe, tested canning recipes. The best options include:
- National Center for Home Food Preservation (https: //nchfp.uga.edu)
- State university extension programs
- USDA Complete Guide to Home Canning
For more in-depth guides and scientific information, check the National Center for Home Food Preservation.
Frequently Asked Questions
Can I Water-bath Can Green Beans?
No. Water-bath canning does not reach the temperature needed to kill dangerous bacteria in low-acid foods like green beans. You must use a pressure canner.
My Instant Pot Has A Canning Setting. Is It Safe?
Even with a “canning” button, most Instant Pots do not reach or maintain the required pressure for safe canning. Always use a tested pressure canner for green beans.
How Long Do Home-canned Green Beans Last?
If stored in a cool, dark place with a good seal, home-canned green beans can last up to 1 year. Always check for signs of spoilage before eating.
Do I Have To Add Salt To The Jars?
No, salt is for flavor only and does not affect safety. You can safely can green beans with or without salt.
What Should I Do If A Jar Does Not Seal?
You can reprocess the jar within 24 hours or refrigerate and use the beans within a few days. Do not try to force the lid to seal.
Home canning is a rewarding way to preserve your green beans, but safety must always come first. While the Instant Pot is a great kitchen tool, it is not a substitute for a real pressure canner when it comes to green beans.
With the right preparation, equipment, and knowledge, you can enjoy garden-fresh green beans all year long—knowing every jar is safe, delicious, and made with care.

Credit: www.tasteofhome.com