
Changing your kitchen cabinet color is one of the most effective ways to give your kitchen a new look without spending a fortune. Many homeowners dream of a fresh, modern kitchen, but full renovations are expensive and time-consuming. Fortunately, updating cabinet color can create a transformation that makes your kitchen feel brand new.
If you choose the right method and follow some key steps, you can achieve a professional-looking result even if you have no prior experience.
In this guide, you’ll learn exactly how to change your kitchen cabinet color from start to finish. We’ll cover practical steps, material choices, preparation, painting, and finishing. You’ll also find tips for choosing the right color, avoiding common mistakes, and making the change last for years.
Whether you want a simple update or a dramatic new style, this article will give you everything you need to know.
Why Change Your Kitchen Cabinet Color?
Many people ask if it’s really worth the effort to paint or refinish kitchen cabinets. The answer is usually yes, for a few key reasons:
- Cost savings: Painting is much cheaper than replacing cabinets. New cabinets can cost thousands, while painting costs a fraction.
- Quick transformation: You can finish the project in a few days, not weeks.
- Personal style: You can choose any color to match your taste and home decor.
- Increase value: A modern kitchen with fresh cabinets can raise your home’s market value.
A 2022 survey by Houzz found that more than 60% of homeowners who updated their kitchens chose to change their cabinet color, showing just how popular this project is.
Choosing The Right Method: Paint, Stain, Or Wrap
Before starting, it’s important to choose the best way to change your cabinet color. There are three main options: painting, staining, and using vinyl wraps. Each has pros and cons. Here’s a simple comparison:
| Method | Best for | Pros | Cons |
|---|---|---|---|
| Painting | Any color or finish | Wide choice, covers old color, durable | More prep, can chip if done poorly |
| Staining | Wood cabinets | Shows natural wood, classic look | Limited colors, needs real wood |
| Vinyl Wrap | Quick updates, renters | No mess, removable, fast | Less durable, limited styles |
Non-obvious insight: Many people forget that not all cabinets can be stained. If your cabinets are laminate or MDF (not real wood), stain won’t work. For these, painting or wrapping is the only option.

Credit: help.roomsketcher.com
Deciding On A New Color
Your new cabinet color will set the mood for your kitchen. Here are practical tips for choosing a color that looks great and works for your space:
- Consider light: Light colors (white, cream, light gray) make kitchens look bigger and brighter. Dark colors (navy, forest green, black) add drama but can make small kitchens feel smaller.
- Match your style: For modern kitchens, try shades like matte gray or deep blue. For classic styles, white or warm beige works well.
- Test samples: Paint small test areas or use color swatches on your cabinets before deciding.
- Think about resale: If you may sell your home soon, neutral colors appeal to more buyers.
- Hardware contrast: Remember, your cabinet handles and knobs will look different against new colors. Try to visualize the full effect.
A non-obvious tip: Always check your chosen color at different times of day. Kitchen lighting changes a lot, and a color that looks perfect in the morning may seem too bright or dull at night.
What You Need: Tools And Materials
Gathering the right materials before you start will save you many headaches. Here’s a complete list for painting kitchen cabinets:
- Screwdriver (for removing doors and hardware)
- Mild cleaning solution (like dish soap or TSP)
- Sponge and cloths
- Sandpaper (120 and 220 grit)
- Tack cloth (removes dust after sanding)
- Painter’s tape (to protect walls and edges)
- Drop cloths or plastic sheets
- High-quality primer (stain-blocking is best)
- Cabinet paint (acrylic or alkyd is ideal)
- Paintbrushes and rollers (foam rollers give smooth finish)
- Small paint tray
- Drill or screwdriver (to reattach hardware)
- New handles or knobs (optional)
If you plan to stain, you’ll need wood stain, a clean rag, and a clear polyurethane finish. For vinyl wraps, get a sharp utility knife, squeegee, and heat gun.
Practical tip: Invest in good brushes and rollers. Cheap ones leave streaks and hairs, ruining your finish.
Step 1: Prepare Your Kitchen And Cabinets
Preparation is the most important step. Rushing here leads to poor results later. Follow these steps:
- Clear the area: Remove small appliances and cover counters and floors with drop cloths.
- Remove doors and hardware: Unscrew all doors, drawers, and handles/knobs. Label each door and its hardware with a piece of tape so you remember where everything goes.
- Clean thoroughly: Kitchen cabinets collect grease and dirt. Wash all surfaces with a degreaser or strong dish soap. Rinse and let dry.
- Fill holes and repair damage: Use wood filler to fix dents or scratches. Let it dry, then sand smooth.
- Sand surfaces: Sand all cabinet faces, doors, and edges lightly. This helps the primer and paint stick. Use 120 grit for rough surfaces, then 220 for a smooth finish.
- Remove dust: Wipe everything with a tack cloth after sanding.
Experience-based guide: One mistake beginners make is skipping sanding, especially if the old paint seems “fine.” Sanding is critical for paint to stick well and last.
Step 2: Mask And Protect
Use painter’s tape to cover edges where cabinets meet walls, floors, or backsplashes. Tape off inside cabinet boxes if you’re not painting them. Lay plastic sheets over appliances and floors.
If you have open shelving or glass doors, tape off glass or shelves to avoid paint splatters.
Non-obvious insight: Open windows and use fans. Good ventilation helps paint dry evenly and keeps fumes from building up.
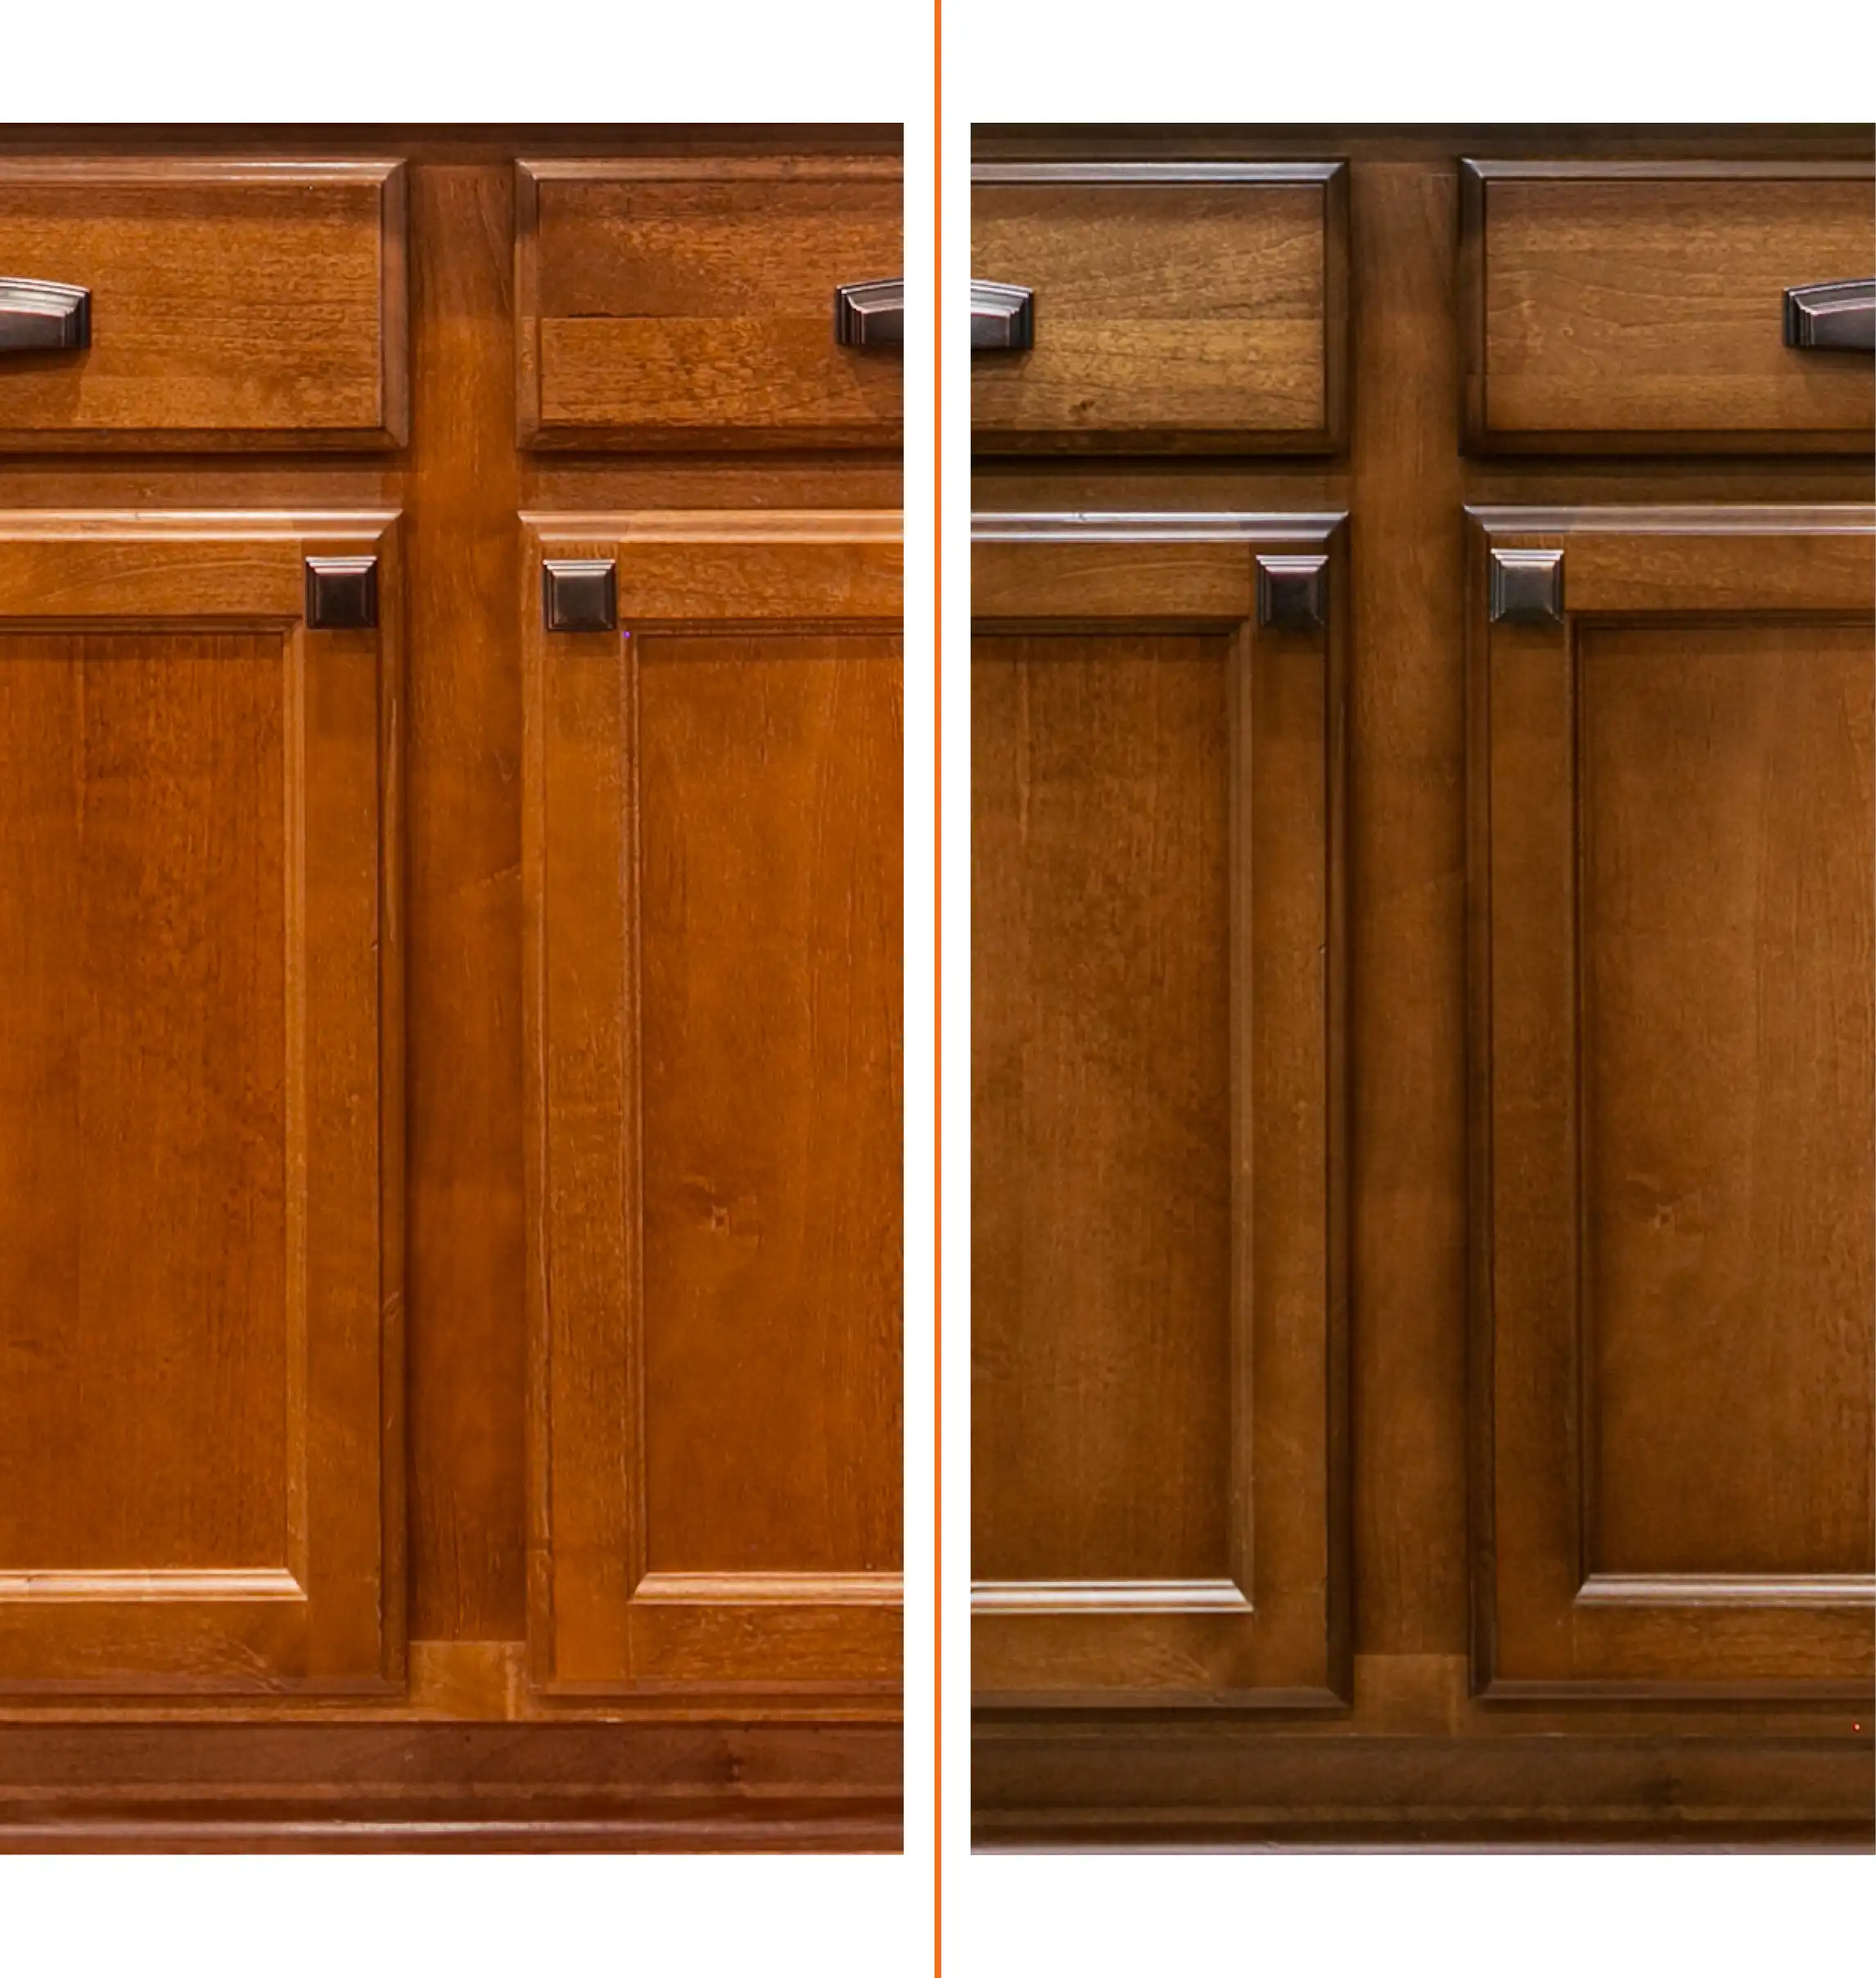
Credit: www.nhance.com
Step 3: Prime The Cabinets
Primer is the key for a long-lasting finish. It blocks stains, seals wood, and helps paint stick. Here’s how to prime:
- Stir the primer well before use.
- Use a brush for corners and edges, and a small foam roller for flat surfaces.
- Apply thin, even coats. Don’t overload the brush or roller.
- Let dry completely—usually 2–4 hours (check your primer’s instructions).
- Lightly sand between coats with 220 grit sandpaper for smoothness, wiping away dust.
If your cabinets are dark or have a strong wood grain, two coats of primer may be needed.
Practical advisor tip: Tinted primer (a shade close to your final color) makes covering dark cabinets easier.
Step 4: Paint Or Stain The Cabinets
Now for the fun part—adding color! The method depends on your choice:
Painting Cabinets
- Stir the paint well and pour into a small tray.
- Use a brush for edges and details, and a foam roller for flat areas.
- Apply thin coats to avoid drips and bubbles.
- Let each coat dry fully (4–6 hours for most paints) before adding another.
- Lightly sand between coats for a flawless finish.
- Two coats are usually enough, but dark colors may need three.
Staining Cabinets
- Use a clean rag or brush to apply wood stain in the direction of the grain.
- Wipe off excess after a few minutes—more time means deeper color.
- Let dry fully before adding another coat or clear finish.
- Always finish with a protective clear coat (polyurethane) for durability.
Using Vinyl Wraps
- Cut wrap to size, peel backing, and stick to cabinet surfaces.
- Use a squeegee to press out bubbles.
- A heat gun helps wrap curves and corners smoothly.
- Trim edges with a sharp knife.
Common mistake: Rushing to reassemble cabinets before the paint or stain is fully dry. This can leave marks or smudges. Be patient—wait at least 24 hours after the final coat.
Step 5: Reassemble And Add Finishing Touches
Once everything is completely dry, it’s time to put your kitchen back together:
- Remove painter’s tape carefully to avoid peeling paint.
- Reattach doors and hardware using your labels to match each piece to the right spot.
- Install new handles or knobs if you want a new look.
- Clean up all surfaces, removing dust and paint spots.
Calm expert tip: If you want a factory-smooth look, consider replacing hinges with “soft close” models. They’re easy to install and make cabinets quieter and more modern.
Comparing Paint Types For Kitchen Cabinets
Choosing the right paint is important for a durable, easy-to-clean finish. Here’s a quick guide to common options:
| Paint Type | Finish | Durability | Best For |
|---|---|---|---|
| Latex (Acrylic) | Satin, semi-gloss | Good | DIYers, easy cleanup |
| Alkyd (Hybrid) | Satin, semi-gloss | Excellent | High-traffic kitchens |
| Oil-based | Semi-gloss, gloss | Very high | Professional use, classic look |
Straight-to-the-point helper: For most homeowners, acrylic or hybrid alkyd paints are best. They’re easy to use, clean up with water, and are durable enough for daily kitchen use.
How Long Does It Take?
Changing your kitchen cabinet color is a project you can finish in a long weekend, but timing depends on your method and kitchen size. Here’s a rough estimate for a medium kitchen (15–20 cabinets):
- Preparation and cleaning: 1 day
- Priming and drying: 1 day
- Painting (2 coats) and drying: 2 days
- Reassembly: Half day
Plan for at least 3–4 days total, especially if you need to let paint dry overnight.
Non-obvious tip: Always check paint or stain drying times on the label. Humidity and temperature can make drying slower.
How Much Does It Cost?
The cost can vary based on materials and kitchen size, but here’s a simple breakdown for a DIY project:
| Item | Estimated Cost (USD) |
|---|---|
| Primer (1 gallon) | $30–$40 |
| Paint (1 gallon) | $35–$60 |
| Brushes & rollers | $15–$30 |
| Sandpaper, cleaning, tape | $20–$30 |
| Optional: New hardware | $40–$120 |
| Total (DIY, mid-size kitchen) | $100–$250 |
Professional painters usually charge $2,000–$6,000 for a full kitchen, depending on location and kitchen size.
Making Your New Color Last
A freshly painted kitchen looks amazing—but how do you keep it looking great for years? Here are some proven tips:
- Let paint cure fully before heavy use. Most cabinet paints reach full hardness in 2–3 weeks.
- Clean gently: Use mild soap and a soft cloth, not harsh chemicals or scrubbers.
- Touch up chips quickly with leftover paint.
- Avoid slamming doors: Soft-close hardware helps prevent wear.
- Check for water leaks near sinks or dishwashers, as moisture can damage paint or stain.
Experience-based guide: Keep a small jar of your cabinet paint for quick touch-ups. Label it with the color and date for future use.
Common Mistakes To Avoid
Even with good instructions, some mistakes are easy to make. Here’s what to watch out for:
- Skipping cleaning: Paint won’t stick to greasy surfaces.
- Not sanding enough: Glossy finishes need to be dulled for paint to bond.
- Applying thick coats: Thick paint drips and takes longer to dry.
- Rushing drying times: Reattaching doors too soon causes smudges.
- Ignoring hardware: Old, dirty handles can ruin a fresh look.
- No primer: Skipping primer can cause peeling or uneven color.
- Painting in humid weather: High humidity makes paint sticky and slow to dry.
Practical advisor: If you make a mistake (like a drip or streak), wait for the paint to dry, sand lightly, and repaint that area. Don’t try to fix wet paint—it usually makes things worse.

Credit: renovateai.app
When To Consider A Professional
DIY is rewarding, but sometimes hiring a professional makes sense. Consider calling an expert if:
- Your cabinets have lots of detailed carvings or features.
- You want a spray finish (which is very smooth but hard to do at home).
- There is water or mold damage that needs repair.
- You have very large kitchen or little free time.
Professionals can finish the job faster and with fewer mistakes, but at a higher cost. If you want to see what’s possible, check real before-and-after pictures on sites like Houzz.
Eco-friendly And Health Considerations
Many modern paints are low in volatile organic compounds (VOCs), making them safer for your family. Always look for “low-VOC” or “no-VOC” on the label. Keep windows open and wear a mask if you’re sensitive to fumes.
For greener options, some people use milk paint or natural stains. These are less common but can give beautiful, unique results.
Styling Ideas After You Paint
Once your cabinets are a new color, you might want to update other parts of your kitchen too. Here are a few affordable ideas:
- Change handles or knobs: Try matte black, gold, or brushed nickel for a modern touch.
- Add under-cabinet lighting: Makes your new color pop and improves workspace.
- Install a new backsplash: Subway tiles, peel-and-stick tiles, or even painted panels.
- Update shelf liners: Brighten the inside of cabinets with patterned liners.
- Decorate with plants: Small pots or herbs look fresh against new cabinets.
Non-obvious tip: Sometimes, painting just the upper or lower cabinets (not both) creates a trendy “two-tone” look and saves time.
Frequently Asked Questions
What Kind Of Paint Should I Use For Kitchen Cabinets?
Choose a durable, water-resistant paint made for cabinets or trim. Acrylic, alkyd (hybrid), or oil-based paints are best. Avoid wall paint—it’s not tough enough for kitchen use.
How Do I Know If My Cabinets Can Be Painted?
Most cabinets—wood, MDF, or laminate—can be painted if prepped correctly. Real wood and MDF are easiest. Laminate needs extra sanding and a strong primer. Avoid painting if cabinets are very damaged or peeling.
How Long Should I Wait Before Using My Cabinets After Painting?
Wait at least 24–48 hours after the final coat before light use. For heavy use (slamming doors, cleaning), wait 2–3 weeks for the paint to fully cure and harden.
Can I Paint Cabinets Without Removing The Doors?
It’s possible but not recommended for best results. Removing doors lets you paint all edges and avoids drips. If you must paint in place, use painter’s tape and work carefully.
How Can I Make My Painted Cabinets Last Longer?
Let paint cure fully, clean gently, avoid harsh chemicals, and touch up chips quickly. Use soft-close hardware if possible and fix any leaks right away to prevent water damage.
Changing your kitchen cabinet color is a project that brings real value and a fresh look to your home. With careful planning and the right steps, you can achieve a professional-quality finish that lasts for years. Whether you go for a bold new shade or a classic white, the satisfaction of a transformed kitchen is worth the effort.