
Keeping your Ninja Blender clean is essential for healthy and tasty smoothies, soups, and more. A dirty blender not only affects flavor but can also breed harmful bacteria. Many users struggle with sticky residue, lingering odors, and even tough stains after blending fruits, vegetables, or protein shakes. You might be surprised—cleaning a Ninja Blender can be quick and easy if you know the right steps and tricks.
This guide will show you how to clean your Ninja Blender thoroughly, whether you need a fast rinse or a deep clean. You’ll learn how to take it apart safely, which cleaning products to use (and avoid), and how to keep every part—from the pitcher to the blades—sparkling clean.
If you’ve ever found old smoothie clumps at the bottom or wondered about that rubbery smell, this article will help you tackle those challenges. You’ll also get answers to common questions and learn simple habits to keep your blender fresh every day.
Let’s break down the complete process so you can enjoy safe, delicious blends every time.
Why Cleaning Your Ninja Blender Matters
Most people clean their blender to remove food particles, but there are deeper reasons to pay attention to this task.
Bacteria and Mold: Blenders are moist environments, perfect for bacteria and mold to grow if not cleaned properly. Even small bits of fruit or protein powder can spoil in hours.
Odors and Stains: Leftover smoothie or soup can leave strong smells and colored stains, especially from berries or spinach. These odors can transfer to your next blend.
Performance and Durability: Food stuck under blades or in seals can make the motor work harder, eventually reducing the blender’s lifespan.
Taste and Quality: Old food residue can change the taste of your drinks, making them sour or gritty.
Regular cleaning keeps your Ninja Blender safe, long-lasting, and ready for fresh creations.
Understanding The Parts Of A Ninja Blender
Before you start cleaning, it helps to know the main Ninja Blender parts. This makes it easier to clean thoroughly and avoid damaging anything.
The common parts include:
- Pitcher/Jar: The main container for blending.
- Lid: Covers the pitcher, often with a removable center cap.
- Blade Assembly: Removable blades at the bottom.
- Base/Motor: The heavy part with controls (never immerse in water).
- Gasket/Seals: Rubber rings that prevent leaks.
- Single-Serve Cups (for some models): Small containers for on-the-go blends.
Knowing these parts helps you clean each one correctly. Always check your model’s manual for any special pieces.
What You Need For Cleaning
You don’t need fancy tools or expensive cleaners. Most items are already in your kitchen:
- Dish soap (mild, unscented is best)
- Warm water
- Sponge or soft brush
- Bottle brush (for deep cleaning or narrow parts)
- Microfiber cloth or paper towels
- White vinegar or baking soda (for odors and stains)
- Toothpick or small brush (for gaskets and hard-to-reach areas)
- Dishwasher (if your model’s parts are dishwasher-safe)
Never use abrasive cleaners or steel wool, as these can scratch plastic and dull blades.
Quick Clean Vs. Deep Clean: What’s The Difference?
Sometimes, you only need a quick clean after one smoothie. Other times, a deep clean is necessary, especially if you notice stains, stuck food, or odors.
Quick Clean
- Removes fresh residue before it dries.
- Takes less than 2 minutes.
- Good for everyday use.
Deep Clean
- Removes old stains, odors, and build-up.
- Needed once a week (or after sticky, thick blends).
- Takes 10–15 minutes.
Both are important. Regular quick cleaning keeps your blender ready, while deep cleaning prevents long-term problems.
How To Do A Quick Clean
A quick clean is perfect right after you finish blending. Here’s how to do it:
- Rinse Immediately: Fill the pitcher halfway with warm water.
- Add Dish Soap: A single drop is enough.
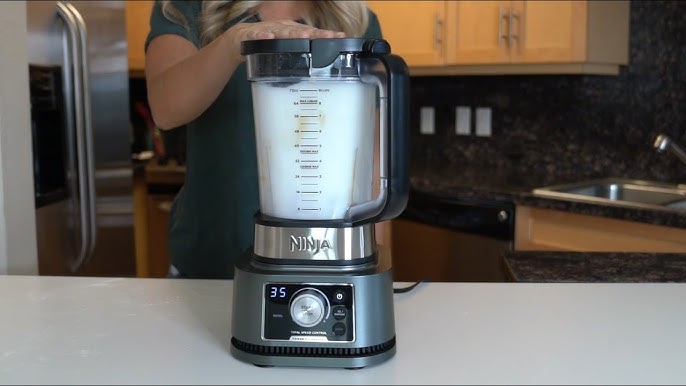
- Run the Blender: Put the lid on and blend for 30–60 seconds.
- Rinse Thoroughly: Pour out the soapy water, then rinse the pitcher, lid, and blades with clean water.
- Dry: Use a microfiber cloth or air dry.
This method removes most residue before it hardens. If you use your Ninja Blender multiple times a day, a quick clean after each use is smart.
Step-by-step: Deep Cleaning Your Ninja Blender
Deep cleaning is essential for removing odors, stubborn stains, and hidden food particles. Here’s a detailed process that works for all standard Ninja Blender models.
1. Unplug And Disassemble
- Unplug the blender for safety.
- Remove the pitcher from the base.
- Take off the lid and remove any removable parts, such as the center cap.
- Carefully lift out the blade assembly (use a towel to protect your hands).
- Remove gaskets/seals if possible.
Tip: Place small parts in a bowl, so nothing gets lost down the drain.
2. Wash Each Part Separately
- Pitcher: Use warm, soapy water and a sponge. For narrow pitchers, use a bottle brush.
- Blades: Scrub carefully with a brush. Never touch the blades directly; they are sharp.
- Lid and Cap: Wash under running water with soap.
- Gaskets/Seals: Use a toothpick or small brush to remove hidden food.
- Single-Serve Cups: Wash like the pitcher.
3. Handle Stubborn Stains And Odors
If stains or smells remain, try these solutions:
- Vinegar Solution: Mix equal parts white vinegar and water. Fill the pitcher and let soak for 5–10 minutes, then rinse well.
- Baking Soda Paste: Mix baking soda with a little water. Scrub stained areas gently, then rinse.
- Lemon Juice: For strong odors, blend water with a few drops of lemon juice, then rinse.
4. Rinse And Dry Completely
- Rinse all parts with clean water.
- Dry with a microfiber cloth or let air dry on a rack.
- Make sure gaskets and seals are completely dry before reassembling.
5. Clean The Base
- Never immerse the base in water.
- Wipe with a damp cloth, especially around the buttons and under the pitcher.
- For sticky spots, use a little dish soap on the cloth, then wipe again with clean water.
Extra Insight: Many people forget to check under the blade assembly or around the gasket. These areas often hide old food and can cause bad smells.
Cleaning The Blades Safely
Blades are the heart of your Ninja Blender but are also dangerous if handled carelessly.
- Always use a towel or brush to clean—never your bare hands.
- For stuck food, soak the blades in warm soapy water for 10 minutes before scrubbing.
- If you see rust or dullness, contact Ninja support. Do not try to sharpen blades at home.
Non-obvious tip: Even if the blades look clean, tiny bits of fruit or seeds can hide in crevices. A weekly deep clean prevents build-up.
How To Clean The Gasket And Seals
Gaskets and seals prevent leaks but can trap debris and bacteria. Many people forget about them until there’s a smell.
- Remove gaskets/seals if possible (check your manual).
- Soak in warm, soapy water for 5–10 minutes.
- Use a small brush or toothpick to clean grooves.
- Rinse well and dry completely before putting back.
If your gasket is cracked or smells bad even after cleaning, it’s time to replace it. You can find replacements on the Ninja website or through their customer support.

Credit: www.reddit.com
Using The Dishwasher: What’s Safe?
Many Ninja Blender models have dishwasher-safe parts, but not all. Check your owner’s manual for your model.
Generally:
- Pitcher, lid, and blades: Top rack only
- Gaskets/seals: Top rack
- Base: Never in dishwasher
Dishwasher cleaning is convenient but can make plastic cloudy over time. Also, dishwasher heat may weaken seals if done too often.
Pro tip: If you notice cloudy spots or white film after dishwashing, wipe with vinegar to restore clarity.
How To Remove Strong Odors
Sometimes, garlic, onion, or protein shakes leave a smell. Regular soap isn’t enough.
- Vinegar Soak: Fill the pitcher with a mix of half vinegar, half water. Let sit for 30 minutes, then rinse.
- Baking Soda Blend: Add 1 tablespoon of baking soda and 2 cups water. Blend for 1 minute, then rinse.
- Sun Dry: If possible, let the pitcher sit in sunlight. UV rays help kill bacteria and remove odors.
Odors can also come from the gasket or under the blades. Make sure to clean these areas as described above.
Dealing With Stubborn Stains
Blending berries, turmeric, or leafy greens can stain plastic. Here’s how to tackle tough stains:
- Baking Soda Paste: Apply paste to stains, let sit 15 minutes, then scrub and rinse.
- Lemon Juice: Squeeze lemon juice on stains, let sit, then rinse.
- Vinegar Rinse: For heavy stains, soak overnight in vinegar and water.
If stains remain after several tries, consider replacing the pitcher. Stained plastic is safe but can look unappealing.
What To Avoid When Cleaning
Some cleaning methods can damage your Ninja Blender:
- Abrasive cleaners: Scratch plastic and dull blades.
- Steel wool or hard brushes: Leave permanent marks.
- Soaking the base: Water in the motor will destroy the blender.
- Bleach or harsh chemicals: Damage seals and can leave harmful residue.
Stick with gentle soap, vinegar, and baking soda for the best results.
How Often Should You Clean Your Ninja Blender?
Frequency depends on use, but a simple rule works for most homes:
- Quick clean: After every use.
- Deep clean: Once a week, or after thick/sticky ingredients.
- Odor/stain removal: As needed.
If you use your blender for baby food, daily protein shakes, or recipes with sticky ingredients, deep clean more often.
Cleaning Ninja Blender Accessories
Many Ninja Blenders come with accessories like single-serve cups, food processor bowls, or extra blades. Clean these the same way as the main pitcher:
- Rinse immediately after use.
- Wash with warm soapy water.
- Use a bottle brush for tight spaces.
- Dry thoroughly before storing.
Check your manual to see if these parts are dishwasher safe.

Credit: simplicityandastarter.com
Storing Your Ninja Blender After Cleaning
Proper storage keeps your blender fresh and ready.
- Always dry all parts completely before reassembling.
- Store with the lid off or ajar to prevent moisture build-up (and odors).
- Keep the base in a dry place, away from splashes.
- Do not store with food inside, even for a short time.
Extra tip: If you blend daily, leave the pitcher upside-down on a drying rack to prevent moisture build-up.
Troubleshooting Common Cleaning Problems
Sometimes, cleaning doesn’t go as planned. Here’s how to fix common issues:
Blender Smells Bad Even After Cleaning
- Check under the blade assembly and around the gasket.
- Soak in vinegar and baking soda.
- Dry completely before storing.
White Film On Pitcher
- Wipe with vinegar, then rinse.
- Avoid frequent dishwasher use.
Leaks After Cleaning
- Check if the gasket is in place and undamaged.
- If leaks continue, replace the gasket or contact Ninja support.
Mold In Hard-to-reach Areas
- Use a toothpick or small brush.
- Soak in vinegar solution.
- For persistent mold, consider replacing the affected part.
Cloudy Or Scratched Plastic
- Cloudiness: Wipe with vinegar.
- Scratches: These cannot be removed but won’t affect performance.
Comparing Cleaning Methods
Here’s a quick overview comparing manual cleaning and dishwasher cleaning for Ninja Blender parts:
| Method | Pros | Cons | Best For |
|---|---|---|---|
| Manual Cleaning | Gentle, thorough, prevents cloudiness | Takes more time, needs extra effort | Everyday cleaning, deep cleaning |
| Dishwasher | Convenient, hands-free | May cloud plastic, weaken seals over time | Quick clean of safe parts |
How The Ninja Blender Compares To Other Blenders For Cleaning
Is the Ninja Blender easier or harder to clean than other brands? Here’s a quick look:
| Brand | Removable Blades | Dishwasher Safe | Ease of Deep Clean |
|---|---|---|---|
| Ninja | Yes | Most parts | Easy (with weekly cleaning) |
| Vitamix | No (fixed) | Some parts | Harder (must clean in place) |
| NutriBullet | Yes | Yes | Easy |
| Oster | Yes | Some parts | Medium |
Ninja’s removable blades and dishwasher-safe parts make it one of the easier blenders to clean, especially compared to high-end models like Vitamix.
Extra Tips For A Spotless Ninja Blender
- Rinse Immediately: The sooner you rinse, the less scrubbing you’ll need.
- Don’t Overfill: Overfilling can push food into gaskets and seals.
- Use Cold Water for Protein: Cold water prevents protein powder from sticking.
- Avoid Harsh Chemicals: Stick with gentle cleaners.
- Replace Worn Parts: If your gasket or pitcher is damaged, replace it to prevent leaks and bacteria.
When To Replace Blender Parts
No matter how well you clean, some parts wear out. Signs you need a replacement:
- Gasket smells or is cracked
- Pitcher is cloudy, scratched, or cracked
- Blades are dull or rusted
- Leaks continue after cleaning
Order genuine parts from the official Ninja website to guarantee fit and safety. For more details on Ninja’s official recommendations and support, visit the Ninja Kitchen Support Page.
Credit: www.youtube.com
Simple Habits To Keep Your Blender Clean
Building a few habits will save you time and effort:
- Clean right after use—don’t wait.
- Deep clean every week.
- Dry all parts before storing.
- Use vinegar or lemon for regular odor control.
- Keep a small brush nearby for seals and gaskets.
These habits prevent tough stains and bad smells from ever starting.
Frequently Asked Questions
How Do I Clean My Ninja Blender If I Forgot And Food Dried Inside?
Soak the pitcher and blades in warm, soapy water for 30–60 minutes. Use a bottle brush to scrub away softened residue. For stubborn bits, make a baking soda paste and let it sit before scrubbing again.
Can I Put Ninja Blender Parts In The Dishwasher?
Most Ninja Blender pitchers, lids, and blades are top-rack dishwasher safe. Always check your model’s manual. Never put the base in the dishwasher.
How Do I Get Rid Of A Strong Smell In My Ninja Blender?
Fill the pitcher with a mix of vinegar and water (1:1 ratio) and let it soak for 30 minutes. Rinse well. For tough odors, blend water with lemon juice or baking soda.
What Should I Do If My Ninja Blender Starts To Leak After Cleaning?
Check that the gasket is in place and not damaged. Make sure all parts are dry and fitted correctly. If leaks continue, you may need to replace the gasket or contact Ninja support.
How Often Should I Deep Clean My Ninja Blender?
Deep clean your Ninja Blender once a week, or more often if you blend sticky or thick ingredients. Quick clean after every use to prevent build-up.
Keeping your Ninja Blender clean doesn’t need to be difficult or time-consuming. With the right steps, habits, and tools, you’ll always have a blender that’s safe, efficient, and ready for anything you want to create.