Cleaning a plastic grinder might seem simple, but doing it the right way can make a big difference. If you use a grinder for herbs, spices, or even coffee, you know how quickly residue can build up. A dirty grinder not only makes grinding harder, but it can also affect the taste, smell, and safety of your ground material.
Some people even throw away grinders when they get clogged, but with proper cleaning, your plastic grinder can last for years. Let’s break down the process, answer common questions, and share pro tips that even experienced users sometimes miss.
Why Clean Your Plastic Grinder?
Many users don’t clean their grinders until it’s too late. Over time, sticky residues from herbs or spices can cause the grinder to jam or not turn smoothly. This can lead to frustration or even broken parts. Dirty grinders also collect bacteria and mold, especially if left in humid environments.
For those using grinders for culinary herbs, this can ruin recipes and even make you sick. Regular cleaning keeps your grinder working smoothly, keeps flavors pure, and helps the grinder last longer.
Understanding Plastic Grinders
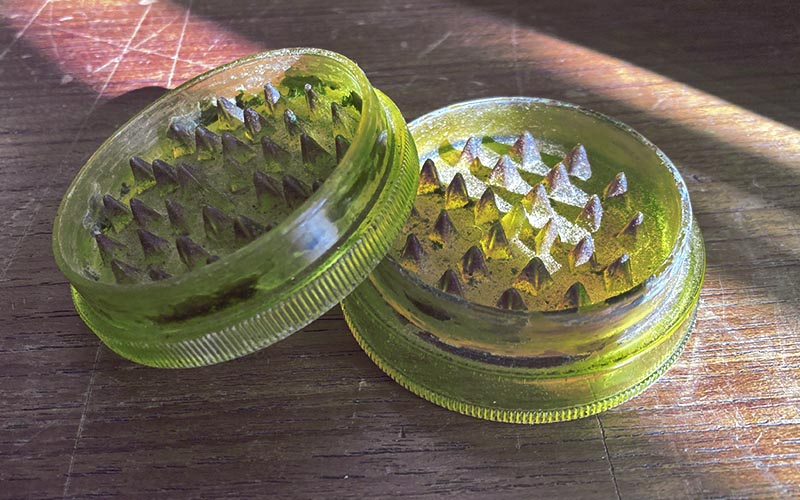
Before you start cleaning, it helps to know what kind of plastic grinder you have. Most plastic grinders are made from acrylic, polycarbonate, or similar sturdy plastics. They are lightweight, affordable, and easy to take apart. However, plastic can be sensitive to harsh chemicals and high heat, so you need to use the right cleaning methods to avoid damaging the grinder.
Common Plastic Grinder Types
- Two-piece grinders: Simple design, just top and bottom.
- Three-piece grinders: Adds a middle compartment for storage.
- Four-piece grinders: Includes a kief catcher for fine particles.
- Electric plastic grinders: Use a small motor, sometimes harder to clean.
Knowing your grinder type helps you choose the safest and most effective cleaning method.
How Often Should You Clean A Plastic Grinder?
How often you clean depends on usage. If you use your grinder daily, a light cleaning once a week and deep cleaning every month is a good routine. For occasional users, monthly cleaning is usually enough. Cleaning schedules can also depend on what you grind—oily or sticky herbs will clog a grinder faster than dry spices.
Tools And Materials You’ll Need
Before you start, gather these items:
- Small, soft brush (like a toothbrush or paintbrush)
- Cotton swabs
- Warm water
- Mild dish soap
- Isopropyl alcohol (70% or lower; only for very tough residue)
- Freezer (optional for sticky residue)
- Paper towels or lint-free cloth
- Toothpick or plastic scraper
- Small container or bowl
- Zip-top bag (optional)
- Gloves (optional, for sensitive skin)
Step-by-step Guide: Cleaning A Plastic Grinder
Let’s look at the full cleaning process, from quick maintenance to deep cleaning.
1. Take Apart The Grinder
Carefully twist and pull apart all pieces of the grinder. For multi-piece grinders, separate every section, including screens and kief catchers. Be gentle—plastic threads can strip if forced.
2. Remove Loose Debris
Tap each piece over a paper towel or trash bin. Use a soft brush to sweep out loose particles. For sticky residue, use a toothpick or plastic scraper to gently dislodge buildup, especially around the teeth and screen.
3. Freeze For Sticky Residue (pro Tip)
If your grinder is especially sticky, place all parts in the freezer for about 30 minutes. The cold hardens sticky material, making it easier to scrape off without scratching the plastic. Many users skip this step, but it’s a game-changer for heavily used grinders.
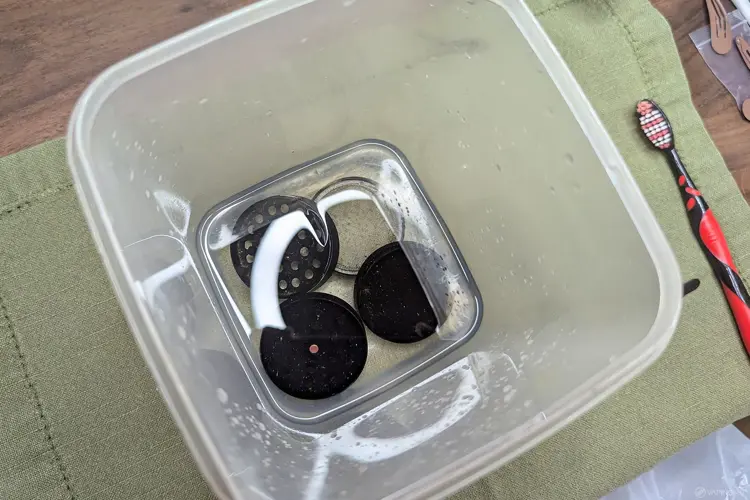
4. Soak The Grinder
Fill a bowl or container with warm (not hot) water and a few drops of mild dish soap. Place grinder parts in the soapy water and let them soak for 20–30 minutes. This loosens oils and residue. Avoid soaking for hours, as some plastics can absorb odors or warp.
5. Scrub Gently
Use a toothbrush or cotton swab to scrub each piece. Focus on the teeth, threading, and screen. Don’t use steel wool or abrasive pads—they can scratch plastic and create places for more residue to stick.
6. Rinse Thoroughly
Rinse all parts under warm running water to remove soap and any remaining debris. Make sure no soap is left, as residue can affect taste and smell during future use.
7. Optional: Isopropyl Alcohol For Stubborn Buildup
If soap and water aren’t enough, dampen a cotton swab with isopropyl alcohol (70% or less) and spot-clean stubborn residue. Alcohol dissolves oils but can dry out or weaken some plastics if used too much. Always rinse well after using alcohol.
8. Dry Completely
Pat all parts dry with a lint-free cloth or paper towel. Let them air dry for an hour to make sure all moisture is gone. Moisture left inside can lead to mold or bacteria growth.
9. Reassemble And Test
Once dry, put your grinder back together. Turn it a few times to make sure it spins smoothly. If it’s still sticky, repeat cleaning or check for damage.
Comparing Cleaning Methods
There are many ways to clean a plastic grinder. Below is a comparison of the most common methods:
| Method | Effectiveness | Safety for Plastic | Time Needed | Best Use Case |
|---|---|---|---|---|
| Soapy Water | Good | Very Safe | 30–45 min | Routine Cleaning |
| Isopropyl Alcohol | Excellent | Use with Care | 10–20 min | Heavy Buildup |
| Freezing & Scraping | Very Good | Very Safe | 45–60 min | Sticky Residue |
| Dishwasher | Varies | Not Recommended | 1–2 hrs | Rare (only if labeled dishwasher-safe) |
Common Mistakes When Cleaning Plastic Grinders
Many people damage their grinders by using the wrong cleaning method. Here are the most common mistakes and how to avoid them:
- Using boiling water: High heat can warp or crack plastic. Use only warm water.
- Strong chemicals: Avoid bleach, acetone, or strong alcohol. These can degrade plastic and leave harmful residues.
- Abrasive tools: Steel wool and rough pads scratch plastic, making it harder to clean in the future.
- Skipping drying: Moisture left inside leads to mold, especially if you store your grinder closed.
- Forcing parts: If something is stuck, soak or freeze first. Forcing can break threads or teeth.
Deep Cleaning Vs. Quick Maintenance
Not every cleaning has to be a deep clean. Here’s a comparison:
| Cleaning Type | Frequency | Steps | When to Use |
|---|---|---|---|
| Quick Maintenance | Weekly | Brush, tap out debris, wipe with damp cloth | Light use, regular upkeep |
| Deep Cleaning | Monthly or as needed | Disassemble, soak, scrub, rinse, dry | Heavy use, sticky buildup |
Regular quick cleaning can help you avoid the need for deep cleaning as often.

Credit: www.wikihow.com
Special Tips For Long-term Grinder Care
1. Store In A Cool, Dry Place
Humidity causes mold and sticky buildup. Keep your grinder dry and out of direct sunlight, which can also weaken plastic over time.
2. Check For Damage
After cleaning, inspect for cracks or worn teeth. Damaged grinders don’t work well and can break during use.
3. Lubricate Threads (advanced Tip)
For grinders that feel stiff, a tiny drop of food-safe mineral oil on the threads can help. Never use cooking oils, as they can go rancid and attract dust.
4. Avoid Cross-contamination
If you use your grinder for different materials (herbs, spices, coffee), clean thoroughly between uses. Flavors and smells can linger in plastic.
5. Save Kief And Fine Particles
When cleaning, collect any fine particles (like kief from herbs) before washing. Use a clean brush to sweep them out. This is especially important for four-piece grinders with screens.
Troubleshooting: When Cleaning Doesn’t Work
If your grinder still doesn’t turn smoothly after cleaning, try these steps:
- Check for plastic warping: If threads are deformed, the grinder may not close properly.
- Look for stuck pieces: Sometimes a tooth breaks off and jams the grinder.
- Try a second cleaning: Very dirty grinders may need soaking and scrubbing twice.
- Consider replacement: If cracks or deep scratches develop, it may be safer to buy a new grinder.
Credit: www.alibongo.co.uk
Why Avoid The Dishwasher?
Some grinders are labeled “dishwasher safe,” but this is rare for plastic models. Dishwashers use high heat and strong detergents that can warp plastic or make it cloudy. If you’re unsure, stick to hand washing.
Can You Use Vinegar To Clean A Plastic Grinder?
Vinegar is popular for cleaning, but it’s not always best for plastic grinders. While vinegar removes some odors and stains, it’s acidic and can weaken certain plastics over time. If you use vinegar, dilute it heavily and rinse very well.
Environmental Impact: Reusing And Recycling
Plastic grinders are cheap, but throwing them out creates waste. Keeping your grinder clean helps it last longer, which is better for the environment. When your grinder is finally worn out, check if your local recycling center accepts that type of plastic.
How To Clean The Screen In Four-piece Grinders
The screen in a four-piece grinder collects fine particles but also gets clogged. Here’s how to clean it:
- Remove the screen if possible (some are fixed; don’t force them).
- Soak in warm soapy water.
- Gently brush with a soft toothbrush or paintbrush.
- For stubborn clogs, use a cotton swab or toothpick, but don’t poke hard—screens are delicate.
- Rinse and air dry fully before reassembling.
If your screen is permanently clogged and can’t be removed, try soaking and gentle brushing. Never use sharp objects that could tear the mesh.
Cleaning Electric Plastic Grinders
Electric grinders with plastic parts need special care:
- Unplug before cleaning
- Remove any detachable parts
- Wipe plastic body with damp cloth (never soak the motor)
- Clean removable grinder parts as above
- Use a small brush to clean inside corners
Water or alcohol inside the motor can cause permanent damage.
When To Replace Your Plastic Grinder
No grinder lasts forever. Replace your grinder if:
- Cracks or chips appear
- Teeth are missing or worn down
- Parts no longer fit together tightly
- It retains odors even after cleaning
A broken grinder can be unsafe or ruin your herbs and spices.
Credit: vaping360.com
Cleaning Other Grinder Types: Quick Comparison
If you’re wondering how plastic compares to other materials:
| Grinder Material | Cleaning Method | Durability | Common Risks |
|---|---|---|---|
| Plastic | Soap, gentle brush, avoid high heat | Low to Medium | Scratches, warping, odor |
| Metal | Alcohol, boiling water, more robust scrubbing | High | Rust (if not dried), corrosion |
| Wood | Damp cloth, avoid soaking | Medium | Cracking, swelling |
Each material has its own cleaning needs. For plastic, gentle care is key.
Non-obvious Insights Most Beginners Miss
You Can Save Kief While Cleaning
Many users wash away the fine powder that collects in grinders. Before soaking, use a small, clean brush to collect kief. Store it in a small glass jar for later use.
Freezing Doesn’t Just Help Cleaning—it Also Preserves Flavors
Freezing a dirty grinder before cleaning not only makes residue easier to remove but can also help preserve the flavor of any material left inside. This is especially useful if you use the grinder for culinary herbs or spices.
What If You Lose A Piece During Cleaning?
If you drop a small part down the drain or lose a screen, check with the manufacturer—some brands sell replacement parts. Otherwise, you may be able to use a fine mesh from a tea strainer as a DIY fix.
Safe Storage After Cleaning
Once your grinder is clean and dry, store it in a sealed bag or container to keep dust and moisture away. This is especially helpful in humid climates.
Health And Safety Notes
Never use harsh chemicals or cleaning products not meant for kitchen use. Plastic can absorb and hold these chemicals, which can be harmful when you use the grinder again. Always rinse thoroughly and let all parts dry completely before use.
For more details on safe cleaning of kitchen tools, check resources like the CDC Food Safety Cleaning Guidelines.
Frequently Asked Questions
How Do You Clean A Plastic Grinder Without Alcohol?
You can clean a plastic grinder using just warm water, mild dish soap, and a soft brush. Disassemble the grinder, soak parts in soapy water for 20–30 minutes, scrub gently, rinse, and dry fully. Freezing the grinder before cleaning can also make sticky residue easier to remove.
Can You Put A Plastic Grinder In The Dishwasher?
Most plastic grinders are not dishwasher safe. High heat and strong detergents can warp or cloud the plastic. Always check the manufacturer’s instructions. If in doubt, hand wash with warm soapy water.
Is Vinegar Safe For Cleaning A Plastic Grinder?
Vinegar is mildly acidic and can clean some plastics, but it can also weaken certain types or leave a smell. If you use vinegar, dilute it and rinse very well. For best results, stick to mild dish soap.
How Often Should I Clean My Plastic Grinder?
For daily users, a light cleaning every week and deep cleaning every month is best. Occasional users can clean monthly or after heavy use. Clean more often if you notice sticky buildup or a change in smell or taste.
What Should I Do If My Grinder Still Smells After Cleaning?
If odors remain, try soaking in a mixture of baking soda and water, then rinse well. Air drying in sunlight can also help remove smells. If odors persist, the plastic may be stained or degraded, and replacement may be needed.
Keeping your plastic grinder clean isn’t just about looks—it’s key for performance, safety, and flavor. With the right tools and methods, cleaning takes just a little time but makes a big impact. Whether you use your grinder daily or just now and then, these steps will keep it working like new.