
Keeping your kitchen clean is never just about wiping counters or washing dishes. One area that often gets overlooked is the kitchen floor mats. These mats collect everything from food spills and grease to dirt and bacteria. Cleaning them regularly is not only about appearance—it is also about hygiene and safety in your home. Surprisingly, even people who clean often may not realize how much grime their floor mats are hiding. If you want a kitchen that truly feels and smells fresh, learning how to clean kitchen floor mats the right way is essential.
Kitchen floor mats come in many materials and styles, each with their own cleaning needs. Whether you have heavy-duty rubber mats, cozy fabric mats, or stylish anti-fatigue mats, knowing the best cleaning methods can extend their life and keep your kitchen safer.
You will also avoid common mistakes that can damage the mats or leave them less clean than you think.
This guide covers everything you need to know about cleaning kitchen floor mats: from daily maintenance to deep cleaning, stain removal, and smart care tips that go beyond the basics. You will find step-by-step instructions, practical solutions for tough messes, and clear advice on when it’s time to replace a mat. By the end, you will have the confidence and knowledge to keep your kitchen mats spotless—and your kitchen healthier.
Why Clean Kitchen Floor Mats Matter
Kitchen floor mats do more than just add comfort underfoot. They are designed to trap dirt, grease, and moisture, reducing slips and falls. Over time, though, these same benefits can turn into problems if mats are not cleaned properly. Grease build-up can make mats slippery instead of safe. Food particles and moisture can promote bacteria and mold growth, leading to bad smells and even health risks.
A study by the National Sanitation Foundation found that kitchen surfaces—including mats—often have more bacteria than the bathroom. Mats near sinks and stoves are especially prone to collecting germs and allergens. For homes with children or pets, this risk is even higher. Clean mats also help to improve air quality in the kitchen, as dust and allergens are less likely to be released into the air.
Types Of Kitchen Floor Mats And Their Cleaning Needs
Not all kitchen mats are the same. Each type requires a slightly different cleaning approach to avoid damage and achieve the best results. Here’s a closer look:
| Mat Type | Common Materials | Cleaning Frequency | Special Care |
|---|---|---|---|
| Rubber/Anti-Fatigue Mats | Natural/Synthetic Rubber | Weekly (surface); Monthly (deep) | Avoid harsh chemicals |
| Fabric/Carpet Mats | Cotton, Microfiber, Polypropylene | Weekly (vacuum); Monthly (wash) | Check washing label |
| Gel/Cushioned Mats | Polyurethane, Gel Foam | Bi-weekly (wipe) | No machine wash |
| Bamboo/Wood Mats | Bamboo, Teak, Engineered Wood | Weekly (wipe); Spot clean as needed | Avoid soaking |
Knowing your mat’s material is step one. Using the wrong cleaner or method can shorten the mat’s life or even cause safety issues.
Credit: www.thekitchn.com
Essential Tools And Products For Cleaning
Having the right tools ready makes cleaning faster and more effective. Here’s what you should keep on hand:
- Vacuum cleaner (preferably with a brush attachment) for removing crumbs and dust from fabric mats.
- Mild dish soap for general cleaning and degreasing.
- White vinegar for deodorizing and removing light stains.
- Baking soda for tackling odors and stubborn grime.
- Soft-bristle brush or old toothbrush for scrubbing grooves and corners.
- Microfiber cloths for wiping and drying.
- Bucket and warm water for soaking or rinsing.
- Spray bottle for easy application of cleaning solutions.
- Rubber gloves to protect your hands from grease and chemicals.
- Disinfectant spray (optional, for extra germ removal).
Avoid using bleach on most mats, as it can break down fibers, fade colors, or make rubber brittle.
Daily And Weekly Maintenance Routines
Keeping kitchen mats clean doesn’t always require deep cleaning. Simple daily and weekly habits can prevent tough stains and build-up.
Daily Habits
- Shake out crumbs and debris: Take the mat outside and give it a firm shake. This prevents crumbs from grinding into the material.
- Wipe up spills immediately: Use a damp cloth to blot any spills as soon as they happen. This stops stains from setting and keeps mats dry.
Weekly Routine
- Vacuum fabric mats: Go over your mat with a vacuum to lift dust, crumbs, and pet hair. Use a brush attachment if possible.
- Surface wipe rubber/gel mats: Use a damp cloth and mild soap to wipe the surface. Rinse with a clean cloth and let air dry.
- Check for stains or odor: If you notice any, plan a spot treatment or deep clean before the problem gets worse.
Regular maintenance takes just a few minutes but can save hours of scrubbing later.
Deep Cleaning Methods For Different Mat Types
Different mats need different cleaning strategies. Here’s how to deep clean the most common kitchen floor mats.
Deep Cleaning Rubber Or Anti-fatigue Mats
- Take the mat outdoors to avoid spreading dirt in your kitchen.
- Rinse with water using a hose or a bucket. This loosens surface dirt and grease.
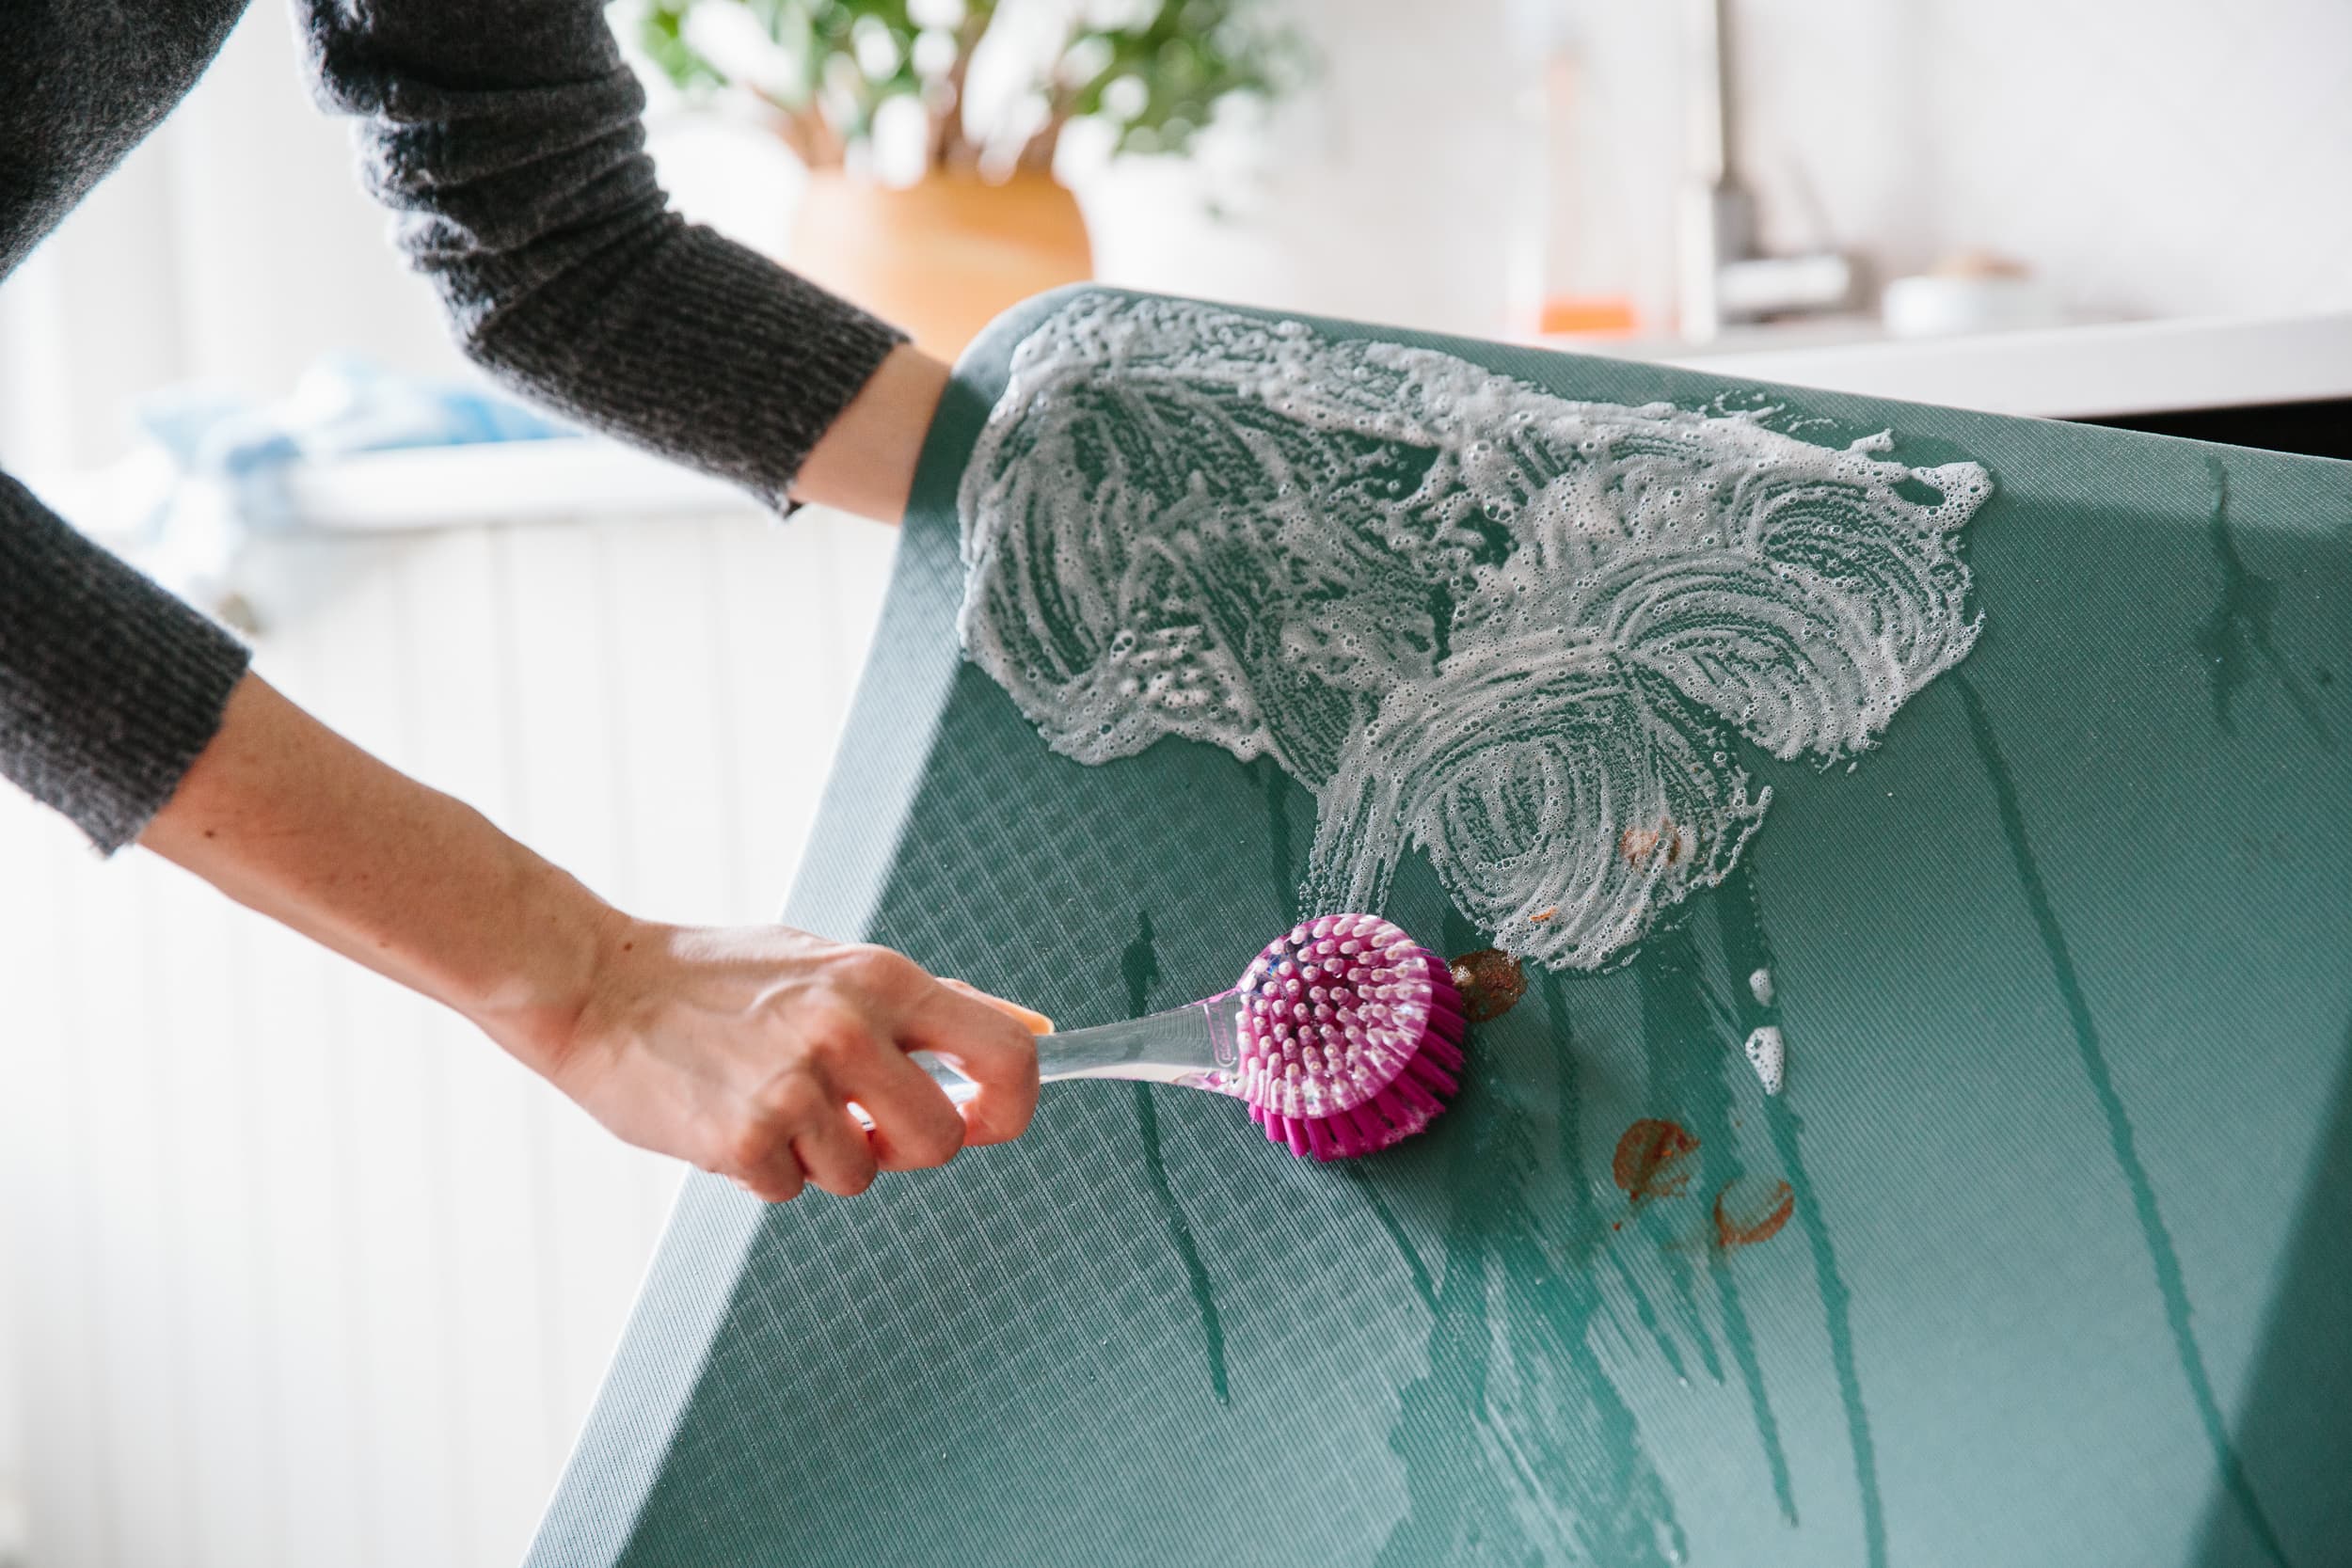
- Scrub with mild soap: Mix a few drops of dish soap in a bucket of warm water. Use a soft-bristle brush to scrub both sides, especially textured areas where grease hides.
- Rinse thoroughly: Any soap left behind can make mats slippery.
- Air dry: Hang the mat over a railing or lay flat in a sunny, ventilated area. Never put rubber mats in the dryer.
Pro tip: For very greasy mats, sprinkle baking soda before scrubbing to boost cleaning power.
Cleaning Fabric Or Carpet Kitchen Mats
- Vacuum both sides to remove loose dirt.
- Check the care label: Some fabric mats can go in the washing machine, others require hand washing.
- Machine washing: Use a gentle cycle with cold water and mild detergent. Do not use bleach.
- Hand washing: Soak in a tub with warm water and mild soap. Gently agitate and use a soft brush for stains.
- Rinse well: Soap residue attracts more dirt.
- Dry thoroughly: Air drying is best. Avoid high heat, which can shrink mats or damage the backing.
Non-obvious tip: Wash mats alone, not with clothes or towels, to avoid transferring grease and bacteria.
Cleaning Gel Or Cushioned Mats
- Wipe with soapy water: Dampen a microfiber cloth with warm, soapy water. Gently wipe the surface.
- Rinse with clean water: Use another cloth to wipe away any soap.
- Dry with a towel: Pat dry and let air dry fully.
- Spot treat stains: Use a little vinegar or baking soda paste on stubborn marks, but test in a small area first.
Do not soak gel mats or place them in a washing machine, as water can get trapped and cause mold.
Cleaning Bamboo Or Wooden Kitchen Mats
- Dust or vacuum: Remove surface dust and crumbs.
- Wipe with damp cloth: Use a little soapy water, but avoid soaking the wood.
- Dry immediately: Use a dry cloth to remove moisture.
- Polish (optional): Use a wood-safe oil or polish to keep the mat looking fresh and prevent drying out.
Never leave bamboo or wood mats wet, as moisture can warp or crack the material.
How To Remove Tough Stains And Odors
Kitchen mats face some of the toughest stains—oil, tomato sauce, coffee, and more. Here’s how to deal with them:
For Grease And Oil Stains
- Sprinkle baking soda over the stain. Let it sit for 10-15 minutes to absorb the grease.
- Scrub gently with a damp brush and a drop of dish soap.
- Rinse well and repeat if needed.
For Food And Beverage Stains
- Blot up excess liquid immediately with a clean cloth.
- Mix a solution: One part white vinegar to two parts water.
- Apply to stain: Let sit for 5-10 minutes, then blot and rinse.
For Persistent Odors
- Sprinkle baking soda liberally over the dry mat.
- Let sit overnight, then vacuum thoroughly.
Non-obvious insight: Don’t use hot water on protein-based stains (like milk or egg), as it can set the stain. Use cold water first.
Disinfecting Kitchen Floor Mats
Cleaning removes dirt, but disinfecting kills bacteria and viruses. This is especially important for mats near sinks or trash areas.
- Use a disinfectant spray safe for your mat’s material. Look for products labeled as safe for food surfaces.
- After cleaning, spray both sides of the mat and let air dry.
- For fabric mats, add a cup of white vinegar to the rinse cycle for extra germ-killing power.
Caution: Avoid strong disinfectants like bleach on rubber or gel mats, as they may damage the material.
Drying And Storage Tips
Drying your mats well is as important as cleaning them. Wet mats can become a breeding ground for mold and bacteria.
- Always air dry: Lay mats flat or hang them in a sunny area. Avoid folding, which can trap moisture.
- Check for dampness: Before putting mats back on the floor, make sure they are fully dry on both sides.
- Store mats upright if you need to put them away for a long time. This prevents creases and helps them stay fresh.
Common Mistakes When Cleaning Kitchen Floor Mats
Even with the best intentions, it’s easy to make mistakes that reduce a mat’s lifespan or cleaning effectiveness.
- Using too much detergent: Excess soap leaves residue that attracts dirt.
- Not rinsing thoroughly: Soap or cleaning products left in the mat can make it sticky or slippery.
- Skipping the care label: Not all mats can be machine washed or exposed to certain cleaners.
- Neglecting the underside: The bottom can harbor bacteria and mold.
- Drying in a dark, damp place: This encourages mold growth and bad smells.
- Using hot water on all stains: Some stains set with heat instead of coming out.
- Ignoring edges and corners: These areas collect grime and bacteria.
How Often Should You Clean Kitchen Floor Mats?
Frequency depends on kitchen activity and mat placement.
- High-traffic areas: (near sink, stove) Clean weekly, deep clean monthly.
- Low-traffic areas: (under kitchen table) Clean every two weeks, deep clean every 2-3 months.
- Homes with pets/kids: Clean more often, as mats pick up extra crumbs, hair, and germs.
If mats start to smell, feel sticky, or look discolored, it’s time for a clean—even if it hasn’t been long.
When To Replace Kitchen Floor Mats
No mat lasts forever. Knowing when to replace your kitchen mat saves time and keeps your kitchen safe.
| Sign | What It Means | Action |
|---|---|---|
| Cracks or splits | Mat structure is breaking down | Replace immediately |
| Permanent stains or odors | Deep dirt or bacteria is trapped | Replace for hygiene |
| Curling edges | Trip hazard | Replace for safety |
| Worn texture | Lost anti-slip effect | Replace for effectiveness |
| Faded color or holes | Material is degraded | Replace for appearance |
Most kitchen mats last 1-3 years with regular care. High-quality mats may last longer, but if cleaning doesn’t restore them, it’s time for a new one.
Eco-friendly Cleaning And Disposal
If you want a greener kitchen, consider these steps:
- Use natural cleaners: Vinegar, baking soda, and mild soap are safer for the environment than harsh chemicals.
- Wash mats in full loads: If machine washing, save water and energy by cleaning mats with other kitchen textiles.
- Recycle old mats: Some rubber mats can be recycled—check your local recycling rules.
- Repurpose worn mats: Old mats can be used in the garage, garden, or as shoe mats.

Credit: www.amazon.com
Professional Cleaning Services: Are They Worth It?
For commercial kitchens or homes with large, heavy mats, professional cleaning can be a smart choice.
- Industrial cleaning removes deep-seated grease and bacteria.
- Steam cleaning can sanitize without chemicals.
- Pickup/delivery services add convenience for busy kitchens.
However, for most homes, regular DIY cleaning is enough. Reserve professional cleaning for mats that are too large, too dirty, or too specialized to handle at home.
Extra Tips For Long-lasting Clean Mats
- Rotate mats regularly: This evens out wear and helps them last longer.
- Use a mat liner: For fabric mats, a non-slip liner underneath keeps mats in place and reduces wear.
- Keep a spare: Having a backup mat means you can always have one clean while the other dries.
- Clean under mats: Don’t forget to mop the floor beneath your mats for a truly clean kitchen.
- Check for moisture: Especially in humid climates, lift mats often to let both mat and floor dry out.
Kitchen Mat Cleaning In Different Environments
Cleaning needs change based on your kitchen type:
- Home kitchens: Focus on regular surface cleaning and quick spill response.
- Commercial kitchens: Mats may require daily degreasing and weekly disinfection.
- Shared kitchens: Mats should be cleaned more often to reduce cross-contamination risks.
If your kitchen has high humidity, extra drying time is important to avoid mold.
Kids, Pets, And Special Concerns
If you have kids or pets, your kitchen mats face even more challenges:
- Pet hair and dander collect in fabric mats. Vacuum often and wash mats more frequently.
- Child-safe cleaning: Avoid strong chemicals. Stick to vinegar, baking soda, and mild soap.
- Non-slip backing: Check regularly that mats stay in place to prevent falls.
A clean mat is even more important in homes with young children crawling or playing on the floor.
Credit: www.doormat.net.au
Troubleshooting: When Cleaning Doesn’t Work
If your mat still smells or looks dirty after cleaning:
- Try a vinegar soak: For fabric mats, soak in a mix of 1 cup vinegar per gallon of water for 30 minutes before washing again.
- Sunlight: Leave mats in direct sunlight for several hours. Sunlight kills bacteria and removes odors naturally.
- Check your water: Hard water can leave residue. Use distilled water for the final rinse if possible.
- Replace stubborn mats: Sometimes, the best solution is a fresh start.
Frequently Asked Questions
How Often Should I Deep Clean My Kitchen Floor Mats?
Deep cleaning is recommended once a month for most homes. If your kitchen is very busy, or if you have pets and kids, deep clean every 2-3 weeks. Regular surface cleaning should be done weekly or after spills.
Can I Put My Kitchen Mat In The Washing Machine?
Many fabric or carpet mats are machine washable, but always check the care label first. Rubber, gel, or cushioned mats should not go in the washer, as it can damage them. When in doubt, hand wash with mild soap and water.
What Should I Do If My Mat Still Smells After Cleaning?
If odors persist, sprinkle baking soda over the mat, let it sit overnight, and vacuum it up. Try a vinegar soak for fabric mats or let the mat dry in the sun. Persistent smells can mean it’s time to replace the mat.
Are There Eco-friendly Ways To Clean Kitchen Mats?
Yes! Use white vinegar, baking soda, and mild soap instead of harsh chemicals. Air dry instead of using a dryer, and recycle old rubber mats if possible. For more eco-friendly cleaning tips, see resources like EPA Safer Choice.
How Do I Keep My Kitchen Mats From Slipping?
Use a non-slip liner under fabric mats, or choose mats with a rubber backing. Make sure the floor and mat are fully dry before placing back on the floor. If edges start to curl, replace the mat to prevent accidents.
A clean kitchen starts from the ground up. Taking care of your kitchen floor mats doesn’t just make your space look better—it keeps your home safer, healthier, and more welcoming. By following these cleaning tips and routines, you’ll ensure your kitchen mats last longer and always stay fresh underfoot.