
Keeping your panini maker clean is more important than most people think. A clean appliance not only makes your sandwiches taste better, but it also helps the machine last longer and keeps you safe from germs. Many people just wipe the plates and call it a day, but there’s a lot more to proper cleaning—especially if you want your panini maker to keep performing like new.
Whether you’re a beginner in the kitchen or you use your panini press every day, understanding the right way to clean it can save you time, hassle, and even money in the long run.
Why Cleaning Your Panini Maker Matters
A panini maker is a handy tool for making crispy sandwiches, grilled veggies, and more. But after every use, oils and crumbs can stick to the cooking plates. Over time, this buildup can affect the flavor of your food, make your machine smell, and even cause mechanical problems.
Some people notice their sandwiches start to taste burnt or strange after a few months of not cleaning their press well.
Another reason to clean your panini maker is food safety. When you leave old cheese, meat, or oils on the plates, bacteria can grow. This is especially risky if you cook for children, elderly people, or anyone with a weak immune system. Finally, regular cleaning means your panini press will last longer. Grease buildup can clog hinges and even lead to electrical problems.
Types Of Panini Makers: What You Need To Know Before Cleaning
Not all panini makers are the same. Knowing the kind you have can help you clean it safely and effectively.
| Type | Removable Plates | Nonstick Surface | Dishwasher Safe |
|---|---|---|---|
| Basic Panini Press | No | Yes | No |
| Advanced Electric Grill | Yes | Yes | Yes (plates only) |
| Stovetop Panini Press | No | No | No |
- Basic panini presses usually have fixed plates. This means you need to clean the whole unit carefully and cannot put it in the dishwasher.
- Advanced models often have removable plates, which makes cleaning easier.
- Stovetop models are usually metal and don’t have nonstick coatings, so they require different cleaning methods.
Before you start, always check your panini maker’s manual. Using the wrong method can ruin nonstick coatings or even break the machine.
Preparing To Clean Your Panini Maker
A little preparation makes the cleaning process faster and safer.
- Unplug the appliance. Never clean a hot or plugged-in panini maker. Always wait for it to cool down.
- Let it cool, but not completely. It’s easier to clean sticky cheese and crumbs when the plates are still slightly warm—not hot, just warm to the touch.
- Gather supplies. You’ll need a soft sponge, mild dish soap, a plastic or silicone spatula, a clean towel, and possibly a small brush or toothpick for corners.
- Avoid harsh tools. Never use steel wool, metal brushes, or harsh chemicals on nonstick surfaces.
Step-by-step Guide: Cleaning Fixed-plate Panini Makers
Most home panini presses have fixed plates. Here’s how to clean them well without causing damage.
1. Remove Loose Crumbs And Debris
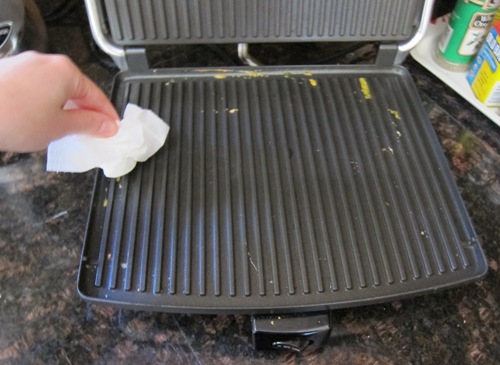
Start by using a plastic spatula or a dry paper towel to scrape or wipe away any big pieces of food. This makes the next steps much easier.
2. Wipe Down While Warm
Dampen a soft towel or sponge with warm water. Wipe the plates gently to remove melted cheese, oil, and stuck-on crumbs. If you wait until the machine is cold, some residues will harden and take more effort to clean.
3. Handle Stubborn Stains
For stains that won’t come off with water, mix a few drops of mild dish soap with warm water. Dip the sponge and gently scrub the dirty spots. For corners and grooves, use a soft brush or even a toothpick.
4. Clean The Outer Surfaces
Don’t forget the outside! Wipe down the lid, handle, and sides with a damp towel. These areas can collect oil and fingerprints.
5. Dry Thoroughly
Use a clean, dry towel to wipe all surfaces. Leaving water on the plates can cause rust or damage, especially if your panini maker is not stainless steel.
6. Reassemble And Store
If you removed any small parts (like drip trays), make sure they’re dry and back in place. Always store your panini maker with the lid slightly open to let air circulate. This prevents musty smells and mold.
Cleaning Panini Makers With Removable Plates
If your panini maker has removable plates, cleaning is much simpler—but there are still smart steps to follow.
1. Remove The Plates
Wait until the plates are cool enough to touch. Then, press the release buttons (if your model has them) and carefully lift out the plates.
2. Hand Wash Or Use Dishwasher
Most removable plates are dishwasher safe. Check your manual. If you wash by hand, use warm soapy water and a soft sponge. Rinse and dry completely.
3. Clean The Main Unit
While the plates are off, wipe the rest of the machine with a damp towel. Do not let water drip into the electrical parts.
4. Reassemble
Once everything is dry, put the plates back. This is a good time to check for any crumbs or oil around the hinges or edges.
How To Deep Clean A Panini Maker
Sometimes, regular cleaning isn’t enough. Oils can build up over months, especially if you use your press often. Here’s how to deep clean your panini maker:
- Mix baking soda and water to make a thick paste. This is safe for nonstick surfaces and helps remove stubborn grease.
- Spread the paste on the plates and let it sit for 5-10 minutes.
- Use a soft brush or cloth to scrub the plates gently.
- Wipe away the baking soda with a damp towel until all residue is gone.
- For hard-to-reach spots, use a cotton swab dipped in the paste.
Never soak your panini maker in water, even if it looks very dirty. Water can damage the electrical parts and ruin the machine.
Cleaning The Drip Tray
Most electric panini makers have a drip tray that catches grease and crumbs. It’s easy to forget this part, but cleaning it is important.
- Remove the tray after each use.
- Wash with warm soapy water or place in the dishwasher (if allowed).
- Dry completely before putting it back.
A dirty drip tray can cause smells, smoke, and even small fires if left unchecked.
Cleaning The Hinges And Joints
Grease and crumbs often collect around the hinges and joints of your panini maker. These spots can be tricky to clean, but they matter just as much as the plates.
- Use a soft brush or old toothbrush to loosen crumbs.
- Wipe with a towel or cotton swab dipped in soapy water.
- Dry these areas well to avoid rust.
Some advanced panini makers let you add a drop of oil to the hinges after cleaning. Check your manual before doing this.

Credit: www.wikihow.life
Keeping The Nonstick Coating Safe
Many panini makers have a nonstick coating on the cooking plates. This makes cleaning easier, but it’s also easy to damage if you’re not careful.
- Always use plastic or wooden tools—never metal.
- Do not use harsh cleaners or scouring pads.
- Never cut sandwiches directly on the plates.
- If you see scratches or flaking, it may be time for a new appliance.
Nonstick surfaces usually last 2–5 years with proper care. Taking care of the coating keeps your food safe and prevents sticking.
Removing Burnt-on Cheese And Food
Burnt cheese is one of the hardest things to clean from a panini maker. Here’s how to tackle it:
- After unplugging, place a damp paper towel on the warm plates and close the lid for 5–10 minutes. The steam will loosen stuck food.
- Open and use a soft spatula to gently remove the melted or burnt cheese.
- Wipe again with a soapy sponge.
If the cheese is still stuck, repeat the steam trick or try the baking soda paste method above.
Cleaning A Stovetop Panini Press
Stovetop presses are usually made of cast iron or aluminum and do not have nonstick coatings. They require a different approach:
- Wash with hot water immediately after use.
- Use a stiff brush, but avoid soap if the press is made of cast iron. Soap can remove the seasoning.
- Dry completely to prevent rust.
- If your press is seasoned, rub a small amount of oil on it after cleaning.
Never soak a cast iron panini press in water. This can lead to rust and damage.
How Often Should You Clean Your Panini Maker?
Regular cleaning is key to a long-lasting panini maker. Here’s a simple schedule:
| Cleaning Task | Frequency |
|---|---|
| Wipe plates after use | Every time |
| Wash removable parts | Every use or weekly |
| Deep clean | Monthly or as needed |
| Clean drip tray | Every use |
| Check hinges/joints | Monthly |
It’s easy to skip these steps when you’re in a hurry, but regular cleaning saves time and effort in the long run.
Common Mistakes To Avoid
Many people make simple mistakes when cleaning their panini makers. Here are the most common ones and how to avoid them:
- Using metal tools. These can scratch the nonstick surface and ruin the plates.
- Cleaning while hot. You can burn yourself or warp the plates. Wait until the appliance is just warm.
- Soaking the unit. Water can get inside and damage electrical parts.
- Forgetting the drip tray. This can cause smoke and odors.
- Using harsh chemicals. Strong cleaners can damage coatings and are unsafe for food.
Pro Tips For Easy Cleaning
Over years of use, some cleaning tricks make life much easier:
- Use parchment paper or reusable grill mats when making sandwiches. This catches cheese and oil and keeps the plates clean.
- Clean right after cooking, before anything hardens.
- Keep a small brush or old toothbrush near your kitchen for cleaning grooves.
- If you make sweet and savory sandwiches, clean especially well between uses to avoid mixing flavors.
When To Replace Your Panini Maker
Even with perfect cleaning, panini makers don’t last forever. Here’s when it’s time to think about a new one:
- The nonstick coating is badly scratched or peeling.
- The plates are warped or cracked.
- The appliance smells burnt even after cleaning.
- The unit does not heat evenly or at all.
A well-cared-for panini maker can last 3–5 years or more. But when you see these signs, it’s safer and more enjoyable to upgrade.
Eco-friendly Cleaning Solutions
If you want to avoid chemicals, there are safe, natural ways to clean your panini maker:
- Baking soda paste is excellent for grease and stains.
- White vinegar diluted with water can clean and deodorize the exterior.
- For stubborn smells, sprinkle baking soda on the plates, let sit, then wipe clean.
These methods are safe for most surfaces and better for your health and the environment.
Cleaning For Allergy Safety
If someone in your home has food allergies, cleaning your panini maker is even more important. Even tiny bits of cheese, nuts, or gluten can cause reactions.
- Clean every surface, including handles, plates, and drip trays, after every use.
- Use separate cleaning cloths for allergy-safe cooking.
- If possible, have a second panini maker for allergy-free foods.
Troubleshooting Odors And Smoke
Sometimes, even after cleaning, your panini maker might smell or smoke during use.
- Check the drip tray and plates for hidden grease.
- Clean the hinges and under the plates.
- Run the press empty for a few minutes (in a well-ventilated area) to burn off old residue.
If the problem continues, you might have a damaged nonstick coating or internal wiring problem. In this case, consider replacing the unit.

Credit: www.wikihow.life
How To Store Your Panini Maker After Cleaning
Proper storage can keep your panini maker fresh and ready for use.
- Always store with the lid slightly open to prevent odor buildup.
- Wrap the cord loosely to avoid damage.
- Keep in a dry, cool place away from sinks or stoves.
If you don’t use your panini maker often, cover it with a clean towel or plastic bag to keep dust away.
Safety Precautions When Cleaning
A few smart habits can prevent accidents and keep your kitchen safe:
- Always unplug before cleaning.
- Never immerse the appliance in water.
- Check for cracks or exposed wires before each use.
- Dry all parts completely before plugging back in.
These steps are easy to forget but can prevent electric shocks and fires.
What To Do If You Can’t Remove A Stain
Sometimes, a stain just won’t budge. In this case:
- Try the baking soda paste one more time.
- Let the paste sit overnight, then scrub gently.
- If the stain is still there but the surface feels smooth and clean, it may be permanent discoloration. As long as the area is clean and not sticky, it’s usually safe to use.
Comparing Panini Maker Cleaning To Other Appliances
How does cleaning a panini maker compare to other kitchen appliances? Here’s a quick look:
| Appliance | Cleaning Difficulty | Time Needed | Main Challenge |
|---|---|---|---|
| Panini Maker | Medium | 5–20 min | Stuck cheese |
| Toaster | Easy | 2–5 min | Crumb removal |
| Waffle Iron | Hard | 10–30 min | Sticky batter |
| Electric Grill | Medium | 10–20 min | Grease buildup |
This shows that a panini maker is easier to clean than a waffle iron, but you still need to be careful with grease and cheese.
The Importance Of Manufacturer Instructions
Always keep your panini maker’s instruction booklet. Manufacturers know their products best and sometimes recommend special cleaning tools or tricks. If you’ve lost your manual, many companies offer digital versions on their websites. Following their advice keeps your warranty valid and helps your machine last longer.
Final Thoughts
A panini maker is a wonderful kitchen tool, but only if you keep it clean and safe. With the right techniques, you can avoid sticky messes, weird smells, and even costly repairs. Remember, gentle cleaning after every use is much easier than a big scrub after months of neglect. Use plastic tools, avoid harsh cleaners, and always dry your appliance well. With a little care, your panini maker will keep making delicious, crispy sandwiches for years. If you need more details about appliance care, you can check out this Consumer Reports guide.
Credit: www.melaniecooks.com
Frequently Asked Questions
How Do I Remove Melted Cheese From My Panini Maker?
The best method is to place a damp paper towel on the warm plates, close the lid, and let the steam loosen the cheese for 5–10 minutes. Then, use a plastic spatula to lift off the cheese. Wipe with a soapy sponge and dry.
Can I Use Cooking Spray On My Panini Maker?
Yes, but use a light spray and avoid products with aerosol propellants, which can damage nonstick coatings. A small amount of oil on a paper towel works well.
Is It Safe To Wash The Whole Panini Maker In The Sink?
No. Never immerse the appliance in water. Only removable plates and drip trays can be washed in the sink or dishwasher. Wipe the main unit with a damp cloth.
What Should I Do If My Panini Maker Smells Burnt?
Clean all parts carefully, especially the drip tray and hinges. Run the empty machine for a few minutes in a ventilated area. If the smell continues, the nonstick coating may be damaged, and it might be time to replace the unit.
Do I Need To Season A Nonstick Panini Maker?
No. Nonstick surfaces do not need seasoning. Only cast iron stovetop presses should be seasoned with a little oil after cleaning to prevent rust.
With these steps and tips, you can keep your panini maker fresh, clean, and ready for countless delicious meals.