
Keeping your kitchen clean is easier when you know how to tackle stubborn areas like stove top coils. Many people ignore these electric coils, but over time, they collect grease, burnt food, and dust. This buildup can cause bad smells, even smoke, and can affect how well your stove works. Worse, dirty coils can become a fire risk. If you cook often, you’ve probably noticed that even with regular wiping, your stove’s coils don’t look as clean as you want. The good news? With the right steps, you can get those coils looking almost new—and keep them that way.
This guide explains everything about cleaning stove top coils. You’ll learn why cleaning matters, the tools you’ll need, and the safest methods to use. Whether you have a small kitchen or a big one, these tips will help you avoid mistakes and get the job done right. Many people are surprised at how much easier cooking becomes on a clean stove. You may even notice your meals taste better, since old food stuck on coils can create unwanted flavors. Let’s dive in and make your kitchen a safer and more pleasant place to cook.
Why Clean Stove Top Coils Matters
Most people clean pots and pans after cooking, but the stove top coils often get less attention. However, keeping them clean is not just about looks.
Dirty coils can:
- Affect how evenly your food cooks
- Produce smoke or bad smells
- Waste energy, as grime blocks heat transfer
- Hide electrical problems or damage
- Increase the risk of fire
A survey by the National Fire Protection Association found that cooking equipment is the leading cause of home fires in the U.S. Grease and food buildup on stove parts, including coils, play a big role in these accidents. Regular cleaning reduces these risks and helps your stove last longer.
Understanding Stove Top Coils
What Are Stove Top Coils?
Stove top coils are metal heating elements found on electric stoves. They sit on top of the stove and get hot when you turn the dial. The metal coil heats your pots and pans directly.
Types Of Stove Top Coils
Most electric stoves have one of these:
- Exposed coil elements: The classic type—metal coils you can see and touch.
- Coil elements under glass: Some modern stoves hide the coils under a glass or ceramic top. (Cleaning steps are different for these.)
- Removable vs. fixed coils: Most exposed coils can be unplugged and removed; a few older or cheaper models have coils that are fixed in place.
For this guide, we’ll focus on exposed, removable coils, since these are the most common and easiest to clean.
Tools And Materials You’ll Need
Before you start, gather these items. Having everything ready makes the cleaning process faster and less messy.
- Non-abrasive sponge or cloth
- Mild dish soap
- Baking soda
- White vinegar
- Old toothbrush
- Small bowl
- Soft towel or drying rack
- Paper towels
- Rubber gloves (optional, protects hands)
- Screwdriver (if you need to remove drip pans)
- Vacuum cleaner or small brush (for crumbs under coils)
- Water spray bottle
What To Avoid
Don’t use:
- Steel wool pads (they scratch and damage the coils)
- Bleach or harsh chemicals (they can corrode metal and harm you)
- Submerging coils in water (can damage electric parts)
Safety Precautions
Before touching your stove’s coils, always unplug the stove or turn off the circuit breaker. Even if the coil looks cool, it may still be warm or carry an electric charge. Wait until all parts are completely cool before you clean.
If you cannot unplug your stove, ensure all knobs are set to “Off. ”
Step-by-step: How To Clean Stove Top Coils
1. Remove The Coils
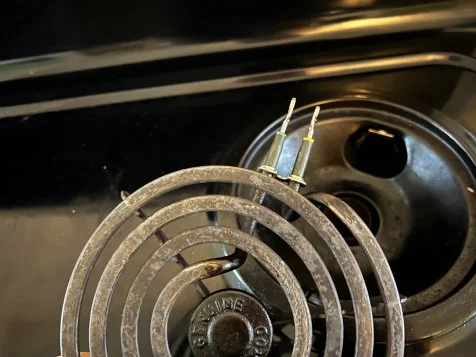
Gently lift each coil. Most coils have a plug-in end that fits into a socket. Grasp the coil near where it connects to the stove, and gently pull. Do not yank the coil by the middle, as this can bend or break it.
If the coil does not come out easily, wiggle it gently. Never force it. For fixed coils, you’ll need to clean them in place.
2. Check For Visible Damage
Before cleaning, look for:
- Cracks or splits in the metal
- Exposed wires
- Burn marks or melted areas
If you see any damage, do not use the coil. Replace it before using your stove again.
3. Clean Drip Pans And Area Under Coils
Under each coil is a drip pan—a metal bowl that catches spills. Remove these and soak them in hot, soapy water while you clean the coils. If they are very dirty, add some baking soda to the water.
Use a small brush or a vacuum to clear crumbs and debris from under the coils.
4. Wipe Off Loose Dirt
With a dry cloth or paper towel, wipe the coil to remove any loose crumbs or burnt bits.
5. Make A Cleaning Paste
Mix a few tablespoons of baking soda with a little water in a bowl. Stir to make a thick paste.
6. Scrub The Coils
Dip your sponge or toothbrush into the baking soda paste. Gently scrub the coil, focusing on sticky spots or burnt-on food. You may need to repeat this step a few times for stubborn stains.
If you prefer, you can spray a mixture of equal parts white vinegar and water onto the coil before scrubbing. The fizzing reaction helps lift grime.
7. Wipe Clean
Use a damp cloth to wipe off the paste and dirt. Rinse the cloth often to avoid spreading grime back onto the coil.
8. Dry Thoroughly
Use a towel or let the coil air-dry completely. Moisture can cause electrical problems, so make sure the coil is totally dry before reinstalling.
9. Clean Drip Pans
Take the drip pans out of their soak. Scrub them with a sponge and rinse. If stains remain, sprinkle baking soda on the spot and rub with a damp sponge.
10. Replace Everything
Once all parts are dry, put the drip pans and coils back in place. Plug the coil ends back into the socket, making sure they are secure.
11. Test The Stove
Turn the burners on for a few minutes to make sure everything works. If you see smoke or smell burning, turn off the stove and check for missed grime.
Dealing With Stubborn Stains
Some food and grease can be tough to remove. Here’s what you can try:
- Let the baking soda paste sit: After applying, wait 15–20 minutes before scrubbing.
- Use white vinegar: Spray on vinegar, let it fizz, then scrub.
- Repeat cleaning: Sometimes, stains need a second or third round.
- Avoid knives or metal tools: These can scratch or damage the coil.
If the coil still looks dirty, it may be stained but clean. As long as there’s no sticky residue, it’s safe to use.
Credit: www.hgtv.com
How Often Should You Clean Stove Top Coils?
How often you clean depends on how much you cook and what you cook. As a rule:
- Light use (1-2 times a week): Clean coils every 2–4 weeks.
- Heavy use (daily cooking, frying): Clean coils weekly.
- After spills: Clean as soon as the coil cools.
Regular cleaning prevents grime buildup and makes each cleaning faster.
Common Mistakes When Cleaning Stove Top Coils
Many beginners make the same errors. Avoid these to keep your stove safe and long-lasting:
- Submerging coils in water: Water can get inside and damage electrical parts.
- Using abrasive tools: Steel wool or sharp tools scratch the coil, making it rust faster.
- Not drying coils: Even a little moisture can cause electric shocks or break the coil.
- Forcing coils in or out: This can bend the prongs or break the socket.
- Using harsh chemicals: Bleach, ammonia, and oven cleaner can ruin the coil’s finish.
What To Do If Your Stove Coils Smell Or Smoke
Sometimes, even after cleaning, coils may smoke the first time you use them. Here’s why:
- Leftover cleaning residue: Wipe with a damp cloth and dry again.
- Hidden food particles: Check under the coil and drip pan.
- Coil is damaged: If you see sparks, stop using the stove and replace the coil.
If smoke continues, check your stove’s manual or call a professional.
Can You Clean Stove Top Coils Without Removing Them?
If your coils are fixed and cannot be removed, you can still clean them, but be more careful:
- Make sure the stove is unplugged and cool.
- Use a damp (not wet) cloth with baking soda paste.
- Wipe gently and avoid getting water near the socket area.
- Dry with a towel or paper towels.
Fixed coils are harder to clean, but regular wiping after each use helps keep them in good shape.
Cleaning Other Stove Parts
Drip Pans
Drip pans take most of the mess. For heavy stains, soak overnight in a mix of hot water, dish soap, and baking soda. For tough stains, add a splash of vinegar.
Control Knobs
Remove knobs (if possible) and wash in soapy water. Wipe the area behind the knobs, as grease often builds up there.
Stove Surface
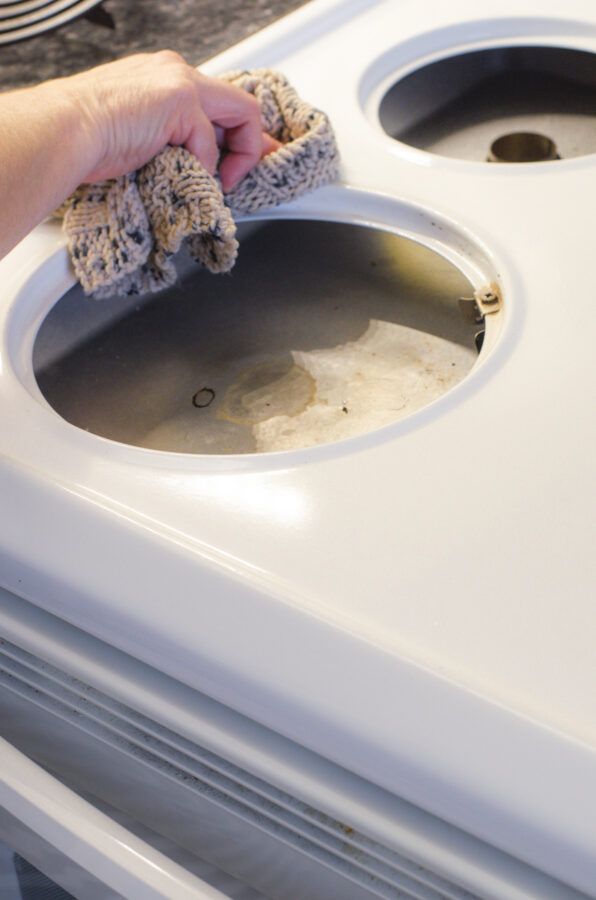
Wipe the area around the coils with a damp cloth and mild soap. Dry after cleaning.
Stove Top Coil Maintenance Tips
Keeping coils clean means less work later. Try these tips:
- Wipe spills right away: This prevents food from burning onto the coil.
- Use drip pan liners: These make cleaning easier and protect the pans.
- Check for damage often: A damaged coil is unsafe.
- Do not overload burners: Heavy pots can bend coils or damage sockets.

Credit: www.youtube.com
Comparing Cleaning Methods
Here’s a quick comparison of popular cleaning methods for stove top coils:
| Method | Effectiveness | Safety | Ease of Use |
|---|---|---|---|
| Baking soda paste | High | Very safe | Easy |
| Vinegar spray | Good | Safe | Easy |
| Chemical cleaner | High | Moderate | Medium |
| Steel wool | High (removes stains) | Unsafe (scratches) | Hard |
Baking soda and vinegar are the safest and most effective for home use.
When To Replace Stove Top Coils
Even with good care, coils eventually wear out. Replace your coil if:
- It won’t heat evenly
- You see cracks, exposed wires, or melted spots
- The coil wobbles or does not fit securely
- There are frequent sparks or smoke
Replacement coils are easy to find online or in appliance stores. Always buy the right size and type for your stove.
Professional Cleaning Vs. Diy
Is it ever worth hiring a pro? For most people, cleaning stove top coils is a simple DIY task. However, you might want a professional if:
- There’s heavy, burnt-on grease that won’t come off
- The stove is very old or valuable
- You are unsure about handling electric parts
Professional cleaning can cost $50–$150, depending on your area and stove type. Most homeowners find DIY cleaning saves money and works well.
Stove Top Coil Cleaning Myths
Many myths exist about cleaning electric stove coils. Let’s clear up the most common ones:
| Myth | Fact |
|---|---|
| Soaking coils in water cleans best | Never soak coils—water can damage them |
| It’s fine to use oven cleaner on coils | Oven cleaner can corrode and ruin the coil |
| Coils never need to be cleaned | Dirty coils can cause fires and waste energy |
| Any brush or pad is okay | Use only soft sponges or old toothbrushes |
Credit: www.harbourbreezehome.com
Environmental Impact Of Cleaning Stove Top Coils
Using baking soda and vinegar is not only safe for your stove, but also better for the environment. Many chemical cleaners contain harsh ingredients that can harm water sources and wildlife. Choosing natural cleaners keeps your kitchen and the planet healthier.
Tips For Keeping Stove Top Coils Clean Longer
A little prevention goes a long way. Try these strategies to spend less time scrubbing:
- Cover pans: Use lids to avoid splatters.
- Don’t overfill pots: Boiling food can spill onto coils.
- Clean as you go: Wipe up messes as soon as the stove is cool.
- Rotate burners: Use all burners, so none get overused and dirtier.
How Clean Coils Improve Cooking
Few people realize that clean stove top coils help food cook more evenly. When grime blocks heat, your pan may have hot and cool spots. This affects everything from pancakes to stir-fry. Clean coils also use less electricity, helping you save on energy bills.
Cleaning Coils On Different Stove Brands
Most electric stoves use similar coils, but some brands have special instructions. Always check your stove’s manual. If you have a Whirlpool, GE, Frigidaire, or Samsung stove, the cleaning steps above will work for most models. For stoves with glass tops or induction, follow the manufacturer’s guidelines.
For more on electric stove safety, see this Wikipedia article.
Frequently Asked Questions
How Do I Know If My Stove Coils Are Removable?
Most exposed electric coils have a plug-in connection. Gently lift near the stove socket and pull. If it slides out, it’s removable. If it’s fixed, clean it in place as described above.
Can I Use Oven Cleaner On My Stove Top Coils?
No. Oven cleaner is too harsh and can damage the coil’s metal. Stick with baking soda and vinegar for best results.
Why Do My Stove Coils Keep Smoking After Cleaning?
Smoke usually means there’s leftover cleaning paste or food bits. Wipe the coils again with a damp cloth and dry fully before using.
What Should I Do If My Coil Won’t Heat After Cleaning?
Check that the coil is plugged in securely and the stove is on. If it still won’t heat, the coil may be damaged and need replacing.
Are Stove Top Coil Covers Safe To Use?
Metal or ceramic covers are okay for protecting coils when not in use. Never cook with covers on, as this can cause overheating or fires.
Cleaning your stove top coils is a simple task that makes a big difference in your kitchen. With the right tools and steps, you’ll enjoy safer, better cooking and a stove that lasts longer. Remember, regular care saves time and trouble in the long run.