
Many people love using the Instant Pot for its speed and convenience. But sometimes, food gets burnt at the bottom, leaving a stubborn mess that seems impossible to clean. If you’ve ever stared at your Instant Pot’s inner pot, worried those brown-black stains might be permanent, you’re not alone. Luckily, you don’t need harsh chemicals or endless scrubbing. This guide will show you exactly how to clean a burnt Instant Pot, prevent future burns, and keep your device running smoothly for years.
Whether you’re a busy parent, a student, or just someone who enjoys easy meals, this article will make cleaning after a cooking disaster much simpler. We’ll cover step-by-step cleaning methods, explain why burnt food happens, and share practical tips most people miss.
By the end, you’ll be confident facing any burnt mess—without damaging your Instant Pot.
Understanding Why Your Instant Pot Gets Burnt
Before you clean, it helps to know why food burns in the Instant Pot. The main reasons are:
- Not enough liquid: Instant Pots need a minimum amount of water or broth to build pressure. Without it, food sticks and burns.
- Thick sauces: Foods like chili or tomato-based sauces can settle on the bottom and scorch easily.
- High heat: Using the “Sauté” mode for too long or with little oil can burn food quickly.
- Starch buildup: Rice, pasta, or beans can create starchy layers that stick and burn.
- Dairy and sugar: Recipes with milk, cream, or sugar often burn if not stirred often or cooked carefully.
Knowing the cause helps you avoid future burnt pots and choose the right cleaning method.
What To Do Immediately After Food Burns
If you see the dreaded “Burn” message or smell burning, act quickly:
- Turn off the Instant Pot: Don’t keep cooking. Remove the inner pot from the base.
- Remove food: Use a spoon to take out unburnt food from the top. Don’t scrape the burnt parts yet.
- Let it cool: Don’t pour cold water into a hot pot—this can warp the metal.
- Do not force-scrape: Scraping burnt food with metal tools can scratch and ruin the nonstick coating or stainless steel.
These steps make cleaning easier and protect your pot from damage.
Essential Tools And Products For Cleaning
You don’t need expensive cleaners. The best tools are usually in your kitchen already:
- Soft sponge or cloth: Non-abrasive, so it won’t scratch the pot.
- Wooden or silicone spatula: Gentle for loosening food.
- Baking soda: Great for lifting burnt spots.
- White vinegar: Helps dissolve tough stains and odors.
- Dish soap: Breaks down grease and residue.
- Plastic scraper: Safe for nonstick or stainless steel.
- Bar Keepers Friend: For very stubborn stains (safe for stainless steel only).
- Hot water: Essential for soaking.
Avoid steel wool or harsh scouring pads, as these can scratch and ruin your pot.
Step-by-step Guide: Cleaning A Burnt Instant Pot
Let’s walk through the best methods, from quick fixes to deep cleaning.
Method 1: The Soak-and-wipe Approach
This is the simplest method for light burns or stains.
- Fill the pot with hot water: Cover the burnt area by at least one inch.
- Add dish soap: A few drops are enough.
- Let it soak: Wait at least 30 minutes, up to a few hours.
- Wipe with a soft sponge: Gently rub the burnt area. Most residue will lift off.
- Rinse and repeat: If stains remain, repeat the process.
This method works best for mild burns and won’t damage the pot’s surface.
Method 2: The Boil Method
For stubborn, stuck-on food, heat can help.
- Fill with water: Add enough to cover the burn, plus a bit extra.
- Add 1-2 tablespoons of baking soda.
- Run “Sauté” mode: Bring the water to a gentle simmer for 5-10 minutes.
- Turn off and let cool: Let the water sit until warm.
- Scrape gently: Use a silicone spatula or plastic scraper to loosen burnt bits.
- Wash as usual: Use dish soap and a soft sponge to finish.
The combination of heat and baking soda softens tough stains.
Method 3: Baking Soda Paste
For dark, stubborn stains that don’t come off with boiling.
- Make a paste: Mix three parts baking soda with one part water.
- Spread on stains: Cover burnt areas with the paste.
- Let sit: Wait at least 30 minutes.
- Scrub gently: Use a soft sponge to rub the paste in circles.
- Rinse well: Wash off all residue.
Baking soda is slightly abrasive but safe for stainless steel.
Method 4: Vinegar And Baking Soda Reaction
This method is good for both cleaning and removing odors.
- Sprinkle baking soda: Cover the burnt area with a generous layer.
- Pour white vinegar: Slowly pour until it bubbles up.
- Let fizz and soak: Wait 10-15 minutes.
- Scrub gently: Use a soft sponge to clean.
- Rinse thoroughly: Remove all traces of baking soda and vinegar.
The fizzing reaction helps lift burnt food without scrubbing hard.
Method 5: Bar Keepers Friend (stainless Steel Only)
If your pot is stainless steel (not nonstick), this cleaner can help.
- Sprinkle Bar Keepers Friend: Add to the burnt area.
- Add a little water: Make a loose paste.
- Let sit for a few minutes: Don’t let it dry.
- Scrub gently: Use a non-abrasive sponge or cloth.
- Rinse well: Remove all cleaner before using the pot again.
Never use this on nonstick or ceramic pots, as it can damage the surface.
Method 6: Dishwasher Tablets
Surprisingly, these can help for very tough stains.
- Place a dishwasher tablet in the pot.
- Add boiling water: Enough to cover the burnt area.
- Let soak for several hours or overnight.
- Scrub gently: Most residue should come off easily.
- Rinse and wash as normal.
This is a last-resort method but can save a badly burnt pot.
Comparison Of Cleaning Methods
Below is a quick comparison to help you choose the right method:
| Method | Best For | Time Needed | Surface Safety |
|---|---|---|---|
| Soak-and-Wipe | Light burns, stains | 30-60 mins | All types |
| Boil Method | Moderate burns, stuck food | 30-45 mins | All types |
| Baking Soda Paste | Stubborn stains | 45+ mins | Stainless steel, ceramic |
| Vinegar & Baking Soda | Odors, heavy burns | 30 mins | Stainless steel, ceramic |
| Bar Keepers Friend | Severe stains | 20-30 mins | Stainless steel only |
| Dishwasher Tablet | Extreme burns | Overnight | Stainless steel, ceramic |
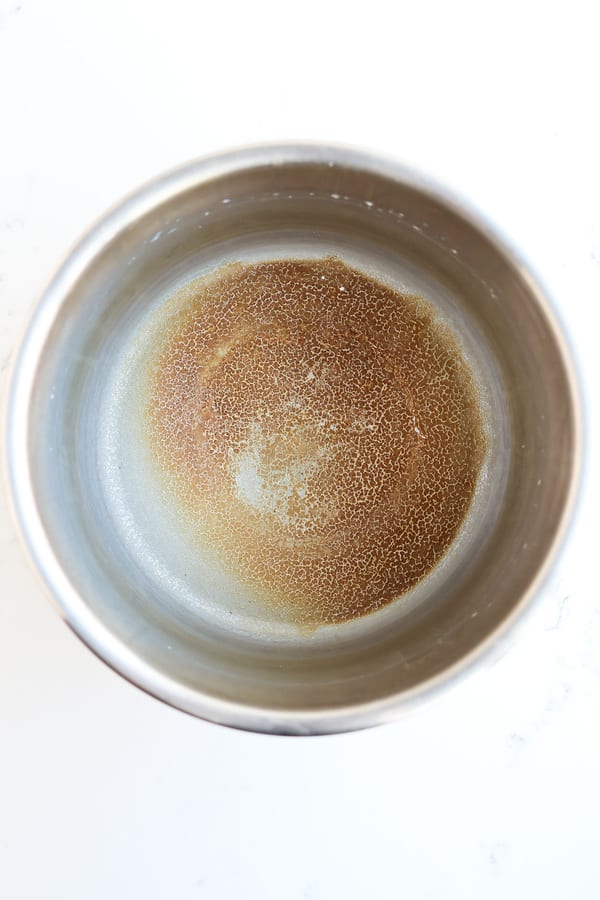
Credit: instafreshmeals.com
Special Care For Nonstick And Ceramic Inner Pots
Some Instant Pots have nonstick or ceramic-coated inner pots. Cleaning rules are different:
- Never use abrasive cleaners: Scratches ruin the coating and make burning worse.
- Use soft tools only: Silicone, plastic, or wood.
- Avoid Bar Keepers Friend or steel wool.
- Check for damage: If the coating peels, replace the pot. Damaged nonstick can release unhealthy chemicals.
A gentle touch keeps these pots in good shape.
How To Remove Burnt Smell From Instant Pot
Even after cleaning, burnt smells can linger. Here’s how to get rid of them:
- Lemon steam clean: Fill the pot with 2 cups of water and slices from one lemon. Run the “Steam” function for 2 minutes. Release pressure, discard water, and wipe dry.
- Vinegar steam: Use equal parts water and white vinegar (about 2 cups total). Run “Steam” for 2 minutes, then let sit for 15 minutes before releasing pressure.
- Baking soda soak: Sprinkle baking soda in the pot, add hot water, and let soak overnight. Wash as usual.
Also, clean the lid, sealing ring, and steam release valve, as odors often hide there.

Credit: nilds.gov.ng
What Not To Do When Cleaning Burnt Instant Pot
Some common mistakes can make things worse:
- Don’t use metal scouring pads: They scratch the surface.
- Don’t use bleach or harsh chemicals: These can damage the pot and leave dangerous residues.
- Don’t soak the base: Only the inner pot is washable. The main unit has electrical parts.
- Don’t force open the lid if stuck: Release pressure naturally, then open.
- Don’t put inner pot in dishwasher if not dishwasher-safe: Check your model’s instructions.
Avoid these errors to keep your Instant Pot safe and long-lasting.
How To Prevent Food From Burning In The Future
Prevention saves time and effort. Here’s how to avoid burnt food next time:
- Always add enough liquid: Most recipes need at least 1 cup of water or broth.
- Layer thick sauces on top: Don’t stir tomato paste or thick sauces into the bottom.
- Deglaze after sautéing: After browning meat or onions, add some liquid and scrape up any stuck bits before pressure cooking.
- Use pot-in-pot method for sticky foods: Cook rice, oatmeal, or dairy dishes in a separate bowl inside the Instant Pot.
- Don’t overfill the pot: Follow the max fill lines, especially for starchy foods.
- Follow recipe instructions: Instant Pot recipes are designed for the device’s needs.
- Use proper settings: “Manual” or “Pressure Cook” for most foods, “Sauté” only for short browning.
These steps reduce the risk of burnt food and cleaning headaches.

Credit: instafreshmeals.com
When To Replace Your Inner Pot
Sometimes, despite your best efforts, the pot is too damaged to save:
- Deep scratches or peeling: Especially for nonstick or ceramic pots.
- Discoloration that won’t come off: This can affect taste and safety.
- Warped pot: Won’t sit flat, cooks unevenly.
- Strange smells that won’t go away: May be embedded in the material.
Replacement inner pots are available for most Instant Pot models. Using a damaged pot can be dangerous or affect your food’s taste.
Deep Cleaning Other Instant Pot Parts
Burnt food or odors can get into other parts of your Instant Pot. Here’s how to clean them:
Lid
- Wash with warm, soapy water. Rinse and dry thoroughly.
- Check the anti-block shield (the small metal cap inside). Remove and clean if dirty.
Sealing Ring
- Remove and wash with soap and water. If smells remain, soak in vinegar water or bake at low heat for 20 minutes.
- Replace if cracked or permanently smelly.
Steam Release Valve
- Remove and clean under running water.
- Use a small brush to clear any food debris.
Outer Housing
- Wipe with a damp cloth. Never submerge in water.
Buttons And Display
- Wipe gently with a slightly damp cloth. Avoid excess moisture.
Keeping all parts clean ensures your Instant Pot works well and food tastes fresh.
Professional Vs. Home Cleaning Solutions
Some people wonder if they should use commercial cleaners or stick with kitchen basics. Here’s a quick comparison:
| Solution | Pros | Cons | Safety |
|---|---|---|---|
| Baking Soda & Vinegar | Cheap, natural, effective | May need soaking, some scrubbing | Very safe |
| Bar Keepers Friend | Very effective on stainless steel | Not for nonstick, can irritate skin | Safe if rinsed well |
| Dishwasher Tablets | Strong, good for worst stains | Not natural, may leave residue | Rinse carefully |
| Professional Cleaners | Very powerful, quick | Expensive, often overkill | Check compatibility |
For most people, baking soda and vinegar are enough. Only use stronger products if safe for your pot’s surface.
Real-life Examples: Cleaning Successes And Mistakes
Here are a few stories from Instant Pot owners:
- Sarah’s chili disaster: She didn’t add enough liquid and her chili burnt badly. She soaked with baking soda and water overnight, then used a silicone spatula to gently lift the mess. Her pot was spotless by morning.
- Mark’s rice mishap: Mark scraped burnt rice with a metal spoon, leaving scratches. Now, he always uses a plastic scraper and deglazes after sautéing.
- Linda’s burnt smell: After a burnt stew, the smell stayed in the sealing ring. She steamed lemon water for 5 minutes, and the odor vanished.
The key lesson: patience and the right tools protect your Instant Pot.
The Science Behind Burnt Food Removal
Why do methods like baking soda and vinegar work so well?
- Baking soda is a mild alkali. It reacts with acids and fats, breaking down burnt food.
- Vinegar is acidic. It cuts through mineral deposits and neutralizes odors.
- Heat and soaking soften residue, making it easier to lift without harsh scrubbing.
You don’t need strong chemicals—just a little science and time.
Simple Maintenance Routine For A Clean Instant Pot
To avoid big cleaning jobs, try this routine after each use:
- Rinse the inner pot immediately: Don’t let food dry and harden.
- Wash with warm, soapy water: Use a soft sponge.
- Dry thoroughly: Prevents water spots and rust.
- Clean the lid and sealing ring weekly: Avoid odor buildup.
- Check for stuck food before each use: Scrape gently with a silicone spatula.
A few minutes of care saves hours of scrubbing later.
When To Seek Help Or Warranty Service
If your Instant Pot is still under warranty and you notice:
- Unusual smells, discoloration, or malfunction not solved by cleaning
- Warped or damaged inner pot
- Lid sealing problems after a burn incident
Contact Instant Pot customer support. Never use a damaged or warped pot, as it can affect pressure and safety.
Helpful Resources For Instant Pot Owners
If you want more information or official guidance, visit the Instant Pot Support page. You’ll find model-specific tips, replacement parts, and safety advice.
Frequently Asked Questions
How Do I Clean A Severely Burnt Instant Pot Inner Pot?
Soak the pot with hot water and baking soda overnight. In the morning, use a silicone spatula to gently scrape off loosened food. If stains remain, try the vinegar and baking soda reaction. For stainless steel pots, Bar Keepers Friend can help.
Avoid abrasive tools or harsh chemicals to protect your pot.
Can I Use Steel Wool Or Metal Scrubbers To Clean Burnt Spots?
No. Steel wool and metal scrubbers will scratch both stainless steel and nonstick inner pots. Scratches make future burns more likely and can damage the pot. Always use soft sponges, silicone, or plastic tools.
What Should I Do If The Burnt Smell Won’t Go Away?
Try steaming lemon water or a vinegar-water mix in the clean pot. Also, wash the sealing ring, lid, and steam valve. If the smell remains after several attempts, consider replacing the sealing ring, as it can absorb odors.
Is It Safe To Use A Damaged Or Scratched Inner Pot?
No. Deep scratches, peeling, or warping can affect cooking and may release harmful chemicals (for nonstick pots). Replace the inner pot if you notice damage. Using a damaged pot can also void your warranty.
How Can I Prevent Food From Burning In My Instant Pot?
Always use enough liquid, don’t overfill, and follow Instant Pot-specific recipes. After sautéing, deglaze the pot with a little liquid to remove stuck bits. For thick sauces, layer them on top and avoid stirring into the bottom. These steps lower the risk of burning and make cleaning easier.
Keeping your Instant Pot clean isn’t hard if you know the right steps. With a little knowledge and care, you can handle any burnt mess and keep cooking with confidence.