
Keeping your Vevor Cotton Candy Machine clean is more than just good practice—it’s essential for tasty results, machine lifespan, and safety. Sticky sugar, burnt residue, and leftover flavors can ruin your next batch or, worse, damage the device. Many users overlook the importance of a proper cleaning routine, but learning how to clean your machine the right way will help you get the most from your investment and avoid common problems. Whether you use your machine for parties, business, or family fun, this guide explains every step, from what tools you need to the best cleaning habits, with practical tips and expert advice.
Why Regular Cleaning Matters
Every time you use a cotton candy machine, sugar melts and spins at high speeds, leaving behind crystals and sticky spots. Over time, this build-up can block vents, wear out parts, and affect the flavor of your cotton candy. More importantly, leftover sugar attracts dust and even pests if you store the machine for weeks.
Regular cleaning is not just about looks; it directly affects hygiene and performance. A well-maintained machine also runs quieter and with less vibration, which protects the motor.
Understanding Your Vevor Cotton Candy Machine
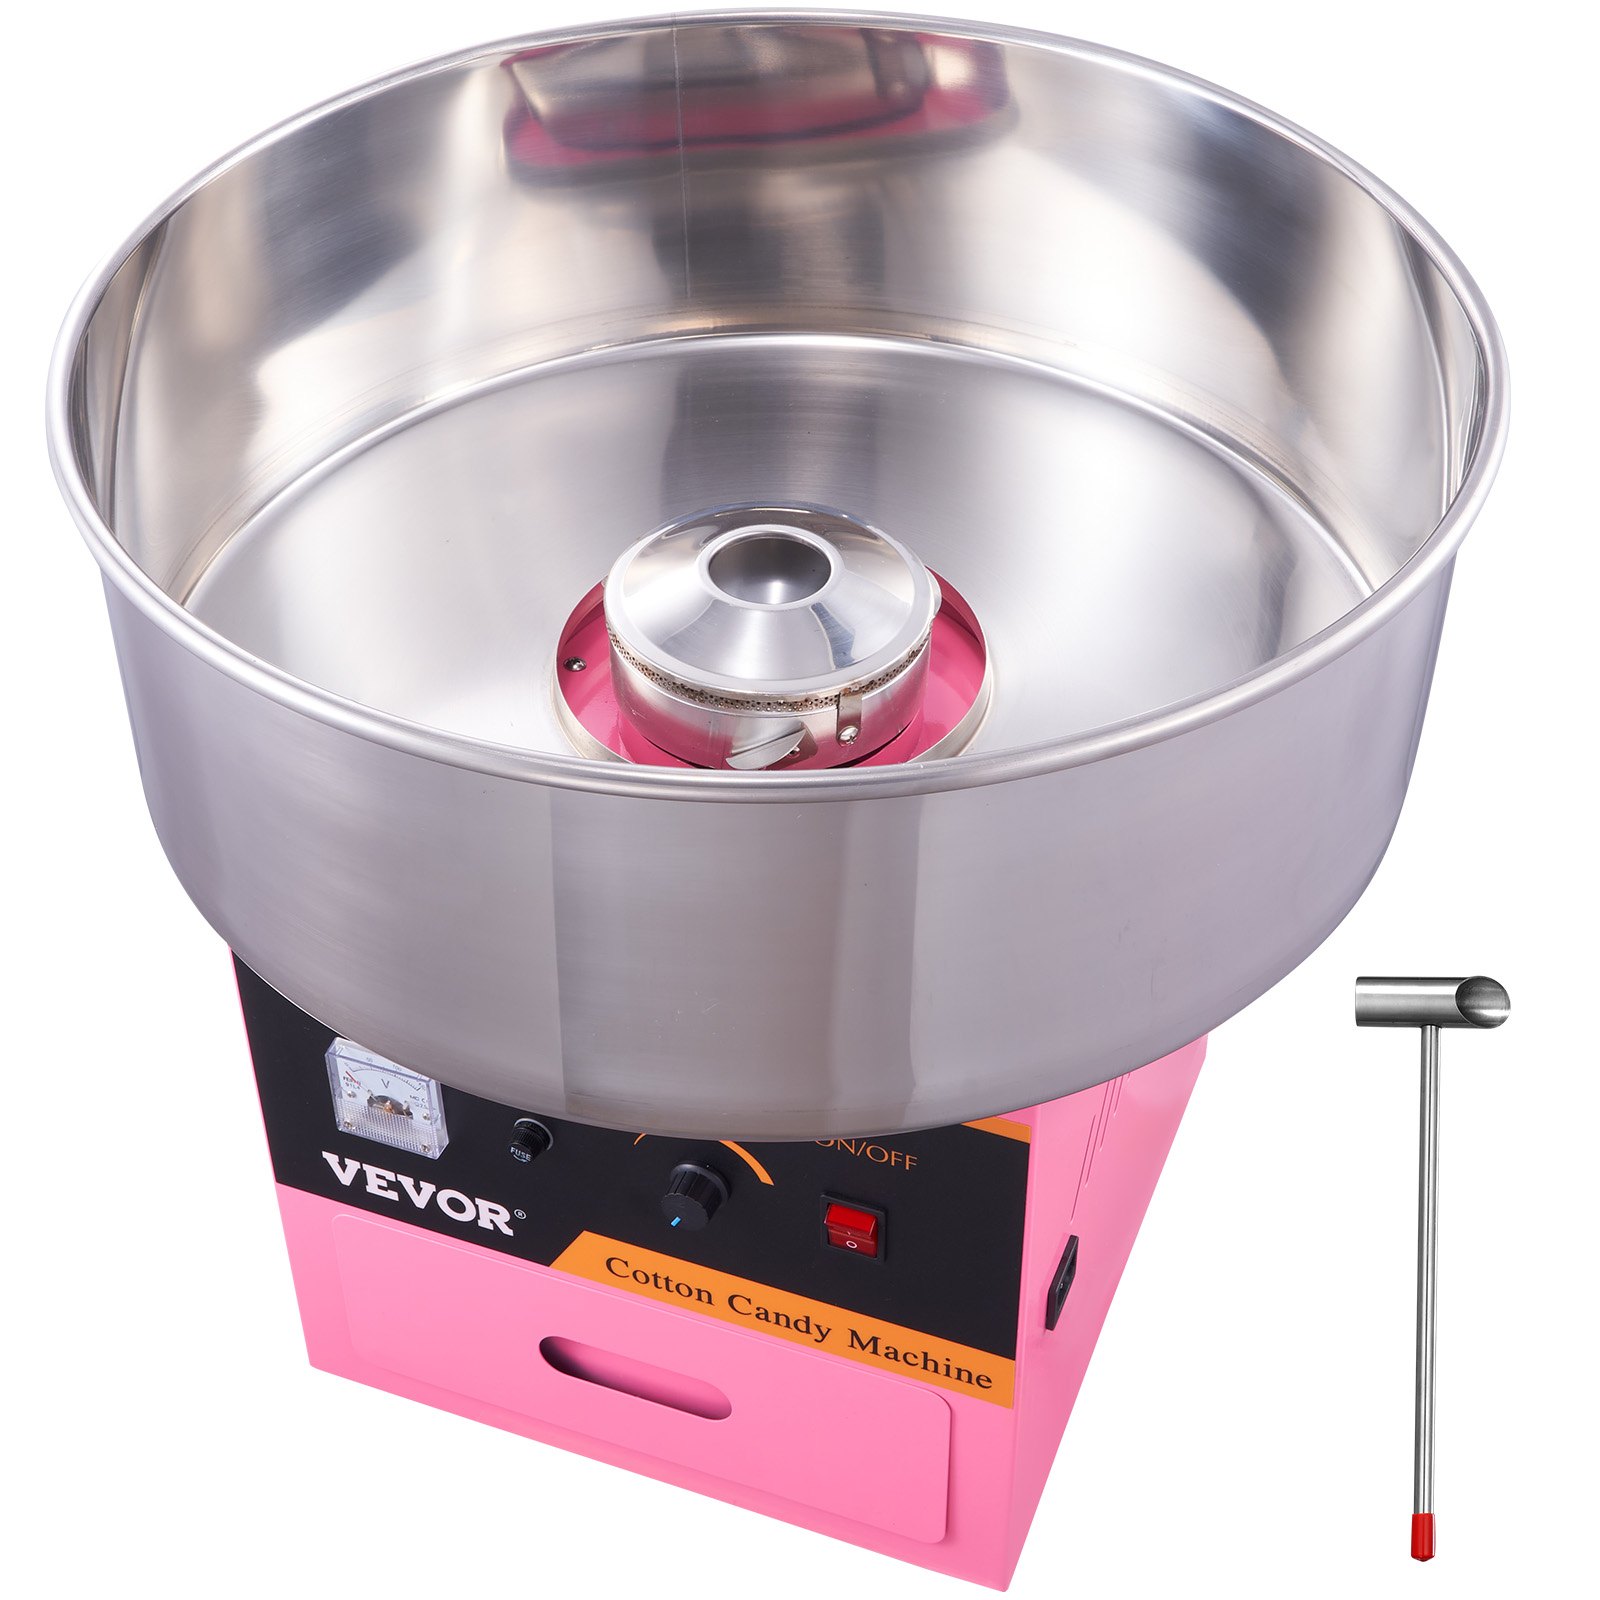
Before you start, it’s important to know the main parts of the Vevor Cotton Candy Machine:
- Spinning head (sugar bowl): Where sugar is heated and spun.
- Bowl (pan): The large metal bowl that catches the spun sugar.
- Protective dome (optional): The clear shield that keeps sugar inside.
- Heating element: The part inside the head that melts sugar.
- Motor base: The bottom unit that powers everything.
Knowing these parts will help you clean each area properly. The Vevor machines are mostly stainless steel or aluminum, but some parts have plastic or rubber. Always check your manual for part-specific advice.
Credit: www.vevor.com
What You Need: Tools And Supplies
Gathering the right supplies before you start will save time and prevent mistakes. Here’s what works best:
- Soft microfiber cloths: For wiping surfaces without scratching.
- Mild dish soap: Harsh cleaners can damage metal or paint.
- Warm water: Loosens sticky sugar.
- Soft-bristle brush or toothbrush: For small crevices.
- Non-abrasive sponge: Scrubs gently.
- Food-safe sanitizer: For deep cleaning.
- Spray bottle: For rinsing or sanitizing.
- Vacuum with small nozzle (optional): Removes loose sugar.
- Paper towels or drying rack: For air drying.
Many beginners forget that even clean-looking parts can hide sticky sugar. Always have a dry towel ready, because leftover water can cause rust on some metal parts.
Safety First: Preparing For Cleaning
Before you touch any part, safety comes first. Unplug the machine from the wall and let it cool for at least 30 minutes. Hot parts can burn your skin or warp if washed too soon. Remove any leftover sugar from the bowl so it doesn’t melt or stick more during cleaning.
If your model has a detachable head, always wait until it’s cool before removing it.
Do not immerse the base or electrical parts in water. Water inside the motor can cause electric shock or permanent damage. Always check for any cracked or loose wires while cleaning; it’s a good chance to spot problems early.
Step-by-step Cleaning Guide
Cleaning your Vevor Cotton Candy Machine isn’t hard, but each part needs special attention. Follow these steps for a thorough clean:
1. Disassemble The Machine
Start by taking off the bowl, the spinning head (if detachable), and the protective dome. Most Vevor models use simple latches or screws. Keep all small parts in a bowl so you don’t lose them. If you’re unsure, check your manual for diagrams.
2. Remove Loose Sugar And Debris
Use a vacuum with a small nozzle or a dry cloth to wipe away any loose sugar, threads, or dust. Pay close attention to the seams and corners—sugar often hides there.
3. Soak Removable Parts
Fill a sink or large basin with warm, soapy water. Place the bowl, spinning head, and dome in the water. Let them soak for 10–15 minutes. This softens hardened sugar and makes scrubbing easier.
4. Scrub And Rinse
Use a soft-bristle brush or non-abrasive sponge to scrub all surfaces. For tough spots, a toothbrush helps reach into grooves. Do not use steel wool; it scratches and damages finishes. Rinse all parts with clean water to remove soap.
5. Clean The Heating Element (with Caution)
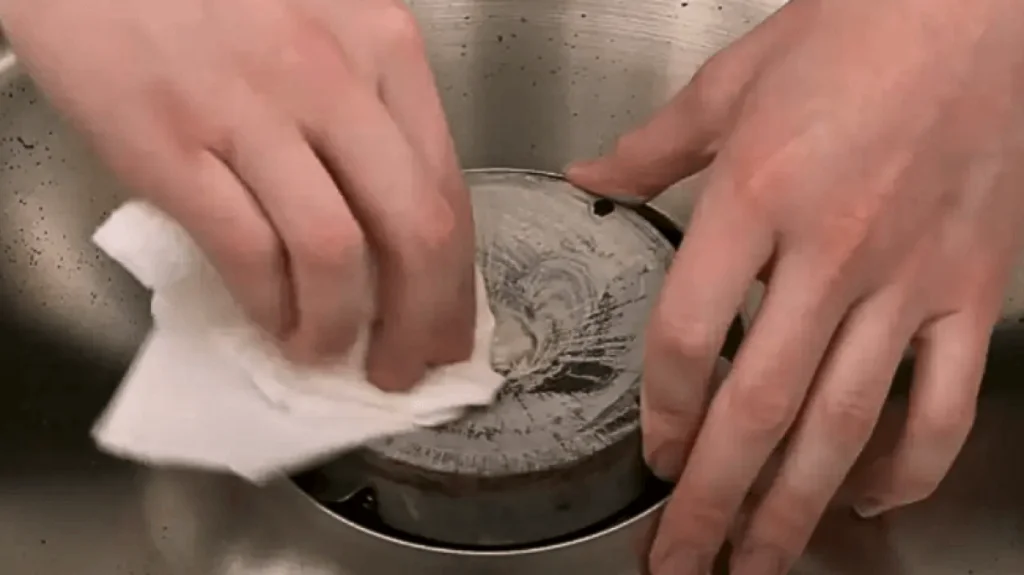
The heating element is sensitive. If sugar has dripped onto it, use a damp (not wet) cloth to gently wipe it. Do not soak or spray water here. If residue is stuck, turn on the machine for a minute to slightly warm the area, then turn off and wipe again once cool.
6. Wipe The Motor Base
Use a damp cloth with a little mild soap to wipe the outside of the motor base. Never let water drip inside. If sticky spots remain, a little rubbing alcohol on the cloth can help.
7. Dry All Parts Thoroughly
Water left on metal can cause rust, even if the part looks stainless. Dry everything with a clean towel, then let parts air-dry for an hour before reassembling.
8. Sanitize (optional, But Recommended)
Spray a food-safe sanitizer on all parts that touch sugar. This is especially important for machines used at events or with many users. Let sanitizer air dry.
9. Reassemble And Test
Once everything is dry, put the machine back together. Run the machine empty for a minute to be sure everything works and is dry.
Cleaning Frequency: How Often Is Enough?
How often you clean your machine depends on use. For home use (once a week or less), a full cleaning every time is best. For commercial or frequent use, clean all removable parts daily and deep clean the heating element weekly.
Here’s a quick comparison:
| Usage | Cleaning Frequency | Notes |
|---|---|---|
| Home (Occasional) | After Each Use | Prevents sugar build-up, keeps flavors fresh |
| Home (Frequent) | Every Use + Weekly Deep Clean | Focus on heating element weekly |
| Commercial/Event | After Each Event + Daily | Sanitize after each event for safety |

Credit: www.amazon.com
Common Mistakes And How To Avoid Them
Many beginners make simple cleaning mistakes that can shorten the life of their machine. Avoid these errors:
- Waiting too long to clean: Sugar hardens quickly. Clean soon after use.
- Using abrasive tools: Steel wool scratches surfaces, making them harder to clean next time.
- Soaking electric parts: Never submerge the base or heating head in water.
- Forgetting to dry: Dampness leads to rust and electrical problems.
- Missing small parts: Sugar can block vents or moving parts if not removed.
One non-obvious tip: If you use flavored sugars, always clean extra thoroughly. Flavors can transfer and change the taste of future batches.
Deep Cleaning: When And How
Sometimes, regular cleaning isn’t enough. If your machine smells burnt, spins unevenly, or you see brown or black residue, it’s time for a deep clean.
Steps For Deep Cleaning
- Unplug and Cool Down: This is always the first step.
- Remove the Bowl and Spinning Head: Soak longer, up to 30 minutes.
- Use Vinegar Solution: Mix equal parts white vinegar and water. Use this on tough residue (avoid heating element).
- Scrub with Toothbrush: Focus on the head’s holes and seams.
- Check for Clogs: Use a toothpick or soft brush to clear any vent holes.
- Wipe Motor Base with Alcohol: Removes sticky film.
- Rinse and Dry: Rinse with clean water and dry fully.
If you find burnt spots inside the spinning head, they may need gentle sanding with very fine sandpaper. Be careful—don’t remove too much metal.
Troubleshooting Cleaning Problems
Sometimes, even after cleaning, problems remain. Here are common issues and solutions:
- Machine smells burnt: Check for hidden sugar around the heating element and spinning head. Clean again with vinegar solution.
- Cotton candy tastes odd: Old flavors or residue can mix with new sugar. Clean all parts and sanitize.
- Machine vibrates or is noisy: Check that the spinning head is seated properly and all screws are tight. Clean away any sugar blocking vents or moving parts.
- Sugar isn’t spinning well: Make sure holes in the head are clear and dry.
If you keep having trouble, contact Vevor support or check the manual. Sometimes, parts need replacement after long use.
How To Store Your Machine After Cleaning
Storing your Vevor Cotton Candy Machine properly is as important as cleaning. Always store in a dry place. Cover with a clean cloth or the original dome to keep dust out. Never leave sugar in the machine. If you won’t use it for weeks, run the machine empty for a minute before storing to be sure all parts are dry.
Special Tips For Commercial Users
If you use the machine for events or business, cleaning becomes even more critical. Here are some pro-level tips:
- Keep spare parts: Have an extra spinning head and bowl to swap during busy events.
- Use color-coded cloths: One for the bowl, another for the base, to avoid cross-contamination.
- Log cleaning: Keep a simple cleaning log for each event or day. This keeps staff accountable and helps with health inspections.
- Pre-clean on site: If you move the machine to different locations, wipe it down before and after travel.
For commercial machines, some parts can be dishwasher safe—but always check the manual. Never assume all parts can go in the dishwasher.
Comparing Vevor Cleaning To Other Brands
How does cleaning a Vevor machine compare with other brands? Here’s a quick look:
| Brand | Disassembly Time | Ease of Cleaning | Parts Dishwasher Safe? |
|---|---|---|---|
| Vevor | 5-10 min | Easy | Some (check manual) |
| Nostalgia | 7-15 min | Medium | Few |
| Paragon | 10-20 min | Medium-Hard | Some |
| Great Northern | 10-15 min | Easy-Medium | Some |
Vevor machines are known for quick disassembly and easy cleaning, but always check which parts are dishwasher safe.
How To Clean Hard-to-reach Areas
Some sugar can hide in tiny cracks or vents. Here’s what helps:
- Compressed air: A short burst can remove sugar from vents.
- Cotton swabs: Dip in mild soapy water for seams.
- Toothpicks: Clear out small holes in the spinning head.
- Small paintbrush: Good for dry sugar dust.
Don’t use sharp metal tools—they can scratch and damage the machine.
How To Avoid Cross-contamination Of Flavors
If you make many flavors of cotton candy, sugar residue can mix and ruin the taste. Always clean thoroughly between flavors, especially fruity or spicy ones. For commercial use, consider separate heads for different flavors.
Environmental Tips: Cleaning With Less Waste
You don’t need harsh chemicals for a good clean. Use warm water and mild soap for most jobs. Microfiber cloths can be washed and reused. Avoid paper towels when possible. For a greener clean, vinegar and water remove most residues safely.
Maintenance Habits That Make Cleaning Easier
Prevention is better than cure. Here are habits that make cleaning faster and simpler:
- Wipe after every batch: A quick wipe before sugar hardens saves time later.
- Keep a brush nearby: Brushing the bowl between uses keeps sugar from building up.
- Check for cracks: Damaged parts collect sugar and bacteria.
- Label parts: If you have more than one machine, label bowls and heads to avoid mix-ups.
- Schedule cleaning: Set reminders, especially for commercial use.
Long-term Care For Your Vevor Machine
With regular cleaning, your Vevor machine can last for many years. Replace worn brushes or seals as needed. Keep the manual handy for part numbers and troubleshooting. A well-cared-for machine keeps working reliably, batch after batch.
Real-world Example: Cleaning Routine For An Event
Imagine you run a cotton candy stand at a fair. Here’s how a typical cleaning routine works:
- Before event: Wipe machine, check all parts are dry, sanitize bowl.
- During event: Wipe bowl every hour, check for sugar build-up in the head.
- After event: Disassemble, soak parts, clean heating element, dry fully before storing.
- Weekly: Deep clean, check for damage or wear.
Most problems at events come from sticky build-up. A quick wipe every hour prevents most issues.
What To Do If You Missed Cleaning After Use
If you forgot to clean right after use and sugar has hardened, don’t panic. Soak removable parts in warm water for 30 minutes. For stuck sugar on the machine, turn it on for a minute to warm, then unplug and wipe with a damp cloth.
Never scrape with metal tools, as this damages the finish.
When To Replace Parts
Some parts wear out over time, especially with heavy use. If you notice:
- Cracked bowl or dome
- Spinning head doesn’t spin evenly
- Heating element takes longer to heat
…it may be time to order replacements. Always use official parts for safety and best fit.
Useful Resources
For more details and updates, visit the official Vevor website or check out guides from food equipment specialists. One helpful resource for food safety and cleaning is USDA Food Safety.
Frequently Asked Questions
How Often Should I Clean My Vevor Cotton Candy Machine?
For best results, clean all removable parts after each use. For commercial use, clean after every event and sanitize daily. Deep clean at least once a week if used heavily.
Is It Safe To Put Vevor Machine Parts In The Dishwasher?
Some bowls and domes may be dishwasher safe, but always check your manual. Never put the motor base or heating element in the dishwasher or under running water.
What Should I Do If Sugar Is Stuck To The Heating Element?
Let the machine cool, then gently wipe with a damp cloth. If sugar is burnt on, warm the machine for one minute, unplug, and then wipe again. Never soak the heating element.
Can I Use Vinegar To Clean My Cotton Candy Machine?
Yes, a mix of white vinegar and water works well for tough residue. Avoid the heating element unless your manual allows. Rinse with clean water after using vinegar.
What’s The Best Way To Prevent Flavor Mixing In My Machine?
Clean thoroughly between flavors, especially the spinning head and bowl. For high-volume or commercial use, keep extra heads or bowls for different flavors.
Keeping your Vevor Cotton Candy Machine clean is the key to tasty treats, happy guests, and a long-lasting machine. With the right tools, habits, and a little extra attention, your machine will be ready for every party and event.
Credit: www.vevor.com