
Renovating a kitchen can completely change the feeling of a home. But before you can enjoy shiny new cabinets or a modern island, you must start with something much less glamorous—kitchen demolition. Demolishing a kitchen yourself can save thousands of dollars and gives you full control over the process. However, it also comes with risks and challenges. If you don’t plan and follow the correct steps, you might damage your home or hurt yourself.
This guide will show you how to demo a kitchen safely and efficiently, even if you’ve never done it before. You’ll learn which tools and materials you need, the right order for taking things apart, and how to avoid expensive mistakes.
We’ll cover everything from shutting off utilities to removing cabinets, appliances, walls, and floors. You’ll also find tips that most beginners miss—like how to protect your subfloor and what to do with all the debris. By the end, you’ll be ready to handle your kitchen demo confidently, knowing you’re saving money and doing the job right.
Planning Your Kitchen Demo
Before picking up a crowbar, smart planning is essential. Demolition can be messy and stressful, but a good plan keeps it under control.
Assess The Scope
First, decide what will be removed. Are you taking out everything, or just some items like cabinets and countertops? Make a clear list. For example:
- All cabinets and countertops
- Appliances (fridge, stove, dishwasher)
- Sink and plumbing fixtures
- Flooring
- Backsplash and wall tiles
- Partial or full walls
Knowing your scope helps you estimate time, cost, and how much help you need.
Gather Permits And Check Local Codes
In many places, removing walls or moving plumbing requires permits. Skipping this can lead to fines or problems when selling your home. Contact your city’s building department before starting. If you rent, get permission from the landlord.
Set A Timeline And Budget
Most DIY kitchen demos take 1–3 days, depending on the kitchen’s size and your experience. Factor in extra time for surprises—old pipes, hidden mold, or tricky fasteners. Estimate costs for:
- Tool rental (if you don’t own a saw, drill, or pry bar)
- Dumpster or trash hauling
- Permits and inspections
You can save $1,000–$3,000 compared to hiring a pro, but only if you plan wisely.
Prepare An Alternate Kitchen
During demolition, your kitchen will be out of use. Set up a temporary spot for:
- Making coffee or simple meals (microwave, hot plate)
- Washing dishes (bathroom sink or laundry room)
- Storing snacks and essentials
This keeps life comfortable during the project.
Safety Precautions For Kitchen Demolition
Kitchen demo is not just about strength—it’s about safety. Mistakes can cause injury or major repairs. Take these steps seriously.
Protect Yourself
Always wear:
- Safety glasses (to guard against flying debris)
- Work gloves (protect hands from sharp edges and splinters)
- Sturdy shoes or boots
- A dust mask (especially if removing drywall, tile, or old insulation)
- Hearing protection when using power tools
Have a first aid kit nearby.
Protect Your Home
Dust and debris spread quickly. Before you start, cover:
- Doorways with plastic sheeting and tape
- Floors and furniture with drop cloths
- Air vents (to avoid spreading dust through the HVAC system)
If you’re removing walls, check for asbestos (in homes built before 1980) or lead paint (before 1978). Testing kits are available, or hire a pro to check.
Turn Off Utilities
Never demo until you’ve turned off:
- Electricity (at the breaker box, not just wall switches)
- Water (at the shutoff valves under the sink and possibly at the main line)
- Gas (if removing a gas stove or oven)
Test outlets and pipes to be sure they’re off. Mistakes here can be deadly.
Plan For Heavy Lifting
Many kitchen parts are heavy. Never try to move a large appliance or countertop alone. Ask for help or use lifting straps. If you’re unsure, don’t risk injury—get assistance.
Tools And Materials You’ll Need
Having the right tools makes your kitchen demo faster and safer. Here’s what you’ll need:
Basic Tools:
- Pry bar (crowbar)
- Hammer
- Utility knife
- Cordless drill and drill bits
- Screwdrivers (flat and Phillips)
- Adjustable wrench
- Tape measure
Safety Gear:
- Safety glasses
- Work gloves
- Dust mask/respirator
- Hearing protection
Specialty Tools:
- Reciprocating saw (for cutting through walls or nails)
- Oscillating multi-tool (for tight spaces)
- Shop vacuum (for debris and dust)
Other Supplies:
- Heavy-duty trash bags
- Buckets (for carrying small debris)
- Drop cloths and plastic sheeting
- Painter’s tape or duct tape
Optional Equipment:
- Sledgehammer (for stubborn walls or tile)
- Appliance dolly or hand truck
- Ladder or step stool
Rent larger tools if you don’t own them. Many hardware stores offer daily or weekly rental.
Step-by-step Kitchen Demo Process
Now, let’s walk through the entire process, from start to finish. Work in this order for the smoothest results.
1. Remove All Items And Cover Surfaces
Clear everything out of the kitchen—dishes, food, small appliances, and decorations. Move them far from the work area. Cover nearby floors and surfaces with drop cloths or cardboard.
2. Shut Off Utilities
Double-check that electricity, water, and gas are off. Unplug all appliances. If you have a dishwasher or garbage disposal, switch off the breaker.
3. Disconnect And Remove Appliances
Start with appliances, as they’re often bulky and need a clear path out.
- Unplug the fridge and move it to another room.
- Turn off the water supply to the dishwasher, disconnect hoses, and slide it out.
- For the stove, disconnect from power or gas. For gas, cap the line with a proper fitting.
- Remove the microwave and vent hood. These are usually screwed into cabinets above.
- Uninstall the garbage disposal by loosening the mounting ring under the sink.
It’s best to have a friend help with heavy lifting.
4. Remove Cabinet Doors And Drawers
Start with upper cabinets. Use a drill or screwdriver to take off doors and remove all drawers. Label them if you plan to reuse or donate.
- Tip: Removing doors first makes cabinets lighter and easier to handle.
- For soft-close hinges, press the release button to detach doors smoothly.
5. Take Down Wall Cabinets
Support the cabinet with one hand while removing screws with the other (or ask for help). Most wall cabinets are attached at the back and sometimes through side panels. Use a drill to remove screws, then lift the cabinet away.
- Beginners often miss hidden screws at the top or sides—check carefully.
- If cabinets are painted over, use a utility knife to score along edges before prying.
6. Remove Base Cabinets
Base cabinets are usually screwed into the wall and to each other.
- Use a drill or impact driver to take out fasteners.
- Slide the cabinet away from the wall.
- Watch for plumbing pipes—work around them carefully.
If the countertop runs over several cabinets, you may need to remove it first (see next step).
7. Take Off Countertops
Countertops are often glued or screwed down.
- Look for screws under the front edge, inside the cabinet.
- If glued, use a utility knife to cut caulk lines.
- Pry up gently with a crowbar, working from one end to the other.
For stone or granite, these can weigh hundreds of pounds—get help or hire professionals.
8. Remove Backsplash And Wall Tiles
Use a hammer and putty knife to tap off tiles. For stubborn spots, a chisel or oscillating tool works well.
- Be careful not to damage the drywall if you plan to keep it.
- Wear goggles—tile shards can fly.
9. Take Out Sink And Plumbing Fixtures
- Disconnect the water lines with a wrench.
- Unscrew the drainpipe (have a bucket ready for water).
- Loosen clamps or fasteners holding the sink.
- Lift out the sink. For undermount styles, cut any adhesive.
Cap water lines to prevent leaks.
10. Demo Walls (if Needed)
If you’re removing a wall for an open kitchen, first check if it’s load-bearing. These walls support the floor or roof above. Never remove them without consulting a structural engineer.
For non-load-bearing walls:
- Remove baseboards and molding.
- Cut drywall into sections with a utility knife.
- Pull down drywall with a pry bar.
- Cut studs with a reciprocating saw if removing the frame.
Watch for electrical wires and pipes inside the wall.
11. Remove Flooring
Flooring removal depends on the type:
- Tile: Use a hammer and chisel to lift tiles. For large areas, a floor scraper saves time.
- Laminate or hardwood: Pry up planks starting at the edge. For floating floors, they may snap out without tools.
- Vinyl: Cut into strips and peel away. Adhesive can be stubborn; a heat gun softens glue.
If you find mold or water damage below, repair before installing new flooring.
12. Clean Up Debris
Bag small debris as you go, and keep larger pieces (cabinets, countertops) aside for hauling.
- Rent a dumpster for large kitchens.
- Some cities offer free bulk pickup—check local rules.
- Donate usable cabinets or appliances to local charities.
Vacuum the whole area thoroughly before starting new construction.
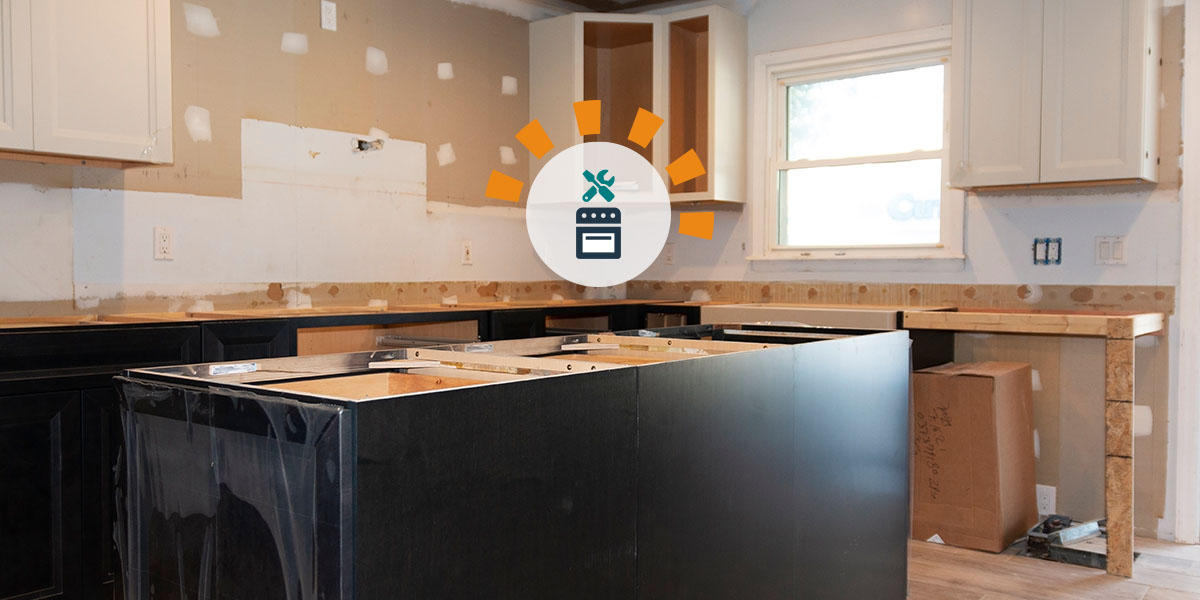
Credit: www.dumpsters.com
Common Mistakes And How To Avoid Them
Many DIYers make errors that cost time and money. Here’s how to avoid the biggest ones.
- Skipping Utility Shutoff: Double-check every line, especially gas. Test with a non-contact voltage tester for electricity.
- Forgetting Hidden Fasteners: Cabinets often have screws at the back or in corners. Running a flashlight inside helps spot them.
- Damaging Subfloor: When removing tile or flooring, don’t gouge the wood below. Use a floor scraper at a shallow angle.
- Over-Demoing: Don’t remove more drywall or framing than needed. The more you take out, the longer and costlier the rebuild.
- Not Labeling Parts: If you plan to reuse or donate, label doors, drawers, and hardware to make reassembly easier.
- Ignoring Dust Control: Block vents and close doors to prevent dust from spreading through the house.
Disposal And Recycling Tips
Kitchen demo produces a lot of waste. Managing it well saves money and helps the environment.
- Rent a dumpster if you have lots of debris. Estimate size based on your kitchen—10 or 20 cubic yards is typical.
- Recycle appliances at local centers. Many stores offer haul-away when you buy new ones.
- Donate cabinets or sinks to charities like Habitat for Humanity. They’ll often pick up for free.
- Separate metals (like copper pipes, faucets) from wood and drywall—scrap yards may pay for these.
- Check local rules for hazardous items like old paint, light bulbs, or asbestos.
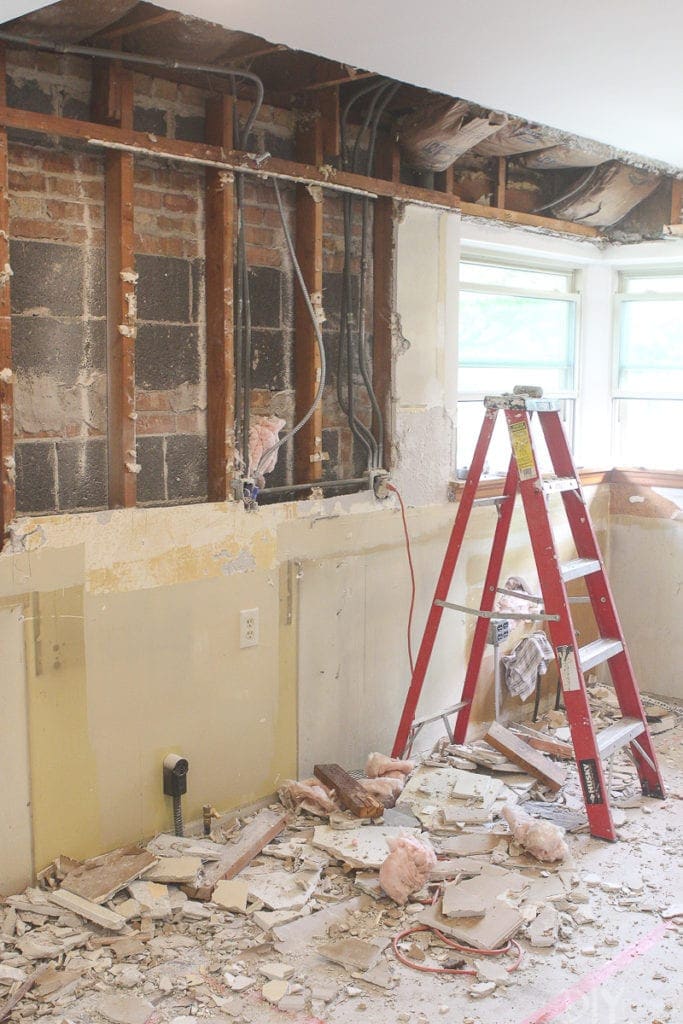
Credit: thediyplaybook.com
Table: Kitchen Demo Task Timeline
Here’s an example of how long each step might take in an average 12’ x 15’ kitchen:
| Task | Estimated Time | Tips |
|---|---|---|
| Clear Out Kitchen | 1–2 hours | Don’t rush—pack breakables carefully |
| Remove Appliances | 2–3 hours | Have a dolly for heavy items |
| Cabinets & Countertops | 3–6 hours | Label pieces if reusing |
| Backsplash & Walls | 2–4 hours | Wear goggles for tile demo |
| Flooring | 3–6 hours | Check subfloor for damage |
| Final Cleanup | 1–2 hours | Vacuum and bag dust/debris |
Adjust these times based on your kitchen size and how much help you have.
Cost Comparison: Diy Vs. Professional Kitchen Demo
Is DIY demo really worth it? Here’s how the costs typically compare:
| Demo Type | Average Cost (USD) | What’s Included |
|---|---|---|
| DIY Demo | $300 – $1,000 | Tool rental, dumpster, safety gear |
| Professional Demo | $2,500 – $5,000 | Labor, disposal, permits, insurance |
DIY saves thousands if you have time and basic skills. But if your kitchen has old wiring, asbestos, or complicated plumbing, hiring a pro is safer and faster.
Advanced Tips Most Beginners Miss
If you want your demo to go smoothly, pay attention to these insights:
- Check for hidden outlets and pipes inside walls before cutting. Use a stud finder or inspection camera.
- Plan for dust control. Seal off the kitchen with plastic and tape, and open windows for ventilation.
- Take photos before and during demo. These will help you (or your contractor) plan the rebuild, especially with wiring and plumbing.
- Save extra materials like molding or undamaged drywall—you might need them for patching.
- Rent a shop vacuum with a HEPA filter. It catches tiny dust that regular vacuums miss, protecting your family’s health.
Table: Tools For Kitchen Demo—buy, Rent, Or Borrow?
If you’re on a budget, here’s how to decide which tools are worth buying, renting, or borrowing:
| Tool | Buy | Rent | Borrow |
|---|---|---|---|
| Cordless Drill | ✔️ | ✔️ | |
| Pry Bar | ✔️ | ✔️ | |
| Reciprocating Saw | ✔️ | ✔️ | |
| Shop Vacuum | ✔️ | ✔️ | |
| Sledgehammer | ✔️ | ✔️ | |
| Oscillating Tool | ✔️ | ✔️ |
Buy tools you’ll use again; rent or borrow the rest.

Credit: www.youtube.com
When To Call A Professional
DIY kitchen demo is rewarding, but sometimes you should call a pro:
- If you find asbestos, lead paint, or mold—these are health hazards.
- If you need to remove a load-bearing wall.
- For major plumbing or electrical rerouting.
- If you feel unsafe or overwhelmed.
A professional can also handle permits and haul away debris. If you’re unsure, get a quote before starting. For more about safe demolition rules, check out this Wikipedia Demolition Guide.
Frequently Asked Questions
What Is The Cheapest Way To Demo A Kitchen?
The cheapest way is to do as much as possible yourself. Remove cabinets, appliances, and flooring carefully to avoid damage to reusable parts. Borrow tools from friends and donate usable items to avoid dumpster costs.
How Do I Know If A Kitchen Wall Is Load-bearing?
Check your home’s blueprints or consult a structural engineer. Load-bearing walls usually run perpendicular to floor joists and may support beams above. If unsure, don’t remove the wall yourself.
Can I Reuse My Old Kitchen Cabinets?
Yes, if they’re in good condition. Remove them carefully by unscrewing, not prying. Donate or repurpose them for a garage, laundry room, or workshop.
How Do I Dispose Of Old Appliances?
Check with your local recycling center or appliance retailer—many offer free or discounted removal when you buy new ones. Some cities have special pickup days for large items.
Is Kitchen Demo Safe For Beginners?
Yes, if you follow safety steps—turn off utilities, wear protective gear, and get help for heavy lifting. Avoid hazardous materials like asbestos or lead paint, and call a pro for complex jobs.
Taking on a kitchen demo is a big project, but with careful planning, the right tools, and attention to safety, you can do it successfully. Each step brings you closer to your dream kitchen—and the satisfaction of knowing you did it yourself.