
Have you ever opened your kitchen cabinet, spun your Lazy Susan, and felt overwhelmed by a jumble of pots, pans, and their lids sliding everywhere? You’re not alone. Many people love the idea of a Lazy Susan—a spinning shelf that promises easy access. But when it comes to heavy, oddly shaped cookware, the reality often feels like chaos. With a little planning, though, you can turn this spinning space into the most organized part of your kitchen.
An organized Lazy Susan isn’t just about looks. It saves you time, prevents scratched cookware, and makes cooking less stressful. In this guide, you’ll learn step-by-step how to organize a Lazy Susan for pots and pans, including practical tips, clever insights, and solutions to common mistakes.
By the end, your kitchen will feel more functional, and you’ll actually enjoy using your cookware.
Understanding Your Lazy Susan: Size, Shape, And Limits
Before you start, take a close look at your Lazy Susan. They come in different types—full circle, kidney-shaped, and pie-cut. Each has its own strengths and limits. Most Lazy Susans are between 24 and 36 inches in diameter. The shelves might be fixed or adjustable, and weight limits usually range from 20 to 60 pounds per shelf.
If you stack heavy pots without thinking about weight, you can damage the spinning mechanism. So, know what you’re working with:
- Measure the diameter and height between shelves.
- Check the weight limit in your cabinet manual or online.
- Look for shelf adjustability—can you move them up or down?
- Identify awkward corners or dead zones where items often get lost.
A common mistake is ignoring the weight and size limits. Heavy cast iron pans, for example, can warp the shelf or stop it from spinning smoothly. It’s better to keep the heaviest pieces elsewhere, or limit the total load.
Step 1: Declutter And Sort Your Pots And Pans
Start by emptying the Lazy Susan completely. Lay out all your pots, pans, lids, and accessories on a table or counter. This gives you a clear view and helps you make smart decisions.
Decluttering Tips
- Remove rarely used items. If you haven’t used a pan in a year, consider donating or storing it elsewhere.
- Group by type and size. Put all saucepans together, skillets together, lids in another pile.
- Inspect for damage. Recycle warped or scratched nonstick pans—they take up space and don’t cook well.
You’ll likely find items that don’t belong, like random utensils or mismatched lids. Removing these makes your organizing process smoother.
Credit: smallishhome.com
Step 2: Clean And Prep The Lazy Susan
With everything out, take a moment to clean the shelves. Grease and crumbs build up over time, making it harder to keep things neat.
- Use a mild dish soap and a damp cloth to wipe surfaces.
- Dry thoroughly to prevent mold or warping.
- If shelves are sticky or rough, consider adding shelf liners. These prevent sliding and are easy to clean.
A non-obvious tip: Clear shelf liners with a slight grip work best. They keep pots from shifting when you spin the Lazy Susan but don’t add bulk.
Step 3: Plan Your Organization Strategy
Now, decide how you want to arrange your pots and pans. There’s no one “right” way, but certain strategies work better depending on your needs and the Lazy Susan’s shape.
Key Organization Methods
- By Frequency of Use: Place daily-use pans in the easiest-to-reach spot.
- By Size: Put the largest items at the back (or perimeter), smallest at the front (or center).
- By Type: Group saucepans, skillets, and lids together for quick access.
- By Cooking Task: Keep all frying pans together, all boiling pots together, etc.
Most people find that a mix of frequency and size works best. For example, keep your everyday skillet near the front edge and less-used stockpots toward the back.
Sketch Your Plan
Take a few minutes to sketch a rough layout on paper. This helps you avoid overcrowding and makes it clear where everything should go. It’s a small step many skip, but it can save you time and frustration.
Step 4: Add Organizers And Dividers
A Lazy Susan by itself is just a spinning shelf. Adding the right organizers makes a huge difference in keeping pots and pans in place. Here are options to consider:
Lazy Susan-friendly Organizers
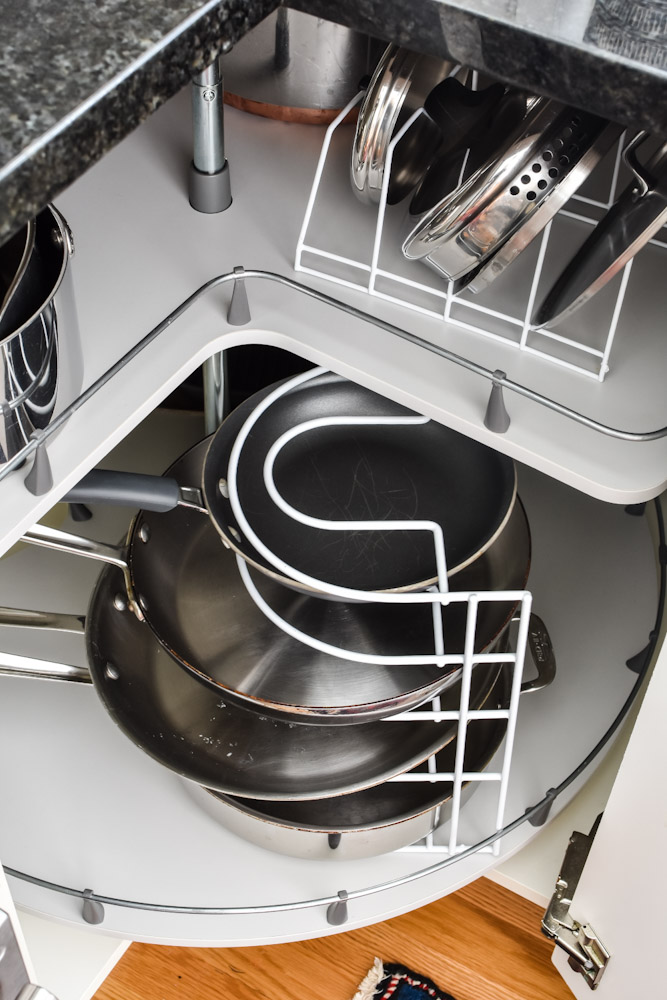
- Adjustable pan racks: These hold pans vertically, saving space and preventing scratches.
- Lid holders: Wire or acrylic holders keep lids upright and easy to grab.
- Stackable bins: Use low-profile bins for small items like steamer inserts or pot holders.
- Non-slip mats: These stop items from sliding as you spin the shelf.
Many people don’t realize that vertical organizers work well on round shelves. Choosing racks with a round base or flexible width lets you fit them perfectly.
Smart Use Of Dividers
Dividers are essential if you have a kidney-shaped or pie-cut Lazy Susan. They stop items from sliding into corners and help you “zone” the space.
- Use tension rods or adjustable dividers to split the shelf into sections.
- Try silicone or bamboo dividers for a softer look.
- Avoid bulky bins that waste space in the curve of the shelf.
A helpful tip: Attach small command hooks to the inner walls to hang lids or small pots. This uses vertical space that’s often wasted.
Step 5: Load Pots And Pans Strategically
Now it’s time to put everything back in. This is where your earlier planning pays off. How you place each item affects both space and convenience.
Order Of Loading
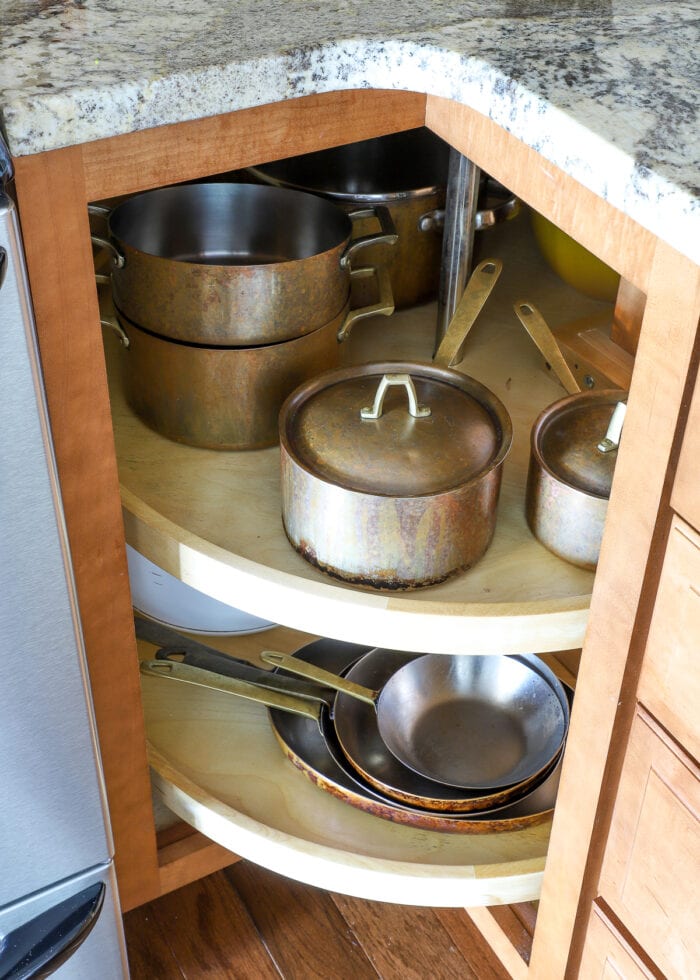
- Heaviest items first: Place large pots or Dutch ovens near the back or at the perimeter, balanced evenly.
- Stack carefully: If you must stack, put soft cloth or felt pads between pans to avoid scratches.
- Vertical placement: Stand pans vertically in racks to free up space.
- Lids upright: Slot lids into holders or along the wall of the Lazy Susan.
- Small accessories: Place these in bins near the center or in unused corners.
A common mistake is stacking too many pans, making it hard to pull one out without unstacking everything. Try to keep stacks no more than two or three pans high.
Example Layout
Let’s say you have:
- 3 frying pans
- 2 saucepans
- 1 stockpot
- 5 lids
You could stand the frying pans vertically in a rack, stack the saucepans, place the stockpot at the back, and line up lids in a holder along the side. Accessories like steamer baskets go in a small bin at the center.
Step 6: Optimize For Everyday Use
Organizing isn’t a “set it and forget it” job. The best systems are easy to use every day, so you actually keep them tidy.
Make Adjustments
- After a week, notice what’s working and what’s not.
- If you always have to move a pot to reach another, try rearranging the order.
- Notice if certain pans slide when you spin the shelf—add a grippy mat or adjust the rack.
Label Sections
If you share your kitchen or have a big family, use removable labels on the shelf or racks. This helps everyone know where things go, reducing clutter.
A tip most beginners miss: Take a quick photo of your organized Lazy Susan. It’s a fast reference if things get messy, and you can show others how you want it kept.
Step 7: Maintain Your Lazy Susan System
Even the best organization system needs upkeep. Set a reminder once a month to check the Lazy Susan.
- Remove crumbs or spills.
- Tighten any organizer racks or dividers that have come loose.
- Check for pots or lids that have migrated to the wrong spot.
- Revisit your “rarely used” pile—move items out if you haven’t used them.
A well-maintained Lazy Susan keeps your kitchen running smoothly and prevents the need for a big reorganization later.
Clever Solutions For Common Problems
Every kitchen is different, and Lazy Susans come with unique challenges. Here are smart solutions for issues you might face:
Problem: Pans Sliding When Spinning
Use silicone mats or drawer liner material. Cut them in a circle to fit the shelf. They grip both the shelf and the bottom of pans, stopping movement.
Problem: Lids Getting Lost
Install a lid rack along the inside wall, or use vertical wire holders. Magnetic strips (usually for knives) can also hold metal lids upright.
Problem: Wasted Center Space
The center of a round Lazy Susan often goes unused. Place a short bin or basket here for small items—just make sure it’s easy to lift out when you need to spin the shelf.
Problem: Not Enough Height For Stacking
If your shelves are adjustable, raise them. If not, focus on vertical organizers rather than stacking pans. You can even store lids separately on a cabinet door.
Problem: Heavy Cast Iron Or Oversized Pots
Store these outside the Lazy Susan if possible. If you must keep them there, limit to one per shelf and balance the weight with lighter items on the opposite side.
Maximizing Space In A Small Lazy Susan
If your Lazy Susan is on the smaller side, you need to be extra strategic.
- Choose only your most-used pots and pans for this space.
- Use narrow, vertical racks instead of wide bins.
- Hang small items, like mini colanders or measuring cups, from hooks on the inside cabinet wall.
- Store bulky or rarely used cookware elsewhere.
Remember, a crowded Lazy Susan is harder to use and more likely to break. Less is often more.
Comparison: Lazy Susan Vs. Other Pot And Pan Storage
It’s helpful to see how a well-organized Lazy Susan stacks up against other common storage solutions.
| Storage Option | Pros | Cons |
|---|---|---|
| Lazy Susan | Easy access, makes use of corner space, customizable | Weight limit, can get messy if overloaded |
| Deep Drawer | Great for heavy pots, easy stacking, simple access | Takes up lower cabinet space, hard to organize lids |
| Hanging Rack | Visual access, air dries pans, frees up cabinet space | Needs wall or ceiling space, dust and grease build-up |
| Standard Cabinet | Hidden from view, good for large items | Hard to reach items in back, wasted corner space |
Advanced Organization Ideas
If you want to take your Lazy Susan to the next level, consider these advanced tips:
Install Rotating Bins
Add small, rotating bins on top of the shelf for ultra-compact items like pot holders or lid knobs. This creates another spinning layer and maximizes space.
Use Modular Racks
Stackable, modular racks let you build custom levels for different pan sizes. Some even expand to fit round shelves.
Add Led Lighting
Small, battery-powered LED puck lights can make it easier to see everything, especially in deep or dark corner cabinets.
Repurpose Office Supplies
Magazine holders make great vertical organizers for pan lids or cutting boards. Use them along the edge of the Lazy Susan for instant order.
Sliding Or Pull-out Shelves
Some modern Lazy Susans have pull-out shelves or tiered levels. These can be retrofitted in older cabinets, making access even easier.
Real-world Example: Before And After
Consider this real-life scenario:
Before: The Lazy Susan is packed with pans of all sizes, tossed in without order. Lids are lost underneath, and every time you spin the shelf, items fall over. Cooking feels stressful and slow.
After: After following these steps:
- Only the most-used pots and pans are kept.
- Pans are stored vertically in a rack, lids in a holder.
- A small bin in the center holds accessories.
- The shelf is clean, items are easy to reach, and nothing slides.
Now, making dinner is faster and more enjoyable, with everything in its place.
Data: Common Lazy Susan Sizes And Weight Limits
To help you plan, here’s a quick look at standard Lazy Susan dimensions and what they can typically hold.
| Diameter (inches) | Height (inches) | Weight Limit (per shelf) | Ideal Items |
|---|---|---|---|
| 24 | 12 | 20 lbs | Small pans, lids, light cookware |
| 28 | 14 | 35 lbs | Standard pots and pans, most lids |
| 32 | 16 | 45 lbs | Large cookware, Dutch ovens |
| 36 | 18 | 60 lbs | Multiple pots, heavy items (with caution) |
Always check your cabinet’s manual or manufacturer specs for exact limits.
What To Avoid When Organizing A Lazy Susan
Many people repeat the same mistakes with Lazy Susans. Here are things to avoid:
- Overcrowding: Too many items make it hard to spin and cause scratches.
- Ignoring weight limits: This can break the shelf or mechanism.
- Stacking without protection: Pans scratch easily if stacked with no padding.
- Using round bins for everything: These waste space, especially in corners.
- Putting rarely used items inside: Reserve the Lazy Susan for daily essentials.
A non-obvious insight: Pots with long handles can block the spinning motion. Angle handles toward the center or use racks that keep them upright.
When A Lazy Susan Isn’t The Best Choice
Sometimes, a Lazy Susan just isn’t right for pot and pan storage. If you have mostly heavy cast iron or large woks, deep drawers or open shelves might be better. Also, very small kitchens might need every inch for food storage instead.
If you decide not to use your Lazy Susan for cookware, repurpose it for lighter items—like baking supplies, mixing bowls, or dry goods.

Credit: www.amazon.com
Maintenance Calendar For Lasting Organization
Staying organized is easier with a routine. Here’s a simple calendar for Lazy Susan upkeep:
- Weekly: Quick check for spills, misplaced items, or clutter.
- Monthly: Wipe shelves, tighten racks/dividers, review rarely used items.
- Seasonally: Deep clean, declutter, and reorganize as needed.
Set a phone reminder or add this to your kitchen cleaning routine.
Bonus: Kid And Accessibility-friendly Lazy Susan Tips
If you have kids or someone with limited mobility in the home, you can make your Lazy Susan safer and more accessible:
- Use shallow bins for lids to prevent finger pinches.
- Store the heaviest pots on the lowest shelf.
- Add soft-close mechanisms or slow-spin hardware.
- Use clear bins so everyone can see what’s inside.
This makes cooking a family activity and keeps everyone safe.
Credit: thehomesihavemade.com
Frequently Asked Questions
How Much Weight Can My Lazy Susan Shelf Hold?
Most Lazy Susan shelves can handle 20 to 60 pounds each, depending on size and construction. Check your cabinet’s manual for the exact limit. Never overload, as this can damage the spinning hardware and shelf.
What’s The Best Way To Store Pot Lids In A Lazy Susan?
Use a vertical lid rack or wire holder along the edge of the shelf. Magnetic strips or small hooks can also hold metal lids upright. Avoid stacking lids flat—they slide and get lost easily.
Can I Store Cast Iron Pans On A Lazy Susan?
You can, but only if your Lazy Susan is sturdy and you limit the number of heavy pans. Place cast iron at the edge, balanced by lighter items, and never exceed the shelf’s weight limit. For many, it’s safer to store cast iron elsewhere.
How Do I Prevent Pans From Sliding When I Spin The Shelf?
Add non-slip mats or grip liners cut to size. These stop pots and pans from moving when you rotate the Lazy Susan. Also, use racks or dividers to keep items in place.
Is A Lazy Susan Better Than A Deep Drawer For Pots And Pans?
Each has pros and cons. A Lazy Susan is great for corner access and visibility but has weight and size limits. Deep drawers can handle heavier pans and make stacking easier. Choose based on your kitchen layout, cookware type, and personal preference.
For more details on kitchen organization and storage solutions, you can visit Good Housekeeping.
A well-organized Lazy Susan turns frustration into ease. By following these steps and tips, you’ll save time, protect your cookware, and make cooking more enjoyable. Start today, and you’ll feel the difference every time you reach for a pan.