
If your coffee has started tasting a bit off, or your Keurig K Express is brewing more slowly than before, it’s probably time to descale your machine. Mineral build-up inside your Keurig can affect both the flavor of your coffee and the performance of the brewer.
Many people ignore descaling until problems appear, but regular cleaning can make a big difference in the lifespan and taste quality of your Keurig K Express.
This guide will show you every step you need to descale your Keurig K Express the right way. You’ll learn not just the how, but also the why—plus some tips most beginners miss. Whether you’re a daily coffee drinker or just use your Keurig on weekends, you’ll find practical advice to keep your machine running smoothly.
Let’s get your coffee tasting fresh again.
Why Descaling Is Essential For Your Keurig K Express
Many people think regular rinsing is enough for their coffee machine, but the real problem is hidden inside. Over time, minerals in water—like calcium and limescale—collect inside the brewer’s tubes and heating system. This mineral build-up can cause several problems:
- Slower brewing time, as water struggles to move through clogged pipes.
- Weaker coffee flavor because the water doesn’t heat or flow correctly.
- Shorter machine lifespan from internal damage.
- Error lights or malfunctioning (your Keurig may stop working if the scale gets too thick).
Even if you use filtered or bottled water, some minerals will always be present. Descaling removes these deposits and keeps your Keurig working like new.
How Often Should You Descale?
Keurig recommends descaling your K Express every 3 months or after about 250 cups, whichever comes first. If you have hard water (water with lots of minerals), you may need to descale more often. If you notice strange tastes, slower brewing, or odd noises, don’t wait—descend right away.
What You Need For Descaling
Before you start, gather these items. Using the right tools makes the process easier and prevents accidental damage.
- Descaling solution (Keurig brand or generic, liquid or powder)
- Large ceramic mug (not paper or plastic, as hot water can damage them)
- Access to a sink
- Fresh water (filtered if possible)
- Clean cloth or sponge
Many people use white vinegar as a cheaper alternative to descaling solution. This works, but it may leave a strong smell if not rinsed thoroughly. If you choose vinegar, use equal parts white vinegar and water.
Descaling Solution Vs. Vinegar
Here’s a quick comparison of your options:
| Method | Effectiveness | Smell/Taste After | Cost |
|---|---|---|---|
| Keurig Descaling Solution | Very Effective | Minimal | Higher |
| White Vinegar | Effective | Strong if not rinsed well | Low |
Keurig’s own solution is designed to avoid aftertaste, but vinegar is a decent alternative if you rinse well.

Credit: support.keurig.com
Preparing Your Keurig K Express For Descaling
You can’t just pour liquid in and hope for the best. Preparing your machine correctly makes descaling easier and safer.
- Turn off the machine. Unplug your Keurig K Express for safety.
- Remove the water reservoir. Empty out any remaining water.
- Take out the pod holder and funnel. These can be rinsed separately to remove coffee grounds.
- Wipe the outside. Use a clean, damp cloth to remove dust or coffee splashes.
- Place your large ceramic mug on the drip tray. It will catch all the liquid during descaling.
Tip: Never use a paper or plastic cup for this process. The water will get hot and could damage or melt these materials.
Step-by-step Guide To Descale Your Keurig K Express
Let’s get into the practical steps. Each step is important, so don’t rush or skip any part.
1. Add Descaling Solution Or Vinegar
- If using Keurig’s descaling solution, pour the entire bottle into the empty water reservoir.
- Fill the same bottle with fresh water, and pour this into the reservoir as well.
- If using white vinegar, mix equal parts vinegar and water to fill the reservoir.
2. Power On And Start The Descaling Cycle
- Plug your Keurig back in and turn it on.
- Make sure the brew basket is empty (no pod inside).
- Place your large mug on the drip tray.
3. Run The Descaling Brew Cycle
- Select the largest cup size (usually 8oz or 10oz).
- Press the brew button to start a water-only cycle.
- Once the mug is full, pour the hot liquid into the sink.
- Repeat this process—brew, dump, brew—until the reservoir is empty.
This process flushes the descaling solution or vinegar through the internal pipes, breaking up mineral deposits.
4. Let It Sit
After running the solution through the machine, let your Keurig sit for at least 30 minutes (do not skip this step). This soak time helps break down stubborn limescale inside the brewer.
5. Rinse The Water Reservoir
- Remove the reservoir and rinse it out several times with clean water.
- Fill it with fresh water only (no descaling solution or vinegar).
6. Run Fresh Water Rinse Cycles
- Place the mug back on the drip tray.
- Run at least 4-6 full reservoirs of water through the machine (without any pod).
- After each cycle, dump the hot water and refill the reservoir as needed.
This step is critical for removing any leftover taste or smell from the descaling solution or vinegar.
Pro tip: If you still smell vinegar after 6 rinses, keep going until the odor is gone. Taste a small spoonful of the hot water from the last cycle—if it tastes clean, you’re done.
7. Reassemble And Test
- Replace the pod holder and funnel.
- Fill the water reservoir with fresh, filtered water.
- Brew a cup of coffee (with a pod) to check for proper taste and flow.
If your coffee tastes good and the machine brews smoothly, the descaling process is complete.
Common Mistakes To Avoid
Descaling is simple, but many people make mistakes that reduce its effectiveness or even damage their machine.
- Using too little descaling solution: If you dilute the solution too much, it won’t remove all the limescale.
- Forgetting the soak step: The 30-minute wait is important for tough deposits—don’t skip it.
- Not rinsing enough: Residual solution or vinegar can ruin your next cup of coffee.
- Using a dirty mug: If your mug has old coffee stains, it could add unwanted flavors during rinsing.
- Ignoring the reservoir: Some people forget to rinse the water reservoir, leaving cleaning solution behind.
- Descaling with flavored vinegar: Only use plain white vinegar—flavored types leave sticky residue and smells.
How Descaling Affects Coffee Taste And Machine Health
Descaling isn’t just about machine maintenance. It directly affects your coffee’s flavor, aroma, and temperature.
- Cleaner taste: Coffee brewed in a descaled machine tastes brighter and less bitter.
- Hotter coffee: Mineral build-up can make the heating system less effective, so descaling helps coffee reach the right temperature.
- Consistent cup size: Clogged pipes can lead to smaller or uneven brews.
- Longer machine life: Regular cleaning prevents rust and other damage from minerals.
Most people notice better coffee within one or two cups after descaling.
How To Tell If Your Keurig Needs Descaling
Sometimes your Keurig K Express will tell you it’s time to descale, but not always. Watch for these signs:
- Strange noises during brewing (gurgling, sputtering, or buzzing)
- Decreased water flow or slow brewing
- Smaller cup sizes than normal
- Odd taste (metallic, sour, or stale)
- Descale indicator light (if your model has one)
If you see any of these, descale your machine even if it’s not on schedule.
How Water Quality Affects Scale Build-up
Not all water is the same. If you live in an area with hard water, your machine will collect minerals faster.
Types Of Water And Scaling Rate
| Water Type | Mineral Content | Descaling Frequency |
|---|---|---|
| Soft (filtered or bottled) | Low | Every 3-6 months |
| Moderate (city tap water) | Medium | Every 3 months |
| Hard (well or mineral water) | High | Every 1-2 months |
Using a simple water filter can slow down mineral build-up and reduce how often you need to descale.
Tips For Maintaining Your Keurig K Express Between Descaling
Regular descaling is important, but you can also prevent problems with a few daily habits.
- Empty the water reservoir daily if you don’t use the machine often. Stagnant water can cause scale and bacteria.
- Wipe the exterior with a damp cloth to keep dust and coffee drips away from buttons and sensors.
- Clean the pod holder weekly by rinsing with warm water to remove coffee grounds.
- Use filtered water if possible. This reduces mineral content and improves taste.
- Run a water-only brew cycle before your first cup of the day. This preheats the machine and flushes old water.
These small steps help keep your Keurig K Express in top shape all year.
What If Descaling Doesn’t Fix The Problem?
Sometimes, even after a full descale, your Keurig K Express may still have issues. Here’s what to check:
- Clogged needles: The tiny needles that pierce the pod can get blocked with coffee grounds. Remove and clean them with a paper clip or the tool Keurig provides.
- Air bubbles in the system: Fill the reservoir and firmly tap the machine on the side to remove trapped air.
- Old or faulty parts: If your machine is over 3 years old, seals or pumps may wear out. Contact Keurig support.
- Incorrect assembly: Make sure the pod holder, funnel, and reservoir are all seated correctly.
Don’t repeat the descaling process more than twice in a row. If problems continue, you may need professional repair.

Credit: www.shakesandcones.com
How To Clean Other Parts Of Your Keurig K Express
Descaling cleans the internal system, but other parts need attention too. Here’s how to clean each one:
Pod Holder And Funnel
- Remove both from the machine.
- Wash with warm soapy water, rinse, and let air dry.
- Check for leftover coffee grounds and clear them with a brush or toothpick.
Drip Tray
- Slide out from the base.
- Wash with warm, soapy water, rinse, and dry.
Water Reservoir And Lid
- Remove and wash with mild soap (never in the dishwasher).
- Rinse thoroughly to avoid soap residue.
Exterior
- Wipe with a soft, damp cloth.
- Avoid harsh cleaners, which can damage the finish.
Tip: Clean these parts weekly to prevent mold, bacteria, and bad smells.
How Descaling Differs From Regular Cleaning
Many new users confuse descaling with regular cleaning. Here’s the difference:
- Descaling removes mineral deposits inside the machine (you can’t see these).
- Regular cleaning gets rid of coffee oils, grounds, and visible dirt from the outside and removable parts.
You need both for a healthy, long-lasting machine.
Credit: www.youtube.com
Comparing Keurig K Express Descaling To Other Models
Keurig has many different models, and each has a slightly different descaling process. Here’s how the K Express compares:
| Model | Descaling Frequency | Descaling Process | Special Features |
|---|---|---|---|
| K Express | Every 3 months | Manual, no display | Simple buttons, easy access |
| K Slim | Every 3 months | Similar, but slimmer reservoir | Space-saving design |
| K Elite | Every 3 months | Guided on-screen prompts | Temperature control, iced coffee |
| K Duo | Every 3 months | Separate carafe and pod descaling | Brews pot or cup |
The K Express is known for its simple design, making the descaling process straightforward and quick.
Environmental Considerations: Dispose Of Descaling Solution Safely
After descaling, you’ll pour the used solution or vinegar down the drain. Is this safe for the environment? Most descaling solutions are biodegradable and safe for household plumbing. White vinegar is also safe.
If you use a strong commercial descaler, check the label for disposal instructions. Avoid pouring large amounts into storm drains or directly outdoors.
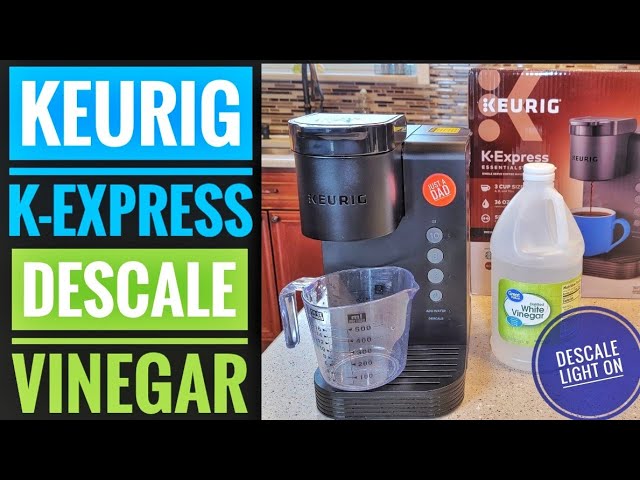
Troubleshooting: What To Do If The Descale Light Stays On
Some Keurig K Express models have a descale indicator light. If it stays on after you finish, try these steps:
- Unplug the machine and wait 5 minutes, then plug back in.
- Run another plain water cycle to flush out any remaining solution.
- Press and hold the brew button for 5-10 seconds (check your manual for your model).
If the light is still on, consult Keurig support or your user guide.
The Benefits Of Regular Descaling
People often underestimate the value of regular descaling. Here’s what you gain:
- Better-tasting coffee every day
- Faster brewing times
- Fewer breakdowns or malfunctions
- Longer machine life
- Lower risk of bacteria or mold inside the machine
Think of descaling as a small investment for a big return in coffee quality and machine health.
Frequently Asked Questions
How Long Does It Take To Descale A Keurig K Express?
Descaling usually takes about 45 to 60 minutes. This includes running the cleaning solution, the 30-minute soaking period, and several rinse cycles. Most of the time is spent waiting, not working.
Can I Use Lemon Juice Instead Of Vinegar Or Descaling Solution?
Lemon juice is sometimes used as a natural cleaner, but it’s not as effective as vinegar or a commercial descaling solution. It can also leave a sticky residue. Stick with white vinegar or the official Keurig descaling solution for best results.
Is It Safe To Run The Descaling Solution Through My Keurig Regularly?
Yes, using the Keurig descaling solution as directed is safe. It is designed for your machine’s internal parts and will not damage them if you follow instructions. Avoid using strong chemicals or cleaners not meant for coffee makers.
How Do I Know If I Rinsed Enough After Descaling?
If you still smell or taste vinegar or the descaling solution in the water after several rinse cycles, keep running plain water cycles until the taste is gone. Usually, 4-6 reservoirs of clean water are enough, but sometimes you need more.
Where Can I Find Official Keurig Descaling Solution?
You can buy the Keurig descaling solution at most major retailers and online. The official Keurig website has details: Keurig Descaling Solution.
Keeping your Keurig K Express clean and descaled not only improves your coffee, it protects your investment. A few simple steps every few months make all the difference. With this guide, you can confidently descale your machine and enjoy great coffee every day.